 EVERY CROCHET
 Amigurumi 11 rounds No account, no download
Tiny plush kitten amigurumi pattern in single crochet
A tiny amigurumi kitten worked in single crochet (UK double crochet); both US and UK stitch terms given throughout.
- Skill
- Intermediate
- Time
- 2-3 hours
- Yarn weight
- Bulky
- Hook
- 3.5 mm

Intermediate
What the original write-up called it. Nothing here is graded again.

Bulky
What the sample was worked in. Any weight works; the size moves with it.

2-3 hours
What the original page reckoned. Your own pace is the one that matters.
About this pattern
This is a tiny amigurumi kitten, roughly 2in (5cm) finished, worked in single crochet (UK double crochet) from bulky or chenille yarn on a 3.5-4mm hook. The body, legs, and tail form one continuous spiral of nine rounds, with separate ears attached afterward and cinched to shape the face. Safety eyes, a safety nose and stuffing complete the piece; expect a short project suited to one sitting.
This tiny plush kitten amigurumi is built almost entirely from single crochet (UK double crochet), the dense, tightly worked stitch that gives amigurumi its firm, sculptable fabric. Increases and decreases within that same stitch shape the head and body without a single change of stitch type, so the whole toy reads as one smooth, rounded silhouette. At roughly 2in (5cm) finished, the piece is small enough to complete in a single sitting once the yarn and hook are matched to the intended scale.
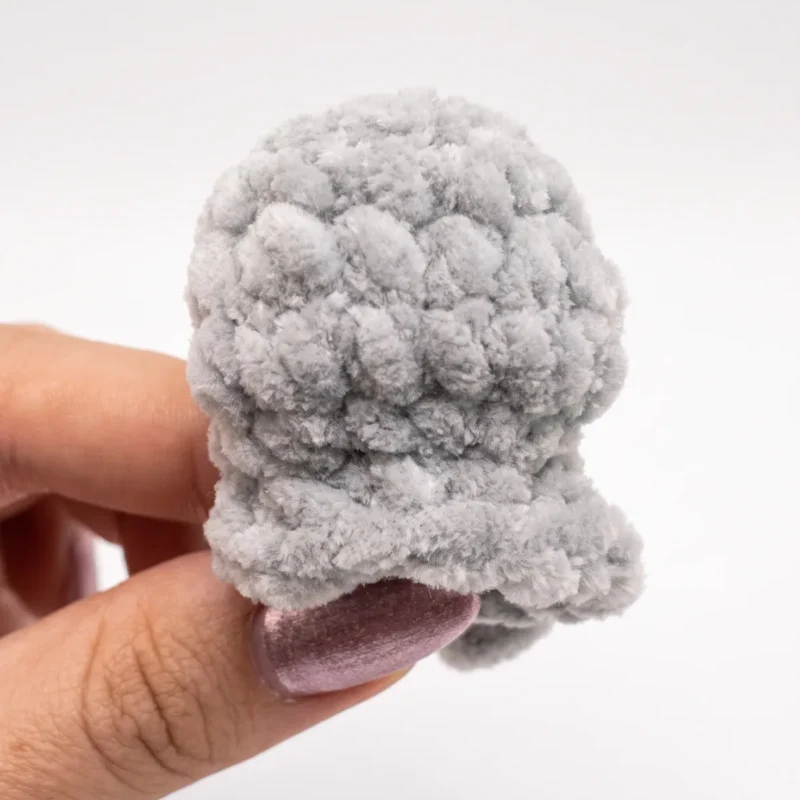
Body and head are worked as one continuous piece, starting from a magic ring and spiralling outward through nine rounds without joining or turning, which keeps the surface free of visible seams. Ears are added afterward, picked up directly behind the increases worked in round four and finished with a chain-one picot before a slip-stitch round closes each one off; cinching threads left on the ears are later used to shape and flatten the face.
Materials
- Bulky (5) weight plush or chenille yarn, in your color of choice (light gray shown in the sample)
- Crochet hook, size E-4 (3.5 mm) or G-6 (4 mm)
- Safety eyes, 5 mm (1 pair)
- Safety nose, approximately 5 mm (1)
- Black cotton embroidery thread, for eyebrows (optional)
- Cotton thread, for cinching the face
- Fiberfill stuffing
- Yarn needle with a large eye
- Stitch marker
- Scissors
The list is the pattern's own wording.
Instructions
Every round is printed as the pattern wrote it, brackets and all. Open the key beside a round to see only the short forms that round uses.
Body & Head (worked in one continuous piece)
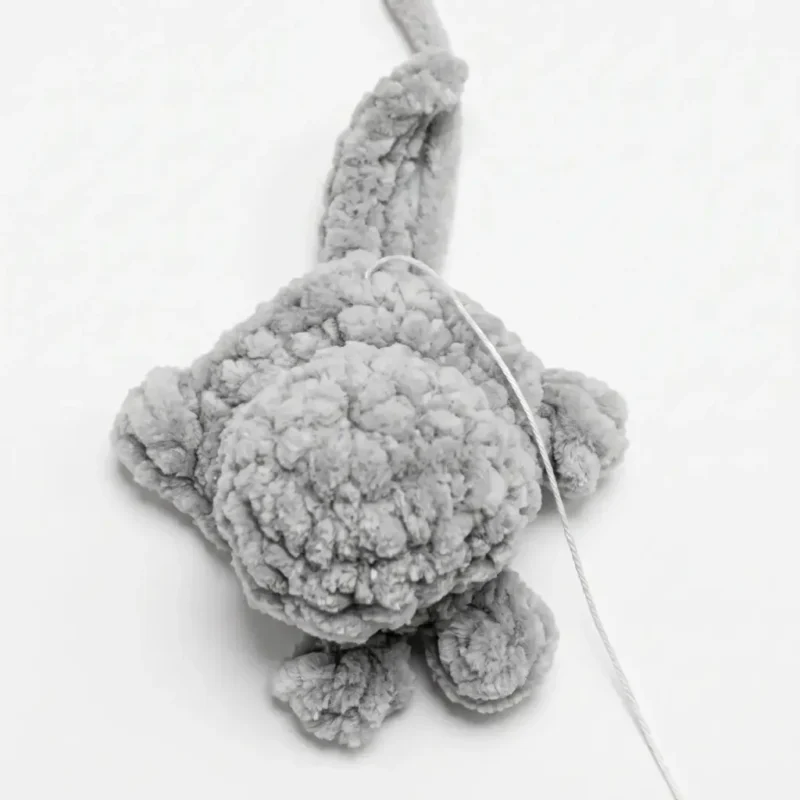
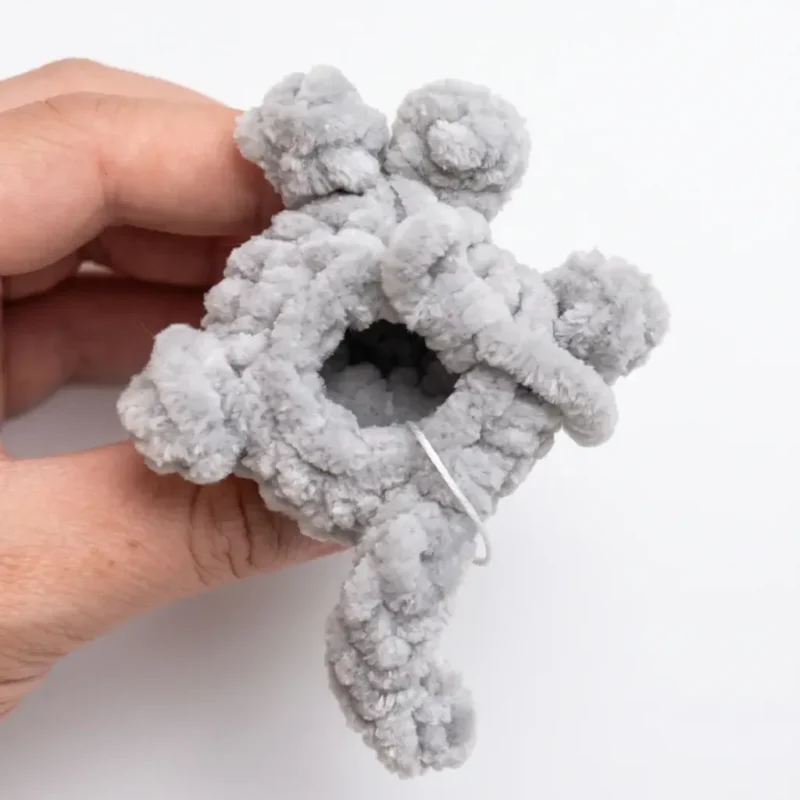
The body, legs, and tail are worked in one continuous spiral — no joining or turning. Stitch counts are given at the end of each round in parentheses. Stuff as you go, packing the edges first and the center last, so the shape stays even and round. The legs and tail are built directly into the body rounds using short chains and puff stitches — no separate pieces to sew on later.
- Round 1
6 sc in MR. (6)
Key2
- MR
- Magic Ring
- sc
- Single Crochet
- Rounds 2–3
sc in each st around. (12)
Key1
- sc
- Single Crochet
- Round 4
3 sc, 2 inc, 2 sc, 2 inc, 2 sc, inc. (17)
Key2
- inc
- Increase (2 sc in same stitch)
- sc
- Single Crochet
- Round 5
inc, 2 sc, 2 dec, 2 sc, 2 dec, 4 sc. (14)
Key3
- dec
- Decrease (invisible decrease)
- inc
- Increase (2 sc in same stitch)
- sc
- Single Crochet
- Round 6
4 sc, 3 dec, 2 sc, 2 inc. (13)
Key3
- dec
- Decrease (invisible decrease)
- inc
- Increase (2 sc in same stitch)
- sc
- Single Crochet
- Round 7
2 inc, 2 sc, inc, 2 sc, inc, 3 sc, 2 inc. (19)
Key2
- inc
- Increase (2 sc in same stitch)
- sc
- Single Crochet
- Round 8
2 inc, 6 sc, Front Leg (ch 3, puff st [2 dc] in 2nd ch from hook), 2 sc, Front Leg (ch 3, puff st [2 dc] in 2nd ch from hook), 4 sc, Back Leg (ch 2, puff st [2 dc] in 2nd ch from hook), 5 sc, Tail (ch 5, 4 sc starting in 2nd ch from hook). (21)
Key5
- puff st
- Puff Stitch (2 dc worked with the same base and same top)
- inc
- Increase (2 sc in same stitch)
- ch
- Chain
- dc
- Double Crochet
- sc
- Single Crochet
- Round 9
5 sc, Back Leg (ch 2, puff st [2 dc] in 2nd ch from hook), 4 sc, 2 dec, 2 sc, 3 dec. (16)Begin stuffing the body now, packing the legs and tail first, then filling the center firmly.Attach the safety eyes and nose at this point, spacing the eyes evenly across the widest part of the face before you continue closing the round.
Key5
- puff st
- Puff Stitch (2 dc worked with the same base and same top)
- dec
- Decrease (invisible decrease)
- ch
- Chain
- dc
- Double Crochet
- sc
- Single Crochet
- Round 10
dec around to close the opening.Close the opening and weave in the yarn tail.
Key1
- dec
- Decrease (invisible decrease)
Ears (make 2)
Attach yarn directly behind the increases worked in Rnd 4.
- Round 1
(sc, ch 1, sc) all in the same stitch.
Key2
- ch
- Chain
- sc
- Single Crochet
- Round 2
sl st across.Fasten off, leaving a short tail for cinching.
Key1
- sl st
- Slip Stitch
Making up
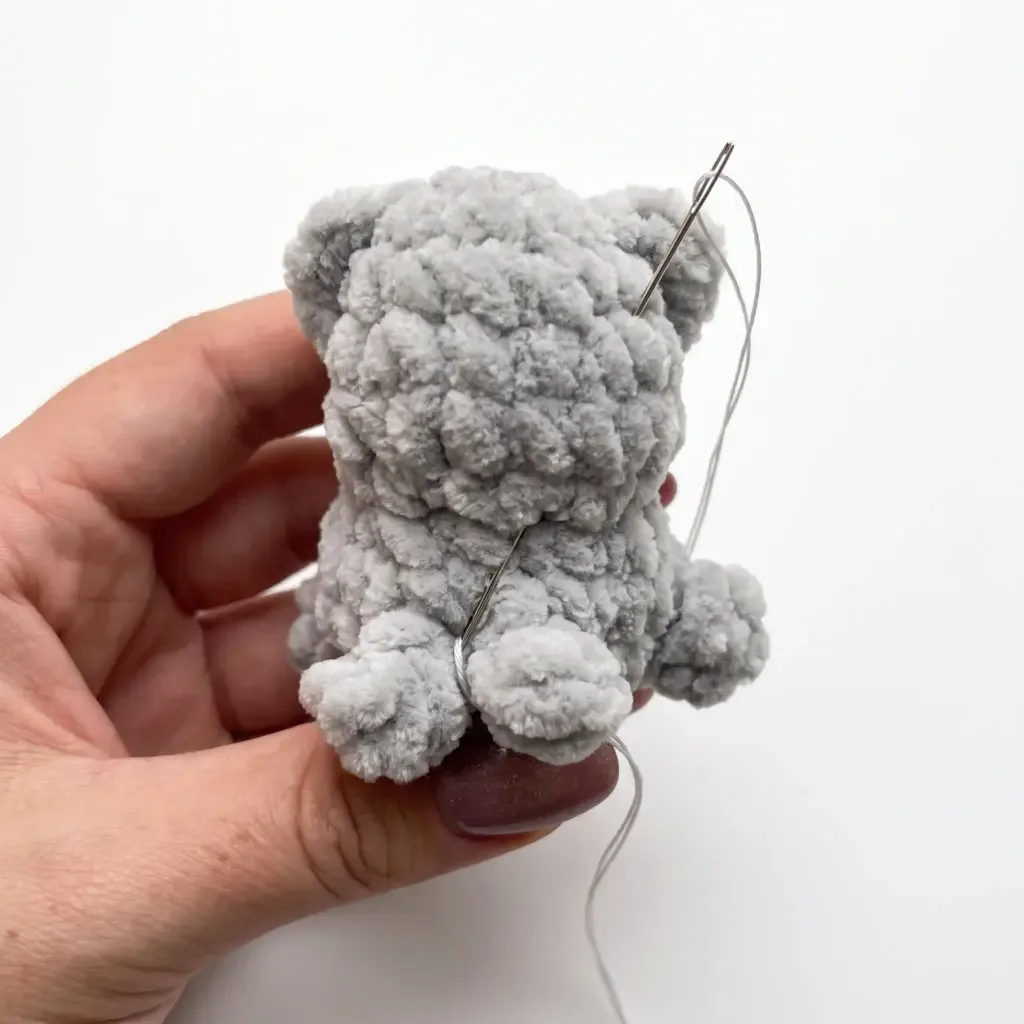
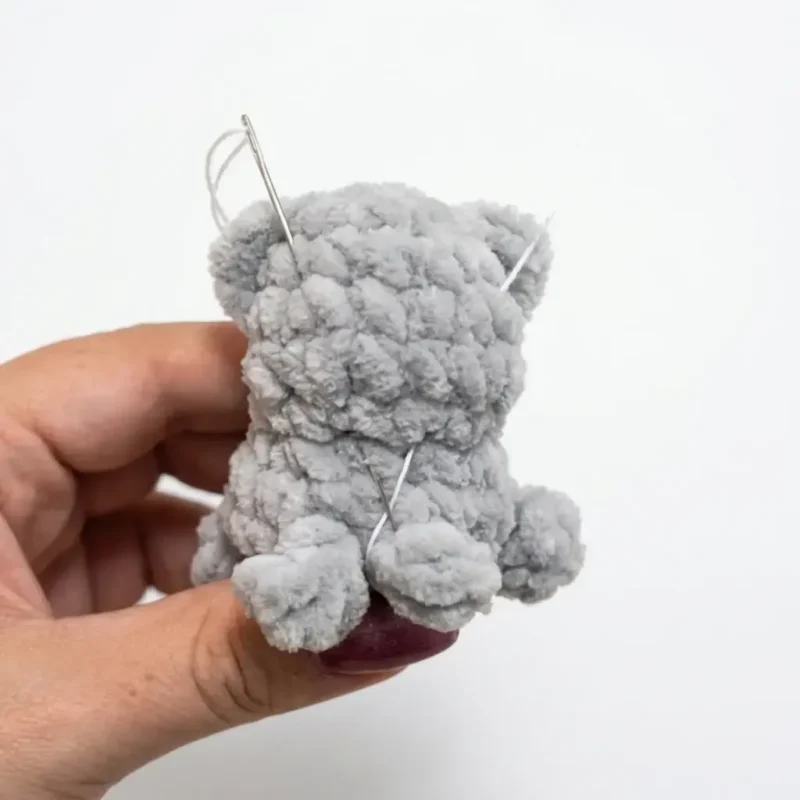
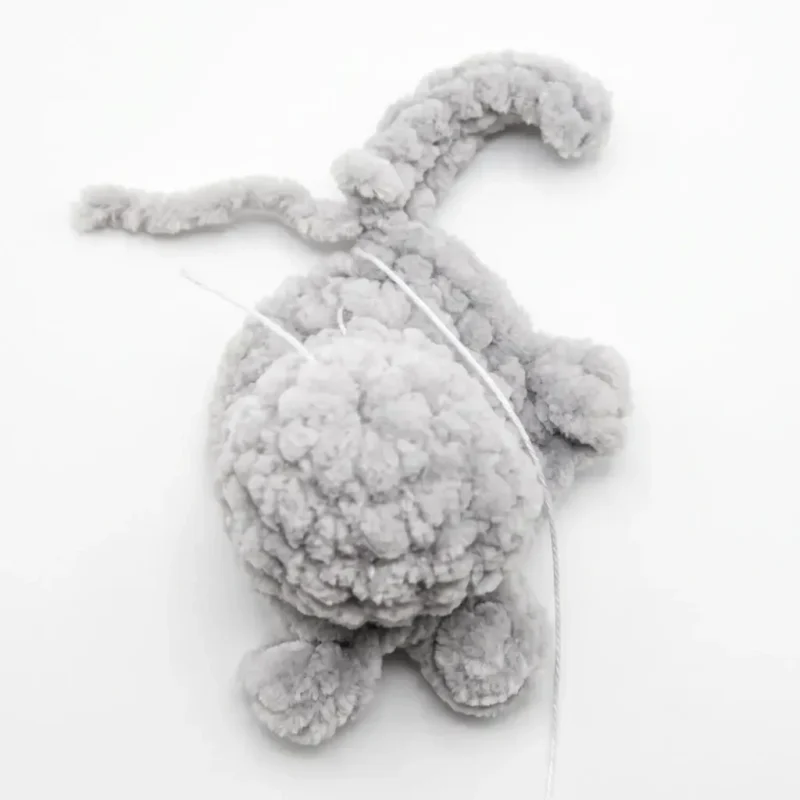
- Step 1Using the yarn tails left on each ear, cinch the head from ear to ear, pulling gently to flatten and shape the face into a soft, rounded muzzle.
- Step 2Secure the cinching thread with a few small stitches at the base of one ear, then weave the end down through the head and trim.
- Step 3If you’d like expressive brows, embroider two small angled lines above the eyes using black cotton thread.
- Step 4Weave in any remaining loose ends, including those from the legs, tail, and ears.
- Step 5Give the finished kitten a gentle shape-check, fluffing the plush stitches so the ears and paws sit evenly.
Notes from the pattern
- The pattern gives a choice between an E-4 (3.5mm) and a G-6 (4mm) hook; the smaller size gives a denser fabric that holds stuffing better at this scale, so use it if the yarn tends to sit loosely on the hook.
- A stitch marker is essential rather than optional, since the body and head are worked as one continuous spiral with no joining round to mark the start of each of the nine rounds.
- Gauge isn't critical here, but tighter tension will give you a firmer, more defined shape; the sample kitten finishes at roughly 2 inches (5cm) tall and long.
- The piece is worked in a single yarn colour, so there are no colour joins to plan; focus instead on stuffing firmly and evenly as each round is completed, particularly around the increases in Rounds 4-5 that shape the muzzle.
- Keep your tension consistent: plush and chenille yarns hide stitch definition well, but loose tension will let stuffing show through at the increases and decreases; work snugly, especially through Rounds 4–9 where the shaping happens.
- Master the invisible decrease early: since Rounds 5, 6, and 9 rely heavily on decreases, practice the invisible decrease technique (working into the front loops of the next two stitches together) before you start the body — it keeps the surface smooth instead of leaving visible bumps.
- Don't overstuff the tiny appendages: the legs and tail are formed from short chains and a single puff stitch, so they don't need stuffing — just let the puff stitch itself create the rounded shape. Overstuffing at this scale can distort the puff and make the paw look lumpy.
- Stuff before you close, not after: because this pattern finishes with a decrease round rather than a wide opening, add all your stuffing by Round 9. Trying to push stuffing through the small closed opening at Round 10 is much harder and can misshape your decreases.
- Watch your puff stitch placement: the Front Leg and Back Leg instructions both start the puff stitch in the 2nd chain from the hook — double-check your chain count before working the puff, since being off by even one chain will make the paws sit at uneven lengths.
The essentials
- Rounds
- 11
- Parts
- 2
- Level
- Intermediate
- Time
- 2-3 hours
- Hook
- 3.5 mm
- Yarn
- Bulky
Stitches you will use
- Magic ring (UK magic circle) Forms the starting point for Round 1; pull the tail firmly once the six stitches are worked so no gap remains at the crown of the head.
- Increase and decrease shaping Used through Rounds 4-5 to move from the cylindrical body into the more sculpted head; check the stitch count against the number in brackets at the end of each round.
- Continuous spiral with a stitch marker The whole body and head is worked round after round with no joining slip stitch; keep a marker in the first stitch of each round to avoid losing the spiral start across nine rounds.
Troubleshooting
The top of the head has a visible hole.
The magic ring was not pulled tight before working Round 1; pull the tail firmly after the first six stitches are worked and check it has closed before continuing to Round 2.
The face looks lopsided or the muzzle sits off-centre.
An increase or decrease in Round 4 or 5 landed on the wrong stitch, shifting the shaping; count stitches against the bracketed totals at the end of each round and unravel back to the last correct count if it has drifted.
The stitches gape open and stuffing
The hook is too large for the yarn or the tension is too loose; move to the smaller E-4 (3.5mm) hook and stuff firmly as each round is worked rather than only at the end.
Substituting yarn
- Cotton, DK (8-ply) weight
- Gives crisper stitch definition than the bulky/chenille yarn specified, but at a lighter weight the same nine rounds will produce a noticeably smaller kitten; a 2.5-3mm hook suits it better than the E-4/G-6 range.
- Acrylic, worsted (Aran) weight
- A close match for the bulky/chenille original in hook sizing (E-4/G-6) and finished scale, though the surface will be smoother and less fuzzy than a plush or chenille yarn.
- Wool-blend, chunky weight
- Keeps the plush character and firm hold on the same hook range, but wool is less forgiving of rough handling and needs gentler care than the fully synthetic yarn shown.
Washing and care
- Spot clean the finished kitten with a damp cloth rather than machine washing; both plush and chenille yarns can mat or lose their fuzzy texture when agitated in water.
- Store away from direct sunlight and reshape gently by hand while damp if any stitches have settled unevenly; the synthetic fibre will not felt, but repeated washing can flatten the pile over time.
The photographs taken while this was being made
Every one was taken by whoever published the pattern, in the order the source listed them.
FAQs
Questions
Can I use a different yarn weight for this pattern?
A bulky weight plush or chenille yarn gives the best texture and matches the finished size in this pattern. Standard worsted weight yarn will work too, but your finished kitten will come out noticeably smaller since plush yarns are thicker.
Why are the legs and tail built into the body rounds instead of made separately?
Building the legs and tail with short chains and a puff stitch keeps this pattern fast and beginner-friendly since there is nothing extra to sew on afterward. It also gives the finished kitten a seamless, one-piece look.
How is the muzzle shaped without a separate piece?
That shape comes from the cinching step, where you pull a length of yarn from ear to ear through the head and tighten it gently. This draws the face inward slightly, creating the soft, flattened muzzle characteristic of this kitten design.
Does this pattern use UK or US crochet terms?
This pattern is written in US crochet terminology throughout, so single crochet refers to what UK crocheters call double crochet. Checking a stitch conversion before starting avoids confusion between the two systems.
These answers came from whoever first published the pattern, kept word for word.