 EVERY CROCHET
 Amigurumi 23 rounds No account, no download
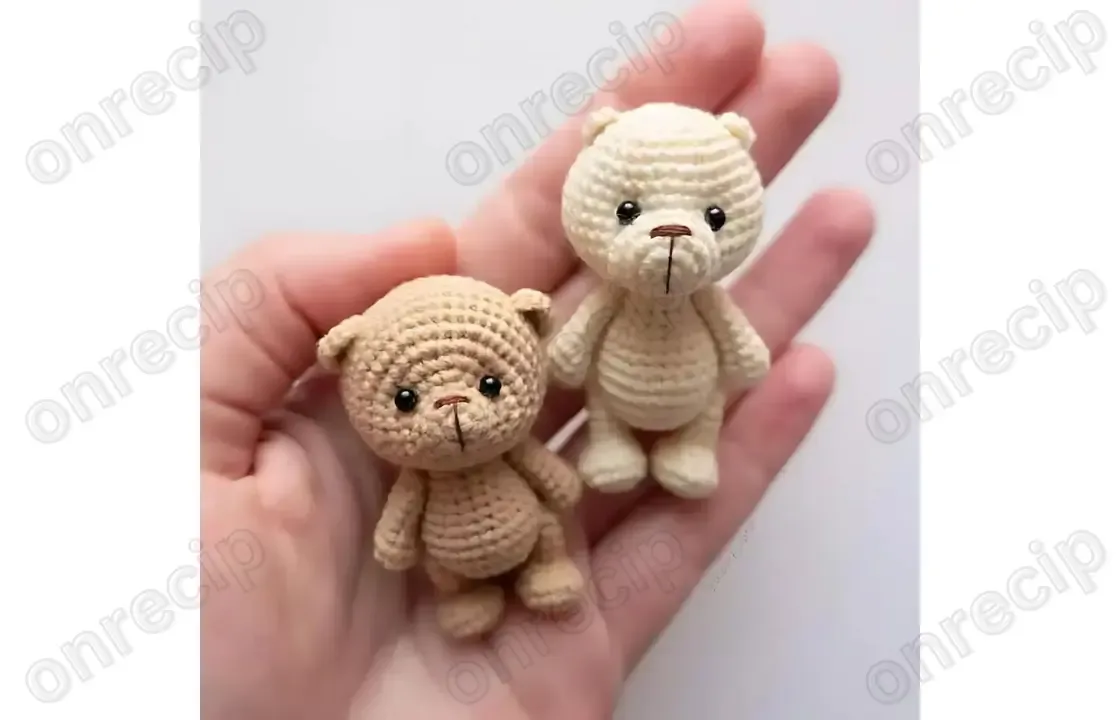
Small amigurumi bear in fine cotton yarn
Single crochet (UK: double crochet) amigurumi bear pattern, written with both US and UK stitch terms throughout.
- Skill
- Intermediate
- Time
- 4-6 hours
- Yarn weight
- Fingering
- Hook
- 1.25 mm

Intermediate
What the original write-up called it. Nothing here is graded again.

Fingering
What the sample was worked in. Any weight works; the size moves with it.

4-6 hours
What the original page reckoned. Your own pace is the one that matters.
About this pattern
This is a small amigurumi bear made from six separately crocheted parts — head, body, two ears, two legs, two arms and a tail — worked in single crochet (UK: double crochet) with a magic ring start. It uses fine cotton blend yarn and a small hook for a dense, firm finish, plus toy eyes, embroidery thread for the nose, and stuffing. Assembly relies on thread jointing to attach the limbs and head securely.
This bear belongs to the amigurumi family, built almost entirely from single crochet (UK: double crochet) worked in continuous spiral rounds. The body is small in scale, worked in fine cotton blend yarn with a correspondingly fine hook, which keeps the stitches dense enough to hold stuffing without gaps showing between them. The result is a firm, close-textured toy rather than a loose, airy one.
Construction starts at the muzzle and builds the head outward over sixteen rounds before the body, legs, arms, ears and tail are worked as separate pieces and joined afterward. The ears use turning rows rather than a spiral, giving them a flatter, more open shape than the rounded parts. All pieces are assembled using thread jointing, which pulls the limbs in close to the body rather than leaving them stitched on as loose flaps.
Materials
- Cotton blend yarn (25 g / 160 m)
- Suitable hook (I use 1.25 mm)
- Toy eyes
- Thread for embroidering the nose
- Stuffing for toys
- Needle
- Scissors
The list is the pattern's own wording.
Instructions
Every round is printed as the pattern wrote it, brackets and all. Open the key beside a round to see only the short forms that round uses.
Head
Start crocheting the head from the muzzle.
Fasten off, pull the opening closed, and hide the end.
Step by step: Fasten off and close the opening with a needle, hiding the tail.
Step by step: Fasten off and close the opening with a needle, hiding the tail.
- Round 1
6 sc in MR. (6)Step by step: 6 sc.
Key2
- MR
- magic ring
- sc
- single crochet
- Round 2
6 inc. (12)
Key1
- inc
- increase
- Round 3
12 sc.
Key1
- sc
- single crochet
- Round 4
(sc, inc) x 6. (18)Step by step: 18 sc. (18); 3 sc, 6 dec, 3 sc. (12); 3 sc, 3 dec, 3 sc. (9); 9 sc; (2 sc, inc) x 3. (12).Step by step: (2 sc, inc) x 6. (24); (3 sc, inc) x 6. (30); 30 sc; 4 sc, (dec, 2 sc) x 5, dec, 4 sc. (24); 24 sc.
Key3
- inc
- increase
- dec
- decrease
- sc
- single crochet
- Round 5
3 sc, (sc, inc) x 6, 3 sc. (24)
Key2
- inc
- increase
- sc
- single crochet
- Round 6
4 sc, inc, (2 sc, inc) x 6, 4 sc. (30)
Key2
- inc
- increase
- sc
- single crochet
- Round 7
3 sc, (3 sc, inc) x 6, 3 sc. (36)
Key2
- inc
- increase
- sc
- single crochet
- Round 8
5 sc, inc, (4 sc, inc) x 5, 5 sc. (42)
Key2
- inc
- increase
- sc
- single crochet
- Rounds 9–14
42 sc.
Key1
- sc
- single crochet
- Round 15
(5 sc, dec) x 6. (36)
Key2
- dec
- decrease
- sc
- single crochet
- Round 16
36 sc.
Key1
- sc
- single crochet
- Round 17
(4 sc, dec) x 6. (30)
Key2
- dec
- decrease
- sc
- single crochet
- Round 18
(3 sc, dec) x 6. (24)
Key2
- dec
- decrease
- sc
- single crochet
- Round 19
(2 sc, dec) x 6. (18)Step by step: 18 sc.
Key2
- dec
- decrease
- sc
- single crochet
- Round 20
(sc, dec) x 6. (12)
Key2
- dec
- decrease
- sc
- single crochet
- Round 21
6 dec.
Key1
- dec
- decrease
Ears
Fasten off, leaving a long tail for sewing.
- Round 1
Make a chain of 2 ch; in the second chain from the hook, crochet 5 sc. (5)
Key2
- ch
- chain
- sc
- single crochet
- Round 2
Make a turning ch and turn the work; sc, inc, sc, inc, sc. (7)
Key3
- inc
- increase
- ch
- chain
- sc
- single crochet
Arms
Fasten off and close the opening with a needle, hiding the tail.
- Round 1
6 sc in MR. (6)
Key2
- MR
- magic ring
- sc
- single crochet
- Round 2
6 inc. (12)
Key1
- inc
- increase
- Round 3
(2 sc, dec) x 3. (9)
Key2
- dec
- decrease
- sc
- single crochet
- Rounds 4–8
9 sc. (9)
Key1
- sc
- single crochet
- Round 9
(sc, dec) x 3. (6)
Key2
- dec
- decrease
- sc
- single crochet
Making up
- Step 1Proceed to shaping the head (secure all threads at the bottom of the head, where the body will attach).
- Step 2Make indentations and sew the eyes between rows 5 and 6 (approximately 7 sc between the eyes in row 5).
- Step 3Embroider the nose.
- Step 4Sew on the ears, approximately between rows 11 and 12.
- Step 5Sew the body to the head using thread jointing.
- Step 6Sew the legs and arms using thread jointing.
- Step 7Sew the tail to the body. For thread jointing, use a strong thread.
Notes from the pattern
- The pattern is written for a very fine hook (the author used 1.25 mm), so tension needs to stay tight and even across all sixteen head rounds to prevent stuffing from showing through.
- A stitch marker is useful at the start of each round since the work is continuous spiral single crochet (UK: double crochet) with no slip stitch join, making the round start easy to lose track of.
- Stuffing should be added gradually as the head and body are built, rather than packed in only at the end, since the narrow muzzle start makes it difficult to push stuffing down later.
- The yarn is designed to be split in half before crocheting, so plan yarn amounts with that halving in mind rather than working with the full strand.
- The author recommends using YarnArt Jeans or Alize Cotton Gold, splitting the yarn in half.
- Author: Ksenia – @brooch_cott
The essentials
- Rounds
- 23
- Parts
- 3
- Level
- Intermediate
- Time
- 4-6 hours
- Hook
- 1.25 mm
- Yarn
- Fingering
Stitches you will use
- Magic ring (MR) Used to start the head, body and other rounded parts; keep the centre pulled fully closed so no hole remains at the base.
- Increase and decrease shaping Used throughout the head and body to curve the spiral outward and inward; misplacing an increase shifts the stitch count and skews the shape visibly.
- Thread jointing Used to attach body, legs, arms and tail; a strong thread is specified because this join bears the ongoing stress of handling the toy.
Troubleshooting
The muzzle end of the head looks loose or has a visible hole
This usually means the magic ring was not pulled fully closed in round 1; tighten the centre loop firmly before fastening off that end.
The head or body cups instead of staying rounded
This points to increases or decreases placed unevenly around the round; recount stitches at the end of each round against the number given before moving on.
The ears sit stiff or curl instead of lying against the head
The ears are worked flat in turning rows rather than in the round, so a loose turning chain and relaxed tension across both rounds helps them sit naturally when sewn on.
Substituting yarn
- Cotton blend, fingering weight (same family as specified)
- Closest match to the original; stuffing shows through least and the hook size can stay close to the one used in the pattern.
- Acrylic, fingering to sport weight
- Softer drape and less stitch definition; a slightly larger hook may be needed, which will produce a bigger finished bear than the gram and metre amounts given suggest.
- Wool or wool blend, fingering weight
- Warmer handle and more give in the fabric, but stitches can loosen with handling over time, so slightly denser stuffing helps the shape hold.
Washing and care
- Hand wash the cotton blend toy in cool water if needed, pressing rather than wringing out excess water, since twisting can distort the tightly stuffed shape.
- Lay flat to dry away from direct heat, reshaping the ears, arms and legs gently by hand while damp, and store the finished bear away from direct sunlight to keep the cotton colour from fading.
FAQs
Questions
What size hook does this pattern need?
The pattern is written for a suitable fine hook, with the author using 1.25 mm. A larger hook can be used but will produce a bigger bear than the stated yarn amount of 25 g / 160 m is calculated for.
Is single crochet the same as UK double crochet here?
Yes. The pattern uses the US term single crochet (sc) throughout, which is the same stitch called double crochet in UK terminology.
How is the nose made?
The nose is embroidered rather than crocheted, using separate thread kept specifically for that purpose. It is added after the head shaping and eye placement are finished.
Why does the pattern mention thread jointing instead of simple sewing?
Thread jointing pulls the body, legs, arms and tail in close against the head and body rather than leaving a loose seam. A strong thread is recommended because this join takes ongoing handling stress.
Where exactly do the eyes and ears get placed?
The eyes are indented and sewn between rounds 5 and 6 of the head, with about 7 single crochet (UK: double crochet) stitches between them on round 5. The ears are sewn on between rounds 11 and 12 of the head.
These answers came from whoever first published the pattern, kept word for word.