 EVERY CROCHET
 Amigurumi 10 rounds No account, no download
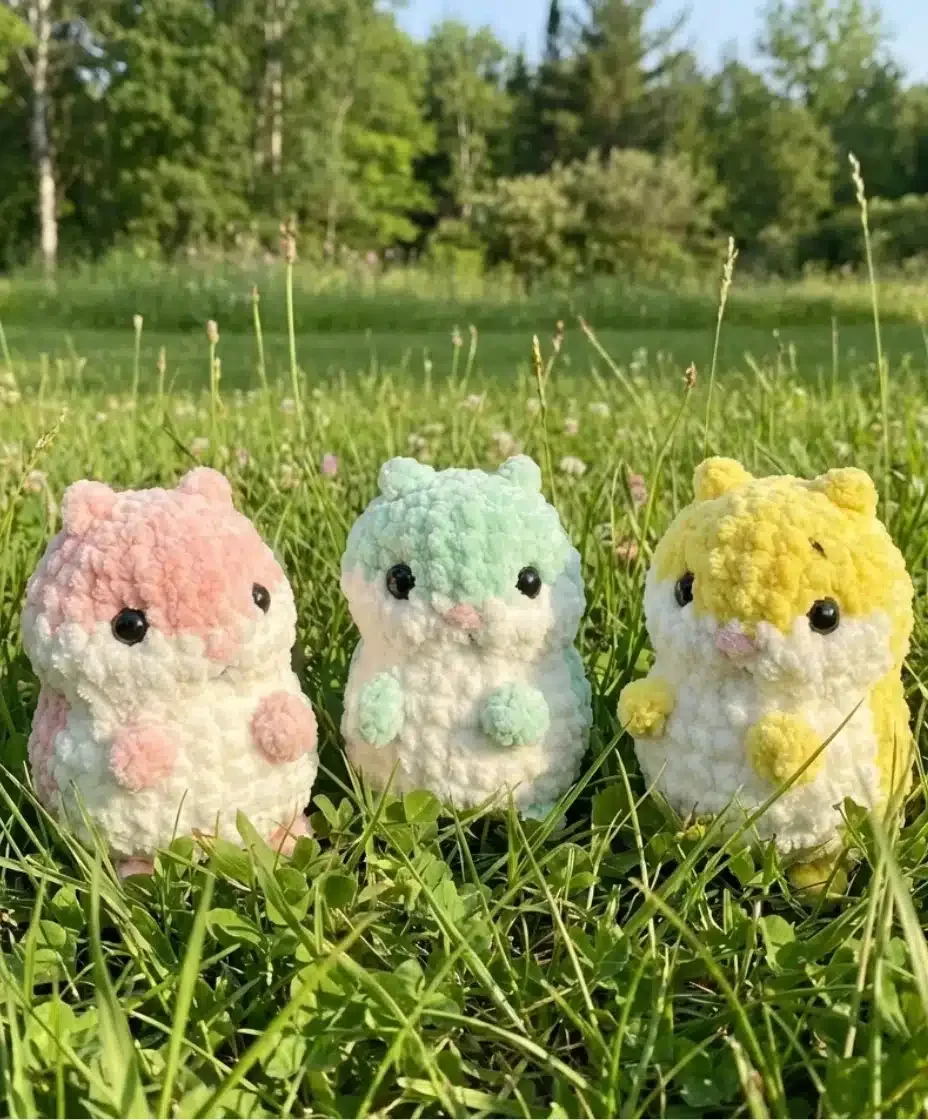
Amigurumi hamster plush: a small crochet pattern
Small amigurumi hamster in single crochet (UK: double crochet). US and UK stitch terms both given throughout.
- Skill
- Intermediate
- Time
- 4-6 hours
- Yarn weight
- Sport/DK (fine)
- Hook
- 4.5 mm

Intermediate
What the original write-up called it. Nothing here is graded again.

Sport/DK (fine)
What the sample was worked in. Any weight works; the size moves with it.

4-6 hours
What the original page reckoned. Your own pace is the one that matters.
About this pattern
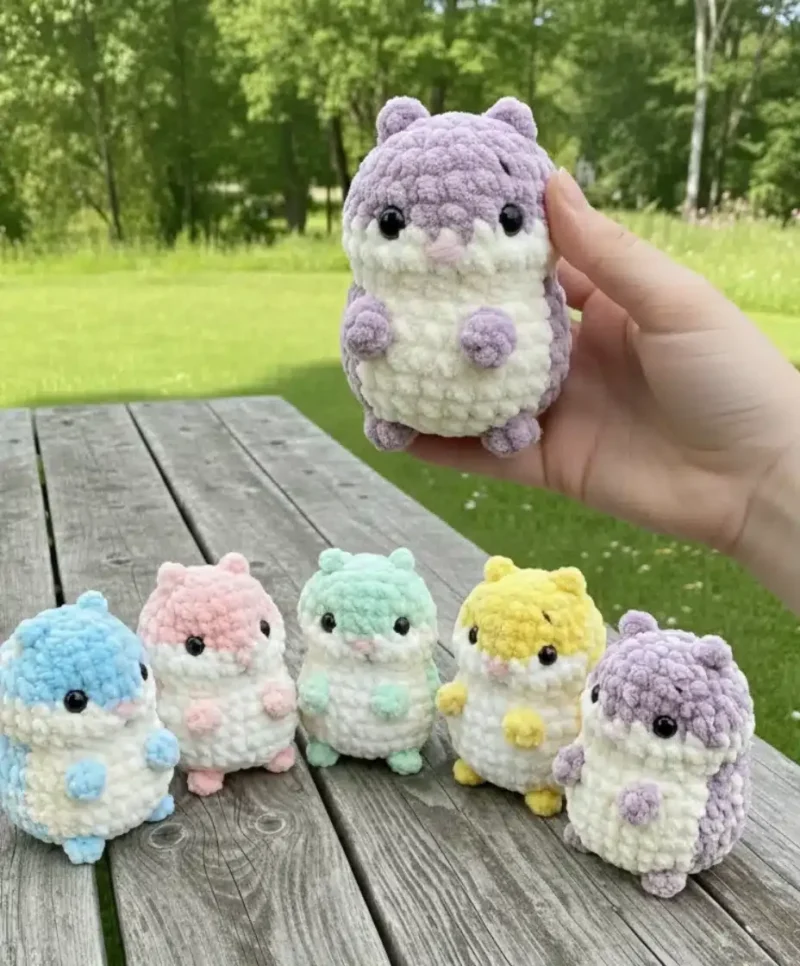
A ten-round amigurumi hamster worked in continuous spirals of single crochet (UK: double crochet), using two yarn colours to form a natural coat pattern. The finished plush stands about 3.1 inches (8 cm) tall without ears. It requires four separately made paws attached after assembly, a tail worked into the final rounds, and a thread-sculpting technique for the eye sockets and cheeks, done after stuffing.
This amigurumi hamster is built almost entirely from single crochet (UK: double crochet), the dense stitch that gives amigurumi its firm, stuffable fabric and hides gaps between fibres. Two contrasting yarn colours are carried through the body to form a realistic coat pattern rather than a plain single-colour shell, which asks a little more attention from the maker than a standard single-colour toy but produces a noticeably more lifelike result at a small scale.
The head and body are worked as a single continuous piece over ten rounds, with increases shaping the rounded head and decreases pulling the body back in, so there is no separate seam joining head to torso. Four small paws are made individually and attached afterward, the tail is added during the final shaping rounds, and the face is sculpted last, once the piece is stuffed, using thread sculpting rather than embroidery alone to set the eye sockets and cheeks.
Materials
- Himalaya Dolphin Baby yarn (or similar plush yarn) in two colors: one dark, one light
- Black cotton yarn for facial features and sculpting (Iris yarn recommended)
- 4.5 mm crochet hook (or size appropriate for your yarn)
- Two 8mm safety eyes (or eye beads of your choice)
- Polyester fiberfill stuffing
- Stitch marker or contrasting scrap yarn
- Tapestry needle for assembly
- Keychain hardware (optional)
The list is the pattern's own wording.
Instructions
Every round is printed as the pattern wrote it, brackets and all. Open the key beside a round to see only the short forms that round uses.
Head and Body (Worked as One Piece)
Start crocheting with dark yarn color.
Chain 2, and start crocheting in the second chain from hook 6 sc
- Round 2
3 inc, 1sc Chain 2, and start crocheting in the second chain from hook 1 sc (the first ear), 1sc (we finished the fourth increase), 2 inc, chain 2, and start crocheting in the second chain from hook 1sc (the second ear) (12)Do not close the second ear and continue crocheting the third round. The first ear is placed in the middle of the fourth increase and the second ear is after the sixth increase.
Key2
- inc
- increase (two single crochet in one stitch)
- sc
- single crochet
- Round 3
(1sc, inc)*6 (18)
Key1
- inc
- increase (two single crochet in one stitch)
- Round 4
18sc (18)
- Round 5
(3inc, 6sc)*2 (24)
- Round 6
24sc (24)
- Rounds 7–8
(2 rounds) dark: 2sc, light: 12sc, dark: 10sc (24)
Start changing the yarn colors from round 7. If you use safety eyes, install them between rounds 6 and 7 with a distance of 6 sc between eye points. The eye positions are easy to mark—they’re placed on the border where dark and light colors meet. Count 3 sc from the light border toward the center.
- Round 9
dark: dec, light: 2dec, 6sc, dec, dark: 2dec, 6sc (18)
Key1
- dec
- decrease (two single crochet together)
- Round 10
dark: 2sc, light: inc, (2sc, inc)*2, dark: (2sc, inc)*3 (18)
Key1
- inc
- increase (two single crochet in one stitch)
- Round 11
dark: 2sc, light: 1sc, inc, 5sc, inc, 2sc, dark: 3sc, inc, 5sc, inc, 2sc (28)
Key1
- inc
- increase (two single crochet in one stitch)
- Rounds 12–15
(4 rounds) dark: 2sc, light: 12sc, dark: 14sc (28)
Paws (Make 4)
Leave a 3.9-inch yarn tail before beginning.
Chain 3, and start crocheting in the second chain from hook: 2 sc.
Fasten off and break yarn. Set aside all four paws.
Facial Sculpting and Details
After completing round 15, it’s time to add personality to your hamster. This is a crucial step that brings your creation to life.
Stuffing and Shaping:
Stuff the head gently, carefully shaping the cheeks as you go. Don’t overstuff—you want soft, natural-looking cheeks.
Eye Socket Sculpting: Use a long double strand of black Iris yarn threaded through your tapestry needle.
Insert the needle in the middle of the bottom under the muzzle (between rounds 9 and 10) and draw it out under the left eye on the outer side. Insert the needle under the same eye on the outer side and draw out under the right eye on the inner side. Insert the needle under the same eye and draw out under the muzzle at the same level, skipping 1 sc from the initial point. Tighten the two yarn tails gently and tie a secure knot. Do not break yarn. Add more stuffing to the cheeks if needed.
Creating the Muzzle Strip:
Insert the needle in the center of the muzzle (between rounds 7 and 8) and draw out under the muzzle at the knot point. Tighten gently and tie a knot. Do not break yarn.
Embroidering Eyebrows:
Insert the needle under the muzzle at the knot point. Embroider the eyebrows to your desired expression. Draw out the yarn under the muzzle, tie a knot, and hide the yarn tails inside the body.
Adding the Nose:
Embroider the nose with pink plush yarn. Insert the needle and draw it out at the bottom of the head to secure.
Attaching the Paws
Round 12 (Paw Attachment): Insert the paws in round 12 by grabbing the yarn tails with your crochet hook and pulling them inside the body. Tie tight knots as close to the body as possible to ensure secure attachment.
Continue crocheting the body pattern.
Making up
- Round 16Round 16: dark: 2sc, light: dec, (2sc, dec)*2, 2sc, dark: dec, 2sc, dec, 2sc,
- Round 16 (cont.)Chain 2, and start crocheting in the second chain from hook 1sc (tail),
- Round 16 (cont.)dec, 2sc, dec (21)
- InfoThe tail should be positioned in the center of the back. Make shift stitches if needed to center it properly. Break light yarn color and fasten off, continuing with dark yarn only.
- Round 17Round 17: (1sc, dec)*7 (14)
- InfoInsert the front paws between rounds 16 and 17 using the same technique as before.
- InfoStuff the body firmly with fiberfill, ensuring even distribution.
- Round 18Round 18: 7 dec (6)
- InfoComplete the stuffing, making sure the hamster has a nice, plump shape.
- InfoTighten the remaining hole with a tapestry needle, weave in all ends securely, and break yarn.
- InfoYour adorable crochet hamster is now complete!
Notes from the pattern
- Use a hook a size or two smaller than the yarn label suggests, since amigurumi relies on a tight fabric to keep stuffing from showing through the stitches.
- Place a stitch marker in the first stitch of each round throughout the head and body piece, as the spiral construction gives no natural round marker and losing count is easy over ten rounds.
- Stuff the head gradually and check cheek shape as work progresses rather than stuffing solid at the end, since the facial sculpting step later depends on soft, workable cheeks rather than a rock-hard head.
- When changing colour mid-round, as in round 16, drop and pick up yarn rather than cutting and rejoining each time, unless the pattern specifically instructs fastening off, to avoid extra ends to weave in on such a small piece.
- Important technique for colour changes: when changing colors, begin your single crochet stitch normally, but complete it with the new yarn color by pulling the new color through the final two loops. This keeps the stitch in the old color while the working loop becomes the new color, allowing you to start the next stitch cleanly with the new yarn. This method prevents the color change from showing at the base of stitches.
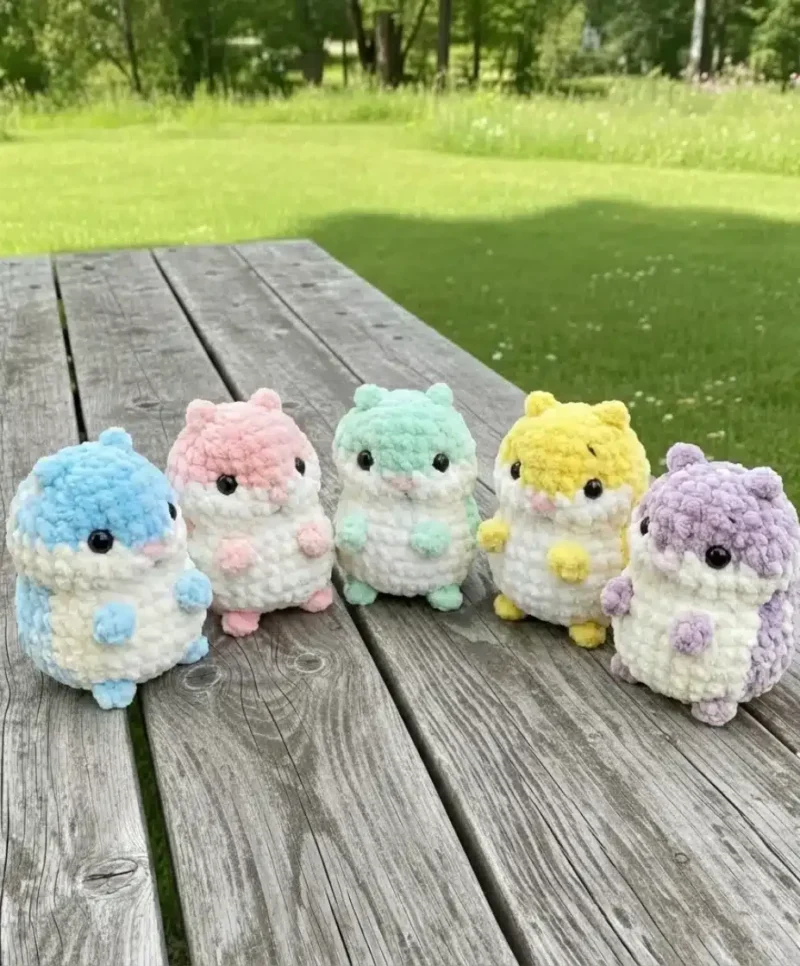
- Experiment with different yarn colors to create unique hamster variations—try brown and cream, gray and white, or another two-tone pairing of your choice.
The essentials
- Rounds
- 10
- Parts
- 4
- Level
- Intermediate
- Time
- 4-6 hours
- Hook
- 4.5 mm
- Yarn
- Sport/DK (fine)
Stitches you will use
- Working ears mid-round without closing them Round 2 builds each ear as a small chain-2 spur without closing it before continuing the round; keep count of stitches worked either side so the increase count stays correct.
- Thread sculpting for facial features Done after round 15, threading a long double strand through the stuffed head to pull the eye sockets and define the cheeks; tension the pull gently and re-stuff the cheeks afterward if they flatten.
Troubleshooting
The ears sit crooked or point the wrong direction
This usually comes from losing track of the increase count in round 2, since each ear is placed relative to a specific increase; recount stitches before starting the ear chains rather than estimating position by eye.
The cheeks look flat or lopsided after sculpting
This happens when stuffing was too firm before the thread was pulled, or the double strand wasn't tightened evenly on both sides; add a little more stuffing to the flatter cheek and re-tension the knot before breaking yarn.
Colour bands look blurred instead of crisp at the join
This is caused by pulling the new colour through loosely on the last stitch before the change; tighten the final pull of the old colour before introducing the new one so the colour break sits exactly on the stitch line.
Substituting yarn
- Acrylic, sport or light DK weight
- Closest match to the pattern's finished 3.1 inch (8 cm) scale; keep the same small hook size and expect a slightly stiffer, more structured fabric that holds the facial sculpting well.
- Cotton, sport weight
- Produces a crisper, less fuzzy stitch definition that makes colour changes look sharper, but has less give, so stuffing needs to be added in smaller amounts to avoid visible lumps.
- Wool or wool-blend, fingering weight
- Gives a softer drape and finished piece slightly smaller than 8 cm unless a larger hook is used to compensate; better fibre memory helps the sculpted cheeks hold their shape over time.
Washing and care
- Hand wash gently in cool water if the yarn is acrylic or a synthetic-blend fibre, since this holds shape best and avoids the felting that can flatten the sculpted cheeks; lay flat to dry rather than hanging.
- Reshape the cheeks and ears by hand while still slightly damp, easing the stuffing back into place, then store away from direct sunlight to prevent the two contrasting colours fading unevenly.
The photographs taken while this was being made
Every one was taken by whoever published the pattern, in the order the source listed them.
FAQs
Questions
Can the hamster be made in a single colour instead of two?
Yes, though the coat pattern is what gives the finished piece its realistic look, so a single colour will read as flatter. The stitch counts and round structure stay the same regardless of colour choice.
What size hook does this pattern need?
The pattern is sized for a very small finished toy, about 3.1 inches (8 cm) without ears, so a hook noticeably smaller than usual for the yarn weight is needed to keep the fabric tight. The exact hook size depends on the yarn chosen, since the finished measurement is the target.
When should the paws be attached?
The paws are made separately in advance and set aside, then attached between specific rounds later in assembly, including the front paws between rounds 16 and 17. Attaching them at the stated round keeps them positioned correctly relative to the colour pattern.
Is the facial sculpting done before or after stuffing?
After. Stuffing and cheek shaping happen first, then the eye socket thread sculpting is worked through the already-stuffed head once round 15 is complete.
Why does the tail need centring during assembly?
Because it's worked directly into round 16 rather than added afterward, its position depends on where the round happens to fall; shift stitches as instructed to keep it centred on the back before continuing.
These answers came from whoever first published the pattern, kept word for word.