 EVERY CROCHET
 Amigurumi 48 rounds No account, no download
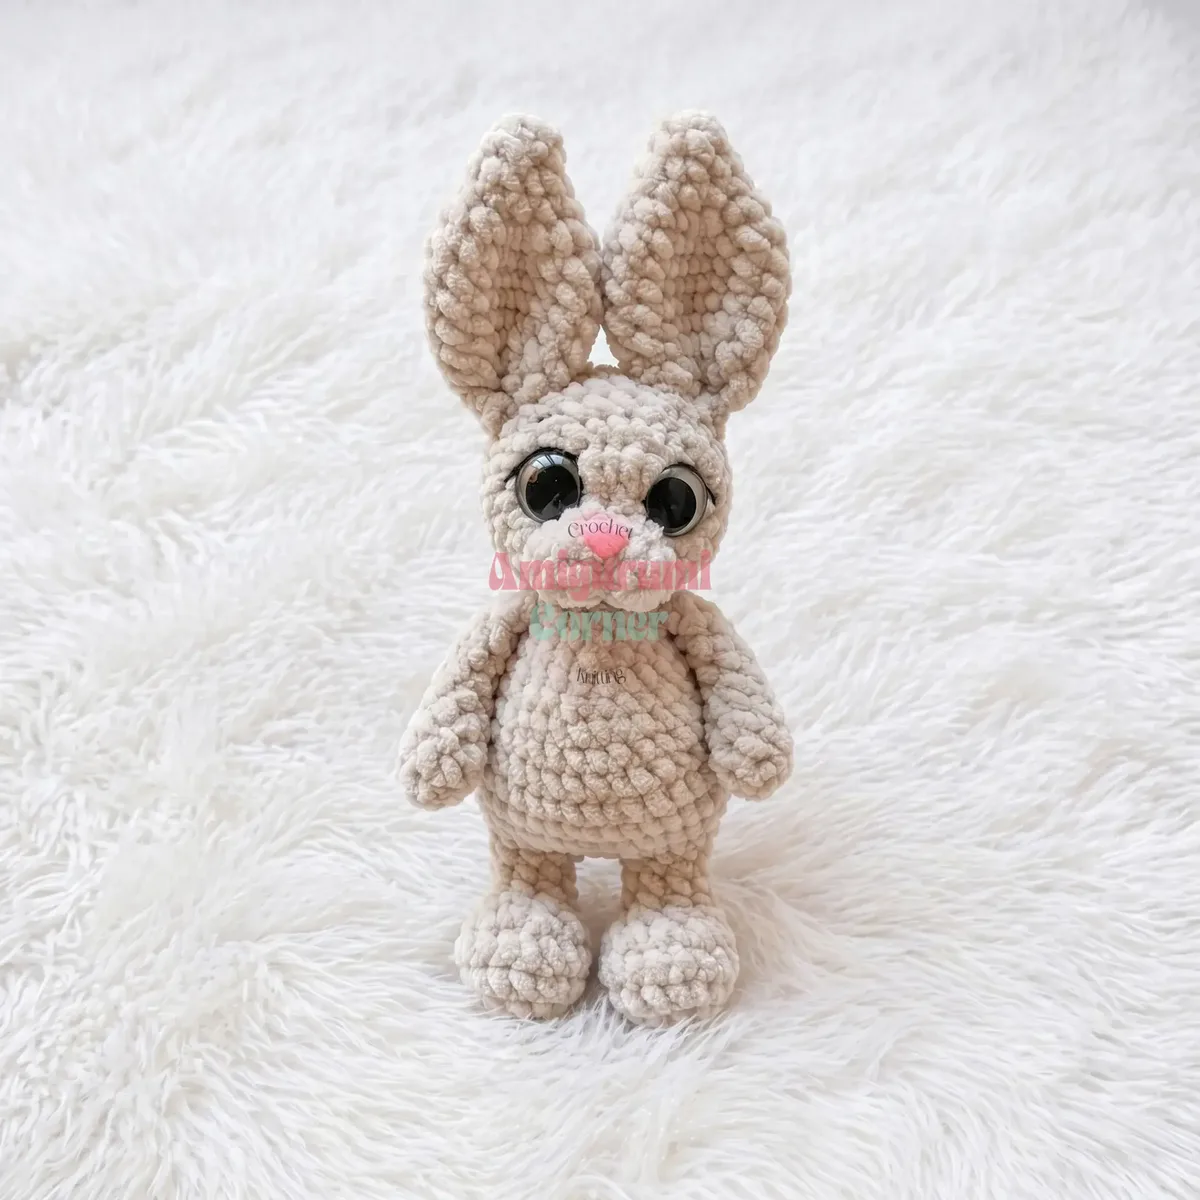
A worsted-weight amigurumi bunny crochet pattern
Amigurumi bunny worked in single crochet (UK double crochet); both US and UK stitch terms are given throughout.
- Skill
- Intermediate
- Time
- 4-6 hours
- Yarn weight
- Worsted
- Hook
- 3.0 mm

Intermediate
What the original write-up called it. Nothing here is graded again.

Worsted
What the sample was worked in. Any weight works; the size moves with it.

4-6 hours
What the original page reckoned. Your own pace is the one that matters.
About this pattern
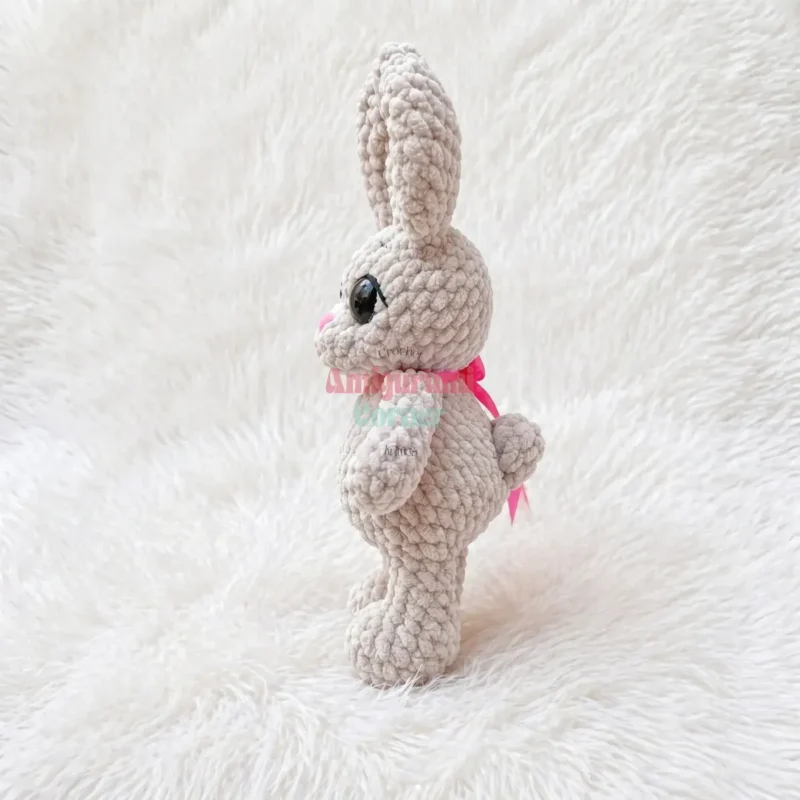
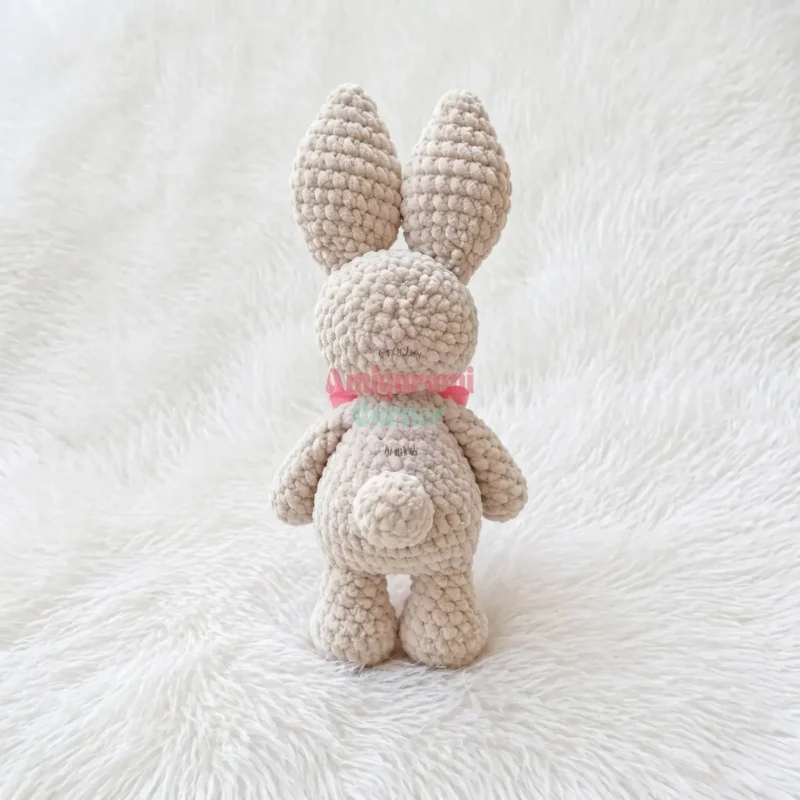
This is a worsted-weight amigurumi bunny worked entirely in single crochet (UK double crochet), built from five pieces — arms, a one-piece leg-and-body section, ears, a tail, and a head — joined by sewing. It uses a 3.0 mm hook, 18 mm safety eyes, a safety nose, polyester fiberfill and fingering-weight black yarn for facial embroidery. The finished bunny stands about 7 inches tall without ears (9 inches with them), with roughly 60 rounds worked across all pieces combined, firm stuffing in the body and legs, a lightly stuffed tail, and unstuffed ears for a soft, flexible fold.
This amigurumi bunny is built almost entirely from single crochet (UK double crochet), the firm, interlocking stitch that keeps toy fabric dense enough to hold its stuffing without gaps. The same stitch carries every part — arms, legs, body, ears and head — worked through rounds of plain stitches, increases and decreases that shape each piece from a flat magic-ring start into a rounded three-dimensional form. Nothing in the construction calls on taller stitches, so the whole figure reads as one consistent texture from paw to ear tip.
Five separate pieces are worked before assembly: two arms, one continuous length that forms both legs and the body, two ears, a small tail, and the head. The legs and body are joined mid-pattern rather than stitched together afterwards, which removes one seam from the finished bunny, while the arms, ears, tail and head are each completed on their own and sewn on at the end. Safety eyes, a gathered muzzle and embroidered eyelids and eyebrows are added only once the head is otherwise finished, so the face comes together last.
The finished toy sitting in your lap will measure about 7 inches tall without ears and closer to 9 inches with them — just the right size for small hands to hold and big enough to show off every detail of that expressive little face. This beginner-friendly amigurumi bunny crochet pattern is a satisfying project whether you're making it as a gift or simply treating yourself to an evening of peaceful, rhythmic work. The muzzle shaping and the slightly forward-tilted head give this bunny a personality all its own.
Materials
Yarn
- Worsted weight, approximately 45–50 g in your chosen color (the original uses a soft baby-weight blend — any smooth worsted or DK will work beautifully)
Hook
- US D-3 / 3.0 mm
Safety eyes
- 18 mm × 2
Safety nose
- 10 × 11 mm × 1
Stuffing
- Polyester fiberfill
- Black yarn (fingering weight) for embroidering eyelids and eyebrows
- Matching yarn (same color as main yarn) for muzzle shaping
- Yarn needle / tapestry needle
- Long knitting needle or skewer for positioning the head before sewing
- Scissors
- Stitch markers
The list is the pattern's own wording.
Instructions
Every round is printed as the pattern wrote it, brackets and all. Open the key beside a round to see only the short forms that round uses.
Arms (Make 2)
Stuff the arms only at the base, through Round 5. Leave the top section unstuffed so the flat edge folds easily.
- Round 1
6 sc in MR. (6)
Key2
- MR
- Magic Ring
- sc
- Single Crochet
- Round 2
sc, inc repeat 3 times. (9)
Key2
- inc
- Increase (2 sc in same stitch)
- sc
- Single Crochet
- Round 3
sc in each st around. (9)
Key1
- sc
- Single Crochet
- Round 4
dec, 7 sc. (8)
Key2
- dec
- Invisible Decrease (insert hook through front loops of next 2 sts, draw up loop, complete as sc)
- sc
- Single Crochet
- Round 5
dec, 6 sc. (7)
Key2
- dec
- Invisible Decrease (insert hook through front loops of next 2 sts, draw up loop, complete as sc)
- sc
- Single Crochet
- (7)Rounds 6–8
sc in each st around. (7) [3 rounds] Fold the arm flat and work through both layers together: sc across to close.
Key1
- sc
- Single Crochet
Legs and Body (One Continuous Piece)
Make two legs, then join them to begin the body. Stuff firmly as you go.
First Leg:
- Round 1
6 sc in MR. (6)
Key2
- MR
- Magic Ring
- sc
- Single Crochet
- Round 2
inc in each st around. (12)
Key1
- inc
- Increase (2 sc in same stitch)
- Round 3
sc, inc repeat 6 times. (18)
Key2
- inc
- Increase (2 sc in same stitch)
- sc
- Single Crochet
- Round 4
sc in each st around. (18)
Key1
- sc
- Single Crochet
- Round 5
3 sc, dec 6 times, 3 sc. (12)
Key2
- dec
- Invisible Decrease (insert hook through front loops of next 2 sts, draw up loop, complete as sc)
- sc
- Single Crochet
- Round 6
3 sc, dec 3 times, 3 sc. (9)
Key2
- dec
- Invisible Decrease (insert hook through front loops of next 2 sts, draw up loop, complete as sc)
- sc
- Single Crochet
- (9)Rounds 7–9
sc in each st around. (9) [3 rounds] Fasten off and cut the yarn on the first leg. Set aside.Second Leg: Work Rnds 1–9 exactly as the First Leg. Do not cut the yarn.Work the shift stitches to align your starting point — approximately 4 sl sts. Chain 3, then join the second leg to the first leg with a sl st to begin the body.
Key2
- sl st
- Slip Stitch
- sc
- Single Crochet
Body (Continued from Second Leg):
- Round 10
9 sc across First Leg, 3 sc across the ch-3 bridge, 9 sc across Second Leg, 3 sc across the opposite side of the ch-3 bridge. (24)
Key2
- ch
- Chain
- sc
- Single Crochet
- Round 11
3 sc, inc repeat 6 times. (30)
Key2
- inc
- Increase (2 sc in same stitch)
- sc
- Single Crochet
- Round 12
4 sc, inc repeat 6 times. (36)
Key2
- inc
- Increase (2 sc in same stitch)
- sc
- Single Crochet
- (36)Rounds 13–15
sc in each st around. (36) [3 rounds]Step by step: Finish with a sl st. Leave a yarn tail for sewing.
Key2
- sl st
- Slip Stitch
- sc
- Single Crochet
- Round 16
(sc, dec) twice, 18 sc, (sc, dec) 4 times. (30)
Key2
- dec
- Invisible Decrease (insert hook through front loops of next 2 sts, draw up loop, complete as sc)
- sc
- Single Crochet
- Round 17
sc in each st around. (30)
Key1
- sc
- Single Crochet
- Round 18
3 sc, dec repeat 6 times. (24)
Key2
- dec
- Invisible Decrease (insert hook through front loops of next 2 sts, draw up loop, complete as sc)
- sc
- Single Crochet
- Round 19
sc in each st around. (24)
Key1
- sc
- Single Crochet
- Round 20
2 sc, dec repeat 6 times. (18)
Key2
- dec
- Invisible Decrease (insert hook through front loops of next 2 sts, draw up loop, complete as sc)
- sc
- Single Crochet
- Round 21
sc in each st around. (18)
Key1
- sc
- Single Crochet
- (18)Round 22
3 sc, [3 sc worked together with First Arm], 6 sc, [3 sc worked together with Second Arm], 3 sc. (18) Work each “sc with arm” by holding the arm against the body and working through both the body stitch and the corresponding edge stitch of the arm simultaneously.
Key1
- sc
- Single Crochet
- Round 23
sc, dec repeat 6 times. (12)Fasten off, leaving a long yarn tail for sewing on the head.
Key2
- dec
- Invisible Decrease (insert hook through front loops of next 2 sts, draw up loop, complete as sc)
- sc
- Single Crochet
Ears (Make 2)
Do not stuff the ears.
- Round 1
5 sc in MR. (5)
Key2
- MR
- Magic Ring
- sc
- Single Crochet
- Round 2
sc in each st around. (5)
Key1
- sc
- Single Crochet
- Round 3
inc in each st around. (10)
Key1
- inc
- Increase (2 sc in same stitch)
- Round 4
sc in each st around. (10)
Key1
- sc
- Single Crochet
- Round 5
inc in each st around. (20)
Key1
- inc
- Increase (2 sc in same stitch)
- (20)Rounds 6–9
sc in each st around. (20) [4 rounds]
Key1
- sc
- Single Crochet
- Round 10
2 sc, dec repeat 5 times. (15)
Key2
- dec
- Invisible Decrease (insert hook through front loops of next 2 sts, draw up loop, complete as sc)
- sc
- Single Crochet
- Round 11
sc in each st around. (15)
Key1
- sc
- Single Crochet
- Round 12
sc, dec repeat 5 times. (10)Fold the ear flat and work 5 sc through both layers to close. Chain 1, fold once more, and work 2 sc then sl st to finish shaping the base.
Key3
- sl st
- Slip Stitch
- dec
- Invisible Decrease (insert hook through front loops of next 2 sts, draw up loop, complete as sc)
- sc
- Single Crochet
Tail
Lightly stuff the tail before sewing it to the body.
- Round 1
6 sc in MR. (6)
Key2
- MR
- Magic Ring
- sc
- Single Crochet
- Round 2
inc in each st around. (12)
Key1
- inc
- Increase (2 sc in same stitch)
- Round 3
dec 6 times. (6)Finish with a sl st. Leave a yarn tail for sewing.
Key2
- sl st
- Slip Stitch
- dec
- Invisible Decrease (insert hook through front loops of next 2 sts, draw up loop, complete as sc)
Head
Stuff the head firmly as you go, paying extra attention to filling the muzzle area completely.
- Round 1
Foundation chain of 4 ch.
Key1
- ch
- Chain
- Round 2
Starting from the 2nd ch from the hook: 2 sc, 3 sc in the last ch (corner), 1 sc along the back side of the chain, inc. (8)
Key3
- inc
- Increase (2 sc in same stitch)
- ch
- Chain
- sc
- Single Crochet
- Round 3
sc, inc repeat 4 times. (12)
Key2
- inc
- Increase (2 sc in same stitch)
- sc
- Single Crochet
- Round 4
2 sc, inc repeat 4 times. (16)
Key2
- inc
- Increase (2 sc in same stitch)
- sc
- Single Crochet
- Round 5
sc in each st around. (16)
Key1
- sc
- Single Crochet
- (24)Round 6
inc in hdc 8 times, 8 sc. (24) Work the first 8 increases as hdc increases to shape the muzzle roundness.
Key3
- hdc
- Half Double Crochet
- inc
- Increase (2 sc in same stitch)
- sc
- Single Crochet
- Round 7
3 sc, inc repeat 6 times. (30)
Key2
- inc
- Increase (2 sc in same stitch)
- sc
- Single Crochet
- (30)Rounds 8–12
sc in each st around. (30) [5 rounds] Install the safety nose between Rounds 2 and 3, centered on the muzzle. Install the safety eyes in Round 6, each placed after the 2nd and 6th hdc increase respectively.
Key2
- hdc
- Half Double Crochet
- sc
- Single Crochet
- Round 13
3 sc, dec repeat 6 times. (24)
Key2
- dec
- Invisible Decrease (insert hook through front loops of next 2 sts, draw up loop, complete as sc)
- sc
- Single Crochet
- Round 14
dec 12 times. (12)
Key1
- dec
- Invisible Decrease (insert hook through front loops of next 2 sts, draw up loop, complete as sc)
- Round 15
dec 6 times. (6)Pull the opening closed, fasten off, and hide the yarn end inside the piece.
Key1
- dec
- Invisible Decrease (insert hook through front loops of next 2 sts, draw up loop, complete as sc)
Making up
- Step 1Muzzle shaping: Using the matching-color yarn and a tapestry needle, pull gathering stitches through the muzzle to define its shape. Work gently and adjust tension until you’re happy with the look.
- Step 2Embroider details: Using the black fingering-weight yarn, embroider the eyelids and eyebrows above the safety eyes. Take your time here — these details define the bunny’s personality.
- Step 3Attach the head: Use long knitting needles or a skewer to pin the head in position on the body before sewing. The head should tilt slightly forward — this is intentional and gives the bunny its characteristic look. Once you’re satisfied with the angle, sew the head firmly using the long yarn tail, working around the full opening with a whipstitch or mattress stitch.
- Step 4Attach the ears: Position the ears on the top of the head and sew them on securely using the yarn tails, making sure they sit symmetrically.
- Step 5Attach the tail: Sew the lightly stuffed tail to the back of the body using the yarn tail.
- Step 6Weave in all remaining ends.
Notes from the pattern
- Use a 3.0 mm (US D-3) hook even when substituting a heavier yarn than the original baby-weight blend, since a smaller hook keeps the fabric dense enough to hide the stuffing.
- Place a stitch marker at the start of each round throughout the leg-and-body piece and the head, since both are worked in a continuous spiral with no turning chain to mark the join.
- Stuff firmly through the legs and body as the rounds are worked, but leave the ears unstuffed, stuff the arms only up to round 5 so the flat top folds easily, and stuff the tail only lightly before sewing it on.
- Around 45–50 g of main-colour yarn covers the whole bunny, so one ball of worsted or DK weight is normally enough without needing a second skein.
- Gauge is not critical for amigurumi, but your fabric should be tight enough that stuffing does not show through. Adjust hook size down if needed.
- All pieces are worked in a continuous spiral (no joining, no turning chains) unless otherwise noted. Stitch count for each round is given at the end of that line in parentheses: (##). Install safety eyes and nose before closing the head — specific placement notes are included within the Head instructions.
The essentials
- Rounds
- 48
- Parts
- 5
- Level
- Intermediate
- Time
- 4-6 hours
- Hook
- 3.0 mm
- Yarn
- Worsted
Stitches you will use
- Magic ring start Used at the beginning of every piece — arms, legs, ears, tail and head; pull the tail tight afterwards so the centre doesn't leave a visible hole.
- Single crochet increase and decrease shaping Used throughout the leg-and-body spiral and the head's rounds to curve the fabric; space increases evenly with a stitch marker so the piece stays symmetrical.
- Safety-eye placement and facial embroidery Done during head assembly with 18 mm eyes and fingering-weight black yarn for eyelids and eyebrows; check spacing before snapping the backs on, since this step can't be undone.
- Invisible decrease Insert the hook through the front loops only of the next two stitches before completing the decrease, instead of under both loops; this avoids the visible bump a standard decrease leaves, which matters most in Rounds 13–15 of the Head.
Troubleshooting
The ears look stiff and don't fold over softly.
Ears are deliberately left unstuffed in this pattern; stiffness usually means the stitches are too tight, so try going up half a hook size for rounds 1–9.
The head won't stay in the pinned
Push a long knitting needle or skewer through the head and down into the body to hold the angle steady, then remove it once a few stitches are secure.
The muzzle looks flat rather than domed.
The gathering stitches pulled through with matching-colour yarn need more tension; redo the gather slightly tighter and check the shape before fastening off. Pushing small amounts of fiberfill into the muzzle with a pencil or stuffing tool before Round 13 also helps, since filling becomes difficult once the decreases begin.
Substituting yarn
- Acrylic, worsted weight
- Closest match to the pattern's own gauge; no hook change needed and the bunny keeps its original size and firmness.
- Cotton, DK weight
- Slightly thinner than worsted, giving a smaller, crisper finished bunny; sizing back up may need a 3.25 mm hook and extra stuffing to keep the fabric tight.
- Wool-blend, aran weight
- Heavier than called for, producing a plumper bunny with a softer drape; moving up to a 3.5 mm hook keeps the stitches from becoming too stiff to work.
Washing and care
- Hand wash gently in cool water and reshape the ears, arms and legs by hand while still damp, since both the original baby-weight blend and worsted acrylic substitutes hold their shape better when eased back into place before drying.
- Dry flat out of direct sunlight to stop the colour fading, and store the finished bunny somewhere it won't be compressed, so the fiberfill inside the body and head keeps its rounded shape.
The photographs taken while this was being made
Every one was taken by whoever published the pattern, in the order the source listed them.
FAQs
Questions
Can a different yarn weight be used instead of the original baby-weight blend?
Yes; any smooth worsted or DK yarn works, which is why the materials list already treats them as equivalents. Adjust the hook size slightly if the fabric starts to look loose enough for stuffing to show through.
Why are the ears left unstuffed while the rest of the body is stuffed firmly?
Unstuffed ears stay flexible enough to fold forward naturally once sewn on. Stuffing them would make them stand stiffly upright instead.
How much fiberfill is needed for the whole bunny?
The main yarn amount is around 45–50 g, and polyester fiberfill is added as the rounds are worked rather than measured in advance. Firm stuffing through the legs and body uses the most.
What size safety eyes does the pattern call for?
The eyes are 18 mm, fitted during head assembly before the backs are snapped into place. Eye spacing is worth checking against the muzzle position first, since this step is permanent.
Is this pattern written in US or UK crochet terms?
It is written in US terminology throughout, so every single crochet (sc) is the same stitch called double crochet (dc) in UK terms. No other stitch-name conversion is needed since single crochet is the only stitch family used.
These answers came from whoever first published the pattern, kept word for word.