 EVERY CROCHET
 Amigurumi 7 rounds No account, no download
How to crochet a mini octopus amigurumi keychain
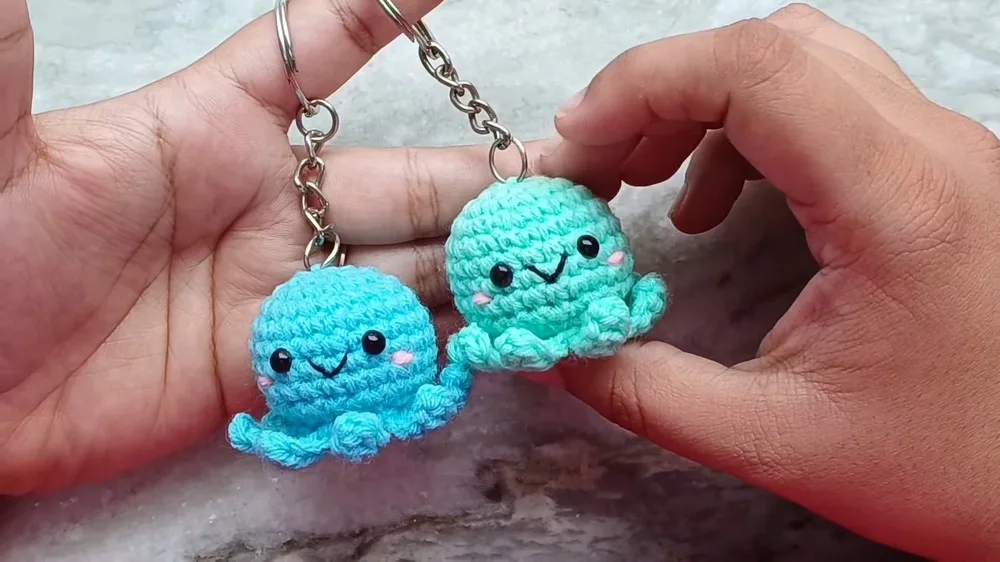
A single crochet (UK: double crochet) octopus amigurumi keychain pattern, with both US and UK stitch terms given.
- Skill
- Intermediate
- Time
- 4-6 hours
- Yarn weight
- Worsted
- Hook
- 4 mm

Intermediate
What the original write-up called it. Nothing here is graded again.

Worsted
What the sample was worked in. Any weight works; the size moves with it.

4-6 hours
What the original page reckoned. Your own pace is the one that matters.
About this pattern
This is a small single crochet (double crochet) amigurumi octopus body, worked in continuous spiral rounds from a 6-stitch magic circle up to 24 stitches, then decreased back down through 16 and 8 stitches before the top is closed. Eight tentacles are added into the front loops of round 10, and the face is embroidered with a mouth and cheeks. It needs a 3mm hook, 4mm safety eyes, stuffing, a stitch marker, and small amounts of contrast yarn for the mouth and cheeks. A blank keyring turns the finished piece into a keychain.
This pattern makes a small, rounded octopus worked entirely in single crochet (double crochet in UK terms), the stitch that underpins most amigurumi because it produces a tight, firm fabric with no visible gaps. The body stays small enough to finish quickly and compact enough to carry on a keyring once a blank keyring is attached, making it suited to both quick gift projects and practice pieces for anyone building confidence with shaping small, dense crochet shapes.
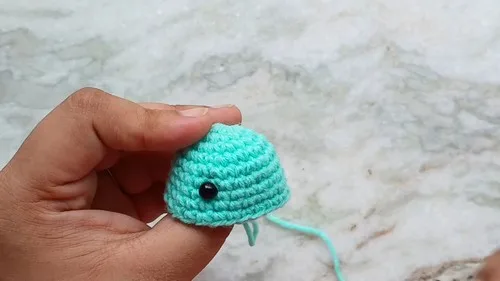
Construction runs bottom to top in continuous spiral rounds, starting from a magic circle of 6 stitches and increasing through rounds 2 to 4 up to 24 stitches, then straight rounds through round 9 that let the fabric curve into shape. Safety eyes go in between rounds 6 and 7, spaced three stitches apart, before two decrease rounds close the top: round 10 brings the count down to 16 stitches, and round 11, worked in back loops only, finishes at 8 before the opening is gathered shut. Eight tentacles are then worked into the front loops of round 10, and the face is finished with embroidered mouth and cheek details.
Materials
- Yarn in one color for the body (plus small amounts of black for the mouth and pink for the cheeks)
- 4mm safety eyes
- Blank keyrings (if turning into keychains)
- Stuffing material
- Crochet hook (3mm is recommended for tight stitches)
- Yarn needle
- Stitch marker (or a paperclip)
- Scissors
The list is the pattern's own wording.
Instructions
Every round is printed as the pattern wrote it, brackets and all. Open the key beside a round to see only the short forms that round uses.
Main Pattern
- Round 1
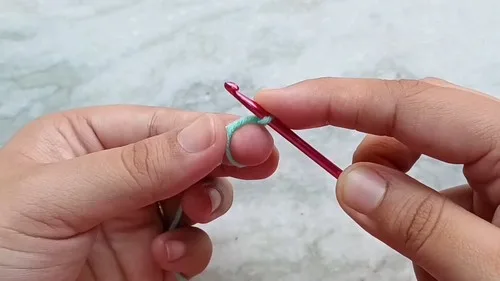
Make a magic circle and chain one to start. This chain does not count as a stitch. Make 6 single crochets (sc) into the magic circle. Pull the tail to cinch the magic circle closed. You have completed Round 1 with 6 sc.
Key1
- sc
- single crochet
- Round 2
Increase Round Increase in each stitch around by making 2 sc in each stitch from the previous round, giving you a total of 12 sc.For Round 3:Alternate Increases: sc in the next stitch, then 2 sc in the following stitch (increase) all the way around, ending the round with 18 sc.
Key1
- sc
- single crochet
- Round 4
Staggered Increases Begin with 1 sc, increase in the next stitch, then 1 sc in the next two stitches. Continue this pattern (1 sc, 1 sc, increase) around, ending up with 24 sc.
Key1
- sc
- single crochet
- Rounds 5–9
Sc in each stitch around, maintaining 24 stitches. Your piece will start to curve.
Key1
- sc
- single crochet
Insert Safety Eyes
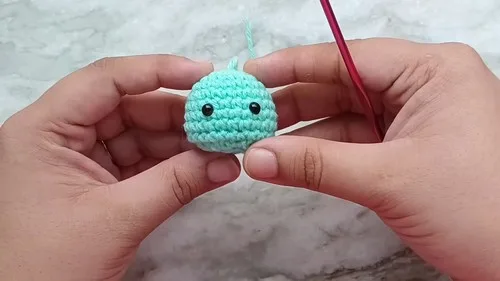
Place safety eyes between Rounds 6 and 7, three stitches apart.
- Round 10
(Start Decreasing): Start with 1 sc, then do an invisible decrease over the next two stitches. Repeat this pattern (1 sc, invisible decrease) around, ending with 16 stitches.
Key1
- sc
- single crochet
Invisible decrease is performed by working only in the front loops of the stitches.
Stuff the Octopus
Partially stuff the octopus body, ensuring it's firm but not overstuffed.
- Round 11
Further Decreasing Invisible decrease in each stitch around, working in the back loops only, to create a base for the tentacles. You’ll finish with 8 stitches.Close up the opening by weaving the tail through the front loops of the last round’s stitches and pulling tight.
Make the Tentacles
- Tentacles
Work in the front loops of Round 10. Attach yarn, chain 5, then make 4 half double crochets down the chain. Slip stitch into the next front loop. Repeat this for all 8 tentacles.
Embroider the Face
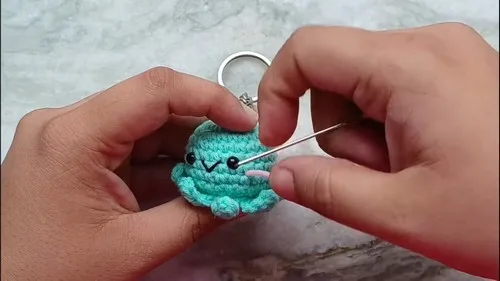
Using black yarn, embroider a smile between the eyes on Round 7.
With pink yarn, stitch the cheeks below each eye.
Final Touches
Sew on the keychain loop or attachment as desired.
Weave in all loose ends securely.
Ensure all components are securely attached, eyes are properly in place, and all ends are woven in.
Notes from the pattern
- A 3mm hook is recommended specifically to keep the single crochet stitches tight enough that stuffing does not show through once the body is filled.
- Because the body is worked in continuous spiral rounds with no joining slip stitch, a stitch marker or paperclip in the first stitch of each round is the only way to keep track of where a round starts and ends.
- The black yarn for the mouth and pink for the cheeks are added as small embroidered details after the main body is complete, not worked into the spiral rounds themselves.
- Stuffing happens in two stages: the body is partially stuffed, firm but not overstuffed, before round 11 closes the top, since the opening becomes too narrow to add more filling afterwards.
The essentials
- Rounds
- 7
- Parts
- 6
- Level
- Intermediate
- Time
- 4-6 hours
- Hook
- 4 mm
- Yarn
- Worsted
Stitches you will use
- Single crochet increases Used across rounds 2 to 4 to grow the body from 12 to 18 to 24 stitches; keep increases spaced evenly so the base sits flat rather than ruffling.
- Invisible decrease worked in one loop only Rounds 10 and 11 use front-loop-only and back-loop-only decreases to shape the top; working in the wrong loop will leave a visible ridge instead of a smooth curve.
- Mid-round safety eye placement Eyes go in between rounds 6 and 7, three stitches apart, before stuffing begins; mark the spot with a stitch marker so the gap is still visible once the fabric has curved.
Troubleshooting
The base cups upward instead of lying flat
This usually means the stitch count drifted during the increase rounds; recount after round 4 to confirm 24 stitches before continuing, since a shortfall here throws off the curve through rounds 5 to 9.
The safety eyes sit at an angle or too close together
This points to uneven spacing when placing the eyes between rounds 6 and 7; unstuff enough to check the three-stitch gap before pushing the posts through and attaching the backs.
Substituting yarn
- Cotton, DK or sport weight
- Gives crisper stitch definition and a firmer, more structured body, which suits a keychain that will be handled often; may need a slightly smaller hook than 3mm to keep the fabric tight.
- Acrylic, worsted weight
- Softer drape and a wider range of ready colours for the body plus the black and pink details, but the fabric is looser by nature, so dropping to a smaller hook helps keep stuffing hidden.
- Wool-blend, sport weight
- Adds a softer handle and slight halo, but less stitch structure, so tension needs to be kept tighter than with cotton; also more prone to felting if washed, which affects long-term care.
Washing and care
- Because the body is stuffed and shaped rather than blocked, hand-wash only if necessary, using cool water and no agitation, then press out excess water in a towel rather than wringing, to avoid distorting the rounded shape.
- Reshape gently while still slightly damp, easing the body back into a sphere with the tentacle base uppermost, and leave flat to dry away from direct heat; store away from damp metal keyring attachments to avoid rust marks transferring onto the yarn.
The photographs taken while this was being made
Every one was taken by whoever published the pattern, in the order the source listed them.
FAQs
Questions
Why does the pattern recommend a 3mm hook?
A smaller hook than many amigurumi patterns keeps the single crochet stitches tight, which stops stuffing from poking through the finished fabric. This matters more here because the piece is small and handled often as a keychain.
Is a stitch marker necessary?
Yes, since the body is worked in continuous spiral rounds with no joining stitch, there is no natural marker for where each round starts. A plain paperclip works just as well as a dedicated stitch marker.
Can the safety eyes be swapped for embroidered eyes?
Yes, embroidered eyes can be placed in the same spot, between rounds 6 and 7, three stitches apart. This is worth considering if the keychain will be given to a young child, since embroidery avoids any small parts.
Does the finished piece need blocking?
No, amigurumi pieces like this one get their shape from stuffing rather than blocking. Shape comes from firm, even stuffing during the stuffing step rather than from wetting or pinning the fabric.
How much yarn is needed for the black and pink details?
Only small amounts of each are needed, since they cover the mouth and cheeks rather than any full round. Leftover scraps from other projects are usually enough for both colours.
These answers came from whoever first published the pattern, kept word for word.