 EVERY CROCHET
 Amigurumi 5 rounds No account, no download
Beagle puppy amigurumi crochet pattern
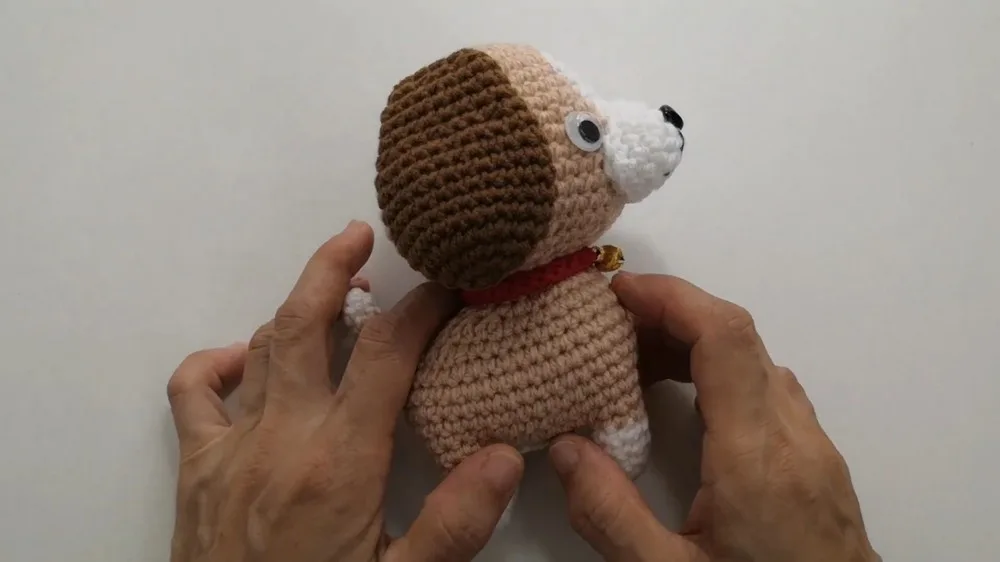
Amigurumi beagle worked in single crochet (UK double crochet) rounds, with US and UK stitch terms given throughout.
- Skill
- Intermediate
- Time
- 4-6 hours
- Yarn weight
- Worsted

Intermediate
What the original write-up called it. Nothing here is graded again.

Worsted
What the sample was worked in. Any weight works; the size moves with it.

4-6 hours
What the original page reckoned. Your own pace is the one that matters.
About this pattern
This is an amigurumi beagle puppy made from separate crocheted pieces — head, nose, ears, legs, tail, body and collar — joined and stuffed to make a small stuffed dog. It uses single crochet (UK double crochet) worked in continuous rounds, a magic ring start, and safety eyes, and calls for basic amigurumi assembly skills including stuffing and sewing pieces together with a yarn needle.
This beagle puppy belongs to the amigurumi family, built entirely from single crochet (UK double crochet) worked in continuous spiral rounds. The dense, close fabric this stitch produces is what keeps the fiberfill stuffing contained and the shape crisp, which is why amigurumi designs lean on it almost exclusively rather than taller, more open stitches.
The body comes together as separate pieces — a shaped nose, a head worked from an increasing round, ears, legs and a tail started from a magic ring, a chained body, and a collar — each stuffed (where applicable) and joined afterwards with a yarn needle. Colour is handled by working the head in white and the body in a main shade such as beige, with a darker yarn reserved for the nose and a contrasting colour for the collar detail.
Materials
- Crochet hook (size not specified)
- Yarn in various colors for the puppy's body, nose, and collar
- Main color for the body (e.g., beige)
- White yarn for the head
- Darker color for the nose
- Additional color for the collar (and potentially a bell for embellishment)
- Stitch marker
- Yarn needle for assembly
- Safety eyes or buttons for the eyes (size not specified)
- Fiberfill for stuffing (not mentioned, but typically needed for amigurumi projects)
- Scissors
The list is the pattern's own wording.
Instructions
Every round is printed as the pattern wrote it, brackets and all. Open the key beside a round to see only the short forms that round uses.
Head
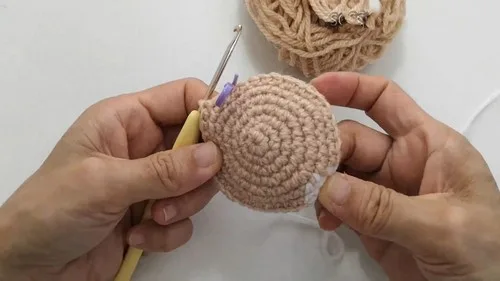
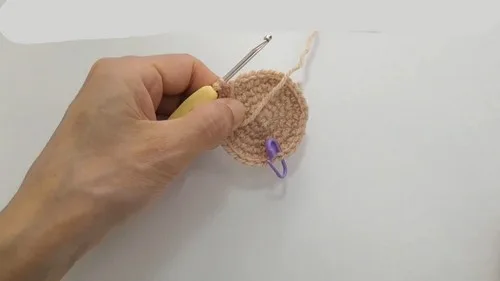
Start with a magic ring.
- (6)Round 1
6 single crochet (sc) in ring (6 sts).
Key2
- sts
- stitches
- sc
- single crochet
- (12)Round 2
2 sc in each st around (12 sts).
Key3
- sts
- stitches
- st
- stitch
- sc
- single crochet
- (18)Round 3
1 sc in the first st, 2 sc in the next st repeat around (18 sts).Continue the pattern, progressively increasing the number of sts in each round until you reach the desired size of the head. Each round will likely have 6 additional sts from the previous one. Mark the beginning of each round with a stitch marker.
Key3
- sts
- stitches
- st
- stitch
- sc
- single crochet
Nose
Begin with a chain 5.
Work sc in chains, with increases at the ends to form a rounded nose.
- (14)Round 1
Start from the second chain from the hook, 4 sc, work 4 sc in last ch, then continue on the opposite side with 3 sc, and finally 3 sc in the last ch (14 sts).
Key3
- sts
- stitches
- ch
- chain
- sc
- single crochet
- (22)Round 2
Increase sts by working 2 sc in one st in several places (22 sts).
Key3
- sts
- stitches
- st
- stitch
- sc
- single crochet
Ears
Start with a magic ring.
Work a few rounds, increasing as for the head, to form the ears.
Eventually, make rounds without increases to elongate the ears.
Legs
Start with a magic ring.
Work a few rounds of sc (amount may be variable depending on the size and shape you want for the legs).
Tail
Work a small cylinder starting with a magic ring and work it for a few rounds.
Body
Start with a chain that forms the foundation of the body.
Work sc along the chain and then work rounds to build up the body.
Collar
Chain 25 (or required length to fit around the puppy's neck).
Slip stitch back along the chain for a total of 14 stitches (or as needed), add a bell for embellishment if desired.
Notes from the pattern
- The pattern does not specify a hook size, so choose one that matches the chosen yarn weight and produces a firm, tight fabric — a looser gauge will let fiberfill show through the stitches.
- A stitch marker is essential once rounds begin increasing on the head, since the start of the round is easy to lose track of without one.
- Colour changes happen between pieces rather than mid-round — white for the head, a main colour such as beige for the body, a darker shade for the nose, and a separate colour for the collar — so ends can be worked in as each piece is finished.
- Stuff firmly but gradually as each piece nears completion, working small amounts of fiberfill in with the fingers or a blunt tool so the nose, head and legs hold a smooth, even shape rather than lumps.
The essentials
- Rounds
- 5
- Parts
- 7
- Level
- Intermediate
- Time
- 4-6 hours
- Yarn
- Worsted
Stitches you will use
- Working in continuous spiral rounds Used throughout the head, ears, legs, tail and body; mark the start of each round with a stitch marker so increase placement stays accurate as counts rise.
- Shaping with increases along both sides of a starting chain Used for the nose, where stitches are added at each end of the chain to turn a flat strip into a rounded, oval shape.
- Starting from a magic ring Used for the head, ears, legs and tail; pulling the ring closed tightly before the first round prevents a hole at the centre of each piece.
Troubleshooting
The nose comes out lopsided rather than a symmetrical oval
This usually means the increases at each end of the starting chain in round 1 were not worked evenly on both sides; count the stitches on each end against the pattern's totals before starting round 2.
The head rounds start spiralling and
This happens when the beginning of the round is lost partway through the increasing rounds; place a stitch marker in the first stitch of every round and move it up each time.
The finished piece looks lumpy or uneven once stuffed
Uneven stuffing density is the usual cause; remove and redistribute the fiberfill in small amounts rather than pushing in one large piece at the end.
Substituting yarn
- Cotton, worsted (aran) weight
- Produces a firmer, more defined stitch definition than acrylic, holds its shape well without stuffing showing through, but has less give, so a hook one size larger may be needed to keep the fabric from becoming stiff.
- Acrylic, worsted weight
- The most direct match to the materials list; lightweight, easy to stuff evenly, and machine washable, with a slightly softer drape than cotton.
- Wool-blend, DK (light worsted) weight
- Produces a smaller finished puppy at the same stitch counts and needs a smaller hook to keep the fabric dense enough to hold stuffing; adds warmth and a softer handle but requires hand washing.
Washing and care
- If made in acrylic yarn as listed, hand wash in cool water and lay flat to dry; avoid a tumble dryer, which can flatten the fiberfill unevenly inside the head and body.
- Reshape the head and legs gently by hand while still damp so the amigurumi keeps its rounded form, then store away from direct sunlight to prevent the coloured yarns from fading unevenly.
The photographs taken while this was being made
Every one was taken by whoever published the pattern, in the order the source listed them.
FAQs
Questions
What stitch is this beagle pattern mostly worked in?
Almost the entire pattern uses single crochet (UK double crochet), worked in continuous spiral rounds for the head, ears, legs, tail and body, and in rows across a chain for the nose. No taller stitches are used.
Does the pattern specify a hook size?
No, the hook size is not given in the materials list. Choose a hook that produces a tight, dense fabric for the chosen yarn weight so stuffing does not show through.
How is the nose shaped without a magic ring?
The nose starts from a chain of 5 rather than a ring; round 1 works stitches along both sides of the chain with increases at each end, and round 2 adds further increases to round out the shape.
What is used for the eyes?
The materials list calls for safety eyes or buttons, with no size specified. Either option should be chosen with the finished head size in mind and attached securely before the head is fully stuffed and closed.
How are the different coloured pieces joined together?
Each piece — nose, head, ears, legs, tail, body and collar — is worked separately in its own colour, stuffed where needed, then assembled afterwards using a yarn needle. There is no colour-carrying within a single round.
How is the collar made?
Chain 25 (or the length needed to fit around the puppy's neck), then work slip stitch back along the chain for a total of 14 stitches (or as needed). A bell can be added for embellishment if desired.
These answers came from whoever first published the pattern, kept word for word.