 EVERY CROCHET
 Amigurumi 21 rounds No account, no download
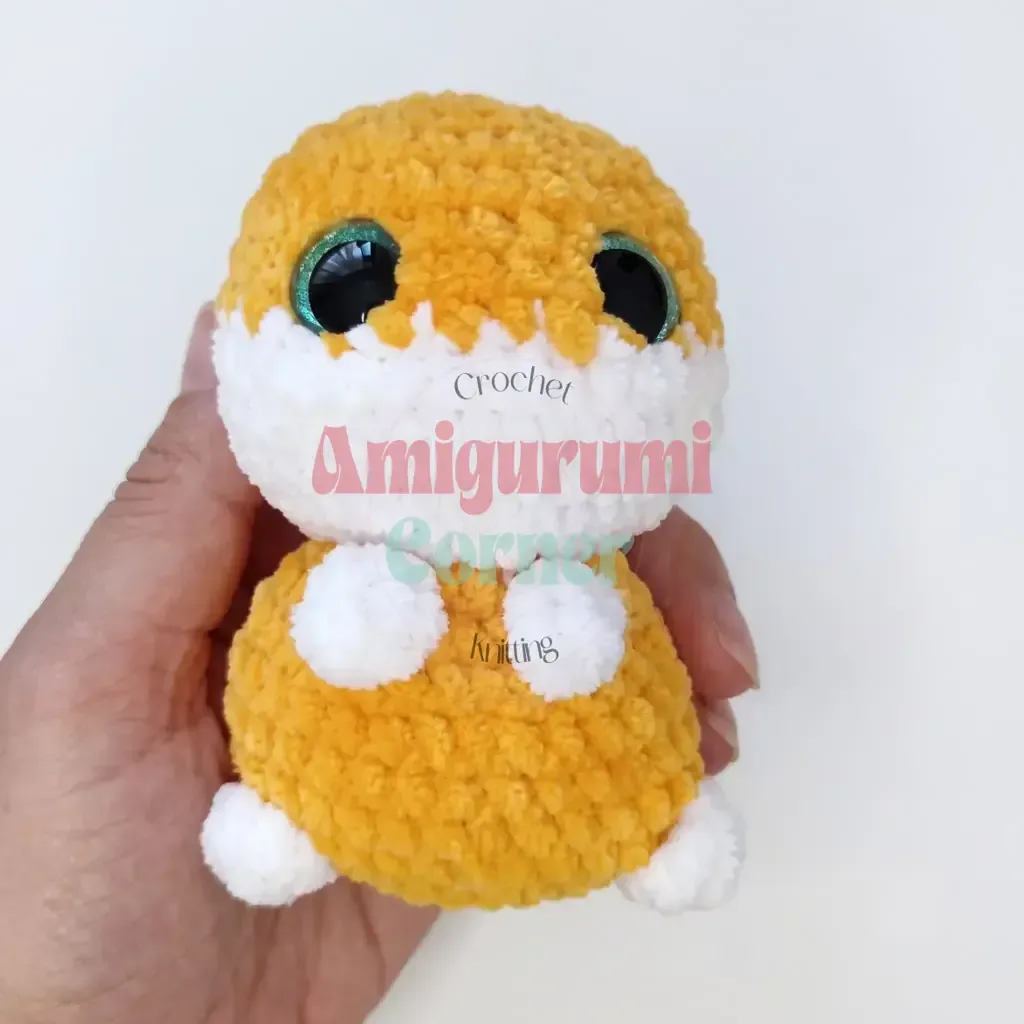
Crochet a big-eyed kitten amigurumi with safety eyes
A big-eyed kitten amigurumi worked mainly in single crochet, using US crochet terminology throughout, finished with oversized safety eyes.
- Skill
- Intermediate
- Time
- 4-6 hours
- Yarn weight
- Worsted
- Hook
- 3.5 mm

Intermediate
What the original write-up called it. Nothing here is graded again.

Worsted
What the sample was worked in. Any weight works; the size moves with it.

4-6 hours
What the original page reckoned. Your own pace is the one that matters.
About this pattern
This pattern makes a stuffed kitten with an oversized head and small flat ears, worked mainly in single crochet (US terminology) with a 3.5mm hook. The Head-Body takes eighteen continuous rounds in a main colour with white contrast for the muzzle and paws, while the Ears are two flat, short-rowed pieces. Finishing needs 16mm safety eyes, fibrefill, embroidery thread and a tightening sequence to shape the face.
This amigurumi kitten is built almost entirely from single crochet (worked in US crochet terminology), the dense, low stitch that amigurumi relies on to keep stuffing from showing through the fabric. The Head-Body spans eighteen rounds worked as a continuous spiral, while the Ears use just a few short turning rows each, giving the finished toy a compact body under a disproportionately large face — the "big-eyed" look the pattern is named for. White contrast yarn marks out the muzzle and paws, so colour changes are part of the shaping rather than added afterwards.
The Head-Body is worked as one continuous piece from a magic ring, increasing steadily across its eighteen rounds before the shaping turns back inward toward the neck opening; a stitch marker tracks the start of each round, since the spiral has no join to work from. The Ears are worked flat instead: a starting chain of eight gives seven single crochet stitches, which are then decreased down to five, then three, then a single stitch over the following short rows. Assembly brings the two pieces together with safety eyes, embroidered facial details and a two-stage tightening sequence at the top of the head.
Materials
- Worsted weight (Medium, 4) yarn in Main Color (orange or your choice)
- Small amount of worsted weight yarn in Contrast Color (white, for the muzzle and paws)
- Crochet hook size E-4 (3.5 mm), or size needed to achieve a tight, gap-free fabric
- Safety eyes, 16 mm, 1 pair
- Fiberfill stuffing
- Stitch markers
- Yarn needle / tapestry needle
- Scissors
- Craft glue (for attaching the nose)
- Embroidery thread (black or dark brown, for eye whites, eyelids, eyebrows, and face details)
The list is the pattern's own wording.
Instructions
Every round is printed as the pattern wrote it, brackets and all. Open the key beside a round to see only the short forms that round uses.
Head-Body
Marker runs down the center back throughout. Join with a slip stitch at any point if needed. Work in Main Color (MC) unless otherwise noted.
- Round 1
8 sc in mr. (8)
Key2
- mr
- Magic Ring
- sc
- Single Crochet
- Round 2
inc in each st around. (16)
Key1
- inc
- Increase
- Round 3
2 sc, 4 inc, 4 sc, 4 inc, 2 sc. (24)
Key2
- inc
- Increase
- sc
- Single Crochet
- Round 4
2 sc, (1 sc, 1 inc) repeat 4 times , 4 sc, (1 sc, 1 inc) repeat 4 times , 2 sc. (32)
Key2
- inc
- Increase
- sc
- Single Crochet
- Round 5
10 sc, paw: 1 Bobble Stitch (4 dc worked into the same st, joined at the top), 10 sc, paw: 1 Bobble Stitch (4 dc worked into the same st, joined at the top), 10 sc, tail (ch 11; starting in 2nd ch from hook: 3 sl st, 3 sc, 4 hdc). (32)
Key5
- sl st
- Slip Stitch
- hdc
- Half Double Crochet
- ch
- Chain
- dc
- Double Crochet
- sc
- Single Crochet
- Rounds 6–8
sc in each st around, 3 rounds even. (32)
Key1
- sc
- Single Crochet
- Round 9
7 sc, 1 dec, 14 sc, 1 dec, 7 sc. (30)
Key2
- dec
- Decrease
- sc
- Single Crochet
- Round 10
(3 sc, 1 dec) repeat 2 times , 2 sc, paw: 1 Bobble Stitch (4 hdc worked into the same st, joined at the top), 1 dec, 2 sc, paw: 1 Bobble Stitch (4 hdc worked into the same st, joined at the top), 1 dec, (3 sc, 1 dec) repeat 2 times . (24)
Key3
- dec
- Decrease
- hdc
- Half Double Crochet
- sc
- Single Crochet
- Round 11
(2 sc, 1 dec) repeat 6 times . (18)
Key2
- dec
- Decrease
- sc
- Single Crochet
- Round 12
(1 sc, 1 dec) repeat 6 times . (12)
Key2
- dec
- Decrease
- sc
- Single Crochet
Continue in Main Color from here. If you’d like to define the muzzle, switch to Contrast Color (CC) for Rounds 13-17.
- Round 13
Working in BLO: inc in each st around. (24)
Key2
- BLO
- Back Loop Only
- inc
- Increase
- Round 14
(1 sc, 1 inc) repeat 12 times . (36)
Key2
- inc
- Increase
- sc
- Single Crochet
- Rounds 15–17
sc in each st around, 3 rounds even. (36)
Key1
- sc
- Single Crochet
- Round 18
9 sc, (1 sc, 1 dec) repeat 6 times , 9 sc. (30)
Key2
- dec
- Decrease
- sc
- Single Crochet
- Rounds 19–21
sc in each st around, 3 rounds even. (30)
Key1
- sc
- Single Crochet
- Round 22
(3 sc, 1 dec) repeat 6 times . (24)Insert the 16 mm safety eyes between Rounds 19 and 20, leaving 3-4 sc between the eyes. Begin stuffing the Head-Body firmly at this point, adding more as you close the remaining rounds.
Key2
- dec
- Decrease
- sc
- Single Crochet
- Round 23
(2 sc, 1 dec) repeat 6 times . (18)
Key2
- dec
- Decrease
- sc
- Single Crochet
- Round 24
dec in each st around. (9)Fasten off, leaving a long tail. Close the remaining opening using the yarn needle, working through the back loops only.
Key1
- dec
- Decrease
Ear (make 2)
Worked in flat turning rows.
Ch 8; starting in 2nd ch from hook: 7 sc, ch 1, turn.
- Round 1
Starting in 2nd st: 1 dec, 3 sc, 1 dec, ch 1, turn. (5)
Key3
- dec
- Decrease
- ch
- Chain
- sc
- Single Crochet
- Round 2
Starting in 2nd st: 1 dec, 1 sc, 1 dec, ch 1, turn. (3)
Key3
- dec
- Decrease
- ch
- Chain
- sc
- Single Crochet
- Round 3
Starting in 2nd st: 1 triple decrease. (1)Fasten off, leaving a 20-30 cm tail for sewing. Weave the working tail down through the piece using the yarn needle so it’s ready for attaching later.
Making up
- Step 1Finish stuffing the Head-Body firmly, making sure the shape stays round and there are no soft or lumpy spots.
- Step 2Using the long tail left at the top of the Head-Body, work the tightening sequence: pass the needle through points T3, T1, T2, T4 in order, then pull to cinch the stitches together and secure with a double knot.
- Step 3With the same yarn, work a second tightening pass through points T5 and T6, pulling to cinch and securing with a double knot. Bury both yarn ends inside the head.
- Step 4Position the two Ears between Rounds 18 and 22 of the Head-Body, leaving 4 sc of space between them. Pin in place first to check symmetry, then whipstitch each Ear securely using its own yarn tail.
- Step 5Using embroidery thread, stitch the eye whites, eyelids, eyebrows, and the center seam of the muzzle to build out the kitten’s expression.
- Step 6Glue the nose in place at the center of the muzzle.
- Step 7Weave in any remaining yarn ends throughout the piece.
Notes from the pattern
- Work with a 3.5mm (US E-4) hook, or size down if the fabric still looks loose, since the pattern treats a tight, gap-free fabric as more important than hitting an exact gauge.
- Keep a stitch marker moving at the start of every Head-Body round throughout all eighteen rounds; because the piece is joinless, losing track of the round start also loses the centre-back line the tightening sequence relies on.
- Keep your tension snug throughout the Head-Body — tight stitches keep stuffing from showing through, especially around the color-changed muzzle section. If your stitches feel loose, try dropping down half a hook size.
- Stuff the Head-Body firmly and evenly as the rounds build — add small amounts of fiberfill after each round from Round 18 onward, pushing it into the corners near the eyes so the face stays smooth and rounded — since the final tightening pass through points T3, T1, T2, T4, and then T5 and T6 only cinches neatly if the shape underneath is already round and firm.
- This pattern is written in US crochet terminology.
- When you reach the decrease rounds near the top of the head (Rounds 23 and 24), work slowly and check your stitch placement after every few stitches. These final rounds shape the crown of the head, and rushing here is the most common way to end up with a lopsided finish.
- the paw bobble stitches in Rounds 5 and 10, pull your working loop snug after each of the four stitches before joining them at the top. This keeps the bobble compact and prevents it from looking floppy against the body.
- If you want to substitute yarn, stick with a smooth worsted weight rather than a fuzzy or textured yarn — the fine facial embroidery and the visible increase/decrease pattern on the muzzle look their best on a smooth stitch definition.
The essentials
- Rounds
- 21
- Parts
- 2
- Level
- Intermediate
- Time
- 4-6 hours
- Hook
- 3.5 mm
- Yarn
- Worsted
Stitches you will use
- Magic ring start Opens Round 1 of the Head-Body with 8 sc worked into the ring; pull the tail fully closed before starting Round 2's increases or a hole shows at the crown.
- Continuous spiral rounds All eighteen Head-Body rounds are joinless, so a stitch marker has to move up at the start of every round to keep track of where the spiral and its centre-back line actually sit.
- Short-row decreasing to a point The Ear rows decrease from seven stitches to five, to three, then close with a triple decrease to one; keep decreases stacked over the previous row's stitches so the ear tip stays centred rather than skewed.
Troubleshooting
The top of the head looks lopsided or
This usually means stuffing was uneven or the tightening points were worked out of order; unpick the knot, restuff to a firm, even round shape, then repeat the T3, T1, T2, T4 pass before adding the second pass through T5 and T6.
The ears curl inward instead of sitting
Flat turning rows pull into a curve when the decrease rows are worked too tightly; crochet the turning chains a little looser and press or steam the finished ear flat before sewing it to the head.
Stuffing peeks through the stitches
The hook is likely too large for the yarn being used; drop to a smaller hook size until the single crochet fabric closes up, since the pattern prioritises a tight fabric over matching a specific gauge.
Substituting yarn
- Cotton, worsted (aran) weight
- Gives crisper stitch definition and a slightly smaller, firmer finished kitten than a springier fibre; keep the same 3.5mm hook or drop half a size to keep the fabric tight enough to hide stuffing.
- Acrylic, DK (light worsted) weight
- A lighter yarn worked over the same eighteen rounds produces a noticeably smaller Head-Body and Ears; size the hook down to around 3mm and use slightly less fibrefill to match the reduced scale.
- Wool-blend, bulky (chunky) weight
- Scaling up to bulky yarn produces a much larger kitten from the same round counts, needing a larger hook (around 5-5.5mm) and more fibrefill, plus extra care working tightly since the open fabric shows gaps more readily.
Washing and care
- The materials list doesn't name a specific fibre beyond worsted weight, so treat the finished kitten as a spot-clean item: a damp cloth with a little mild soap on the surface is safer than full immersion, which can saturate the fibrefill and distort its shape.
- Keep the toy away from direct heat or a tumble dryer, since the safety eyes and the glued-on nose can loosen under warmth; reshape the ears and head by hand while slightly damp, let it air-dry fully, then store it upright or flat on a shelf rather than squashed in a box.
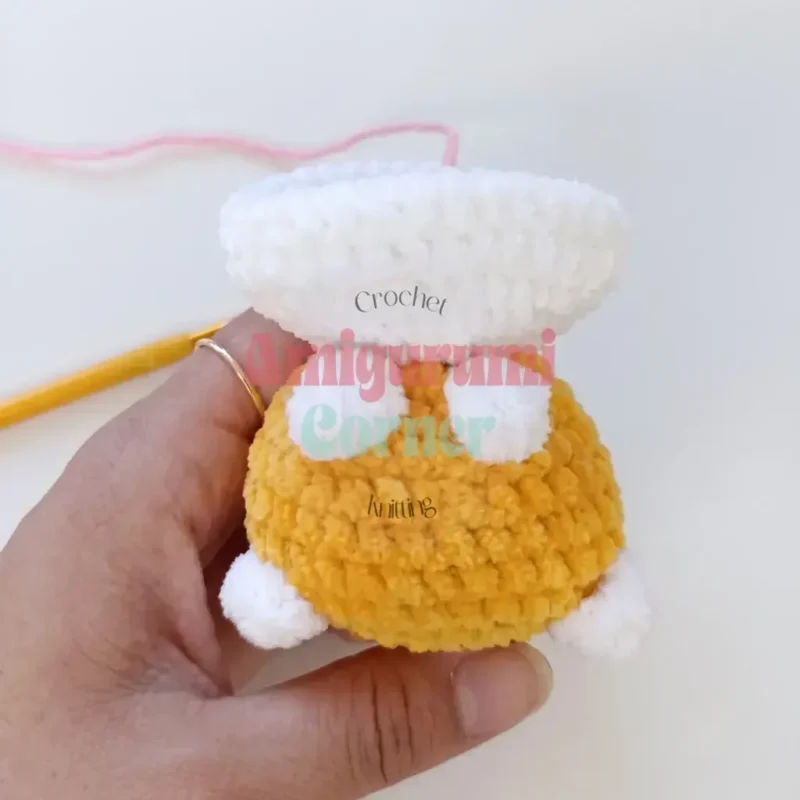
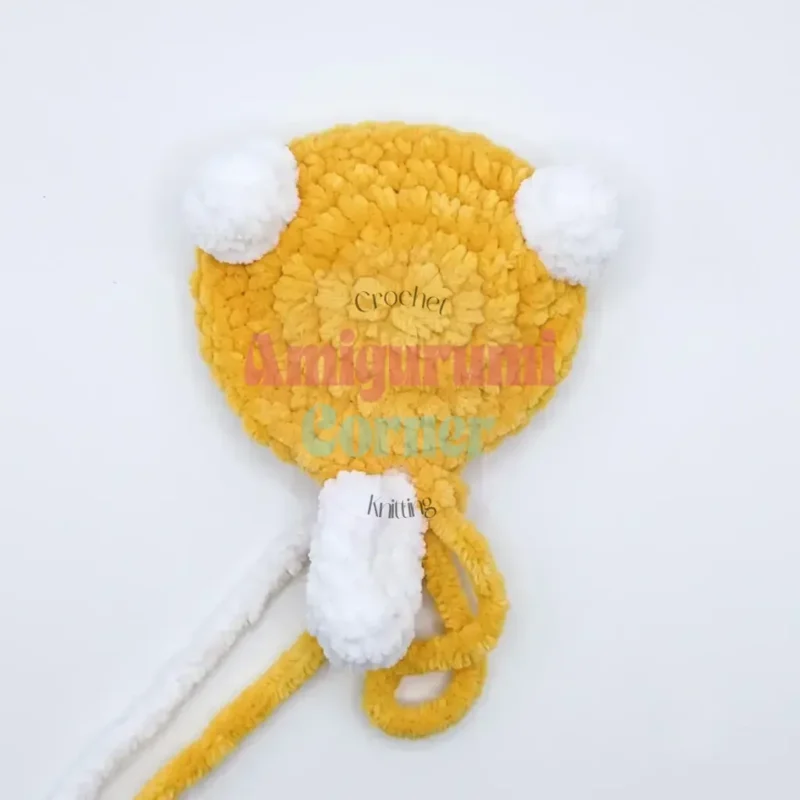
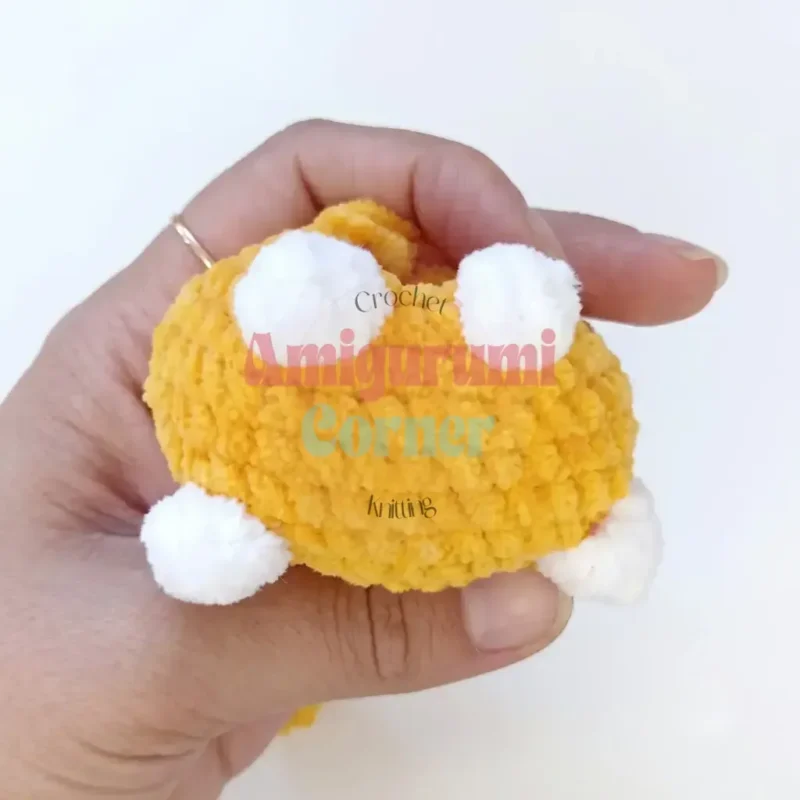
The photographs taken while this was being made
Every one was taken by whoever published the pattern, in the order the source listed them.
FAQs
Questions
What size finished kitten does this pattern make?
Using worsted weight yarn and a 3.5 mm hook, this pattern produces a small kitten roughly palm-sized, ideal for shelf display or as a pocket-sized gift. The exact size can vary slightly depending on your tension and stuffing firmness.
Why are my safety eyes uneven after inserting them?
This usually happens when the eyes are placed before checking symmetry on both sides. Insert the posts loosely first, count the stitches between them to confirm they match, and hold the piece at arm’s length to check the angle before pushing the backs on permanently.
What is a triple decrease and how do I work it?
A triple decrease combines three stitches into one by pulling up a loop in each of three consecutive stitches, then yarning over and pulling through all loops on the hook at once. It’s used at the tip of the Ear rows here to taper the point to a single closing stitch.
These answers came from whoever first published the pattern, kept word for word.