 EVERY CROCHET
 Amigurumi 26 rounds No account, no download
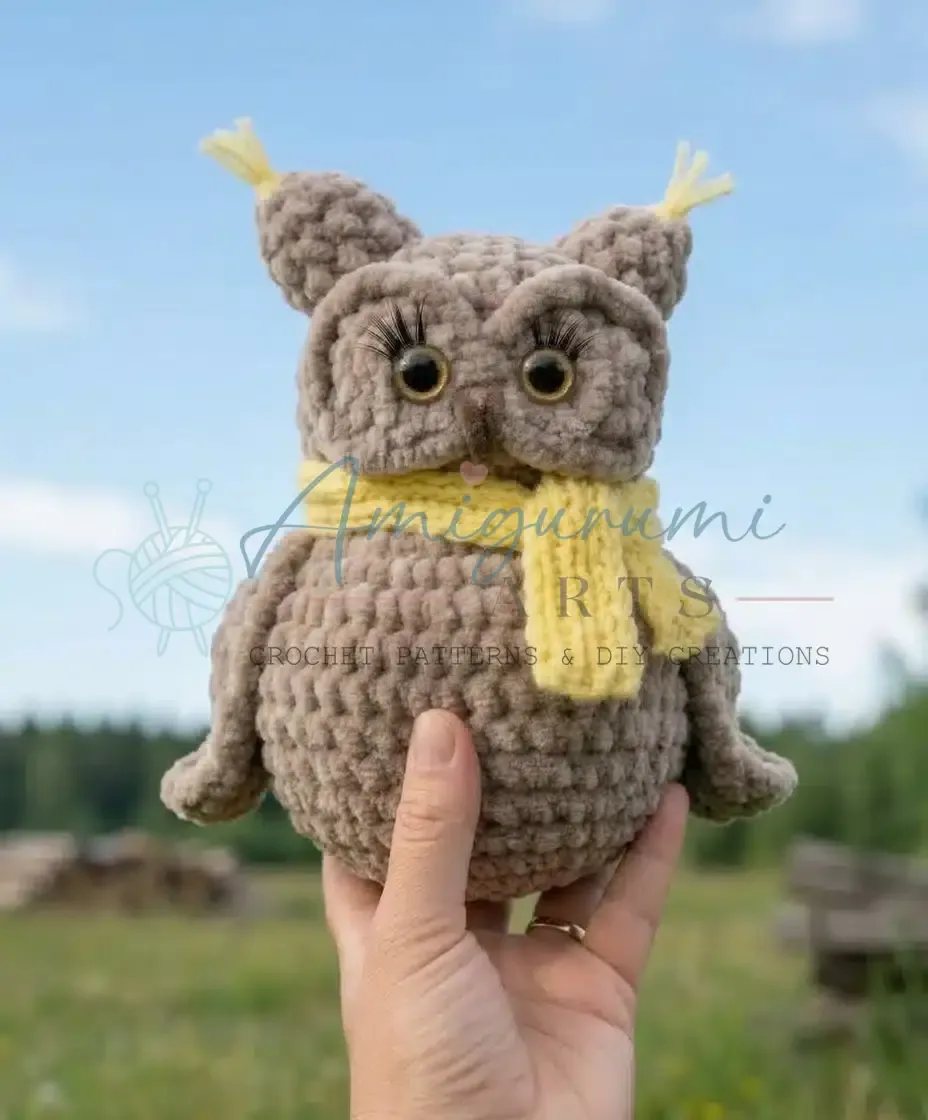
Amigurumi owl crochet pattern with horns and wings
A plush amigurumi owl pattern worked in single crochet (UK double crochet); both US and UK stitch terms given throughout.
- Skill
- Intermediate
- Time
- 4-6 hours
- Yarn weight
- Super Bulky
- Hook
- 4.0 mm

Intermediate
What the original write-up called it. Nothing here is graded again.

Super Bulky
What the sample was worked in. Any weight works; the size moves with it.

4-6 hours
What the original page reckoned. Your own pace is the one that matters.
About this pattern
This is a stuffed amigurumi owl made with super bulky plush yarn on a 4.0mm hook, with a contrasting fingering-weight yarn for a scarf and horn tassels on a 2.5mm hook. The head, body, wings, eye patches and horns are crocheted separately in continuous spirals, then sewn together and finished with safety eyes, false eyelashes and a darker-shade beak. Expect several short pieces to join rather than one continuous build.
This amigurumi owl is built almost entirely from single crochet (UK double crochet), the dense, firm stitch that gives amigurumi its structure and keeps stuffing from showing through the fibre. The wings bring in half double crochet and double crochet to shape a curved outer edge, while increases and decreases shift the stitch count round by round to form the head, body, wings, eye patches and horns.
Construction works outward from the head, which starts as two flat circles joined with a slip stitch into a single eye-mask shape before the rounds continue upward. The body is worked as its own piece, while the wings, eye patches and horns are crocheted separately and sewn on afterwards. A contrasting fingering-weight yarn, worked on a smaller hook, is reserved for the scarf and horn tassels, keeping the accent pieces finer than the main plush body.
Materials
Plush Yarn
- 1 skein of super bulky (size 6) plush yarn in your main owl color (e.g., Himalaya Dolphin Baby).
Accent Yarn
- 1 skein of sport/fingering (size 2) cotton yarn in a contrasting color for the horn tassels and scarf (e.g., YarnArt Jeans).
Darker Plush Yarn
- A small amount of super bulky (size 6) plush yarn in a slightly darker shade than your main color for the beak.
Crochet Hook
- A 4.0mm hook (or size recommended for your plush yarn) for the main body parts. A 2.5mm hook (or size recommended for your accent yarn) for the scarf and horn tassels.
Safety Eyes
- Two 12mm safety eyes.
Eyelashes
- A pair of false eyelashes (the kind you find for human use work wonderfully!).
Polyfill Stuffing
- For filling your owl.
Tapestry Needle
- For sewing parts together and weaving in ends.
Scissors
- For cutting yarn.
The list is the pattern's own wording.
Instructions
Every round is printed as the pattern wrote it, brackets and all. Open the key beside a round to see only the short forms that round uses.
Head
- Round 1
6 sc in a MR (6)
Key2
- sc
- single crochet
- MR
- magic ring (also known as magic circle or adjustable ring)
- Round 2
Inc in each stitch around (12)Fasten off the first circle, leaving a short tail to weave in. Do NOT fasten off the second circle; we’ll continue working from it.Step by step: Joining Round (to create the eye mask shape):.With the second circle still on your hook, join to any stitch on the first circle with a slip stitch.Sc in the first 4 stitches of Circle 1. Now, working into Circle 2: Sc in the next 3 stitches, inc in the next stitch, sc in the next 5 stitches, inc in the next stitch, sc in the next 2 stitches.Find the point where the two circles touch. Sc 1 into this joining point (this helps bridge the gap neatly).Now, working into the remaining stitches of Circle 1: Sc in the next 2 stitches, inc in the next stitch, sc in the next 6 stitches, inc in the next stitch, sc in the next 6 stitches, inc in the next stitch, sc in the next 2 stitches.Step by step: Sl st to the first sc of the round to join. (37 stitches); Fasten off, leaving a long tail for sewing.
Key3
- sl st
- slip stitch
- inc
- increase (2 sc in same stitch)
- sc
- single crochet
- Round 3
(1 sc, inc) x 6 (18)
Key2
- inc
- increase (2 sc in same stitch)
- sc
- single crochet
- Round 4
(2 sc, inc) x 6 (24)
Key2
- inc
- increase (2 sc in same stitch)
- sc
- single crochet
- Round 5
(3 sc, inc) x 6 (30)
Key2
- inc
- increase (2 sc in same stitch)
- sc
- single crochet
- Round 6
(4 sc, inc) x 6 (36)
Key2
- inc
- increase (2 sc in same stitch)
- sc
- single crochet
- Rounds 7–9
Sc in each stitch around for 3 rounds (36)
Key1
- sc
- single crochet
- Round 10
(4 sc, dec) x 6 (30)
Key2
- dec
- decrease (single crochet two together)
- sc
- single crochet
- Round 11
(3 sc, dec) x 6 (24)
Key2
- dec
- decrease (single crochet two together)
- sc
- single crochet
- Round 12
(2 sc, dec) x 6 (18)Start stuffing the head firmly with polyfill. Continue to stuff as you go.
Key2
- dec
- decrease (single crochet two together)
- sc
- single crochet
Your head is looking adorable already! Now let’s move right into the body.
Wings (Main Color Plush Yarn, 4.0mm Hook)
Make 2.
Ch 10.
- (24)Round 1
Starting in the second chain from the hook, sc in the next 5 ch, hdc in the next 2 ch, dc in the next 2 ch. In the last chain, work 6 dc. Now, continue working down the other side of the starting chain: dc in the next 2 ch, hdc in the next 2 ch, sc in the next 5 ch. (24 stitches)
Key4
- hdc
- half double crochet
- ch
- chain
- sc
- single crochet
- dc
- double crochet
- (33)Round 2
Sc in the next 5 stitches, hdc in the next 3 stitches, dc in the next 3 stitches, (inc in dc) x 5, dc in the next 3 stitches, hdc in the next 3 stitches, sc in the next 5 stitches. Sl st to the first sc to join. (33 stitches)Fasten off, leaving a long tail for sewing.
Key5
- sl st
- slip stitch
- inc
- increase (2 sc in same stitch)
- hdc
- half double crochet
- sc
- single crochet
- dc
- double crochet
Horns (Main Color Plush Yarn, 4.0mm Hook)
Make 2.
- Round 1
6 sc in a MR (6)
Key2
- sc
- single crochet
- MR
- magic ring (also known as magic circle or adjustable ring)
- Round 2
(1 sc, inc) x 3 (9)
Key2
- inc
- increase (2 sc in same stitch)
- sc
- single crochet
- Rounds 3–5
Sc in each stitch around for 3 rounds (9)Fasten off, leaving a long tail for sewing. Do not stuff.
Key1
- sc
- single crochet
Scarf (Accent Yarn, 2.5mm Hook)
Ch 45 (or your desired length for the scarf).
- (44)Round 1
Sc in the second ch from hook and in each ch across. Ch 1, turn. (44 stitches)
Key2
- ch
- chain
- sc
- single crochet
- Rounds 2–5
Sc in the BLO in each stitch across. Ch 1, turn. (44 stitches) Fasten off and weave in ends.
Key3
- BLO
- back loop only
- ch
- chain
- sc
- single crochet
Body
- Round 13
Inc in each stitch around (36)
Key1
- inc
- increase (2 sc in same stitch)
- Round 14
(1 sc, inc) x 18 (54)
Key2
- inc
- increase (2 sc in same stitch)
- sc
- single crochet
- Rounds 15–19
Sc in each stitch around for 5 rounds (54)
Key1
- sc
- single crochet
- Round 20
(4 sc, dec) x 9 (45)
Key2
- dec
- decrease (single crochet two together)
- sc
- single crochet
- Round 21
(3 sc, dec) x 9 (36)
Key2
- dec
- decrease (single crochet two together)
- sc
- single crochet
- Round 22
(2 sc, dec) x 9 (27)Continue stuffing the body firmly.
Key2
- dec
- decrease (single crochet two together)
- sc
- single crochet
- Round 23
(1 sc, dec) x 9 (18)
Key2
- dec
- decrease (single crochet two together)
- sc
- single crochet
- Round 24
Dec in each stitch around (9)
Key1
- dec
- decrease (single crochet two together)
- Round 25
Dec 3 times (3)Fasten off, leaving a long tail. Thread the tail through the remaining 3 stitches and pull tight to close the opening. Weave in the end.
Key1
- dec
- decrease (single crochet two together)
Head and Body (Main Color Plush Yarn, 4.0mm Hook)
Step by step: Make 2 identical circles first, then we’ll join them; Circle 1 & 2:.
We’ll start with the head and then seamlessly transition into the body.
Horn Tassels (Accent Yarn, 2.5mm Hook)
Take your accent yarn. Cut several strands, each about 4-5 inches long. Fold them in half, pull the loop through the top of each horn, and then thread the ends through the loop to create a small tassel. Trim the tassels to your desired length.
Making up
- Step 1This is where your owl truly comes to life! Take your time with these steps, and don’t be afraid to use pins to hold everything in place before you sew.
- Step 2Attach the Eye Patches: Position the crocheted eye patches on the head. They should sit side-by-side, covering the front of the head. Pin them securely, making sure they are centered and level. Sew them firmly in place using the long tail left on the eye patch. Weave in any remaining ends.
- Step 3Add Safety Eyes and Eyelashes: Now, carefully insert your 12mm safety eyes through the crocheted eye patches. I like to place them roughly in the center of each patch. Before securing the backings, you can gently pull the fabric around the eyes to create a slight indentation, giving your owl a more expressive look. Once you’re happy, attach the safety eye backings. Next, apply the false eyelashes just above the safety eyes. You can use a tiny dab of fabric glue if needed, or simply thread them through a few stitches on the eye patch for a secure hold.
- Step 4Embroider the Beak: Using your darker plush yarn and a tapestry needle, embroider a small triangular beak just below and between the eye patches. A few horizontal stitches and then a vertical stitch in the center usually works perfectly.
- Step 5Attach the Horns: Pin the horns to the top of the head, slightly behind the eye patches, one on each side. Make sure they are symmetrical. Sew them securely in place with the tails you left.
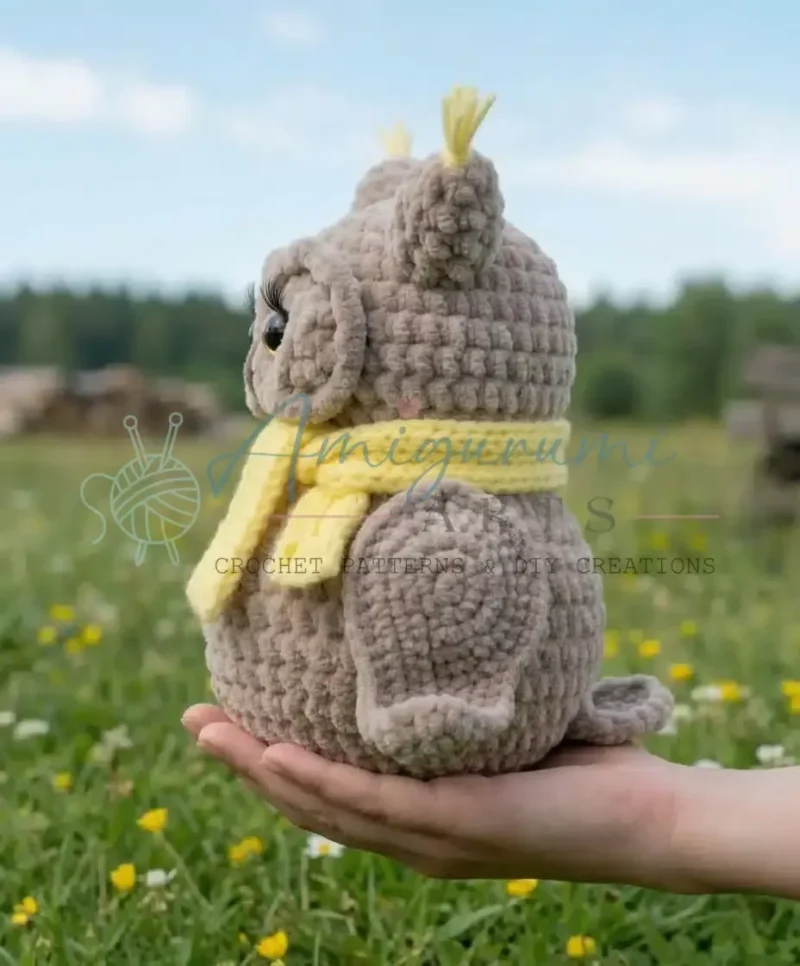
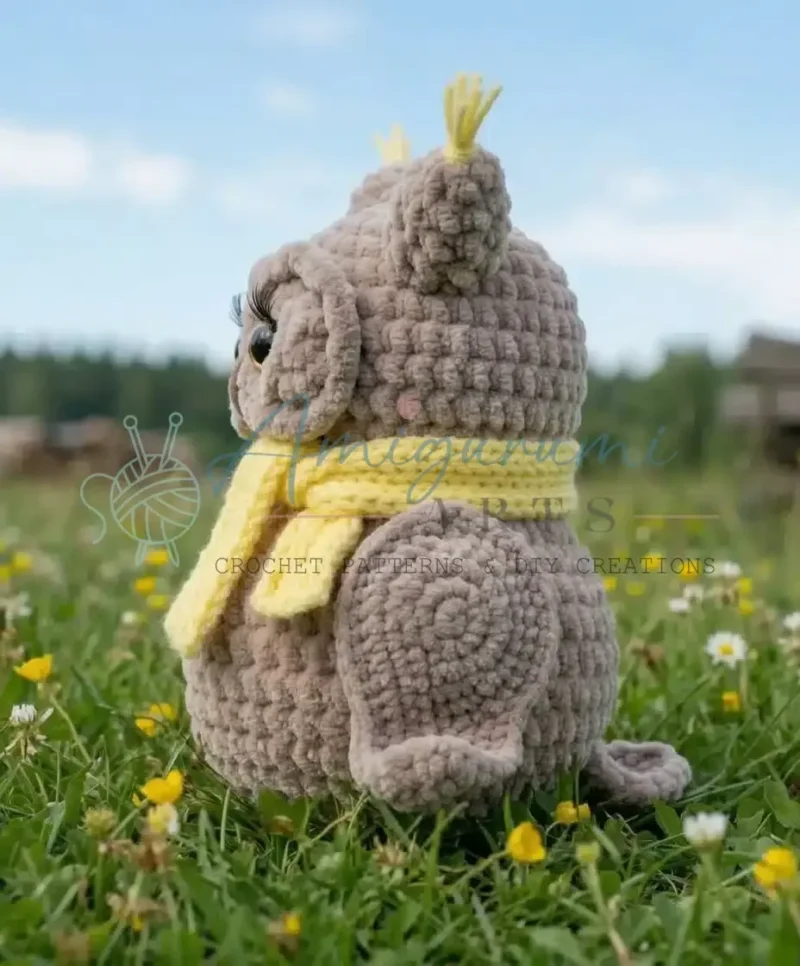
- Step 6Attach the Wings: Pin the wings to the sides of the body, roughly in line with the horns. They should sit comfortably on the owl’s sides. Sew them firmly, ensuring they are symmetrical and upright.
- Step 7Add the Scarf: Wrap the crocheted scarf around your owl’s neck. You can tie it in a simple knot or leave the ends draped for a cozy touch.
Notes from the pattern
- A stitch marker is essential throughout, since the pattern is worked in continuous spirals rather than joined rounds; move it up at the start of each new round.
- Keep tension tight on the super bulky plush yarn, particularly around the Head's joining round, so the stuffing does not peek through the stitches.
- Stuff the Head and Body firmly before closing, but leave the Horns unstuffed as instructed, so they keep a flatter, softer profile.
The essentials
- Rounds
- 26
- Parts
- 7
- Level
- Intermediate
- Time
- 4-6 hours
- Hook
- 4.0 mm
- Yarn
- Super Bulky
Stitches you will use
- Magic ring (MR) start Opens both the Head and the Horns at round 1; pull the centre closed firmly so no hole shows once stuffed.
- Continuous spiral shaping with increases and decreases Used across every part to move the stitch count, as in the wings' (inc in dc) x5 round; a stitch marker is needed since rounds are not joined.
- Working both sides of a foundation chain Shapes the flat oval base of the Wings from a single starting chain; keep stitch placement even on both sides or the oval will skew.
Troubleshooting
A visible gap or hole appears where the two head circles meet
The slip-stitch join was worked too loosely; pull it snug when joining and use the leftover tail to close any remaining gap as you weave in ends.
The wings curl or will not lie flat
The increase round (inc in dc x5) was not spread evenly across the tip stitches; recount to 33 stitches and redistribute the increases evenly before fastening off.
Stuffing shows through the stitches on the head or body
Tension on the super bulky plush yarn is too loose; tighten each stitch as it is worked, or drop to a slightly smaller hook for the main-colour parts.
Substituting yarn
- Acrylic, super bulky (size 6)
- Keeps the same hook size and stitch count but gives a firmer, less plush drape, and is easier to find stuffing-safe colours in.
- Chenille or velvet, bulky (size 5)
- Gives a softer, more plush surface than standard super bulky but runs slightly thinner, so sizing the hook up to around 4.5-5mm helps match the original gauge.
- Cotton-acrylic blend, DK (size 3)
- Can replace the sport/fingering accent yarn for the scarf and tassels, producing a thicker, chunkier finish; a 3.0mm hook suits the heavier yarn better than the original 2.5mm.
Washing and care
- If the finished owl needs cleaning, hand wash in cool water and air-dry flat rather than using a machine dryer, as the plush polyester yarn holds its loft best when left undisturbed to dry.
- Reshape the wings and horns by hand while still slightly damp, and store the owl lying flat or sitting upright rather than squashed in a box, to stop the stitches from flattening over time.
The photographs taken while this was being made
Every one was taken by whoever published the pattern, in the order the source listed them.
FAQs
Questions
Does this pattern use US or UK crochet terms?
The pattern is written throughout in US terminology. Single crochet corresponds to UK double crochet, half double crochet to UK half treble, and double crochet to UK treble.
Why does the head start as two separate circles?
The two 12-stitch circles are joined with a slip stitch in a dedicated joining round to create the owl's eye-mask shape before the head continues upward in one piece.
Should the horns be stuffed like the head and body?
No. The pattern specifically instructs leaving the horns unstuffed so they sit softer and flatter against the head.
Why does the pattern call for two different hook sizes?
The 4.0mm hook is used for all the main-colour plush parts, while the smaller 2.5mm hook suits the finer accent yarn used for the scarf and horn tassels.
How many separate pieces need sewing together at the end?
The head, body, two wings, two eye patches and two horns are all crocheted separately and brought together across the seven assembly steps, along with the scarf and tassels.
These answers came from whoever first published the pattern, kept word for word.