 EVERY CROCHET
 Amigurumi 3 rounds No account, no download
Crochet a popcorn stitch pumpkin in any size
A popcorn-stitch (bobble) pumpkin pattern with US and UK crochet terms given throughout, sized to any yarn weight.
- Skill
- Intermediate
- Time
- 4-6 hours
- Yarn weight
- Worsted
- Hook
- 4 mm

Intermediate
What the original write-up called it. Nothing here is graded again.

Worsted
What the sample was worked in. Any weight works; the size moves with it.

4-6 hours
What the original page reckoned. Your own pace is the one that matters.
About this pattern
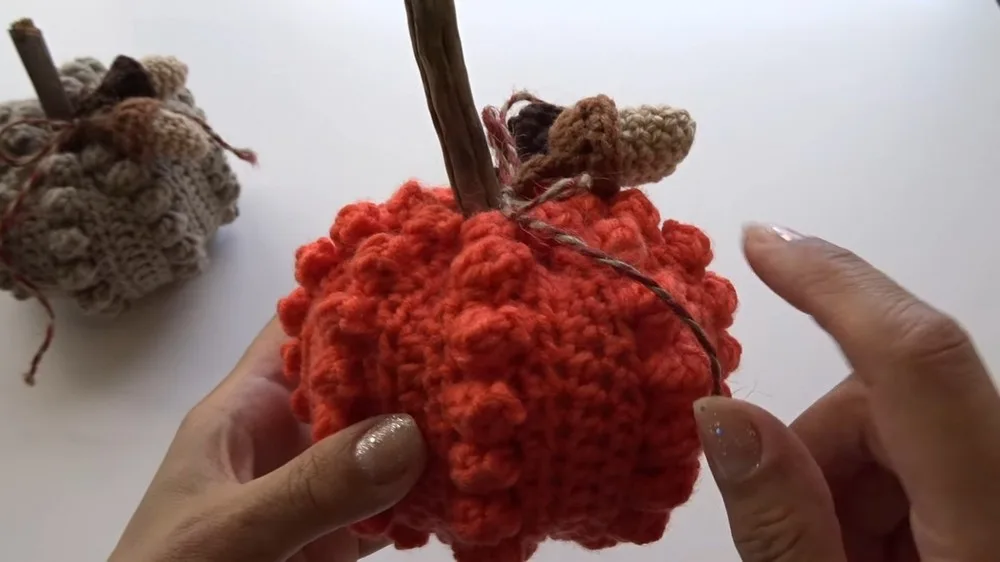
This pattern crochets a small stuffed pumpkin from a single flat panel worked in half double crochet (US)/half treble crochet (UK), with popcorn stitch rows forming raised ridges. The main pattern runs three rounds, starting at 19 stitches and building to 9 popcorn stitches per row. Assembly involves seaming into a tube, stuffing firmly, cinching both ends, and inserting a stick as the stem.
This pumpkin pattern builds its shape from a flat panel worked in half double crochet (HDC; called half treble crochet, or htr, in UK terminology), with popcorn stitches added on later rows to create the raised ridges that give the finished pumpkin its characteristic texture. Popcorn stitch carries the same name in both US and UK terms, so no translation is needed there. Nineteen stitches across the base row set the width, and the popcorn count establishes the vertical ridge pattern that reads clearly once the piece is seamed and stuffed.
Construction is straightforward: the panel is worked flat, then folded right sides together and slip stitched along one edge to form a tube. One end is cinched closed with a tapestry needle before the tube is turned right side out and stuffed firmly, and the second end is gathered nearly shut, leaving a small opening for the stem. A stick inserted at the centre finishes the pumpkin and gives it a sturdy, freestanding top.
Materials
- No. 4 Medium Weight Yarn (Orange recommended)
- 4mm Crochet Hook
- Scissors
- Tapestry Needle
- Stick (for the pumpkin stem)
- Stuffing
The list is the pattern's own wording.
Instructions
Every round is printed as the pattern wrote it, brackets and all. Open the key beside a round to see only the short forms that round uses.
Main Pattern
- Round 1
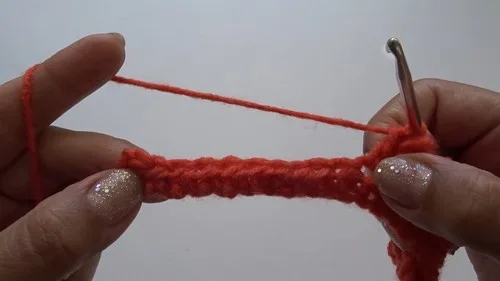
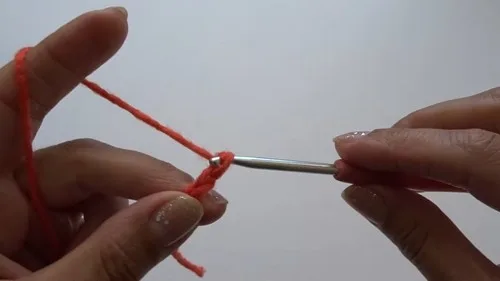
Half Double Crochet (HDC) into the third chain from the hook and each chain across. You should have 19 HDC.
Key1
- hdc
- half double crochet
- Round 2
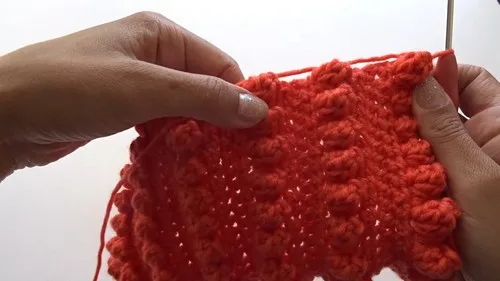
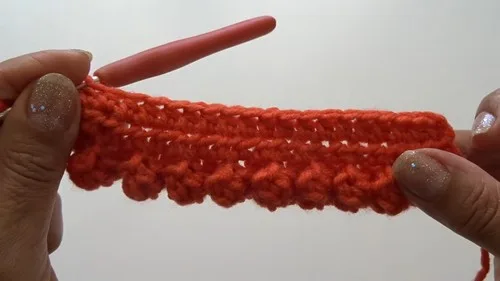
Popcorn Stitch Row Chain 1, turn. This chain does not count as a stitch. Double Crochet (DC) into the first stitch.Popcorn Stitch in the next: 5 DCs into the same stitch, remove hook, count 5 DCs back, insert hook from front to back, pull loop through, slip stitch to complete the popcorn.1 DC in the next stitch, then Popcorn Stitch in the following stitch. Repeat - across. End with 1 DC in the last stitch. You should have 9 popcorn stitches.
Key1
- dc
- double crochet
After Row 3:
Chain 1, turn. Work 1 HDC in each stitch across (including the tops of the popcorn stitches and DCs), totaling 19 HDC.
Row 4: Repeat Row 2.
- Round 5
Repeat Row 3. Repeat the pattern (Row 2-5) until you have a total of 8 rows of popcorn stitches, making sure to end with a popcorn row.After the final popcorn row, work 2 more rows of HDC (to mirror the starting sequence).
Key1
- hdc
- half double crochet
Making up
- Step 1Seam:: Fold the piece right sides together. Slip stitch the sides together to form a tube.
- Step 2Close Bottom:: Using a tapestry needle and a long piece of yarn, run a stitch around one end of the tube. Pull tight to cinch, sew securely to close.
- Step 3Stuff the Pumpkin:: Turn right side out, stuff firmly.
- Step 4Close Top:: Repeat the running stitch around the open end, pull tight, but not completely close - you need a small opening to insert the stem.
- Step 5Add Stem:: Place your stick into the center of the top opening as a stem. You can secure it with a bit of glue if you prefer.
- Step 6Decorate:: Optional, add any decorations like crocheted acorns, tied around the stem with jute cord, or leaves.
Notes from the pattern
- Use the 4mm hook as specified; a smaller hook tightens the popcorn stitches and makes the front-to-back loop-through step needed to close each one much harder to manage.
- Place a stitch marker at the start of Row 1 and recheck it periodically, since the 19-stitch count across a long foundation chain is easy to lose without a fixed reference point.
- Keep tension even through the popcorn row in particular; working the 5 DCs too tightly before drawing the loop through pulls the surrounding fabric out of shape and flattens the ridge.
- Stuff firmly before the top opening is cinched, as packing in more filling afterward through the small remaining gap for the stem is difficult once it is mostly closed.
The essentials
- Rounds
- 3
- Level
- Intermediate
- Time
- 4-6 hours
- Hook
- 4 mm
- Yarn
- Worsted
Stitches you will use
- Half double crochet base row Worked into the third chain from the hook across Row 1; keep the starting chain count steady so the row lands at 19 HDC.
- Popcorn stitch Built from 5 DC into the same stitch on the popcorn row; watch the front-to-back hook insertion before pulling the loop through, as a reversed insertion flattens the ridge.
- Slip stitch seaming Used to close the panel into a tube during assembly; match edge stitch to edge stitch to keep the seam straight rather than spiralled.
Troubleshooting
The tube seam puckers instead of lying flat.
Uneven slip stitches along the seam are pulling the fabric tight in places; slip stitch loosely and evenly, matching one edge stitch to its opposite number all the way along.
The popcorn stitches sit flat instead of standing proud.
The hook was not reinserted from front to back correctly before pulling the loop through, or the 5 DC count was off; recount the stitches and check the insertion direction before closing each popcorn.
The finished pumpkin looks lopsided once stuffed.
Stuffing was added unevenly or one end was cinched tighter than the other; add filling in small handfuls, checking the shape from several angles, and gather both ends with matched tension before securing.
Substituting yarn
- Acrylic, medium weight (No. 4, as recommended)
- Keeps the 4mm hook and gives crisp, well-defined popcorn stitches that hold their shape well once stuffed.
- Cotton, DK weight
- Needs a smaller hook, around 3.5mm; drape is stiffer and the popcorn texture reads less pronounced, so extra stuffing may be needed to hold the rounded shape.
- Wool-blend, chunky weight
- Needs a larger hook, around 5-6mm; produces a noticeably bigger pumpkin with a softer drape and more exaggerated popcorn ridges.
Washing and care
- Hand wash in cool water only if necessary, since medium-weight yarns used for stuffed pieces are typically acrylic and best kept away from a washing machine to protect both the fibre and the stuffing inside.
- Reshape gently while damp and dry flat away from direct heat or sunlight; store the finished pumpkin somewhere it will not be crushed, so the stuffed shape and the stem stick keep their position.
The photographs taken while this was being made
Every one was taken by whoever published the pattern, in the order the source listed them.
FAQs
Questions
What size hook does this pumpkin pattern use?
A 4mm hook is used throughout, paired with No. 4 medium weight yarn. Changing the hook size along with the yarn weight is how the pumpkin is scaled up or down.
Can this pumpkin really be made in any size?
Yes, the same three-round main pattern structure works with different yarn weights and matching hook sizes. Moving to a heavier yarn and larger hook produces a bigger pumpkin without changing the stitch pattern itself.
What exactly is the popcorn stitch used in Row 2?
It is a raised cluster made from 5 double crochets worked into the same stitch, then closed by removing the hook, reinserting it front to back through the first of those stitches, and slip stitching to secure it. This is what creates the pumpkin's ridged texture.
Is a real stick needed for the stem?
The pattern calls for a stick inserted into the small opening left at the top after stuffing. A trimmed twig or a rolled piece of sturdy cardboard works as a substitute if a stick is not on hand.
How much stuffing does the pumpkin need?
The materials list calls for stuffing without a specific quantity, so filling is judged by feel. Stuff firmly before closing the top opening so the pumpkin holds a rounded shape rather than collapsing.
These answers came from whoever first published the pattern, kept word for word.