 EVERY CROCHET
 Amigurumi 54 rounds No account, no download
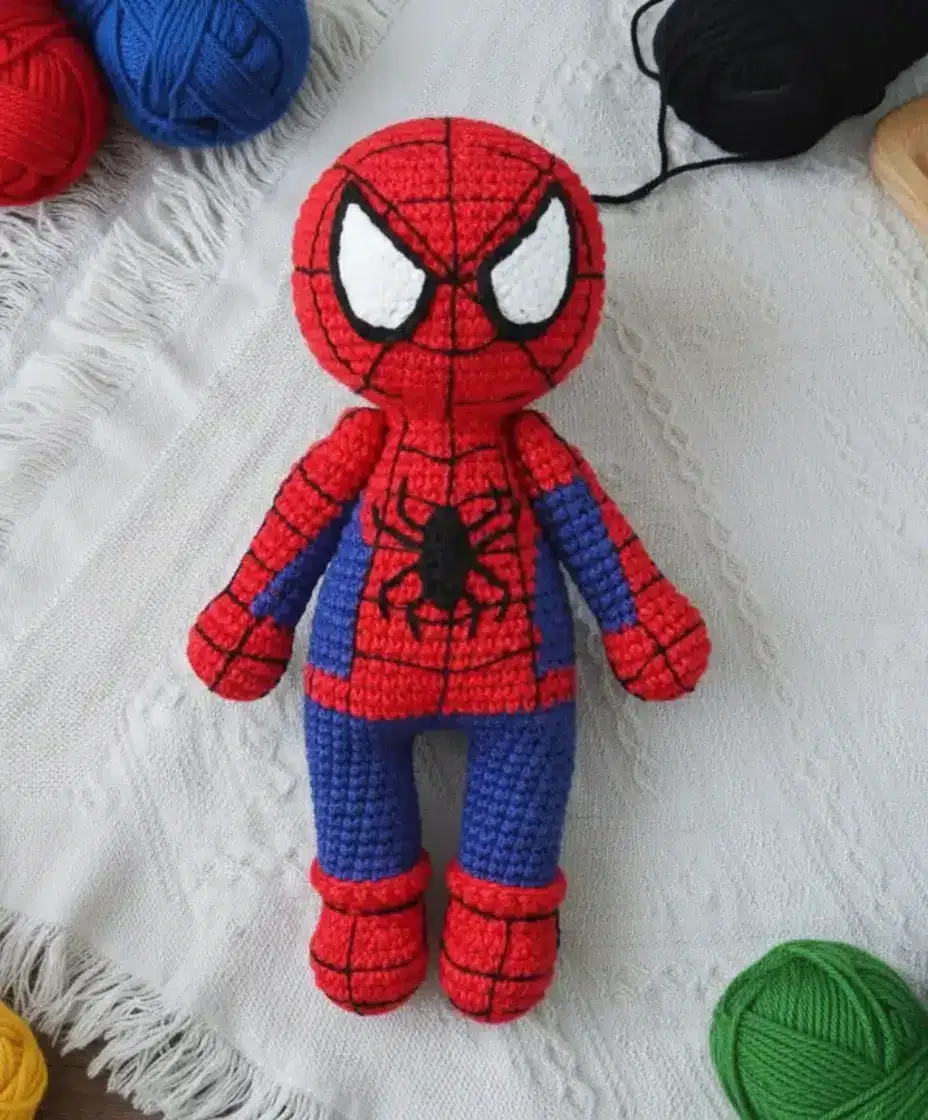
A realistic Spiderman amigurumi worked in single crochet
A realistic Spiderman amigurumi worked in single crochet (UK double crochet), with both US and UK stitch names given throughout.
- Skill
- Intermediate
- Time
- 4-6 hours
- Yarn weight
- DK
- Hook
- 1.75 mm

Intermediate
What the original write-up called it. Nothing here is graded again.

DK
What the sample was worked in. Any weight works; the size moves with it.

4-6 hours
What the original page reckoned. Your own pace is the one that matters.
About this pattern
This pattern builds a realistic Spiderman amigurumi, standing approximately 15-20 cm tall, from two red legs joined into a single body and head worked through round 64, with two separate arms attached afterwards. Blue colour-blocked panels (rounds 25 to 34) form the web pattern, which is also hand-embroidered in thin black yarn. A 1.75mm hook, felt or foamiran eye pieces and firm stuffing are needed to hold definition at this small scale.
This design is a realistic-style Spiderman amigurumi worked almost entirely in single crochet (UK double crochet), the dense stitch family that gives amigurumi its firm, stuffable fabric. Rather than sticking to a cartoonish silhouette, the pattern uses careful increase and decrease placement to suggest muscle definition and proportion, so the stitch count in each round matters more than usual. The red and blue colourway is worked as solid colour-blocked panels rather than a printed design, meaning the shaping itself has to carry the likeness.
Standing approximately 15-20 cm tall depending on your yarn choice, construction starts at the feet and builds upward: each leg is worked separately from round 1 through round 18, then both legs are joined onto a single base so the body and head continue as one continuous piece from round 19 to round 64, with the colour-blocked web panels worked into rounds 25 to 34. The arms are made separately, two identical pieces worked flat in the round from a magic ring through round 22, then set aside until assembly. Eyes, web embroidery and limb attachment are completed last, once all pieces are stuffed.
Materials
- Red Yarn Art Jeans (Color 26)
- Black Yarn Art Jeans (Color 53)
- Blue Yarn Art Jeans (Color 47)
- Crochet hook size 1.75mm
- Felt or foamiran for eye details
- Stuffing material
- Thin black yarn for embroidery (or split your black yarn)
- Hot glue or needle and thread for assembly
The list is the pattern's own wording.
Instructions
Every round is printed as the pattern wrote it, brackets and all. Open the key beside a round to see only the short forms that round uses.
Starting with the Legs
The pattern begins from the feet and works upward, ensuring stability and proper proportions.
First Leg (Red yarn):
- Round 1
Chain 5, and starting from the second loop from the hook: inc, 2sc, 4sc in 1 loop, 2sc, inc
Key1
- inc
- Increase
- Round 2
inc, 4sc, 2inc, 4sc, inc
Key1
- inc
- Increase
- Round 3
1sc, inc, 5sc, inc, 1sc, inc, 5sc, inc
Key1
- inc
- Increase
- Round 4
2sc, inc, 6sc, inc, 2sc, inc, 6sc, inc
Key1
- inc
- Increase
- Rounds 5–6
24sc with 1sc forward displacement
- Round 7
7sc, 5dec, 7sc
- Round 8
6sc, 3dec, 7sc
- Round 9
16sc
- Round 10
Switch to blue, work BLO 16sc
Key1
- BLO
- Back Loops Only
- Rounds 11–18
16scAfter completing Round 10, work in FLO with 16dc in the same manner. Repeat for the second leg, then connect both legs with 3 chain stitches.
Key1
- FLO
- Front Loops Only
Creating the Arms (Make 2)
Start with red yarn:
- Round 1
6sc in Magic Ring
- Round 2
6inc
- Round 3
(1sc, inc) around
Key1
- inc
- Increase
- Rounds 4–5
18sc
- Round 6
(4sc, dec) around
Key1
- dec
- Decrease
- Round 7
(3sc, dec) aroundAdd blue yarn for color work:
Key1
- dec
- Decrease
- Rounds 8–17
3sc red, 6sc blue, 3sc red
- Rounds 18–21
Continue in red only, 12sc
- Round 22
6dec
Building the Body and Head
- Round 19
Work 16sc on the first leg, 3sc along the connecting chain, 16sc on the second leg, 3sc along the chain
- Round 20
16sc, inc, 1sc, inc, 16sc, inc, 1sc, inc
Key1
- inc
- Increase
- Rounds 21–22
42sc
- Rounds 23–24
Continue with red, 42scColor Work Section (Rounds 25-34): Now begins the distinctive two-color pattern. Blue portions are indicated in the following instructions:
- Rounds 25–26
4sc (red), 10sc (blue), 11sc (red), 10sc (blue), 7sc (red)
- Round 27
4sc, (3sc, dec, 5sc), 11sc, (4sc, dec, 4sc), 7sc
Key1
- dec
- Decrease
- Round 28
4sc, (3sc, dec, 5sc), 10sc, (3sc, dec, 5sc), 6sc
Key1
- dec
- Decrease
- Round 29
4sc, 9sc, 10sc, 9sc, 6sc
- Round 30
4sc, (3sc, dec, 4sc), 10sc, (3sc, dec, 4sc), 6sc
Key1
- dec
- Decrease
- Round 31
4sc, 8sc, 10sc, 8sc, 6sc
- Round 32
4sc, (3sc, dec, 3sc), 10sc, (3sc, dec, 3sc), 6sc
Key1
- dec
- Decrease
- Round 33
5sc, 5sc, 12sc, 5sc, 7sc
- Round 34
6sc, (dec, 1sc), 14sc, (1sc, dec), 8sc
Key1
- dec
- Decrease
Continuing with Red Only:
- Round 35
6sc, dec, 14sc, dec, 8sc
Key1
- dec
- Decrease
- Round 36
30sc
- Round 37
6sc, dec, 13sc, dec, 7sc
Key1
- dec
- Decrease
- Round 38
6sc, dec, 12sc, dec, 6sc
Key1
- dec
- Decrease
- Round 39
5sc, dec, 11sc, dec, 6sc
Key1
- dec
- Decrease
- Round 40
(2sc, dec) around
Key1
- dec
- Decrease
- Round 41
18sc
- Round 42
18inc
- Round 43
(5sc, inc) repeat 6 times
Key1
- inc
- Increase
- Round 44
(6sc, inc) repeat 6 times
Key1
- inc
- Increase
- Round 45
(7sc, inc) repeat 6 times
Key1
- inc
- Increase
- Round 46
(8sc, inc) repeat 6 times
Key1
- inc
- Increase
- Rounds 47–55
60sc
- Round 56
(8sc, dec) repeat 6 times
Key1
- dec
- Decrease
- Round 57
(7sc, dec) repeat 6 times
Key1
- dec
- Decrease
- Round 58
(6sc, dec) repeat 6 times
Key1
- dec
- Decrease
- Round 59
(5sc, dec) repeat 6 times
Key1
- dec
- Decrease
- Round 60
(4sc, dec) repeat 6 times
Key1
- dec
- Decrease
- Round 61
(3sc, dec) repeat 6 times
Key1
- dec
- Decrease
- Round 62
(2sc, dec) repeat 6 times
Key1
- dec
- Decrease
- Round 63
(1sc, dec) repeat 6 times
Key1
- dec
- Decrease
- Round 64
6dec
Making up
- Step 1Creating the Eyes: Cut four felt or foamiran pieces: two black (larger) and two white (smaller)
- Step 2Use an overcasting seam around the edges to prevent sagging
- Step 3Sew the white pieces onto the black pieces
- Step 4If drawing is challenging, print a reference image or trace from your screen
- Step 5Adding the Iconic Webbing: Using thin black yarn (or split your regular black yarn), carefully embroider the web pattern across Spiderman's face and body. This detail work is what brings the character to life, so take your time and follow reference images for accuracy.
- Step 6The Spider Emblem: Embroider or sew the spider symbol on the chest using black yarn. This iconic detail is essential for that authentic Spiderman look.
- Step 7Final Assembly for Your Spiderman Amigurumi: Attach the eyes using hot glue or sew them securely in place. Ensure all parts are firmly stuffed before closing, and weave in all loose ends for a professional finish.
Notes from the pattern
- The 1.75mm hook is unusually fine for amigurumi and is what keeps the stitches tight enough to hide the stuffing at this scale; swapping to a larger hook will enlarge the whole doll and loosen the fabric.
- A stitch marker on round 1 of each leg and at the start of round 19, where the two legs are joined, makes it easier to track the jump from working two separate pieces to one continuous body.
- Stuff the legs and body firmly before closing rounds, especially around round 19-20 where the leg and body stitches meet, so the joint doesn't go soft or cave in.
- Carry the unused colour loosely across the back of the work during the colour-block rounds (25-34) rather than cutting and rejoining; this keeps tension even and avoids extra ends to weave in.
- The finished Spiderman amigurumi stands approximately 15-20 cm tall, depending on the yarn weight used.
The essentials
- Rounds
- 54
- Parts
- 3
- Level
- Intermediate
- Time
- 4-6 hours
- Hook
- 1.75 mm
- Yarn
- DK
Stitches you will use
- Standard amigurumi increasing and decreasing Shapes the legs (rounds 1-5), the body/head join (round 20) and the arm shaping (rounds 1-3); miscounting a single increase here throws off the whole silhouette at this fine gauge.
- Felt/foamiran appliqué and surface embroidery Used for the layered eye pieces and the embroidered web lines over the face and body; worked after stuffing, so placement should be checked against the body before gluing or stitching permanently.
Troubleshooting
The legs lean or twist rather than standing straight.
This usually comes from increases in rounds 1-3 landing in slightly different places on each repeat; keep the first increase of each round directly above the previous round's first increase, and stuff firmly before closing.
A visible ridge or gap runs along the
This happens when the carried yarn is pulled too tight between colour blocks in rounds 25-34; leave a little slack in the strand on the wrong side of each colour change.
A faint seam or small hole shows where
This is the join made in round 19, where stitches are worked along the connecting chain between the two legs; close any gap by whipping the base closed before continuing into round 20.
Substituting yarn
- Mercerised cotton, 4-ply/fingering weight
- Gives crisper stitch definition and a slightly smaller finished doll; use a hook one size down from 1.75mm if the stitches look loose, and stuff a little less firmly since cotton holds its shape well.
- Acrylic, DK weight
- Produces a noticeably larger, softer doll with more drape; move up to a 2.5-3mm hook to keep the fabric dense enough to hide the stuffing.
- Cotton-acrylic blend, sport weight
- A middle option closest to the fibre and weight named in the materials list; keep the hook close to 1.75-2mm and expect a very slightly looser stitch than the pattern's original gauge.
Washing and care
- Hand wash in cool water and reshape the piece while still damp, since cotton-acrylic blends hold their finished size well but can stretch slightly if wrung rather than pressed dry.
- Dry flat away from direct heat and store stuffed rather than flattened, so the felt or foamiran eye pieces and embroidered web keep their shape rather than creasing.
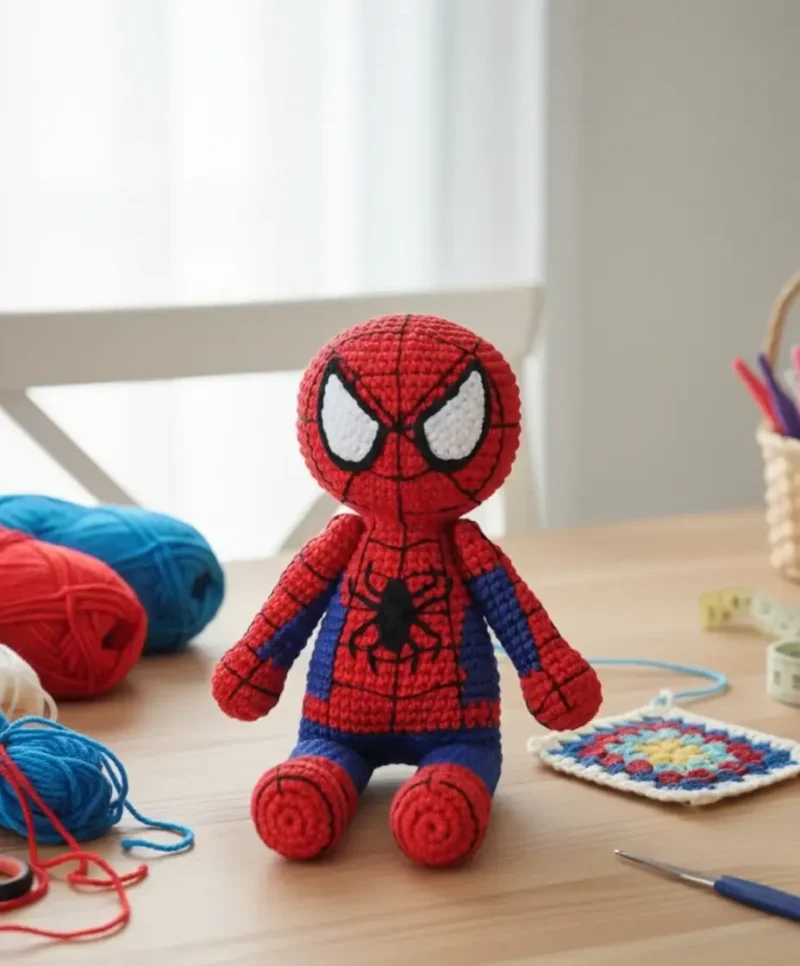
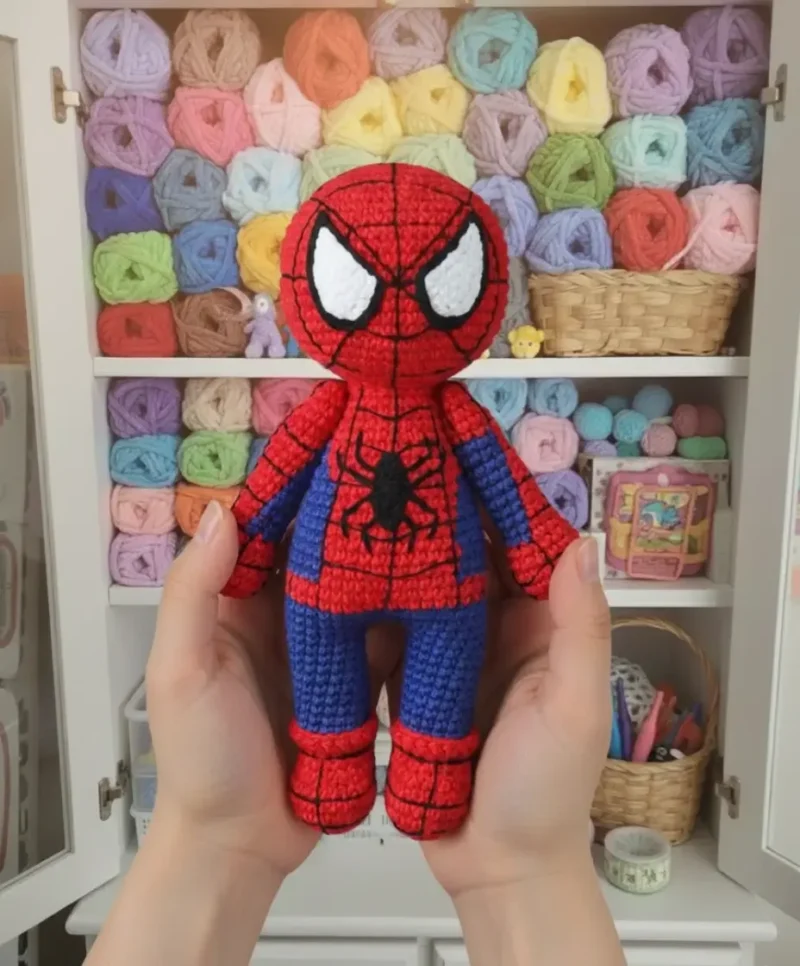
The photographs taken while this was being made
Every one was taken by whoever published the pattern, in the order the source listed them.
FAQs
Questions
Why does this pattern call for such a fine 1.75mm hook?
this gauge the stitches sit close together, which hides the stuffing and keeps the realistic proportions crisp rather than loose. A larger hook will still work but produces a bigger, softer doll with less defined shaping.
Does the web pattern need to be drawn on first?
Yes, the instructions suggest tracing or printing a reference image before embroidering, since the web lines are added freehand in thin black yarn across the face and body. Working from a traced guide keeps the lines symmetrical.
How are the colour changes in the body worked, as intarsia or stranding?
The red and blue sections in rounds 25-34 sit in blocks within the same round, so the unused colour is carried across the back rather than cut, similar to stranded colourwork. Keeping that carried yarn snug but not tight is what keeps the colour boundary clean.
What does 'inc' mean, and is it the same in US and UK terms?
Inc refers to an increase, usually two single crochet (UK double crochet) worked into one stitch; the abbreviation itself doesn't change between US and UK patterns, only the stitch name behind it does. Decreases work the same way in reverse.
Should the eyes be made from felt or foamiran?
Either works, since the pattern treats them as interchangeable for the black and white eye layers. Foamiran holds a slightly stiffer, more domed shape, while felt lies flatter against the head.
These answers came from whoever first published the pattern, kept word for word.