 EVERY CROCHET
 Amigurumi 17 rounds No account, no download
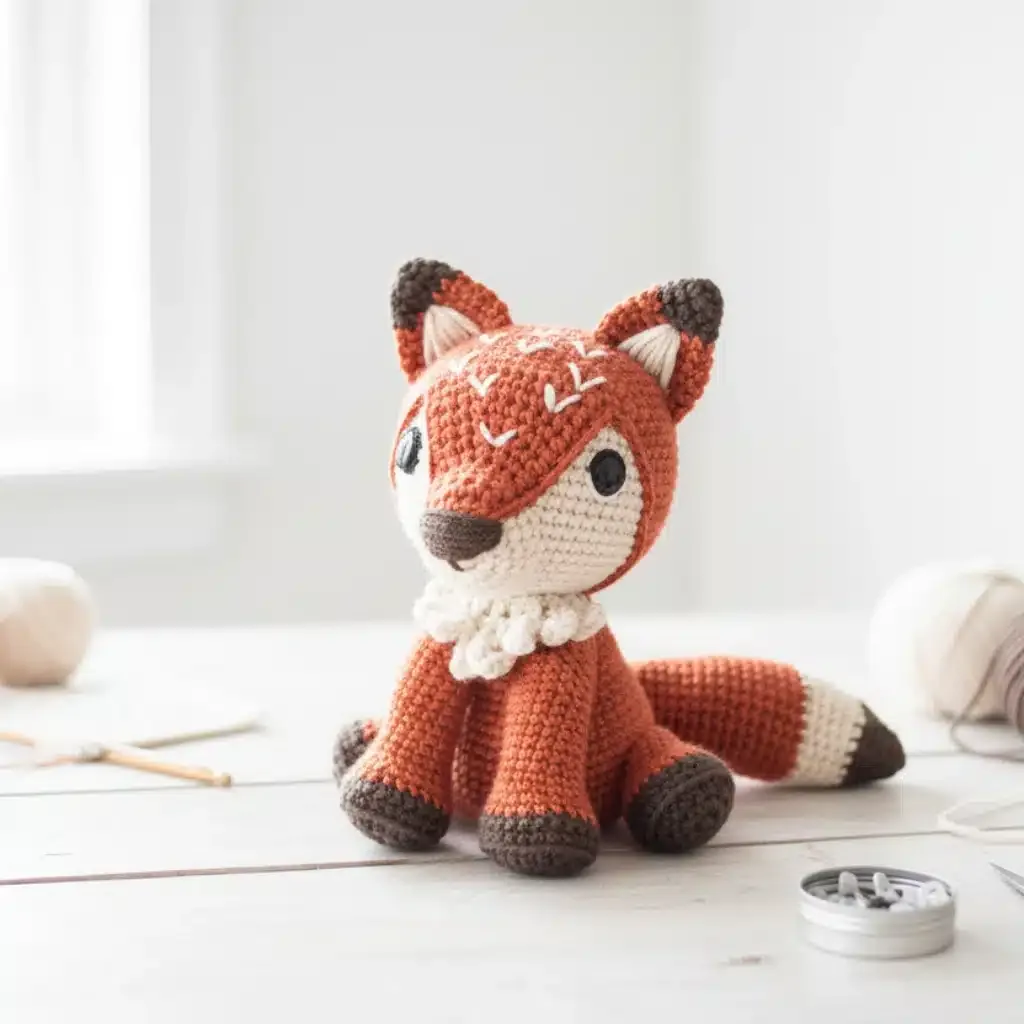
Sitting fox amigurumi pattern in single crochet
A sitting fox amigurumi worked in single crochet (UK: double crochet), with US and UK stitch names given throughout.
- Skill
- Intermediate
- Time
- 4-6 hours
- Yarn weight
- DK (Light Worsted)
- Hook
- 3 mm

Intermediate
What the original write-up called it. Nothing here is graded again.

DK (Light Worsted)
What the sample was worked in. Any weight works; the size moves with it.

4-6 hours
What the original page reckoned. Your own pace is the one that matters.
About this pattern
This pattern makes a sitting fox amigurumi worked mainly in single crochet (UK: double crochet) with merino DK yarn and a 3mm hook, finishing at approximately 18 cm tall. The head, ears, eyes, snout, tail, and chest detail are crocheted as separate pieces in orange/rust, cream, dark brown, black, and white, then stuffed with polyester fibrefill and sewn together, matching 24 head stitches to 24 body stitches.
This sitting fox amigurumi belongs to the single crochet (UK: double crochet) family, the dense, tightly worked stitch that gives amigurumi its firm, stuffable structure. Worked with merino DK yarn on a 3mm hook, the finished fox measures approximately 18 cm tall, a size suited to a shelf or a small pair of hands. Orange/rust, cream, and dark brown yarns build the fox's face and body markings, while black and white yarn shape the eyes separately before assembly.
Construction proceeds head first, worked in continuous rounds before shifting to rows for the flattened head top detail, then moving to the ears, eyes, and snout as separate pieces. The body follows a similar logic, with rounds for the main shape and separate short sections for the chest detail and tail. Individual parts are stuffed with polyester fibrefill and joined by sewing, including matching 24 stitches from the head to 24 stitches from the body, so accurate stitch counts during crocheting matter as much as the sewing itself.
Materials
Yarn
- Merino DK weight yarn in Orange/Rust, Cream/Off-White, and Dark Brown
Small amounts
- Black and white yarn for the eyes
Hook
- 3mm crochet hook
Stuffing
- Hypoallergenic polyester fiberfill
Notions
- Yarn needle, scissors, stitch markers (optional)
The list is the pattern's own wording.
Instructions
Every round is printed as the pattern wrote it, brackets and all. Open the key beside a round to see only the short forms that round uses.
Crafting the Head
Start with white yarn:
Step by step: Switch to Orange/Rust yarn:.
Step by step: Start with brown yarn:.
Step by step: With Cream/Off-White yarn:.
Step by step: With brown yarn:.
Step by step: With brown yarn:.
Step by step: With brown yarn:.
- Round 1
6sc in a magic ring
Rnds 22-23: 24sc Take the finished front legs and locate the 9 stitches at the back of each paw. Make 9 slip stitches to connect the legs to the body. Don’t work any stitches above these 9 slip stitches.
Step by step: Rnd 24: 42sc (15sc from body + 27sc from front paws); Rnds 25-26: 42sc Rnd 27: (6sc, 1dec) repeat 6 times (Total: 42sts); Rnd 28: (5sc, 1dec) repeat 6 times (Total: 36sts); Rnd 29: (4sc, 1dec) repeat 6 times (Total: 30sts).
Rnd 30: (3sc, 1dec) repeat 6 times (Total: 24sts) Cut yarn, fasten off. Add stuffing material.
Step by step: Rnd 2: 6inc (Total: 12sts); Rnd 3: (1sc, 1inc) repeat 6 times (Total: 18sts); Rnd 4: (2sc, 1inc) repeat 6 times (Total: 24sts).
Rnd 5: 24blsc Rnd 6: 24sc Change to Orange/Rust yarn: Rnd 7: (6sc, 1dec) repeat 3 times (Total: 21sts)
Step by step: Rnd 8: (5sc, 1dec) repeat 3 times (Total: 18sts); Rnd 9: (4sc, 1dec) repeat 3 times (Total: 15sts); 15sc On the second leg, don’t cut yarn. Chain 3 and add stuffing before continuing.
Step by step: Rnd 2: 6inc (Total: 12sts); Rnd 3: (1sc, 1inc) repeat 6 times (Total: 18sts); Rnd 4: (2sc, 1inc) repeat 6 times (Total: 24sts); Rnd 5: 24blsc (back loop only); Rnd 6: 24sc Change to Orange/Rust yarn: Rnd 7: (6sc, 1dec) repeat 3 times (Total: 21sts); Rnd 8: (5sc, 1dec) repeat 3 times (Total: 18sts); Rnd 9: (4sc, 1dec) repeat 3 times (Total: 15sts); Rnds 10-13: 15sc; 6sc, chain 1, turn (start working in rows); Row 15: 6sc Cut yarn, fasten off, leave tail for sewing. Add stuffing to paws.
Step by step: Rnd 2: 3inc (Total: 6sts); Rnd 3: (1sc, 1inc) repeat 3 times (Total: 9sts); Rnd 4: (2sc, 1inc) repeat 3 times (Total: 12sts); Rnd 5: (3sc, 1inc) repeat 3 times (Total: 15sts); Rnd 6: (4sc, 1inc) repeat 3 times (Total: 18sts); Rnd 7: (5sc, 1inc) repeat 3 times (Total: 21sts).
Rnd 8: (6sc, 1inc) repeat 3 times (Total: 24sts) Change to Cream/Off-White yarn: Rnd 9: (7sc, 1inc) repeat 3 times (Total: 27sts)
Step by step: Rnd 10: 27sc.
Rnd 11: (3dc in same st, skip 1, 1sl) repeat 9 times Cut yarn, leave tail for sewing. Insert detail into finished tail and sew around Cream/Off-White part.
Step by step: Rnd 2: 6inc (Total: 12sts); Rnd 3: (1sc, 1inc) repeat 6 times (Total: 18sts); Rnds 4-5: 18sc Cut yarn, fasten off, leave tail for sewing.
Step by step: Rnd 2: (1inc, 2sc) repeat 2 times (Total: 8sts); Rnd 3: (1inc, 3sc) repeat 2 times (Total: 10sts).
Rnd 4: (1inc, 4sc) repeat 2 times (Total: 12sts) Change to Orange/Rust yarn: Rnd 5: (1inc, 5sc) repeat 2 times (Total: 14sts)
Rnd 6: (1inc, 6sc) repeat 2 times (Total: 16sts) Cut yarn, fasten off, leave tail for sewing. Flatten the ears.
Step by step: Rnd 2: 6inc (Total: 12sts); Rnd 3: (1sc, 1inc) repeat 6 times (Total: 18sts); Rnd 4: (2sc, 1inc) repeat 6 times (Total: 24sts); Rnd 5: (3sc, 1inc) repeat 6 times (Total: 30sts); Rnd 6: (4sc, 1inc) repeat 6 times (Total: 36sts); Rnd 7: (5sc, 1inc) repeat 6 times (Total: 42sts); Rnd 8: (6sc, 1inc) repeat 6 times (Total: 48sts); Rnd 9: (7sc, 1inc) repeat 6 times (Total: 54sts); Rnd 10: (8sc, 1inc) repeat 6 times (Total: 60sts).
Rnds 11-21: 60sc Cut the yarn and fasten off. Now locate the 12 center stitches (count 24 stitches from the beginning) and attach yarn to begin working in rows.
Rnd 2: 6inc (Total: 12sts)
Rnd 3: (1sc, 1inc) repeat 6 times (Total: 18sts)
Rnd 4: (2sc, 1inc) repeat 6 times (Total: 24sts)
Rnd 5: (3sc, 1inc) repeat 6 times (Total: 30sts)
Rnd 6: (4sc, 1inc) repeat 6 times (Total: 36sts)
Rnd 7: (5sc, 1inc) repeat 6 times (Total: 42sts)
Rnd 8: (6sc, 1inc) repeat 6 times (Total: 48sts)
Rnd 9: (7sc, 1inc) repeat 6 times (Total: 54sts)
Rnd 10: (8sc, 1inc) repeat 6 times (Total: 60sts)
Rnds 11-21: 60sc Rnd 22: (8sc, 1dec) repeat 6 times (Total: 54sts)
Rnd 23: (7sc, 1dec) repeat 6 times (Total: 48sts)
Rnd 24: (6sc, 1dec) repeat 6 times (Total: 42sts)
Rnd 25: (5sc, 1dec) repeat 6 times (Total: 36sts)
Rnd 26: (4sc, 1dec) repeat 6 times (Total: 30sts)
Rnd 27: (3sc, 1dec) repeat 6 times (Total: 24sts) Cut the yarn, fasten off, leaving a tail for sewing. Add stuffing material to the head.
Head Top Detail
Starting from stitch 24, work in rows:
- Round 1
12sc, chain 1, turn
- Round 2
12sc, chain 1, turn
- Round 3
2sc, 1dec, 4sc, 1dec, 2sc, chain 1, turn (Total: 10sts)
- Round 4
10sc, chain 1, turn
- Round 5
2sc, 1dec, 2sc, 1dec, 2sc, chain 1, turn (Total: 8sts)
- Round 6
8sc, chain 1, turn
- Round 7
2sc, 1dec, 1dec, 2sc, chain 1, turn (Total: 6sts)
- Round 8
6sc, chain 1, turn
- Round 9
1sc, 1dec, 1dec, 1sc, chain 1, turn (Total: 4sts)
- Round 10
4sc, chain 1, turn
- Rounds 11–14
4sc, chain 1Row 15: Make 15sc on one side, 48sc around the detail, and 15sc on the other side Cut yarn, fasten off, and leave a long tail for sewing.
Crocheting the Eyes (Make 2)
With black yarn:
- Round 1
6sc in a magic ring Join with slip stitch. Cut yarn, fasten off, leave tail for sewing.
Making the Tail
With Orange/Rust yarn:
- Round 1
3sc in a magic ring
Rnd 2: 3inc (Total: 6sts)
Rnd 3: (1sc, 1inc) repeat 3 times (Total: 9sts)
Rnd 4: (2sc, 1inc) repeat 3 times (Total: 12sts)
Rnd 5: (3sc, 1inc) repeat 3 times (Total: 15sts)
Rnd 6: (4sc, 1inc) repeat 3 times (Total: 18sts)
Rnd 7: (5sc, 1inc) repeat 3 times (Total: 21sts)
Rnd 8: (6sc, 1inc) repeat 3 times (Total: 24sts)
Rnd 9: (7sc, 1inc) repeat 3 times (Total: 27sts)
Rnds 10-19: 27sc Rnd 20: (7sc, 1dec) repeat 3 times (Total: 24sts)
Rnds 21-22: 24sc Rnd 23: (6sc, 1dec) repeat 6 times (Total: 21sts)
Rnds 24-25: 18sc Rnd 26: (5sc, 1dec) repeat 3 times (Total: 18sts)
Rnds 27-28: 15sc Rnd 29: (4sc, 1dec) repeat 3 times (Total: 15sts)
Rnds 30-32: 15sc (add stuffing before continuing)
Rnd 33: Crochet edges together making 7sc Cut yarn, leave tail for sewing.
Making the Chest Detail
With Cream/Off-White yarn, make 8 chains. Skip first chain:
- Round 1
7sc, chain 1, turn
Rnd 2: 7inc (Total: 14sts)
- Round 3
Create decorative edge by making chains of varying lengths (4, 5, 6, 7, 6, 5, 4) and working back down each chain, joining to the base rowCut yarn, fasten off, leave tail for sewing.
Connecting the Front Legs
Connect the two legs by inserting the chain into one stitch of the first leg:
- Round 20
Work 1sc in each chain, 15sc around first leg, 1sc in each chain on other side, 15sc around second leg (Total: 36sts)Rnds 21-22: 36sc Cut yarn and fasten off.
Assembling the Head
Follow these steps for perfect assembly: Insert the head detail on top of the head. Use pins to secure parts while sewing
Sew ears onto round 13 of the head, leaving 5 stitches between them Sew the snout first, then sew the Orange/Rust detail on top, going all around the head
With brown yarn, embroider lines on top of the snout
Sew black eyes one round below the Orange/Rust detail. Add white embroidery for eye highlights and contour lines With Cream/Off-White yarn, embroider a V shape on the fox’s forehead
Set the head aside and begin working on the body
Making up
- Step 1Bring your sitting fox to life:
- Step 2Use pins to position back paws in place
- Step 3Sew back paws to body starting at row 10 and finishing at row 15
- Step 4Attach the tail between the back legs
- Step 5Sew chest detail onto the 7 central stitches of the fox’s chest
- Step 6Join head to body by sewing the 24 stitches from the head together with the 24 stitches from the body
Notes from the pattern
- The 3mm hook paired with DK yarn produces a firm, tight fabric typical of amigurumi; work snugly enough that stuffing does not show through the stitches.
- Stitch markers are optional but worthwhile here, since the head and body are worked in continuous, unjoined rounds where it is easy to lose track of the round start.
- Add polyester fibrefill gradually as each piece closes rather than stuffing everything at the very end, so the finished fox holds its shape without gaps or lumps.
The essentials
- Rounds
- 17
- Parts
- 7
- Level
- Intermediate
- Time
- 4-6 hours
- Hook
- 3 mm
- Yarn
- DK (Light Worsted)
Stitches you will use
- Magic ring (UK: magic circle) starts Used to begin rounded pieces such as the eyes; pull the centre tight before working the first round to avoid a visible hole.
- Continuous spiral rounds Used for the head and body shaping without joining slip stitches; a stitch marker helps track where each round begins.
- Flat shaping in rows with decreases Used across the 11 rows of the Head Top Detail; check the stitch count after each decrease row so the panel stays symmetrical.
Troubleshooting
The top of the head sits crooked instead of lying flat.
This usually comes from uneven decreases across the 11 rows of the Head Top Detail; check the stitch count after each decrease row against the pattern before moving on.
The eyes look lopsided or the centre puckers oddly once sewn on.
The magic ring used in Crocheting the Eyes was not pulled fully closed before joining; tighten the centre completely before cutting the yarn.
The head does not sit level once joined to the body.
This points to mismatched stitch counts along the seam; confirm both the head and the body have 24 stitches and distribute them evenly before sewing.
Substituting yarn
- Acrylic DK
- Keeps the same 3mm hook and finished size, and is easier to wash than merino, though the fabric drapes stiffer and stitch definition is less crisp.
- Cotton DK or worsted
- Gives firmer, more defined stitches useful for the head top and chest detail, but may need a slightly larger hook, around 3.5mm, to match tension.
- Aran or chunky weight wool blend
- Produces a fox noticeably larger than the 18 cm original, needs a bigger hook (around 4-4.5mm) and more fibrefill, with a softer overall drape.
Washing and care
- Hand wash the finished fox in cool water with a wool-safe detergent, since the merino DK yarn can felt or shrink if machine washed or agitated.
- Reshape gently while still damp and dry flat away from direct heat or sunlight, then store somewhere dry to keep the merino fibre soft and the shaping intact.
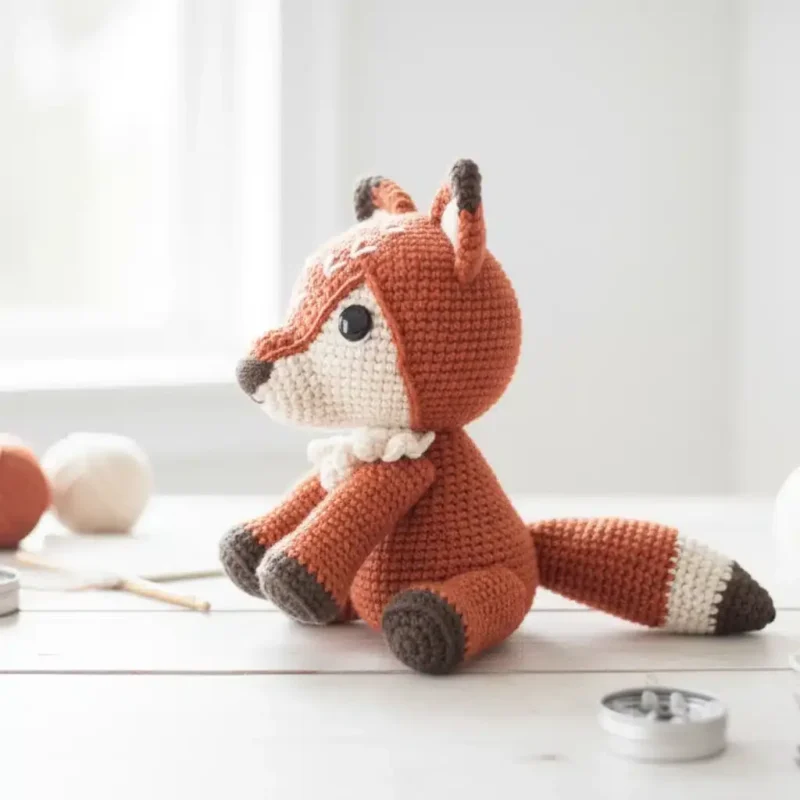
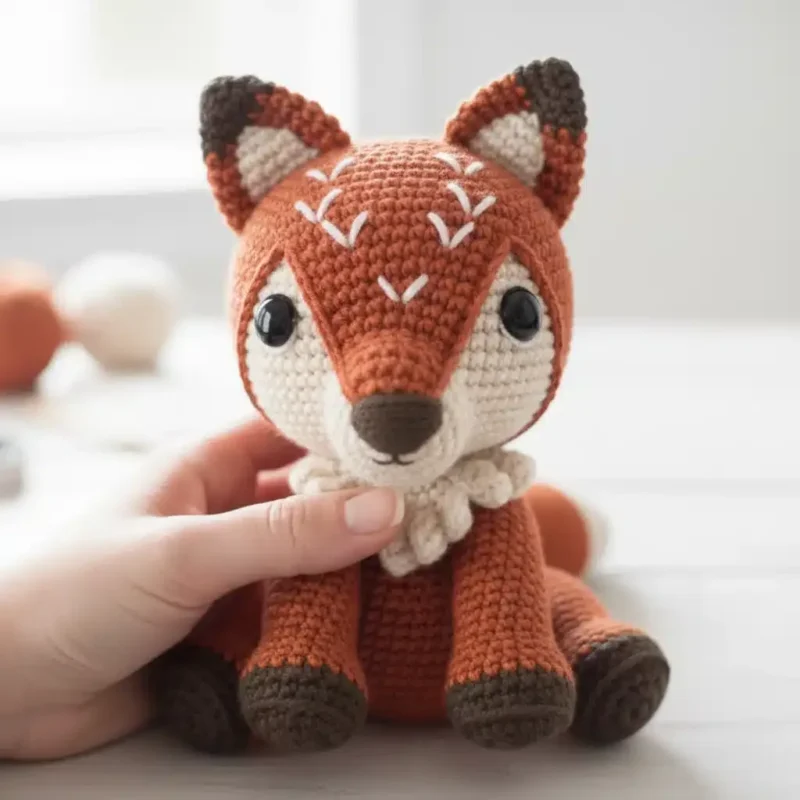
The photographs taken while this was being made
Every one was taken by whoever published the pattern, in the order the source listed them.
FAQs
Questions
What size hook does this pattern need?
A 3mm hook is used throughout, paired with merino DK yarn. This combination produces the tight fabric needed for amigurumi and gives the stated finished size.
How big is the finished fox?
Made with merino DK yarn and a 3mm hook, the fox measures approximately 18 cm (7 inches) tall. Substituting a different yarn weight will change this size.
Are single crochet and double crochet the same stitch here?
Yes, the pattern's single crochet is the US term for the stitch known as double crochet in the UK. Both names refer to the same stitch, and the pattern is worked with yarn under the hook as noted.
Why are the eyes crocheted as separate pieces?
The eyes are worked individually in black yarn from a magic ring so they can be sewn on at the exact spacing needed for the fox's expression. Working them separately also makes it easier to keep the round tidy before attaching them to the head.
How much stuffing does this pattern require?
The materials list calls for hypoallergenic polyester fibrefill, added gradually as each section, such as the head and body, is worked and closed. There is no fixed quantity stated, so fill firmly enough to hold shape without distorting the stitches.
These answers came from whoever first published the pattern, kept word for word.