 EVERY CROCHET
 Amigurumi 36 rounds No account, no download
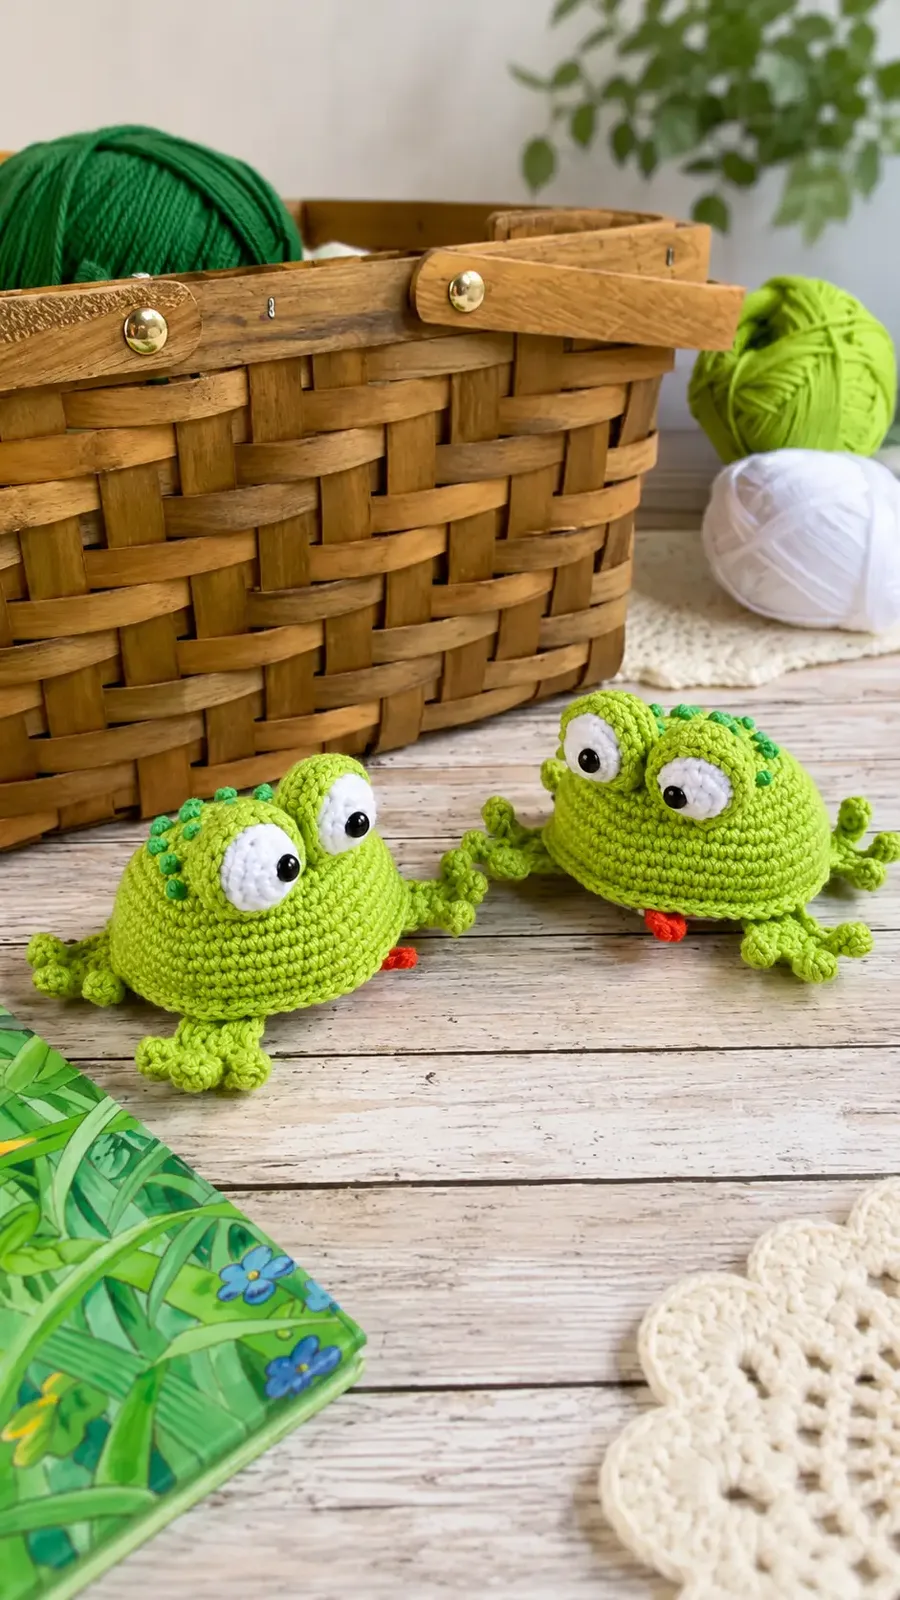
Small crochet frog amigurumi with puff stitch paws
A crochet frog amigurumi worked in single crochet (UK double crochet), with US and UK stitch terms given.
- Skill
- Intermediate
- Time
- 4-6 hours
- Yarn weight
- DK
- Hook
- 2.0 mm

Intermediate
What the original write-up called it. Nothing here is graded again.

DK
What the sample was worked in. Any weight works; the size moves with it.

4-6 hours
What the original page reckoned. Your own pace is the one that matters.
About this pattern
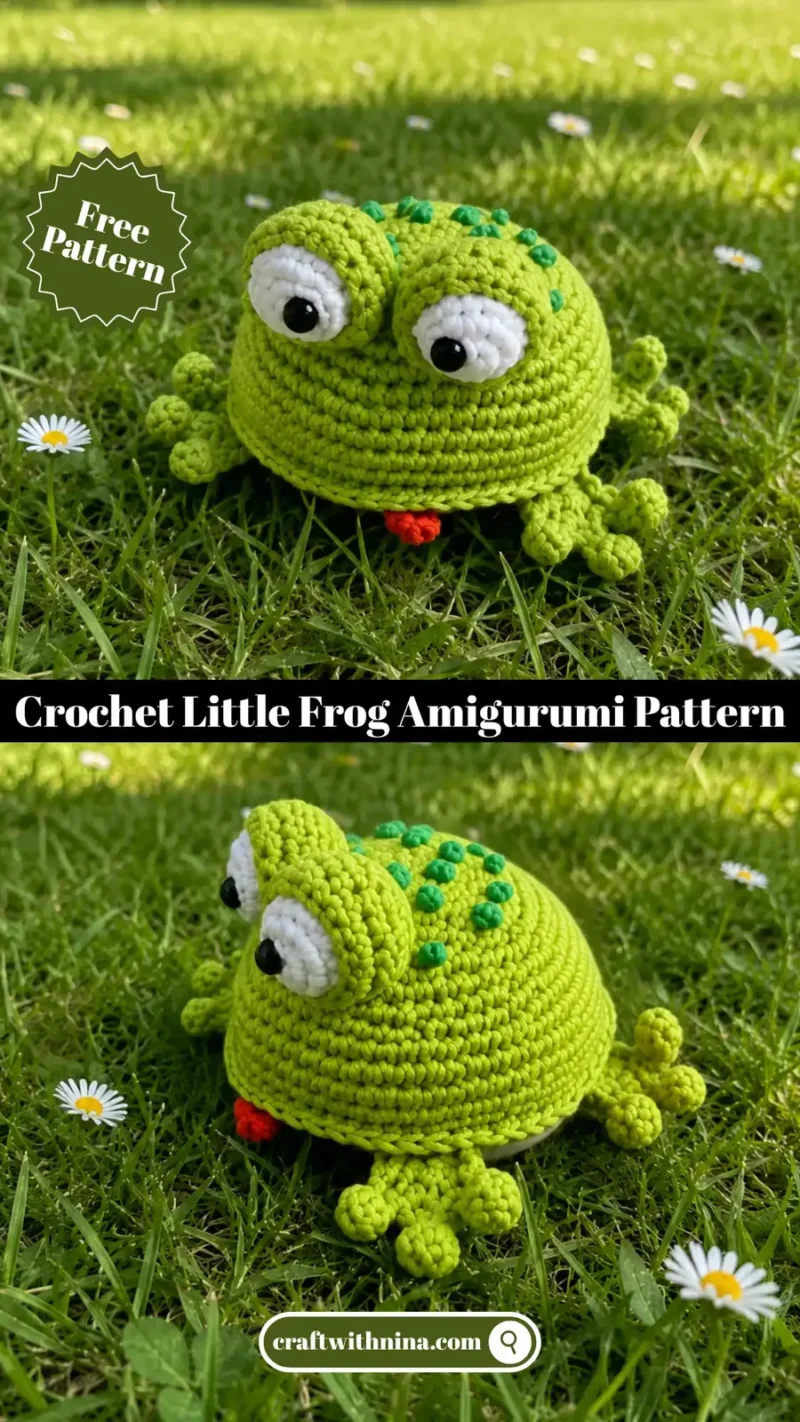
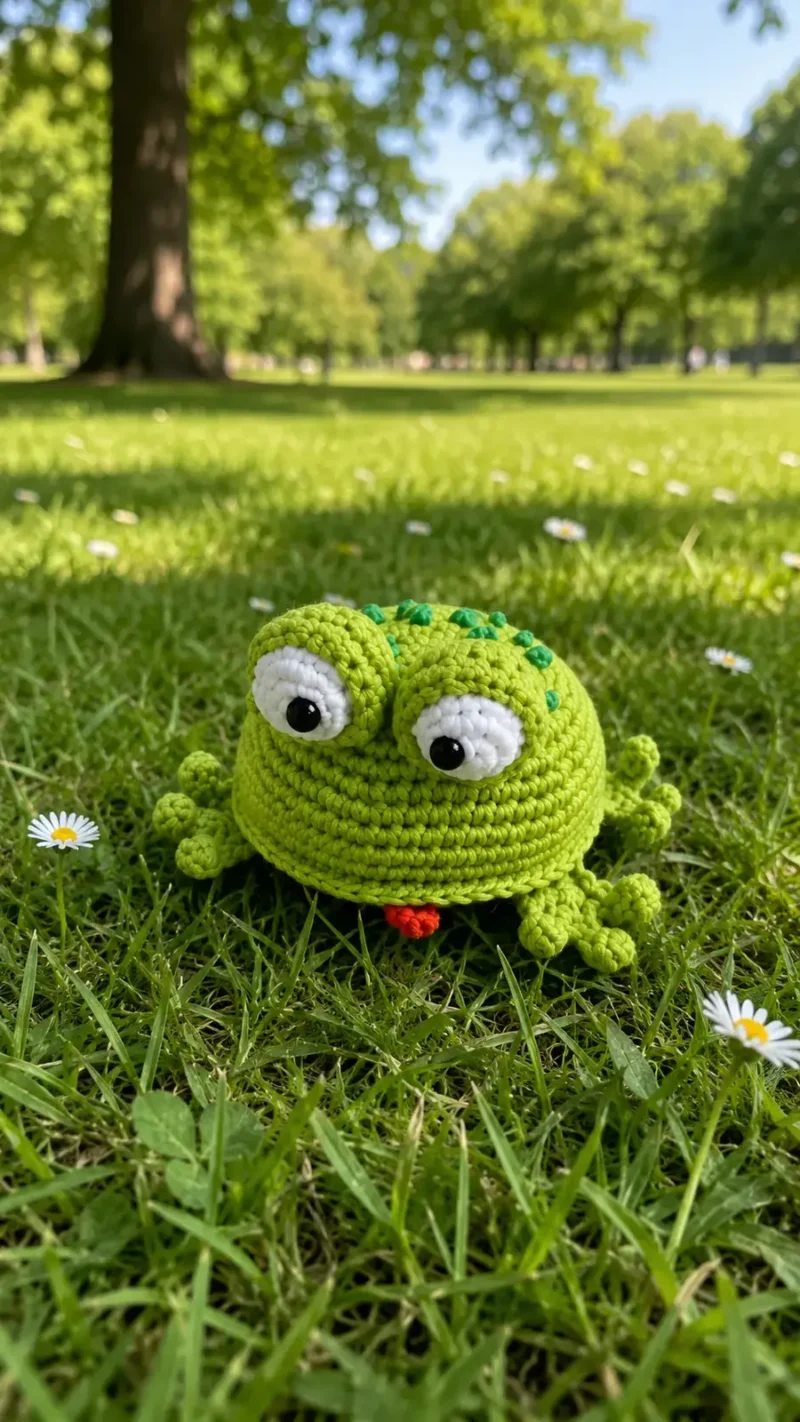
A roughly 7 cm crochet frog amigurumi made from cotton DK yarn and a 2.0 mm hook, worked mainly in single crochet (UK double crochet) with puff-stitch paws. The two-piece body (a white belly and a green back) is joined and stuffed in one step, safety eyes are set into crocheted eyelids, and features are finished with sewing pins, French knots or small glued beads. Suits confident beginners comfortable with amigurumi shaping.
This frog amigurumi is worked almost entirely in single crochet (UK double crochet), the short, dense stitch that gives amigurumi its firm, sculptural shape. The paws bring in a second stitch family: a puff stitch worked into chain loops, shaping four small toes on each foot. At roughly 7 cm tall, the finished frog is a small-scale project, and the tight gauge asked for throughout is what keeps the stuffing from showing through the fabric, rather than any special technique.
The body is a 2-in-1 design made from two separate pieces worked in their own spiral from a magic ring of 6 stitches: a white belly and a green back. The two pieces are then held wrong sides together and joined with single crochet around the edge, with stuffing added gradually as the seam closes. The eyes, eyelids, four paws and tongue are crocheted as separate small pieces and sewn on afterward, with the safety eyes set inside the green eyelid pieces before they are sewn to the head.
Materials
- 100% cotton yarn for crocheting the frog (the pattern used PaintBox Yarns Cotton DK, 125 m / 50 g, in the following colors: Lime Green (629), Paper White (601), a small amount of Pillar Red (615), and Spearmint Green (626))
- Crochet hook 2.0 mm (the pattern used a Clover hook)
- Stuffing, hollow fiber
- Safety eyes or black beads, 6 mm in diameter
- A needle with a large eye
- Sewing pins
The list is the pattern's own wording.
Instructions
Every round is printed as the pattern wrote it, brackets and all. Open the key beside a round to see only the short forms that round uses.
Belly
With white yarn. Use a 2.0 mm hook. The belly is crocheted in a spiral.
- Round 1
6 sc in magic ring (6)
Key1
- sc
- single crochet
- Round 2
2 sc in each sc (12)
Key1
- sc
- single crochet
- Round 3
(1 sc, sc inc)*6 (18)
Key2
- sc inc
- increase
- sc
- single crochet
- Round 4
(2 sc, sc inc)*6 (24)
Key2
- sc inc
- increase
- sc
- single crochet
- Round 5
(3 sc, sc inc)*6 (30)
Key2
- sc inc
- increase
- sc
- single crochet
- Round 6
(4 sc, sc inc)*6 (36)
Key2
- sc inc
- increase
- sc
- single crochet
- Round 7
(5 sc, sc inc)*6 (42)
Key2
- sc inc
- increase
- sc
- single crochet
- Round 8
(6 sc, sc inc)*6 (48)
Key2
- sc inc
- increase
- sc
- single crochet
- Round 9
(7 sc, sc inc)*6 (54)
Key2
- sc inc
- increase
- sc
- single crochet
- Round 10
(8 sc, sc inc)*6, sl.st. (60)Tie off the thread and cut it
Key3
- sl.st.
- slip stitch
- sc inc
- increase
- sc
- single crochet
Back
With green yarn. Use a 2.0 mm hook. The back is crocheted in a spiral.
- Round 1
6 sc in magic ring (6)
Key1
- sc
- single crochet
- Round 2
2 sc in each sc (12)
Key1
- sc
- single crochet
- Round 3
(1 sc, sc inc)*6 (18)
Key2
- sc inc
- increase
- sc
- single crochet
- Round 4
(2 sc, sc inc)*6 (24)
Key2
- sc inc
- increase
- sc
- single crochet
- Round 5
(3 sc, sc inc)*6 (30)
Key2
- sc inc
- increase
- sc
- single crochet
- Round 6
(4 sc, sc inc)*6 (36)
Key2
- sc inc
- increase
- sc
- single crochet
- Round 7
(5 sc, sc inc)*6 (42)
Key2
- sc inc
- increase
- sc
- single crochet
- Round 8
(6 sc, sc inc)*6 (48)
Key2
- sc inc
- increase
- sc
- single crochet
- Round 9
48 sc (48)
Key1
- sc
- single crochet
- Round 10
(7 sc, sc inc)*6 (54)
Key2
- sc inc
- increase
- sc
- single crochet
- Round 11
54 sc (54)
Key1
- sc
- single crochet
- Round 12
(8 sc, sc inc)*6 (60)
Key2
- sc inc
- increase
- sc
- single crochet
- Rounds 13–14
2 rows of 60 sc (60)Do not cut the work threadJoining the belly and the back together: Put the wrong sides of the pieces to each other, insert the crochet hook through the loops of both pieces and crochet sc. Work sc around the edge. Stuff the body as you go around. Finish with sl.st. Tie off the thread and hide it inside.
Key2
- sl.st.
- slip stitch
- sc
- single crochet
Eyes (make 2)
With white yarn. Use a 2.0 mm hook. The eyes are crocheted in a spiral.
- Round 1
6 sc in magic ring (6)
Key1
- sc
- single crochet
Close the magic ring, but not too tight so that you can insert the safety eyes easily
- Round 2
2 sc in each sc (12)
Key1
- sc
- single crochet
- Round 3
(3 sc, sc inc)*3 (15)
Key2
- sc inc
- increase
- sc
- single crochet
- Rounds 4–5
2 rows of 15 sc (15)Insert the safety eyes into the middle of the magic ring
Key1
- sc
- single crochet
- Round 6
(3 sc, sc dec)*3 (12)Stuff the eye
Key2
- sc dec
- decrease
- sc
- single crochet
- Round 7
6 sc dec (6)Finish with sl.st.Tie off the thread and leave enough for sewing
Key2
- sc dec
- decrease
- sc
- single crochet
Eyelids (make 2)
With green yarn. Use a 2.0 mm hook. The eyelids are crocheted in a spiral.
- Round 1
6 sc in magic ring (6)
Key1
- sc
- single crochet
- Round 2
2 sc in each sc (12)
Key1
- sc
- single crochet
- Round 3
(1 sc, sc inc)*6 (18)
Key2
- sc inc
- increase
- sc
- single crochet
- Rounds 4–6
3 rows of 18 sc (18)Finish with sl.st.Tie off and leave enough thread for sewing
Key1
- sc
- single crochet
Paws (make 4)
With green yarn. Use a 2.0 mm hook.
- Round 1
2 ch, 12 dc in magic ring, sl.st. (12)
Key3
- sl.st.
- slip stitch
- ch
- chain
- dc
- double crochet
- Round 2
4 sl.st., (6 ch., puff stitch in the 3rd loop from the hook and 1 sc in the 4th, 5th and 6th loops from the hook, 1 sl.st. in the next loop of the first row) * repeat this pattern two more times, 4 sl.st.Tie off the thread and leave enough for sewing
Key4
- puff stitch
- crochet 4 dc in the same stitch and then join them together to finish the stitch
- sl.st.
- slip stitch
- ch
- chain
- sc
- single crochet
Tongue
With red yarn. Use a 2.0 mm hook.
Crochet 4 ch
- Round 1
Start in the second loop from the hook and crochet 2 sc, 3 sc in last ch, do not turn the work and crochet continuously in circle direction, 1 sc, 1 sc inc (8)Finish with sl.st.Tie off the thread and leave enough for sewing
Key3
- sc inc
- increase
- ch
- chain
- sc
- single crochet
Making up
- Step 1Place the eyes into the eyelids and sew them. Tie off the white yarn at the bottom of the eye.
- Step 2Sew the eyes onto the head/body between the 4th and 8th rows.
- Step 3Sew the front paws onto the bottom of the frog symmetrically to the muzzle.
- Step 4Sew the back paws onto the bottom of the frog. The back paws should be placed pointing outward to the sides.
- Step 5Sew the tongue onto the muzzle.
- Step 6Embroider french knots on the back of the frog using the dark green yarn. Note: You can also use green beads for decorating.
- Step 7Congratulations! Your little frog is ready!
Notes from the pattern
- Use the 2.0 mm hook specified with cotton DK yarn; this combination is meant to produce a firm fabric, so resist the urge to size up for speed. Finished size is approximately 7 cm (2.7 inches) when worked with the materials listed.
- The belly is crocheted in white and the back in green as two separate pieces, with the eyelids also worked separately in green, so start each piece with the correct color and weave in ends neatly rather than expecting a single continuous color-change spiral.
- Add stuffing gradually while the two body halves are being joined rather than waiting until the seam is nearly closed, so the shape fills out evenly without lumps.
The essentials
- Rounds
- 36
- Parts
- 6
- Level
- Intermediate
- Time
- 4-6 hours
- Hook
- 2.0 mm
- Yarn
- DK
Stitches you will use
- Spiral single crochet shaping Used across the two body pieces (belly and back), each worked from its own 6-stitch magic ring; watch for stitch count drift between rounds since there is no turning chain to mark the join.
- Puff stitch worked into chain loops Forms the toes on each of the four paws; work slowly on the first paw so the loop tension stays even, then the remaining three go faster.
- Loose magic ring for the eye pieces The 6-stitch ring on the Eyes part needs to stay snug, not fully cinched, so the safety eye post can still be pushed through the centre.
Troubleshooting
The safety eye post will not push through the eye piece.
The magic ring on the Eyes part was closed too tightly; leave it snug rather than fully cinched so the centre opening stays large enough for the post.
Stuffing is visible through the belly or back fabric.
The stitches were worked too loosely for the cotton DK and 2.0 mm hook combination; drop to a smaller hook size and keep tension tight, as the pattern instructs.
The finished body looks lumpy or uneven once joined.
Filling was likely added all at once near the end of the seam; adding stuffing gradually as the two halves are joined around the edge gives a rounder, more even shape.
Substituting yarn
- Mercerised cotton, 4-ply/fingering weight
- Produces a smaller finished frog with crisper stitch definition; use a smaller hook, around 2.5 mm, and slightly less stuffing to match the reduced scale.
- Cotton-acrylic blend, DK weight
- Gives a softer, less structured fabric than pure cotton; going down one hook size helps keep the stitches tight enough to hide the stuffing.
- Wool or wool-blend, DK weight
- Produces a larger, softer finished piece since wool has more give than cotton; stitch definition is less crisp, so extra care with tension is needed to match the firmness of the original.
Washing and care
- Hand wash the finished frog in cool water with a mild detergent, since machine washing can distort or felt the tightly worked cotton stitches.
- Reshape gently while still damp and lay flat to dry away from direct heat, then store in a dry place to keep the cotton fabric from softening or sagging over time.
The photographs taken while this was being made
Every one was taken by whoever published the pattern, in the order the source listed them.
FAQs
Questions
What does closing the magic ring loosely for the eyes actually mean?
The 6-stitch magic ring at the start of each Eyes piece should stay snug rather than fully cinched, leaving a small opening at the centre. This allows the safety eye post to be pushed through before the piece is completed.
Why stuff the body while joining rather than at the end?
Waiting until the seam is nearly closed to add filling tends to leave the shape unevenly stuffed or lumpy. Adding filling gradually as the two body halves are joined keeps the finished shape rounder and more consistent.
Is embroidery required for the spots on the frog's back?
French knots worked in dark spearmint green yarn are the default finish for the spots. Small glued-on green beads are offered as a quicker alternative that looks equally good.
How large is the finished frog?
Worked as written with the materials listed, the finished frog measures approximately 7 cm.
Can safety eyes be used for a child under 3?
If the frog is for a very young child, skip the safety eyes and embroider the eyes instead using black yarn; embroidered eyes are safe and still look adorable.
These answers came from whoever first published the pattern, kept word for word.