 EVERY CROCHET
 Amigurumi 33 rounds No account, no download
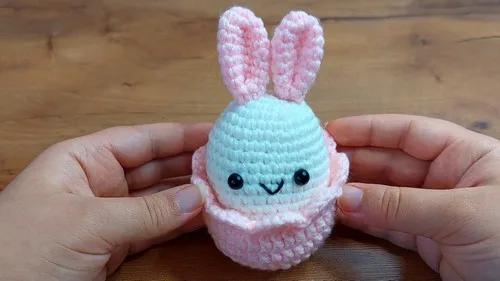
Egg-shaped crochet bunny with a removable double crochet shell
Egg-shaped bunny in single crochet (UK: double crochet), with a double crochet (UK: treble) shell. US and UK terms given.
- Skill
- Beginner
- Time
- about 1 hour
- Yarn weight
- Worsted

Beginner
What the original write-up called it. Nothing here is graded again.

Worsted
What the sample was worked in. Any weight works; the size moves with it.

about 1 hour
What the original page reckoned. Your own pace is the one that matters.
About this pattern
This beginner-friendly amigurumi bunny is shaped like an egg and worked mainly in single crochet (UK: double crochet), with a separate egg shell in taller double crochet stitches and small rabbit ears. The body takes 21 rounds, the ears 4, and the shell 8, all worked in continuous spiral rounds and stuffed before closing. The whole piece can be finished in about an hour of focused crocheting.
This egg-shaped bunny belongs to the amigurumi family, built almost entirely from single crochet (UK: double crochet), the short, dense stitch that keeps stuffing hidden and gives toys their firm, rounded shape. The body, ears, and face all rely on this one stitch worked in continuous spiral rounds, which is what separates amigurumi from the looser, drape-focused crochet used for garments and blankets.
The toy is made from three separate pieces rather than one continuous shape: a 21-round egg body worked outward from a magic ring, a pair of rabbit ears worked over 4 rounds, and an egg shell worked on its own over 8 rounds in taller, joined double crochet. The shell is crocheted as a standalone piece rather than attached directly to the body, so it sits over the finished bunny like a hard outer casing rather than a permanent layer.
Materials
- Yarn in various colors (for body, shell, ears, and face)
- Crochet hook (size suitable for your yarn)
- Safety eyes or beads
- Black yarn for embroidery
- Stuffing (cotton or fiberfill)
- Yarn needle
- Scissors
- Stitch marker (optional)
The list is the pattern's own wording.
Instructions
Every round is printed as the pattern wrote it, brackets and all. Open the key beside a round to see only the short forms that round uses.
Creating the Egg Body
- Round 1
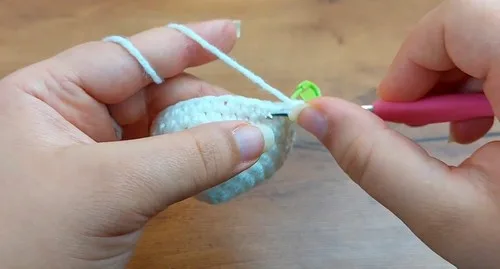
Start with a magic ring and 6 single crochets (sc)
Key1
- sc
- single crochet
- Round 2
6 increases to make 12 sc
Key1
- sc
- single crochet
- Round 3
Repeat (1 sc, 1 increase) 6 times to make 18 sc
Key1
- sc
- single crochet
- Round 4
Repeat (2 sc, 1 increase) 6 times to make 24 sc
Key1
- sc
- single crochet
- Round 5
Work 24 sc
Key1
- sc
- single crochet
- Round 6
Repeat (3 sc, 1 increase) 6 times to make 30 sc
Key1
- sc
- single crochet
- Round 7
Work 30 sc
Key1
- sc
- single crochet
- Round 8
Work 30 sc
Key1
- sc
- single crochet
- Round 9
Repeat (9 sc, 1 increase) 3 times to make 33 sc
Key1
- sc
- single crochet
- Round 10
Work 33 sc
Key1
- sc
- single crochet
- Round 11
Work 33 sc
Key1
- sc
- single crochet
- Round 12
Work 33 sc
Key1
- sc
- single crochet
- Round 13
Work 33 sc
Key1
- sc
- single crochet
- Round 14
Work 33 sc
Key1
- sc
- single crochet
- Round 15
Work 33 sc
Key1
- sc
- single crochet
- Round 16
Work 33 sc
Key1
- sc
- single crochet
- Round 17
Repeat (9 sc, 1 decrease) 3 times to make 30 sc
Key1
- sc
- single crochet
- Round 18
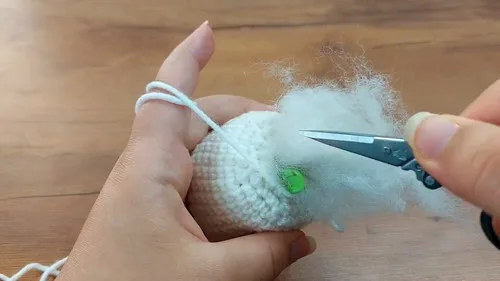
Repeat (3 sc, 1 decrease) 6 times to make 24 sc Stuff the body firmly
Key1
- sc
- single crochet
- Round 19
Repeat (2 sc, 1 decrease) 6 times to make 18 sc
Key1
- sc
- single crochet
- Round 20
Repeat (1 sc, 1 decrease) 6 times to make 12 sc Add more stuffing
Key1
- sc
- single crochet
- Round 21
Do 6 sc decreases to make 6 sc Close the opening by weaving yarn through the remaining stitches
Key1
- sc
- single crochet
Knitting the Rabbit Ears
- Round 1
Start with a magic ring and 6 sc
Key1
- sc
- single crochet
- Round 2
Do 6 increases to make 12 sc
Key1
- sc
- single crochet
- Rounds 3–8
Work 12 sc each round (6 rounds)
Key1
- sc
- single crochet
- Round 9
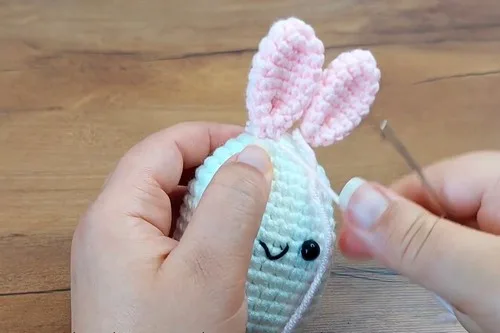
Repeat (2 sc, 1 decrease) 3 times to make 9 sc Chain 1 and cut the yarn Attach the ears to the top sides of the head and sew securely
Key1
- sc
- single crochet
Creating the Egg Shell
- Round 1
Start with a magic ring and make 12 double crochets (dc), then 1 slip stitch
Key1
- dc
- double crochet
- Round 2
Chain 2, do 12 dc increases to make 24 dc, then 1 slip stitch
Key1
- dc
- double crochet
- Round 3
Chain 2, repeat (1 dc, 1 dc increase) 12 times to make 36 dc, then 1 slip stitch
Key1
- dc
- double crochet
- Round 4
Chain 2, work 36 dc, then 1 slip stitch
Key1
- dc
- double crochet
- Round 5
Chain 2, work 36 dc, then 1 slip stitch
Key1
- dc
- double crochet
- Round 6
Chain 2, work 36 dc, then 1 slip stitch
Key1
- dc
- double crochet
- Round 7
Work 36 single crochets (sc)
Key1
- sc
- single crochet
- Round 8
Create scalloped edge by repeating [skip 1 stitch, 6 dc in next stitch, skip 1 stitch, 1 slip stitch] 9 timesChain 1 and cut the yarn Hide the thread end with a yarn needle
Key1
- dc
- double crochet
Notes from the pattern
- Match the hook to the chosen yarn weight rather than a fixed size, since the pattern only specifies 'a hook suitable for your yarn'; a hook that is too large will leave visible gaps that show the stuffing underneath.
- A stitch marker is worth using on the spiral rounds of the egg body and ears, since there is no slip stitch join to mark where each round starts or ends.
- Keep tension noticeably firmer on the shell's double crochet rounds than on the body's single crochet rounds, since the shell relies on tighter stitches to hold its shape once it is fitted over the bunny.
- Stuff the egg body firmly before closing the final rounds and before placing the safety eyes, as understuffing at this stage is difficult to correct once the opening is worked shut.
The essentials
- Rounds
- 33
- Parts
- 3
- Level
- Beginner
- Time
- about 1 hour
- Yarn
- Worsted
Stitches you will use
- Magic ring starts Used to begin the egg body, each ear, and the shell; pull the centre closed firmly before working the first round so no gap remains once stuffed.
- Joined double crochet (UK: treble) rounds The shell's 8 rounds use chain-2 turns and a slip stitch join rather than a spiral, so keep tension even across each round or the shell will cup instead of sitting flat.
- Safety eye placement and embroidery finishing Eyes go between rounds 8 and 9 with 5 stitches between them, and the mouth is a small black V embroidered afterward; mark the spot before pushing the eye backs through, since they cannot be repositioned once secured.
Troubleshooting
The egg shell cups or ruffles instead of lying flat
This usually comes from uneven increases in rounds 2 and 3 or loose tension on the dc rounds; count stitches after each round against the stated totals (24, then 36) before moving on.
The safety eyes sit crooked or too close together
This happens when the 5-stitch gap is measured loosely between rounds 8 and 9; mark both eye positions with pins first and check they are level before pushing the backs through.
The ears flop or twist instead of standing upright
Rounds 3 to 8 are worked straight with no shaping, so any curl usually comes from under-stuffing or sewing the ear on at an angle; stuff lightly and pin the ear flat against the head before securing it.
Substituting yarn
- Cotton, DK to worsted weight
- Gives crisper stitch definition and a firmer shell that holds its shape well, but cotton has less give than acrylic, so stitches may need slightly looser tension to stuff the body comfortably.
- Acrylic, worsted weight
- Produces a soft, lightweight finish that is easy to stuff evenly and forgiving of minor tension differences across the 21 body rounds.
- Cotton-acrylic blend, sport or fingering weight
- Scales the whole bunny down for a smaller egg; use a correspondingly smaller hook and reduce the amount of stuffing to match the tighter gauge.
Washing and care
- Spot clean where possible; if a full wash is needed, hand wash in cool water and press out excess moisture in a towel rather than wringing, since safety eyes and embroidered details do not tolerate agitation well.
- Reshape the egg body and ears while still slightly damp, then leave flat to air dry fully before storing, as damp stuffing left bundled can cause the fibre to flatten or mat over time.
The photographs taken while this was being made
Every one was taken by whoever published the pattern, in the order the source listed them.
FAQs
Questions
Is the shell meant to come off, or is it attached permanently?
The shell is crocheted as its own separate piece over 8 rounds, so it fits over the finished bunny rather than being worked directly onto the body. This means it can be lifted off and put back on.
Where exactly do the safety eyes go?
They are placed between rounds 8 and 9 of the egg body, with 5 stitches left between them. Mark both spots before inserting the eyes, since the backs lock in place and cannot be shifted afterward.
How is the mouth made, since there's no stitch listed for it?
The mouth is not crocheted; it is embroidered afterward using black yarn worked into a small V shape. This is done once the body is complete and the eyes are secured.
How many separate pieces does this pattern actually involve?
Three: the egg body (21 rounds), the rabbit ears (4 rounds), and the egg shell (8 rounds). The ears are sewn onto the body, and the shell is fitted over the top rather than crocheted on.
Can this really be finished in about an hour?
a confident beginner already comfortable with magic rings and increases, the round counts given (21, 4, and 8) make an hour a realistic target. Stuffing, attaching the eyes, and embroidering the mouth add a little time on top of the crocheting itself.
These answers came from whoever first published the pattern, kept word for word.