 EVERY CROCHET
 Amigurumi 6 rounds No account, no download
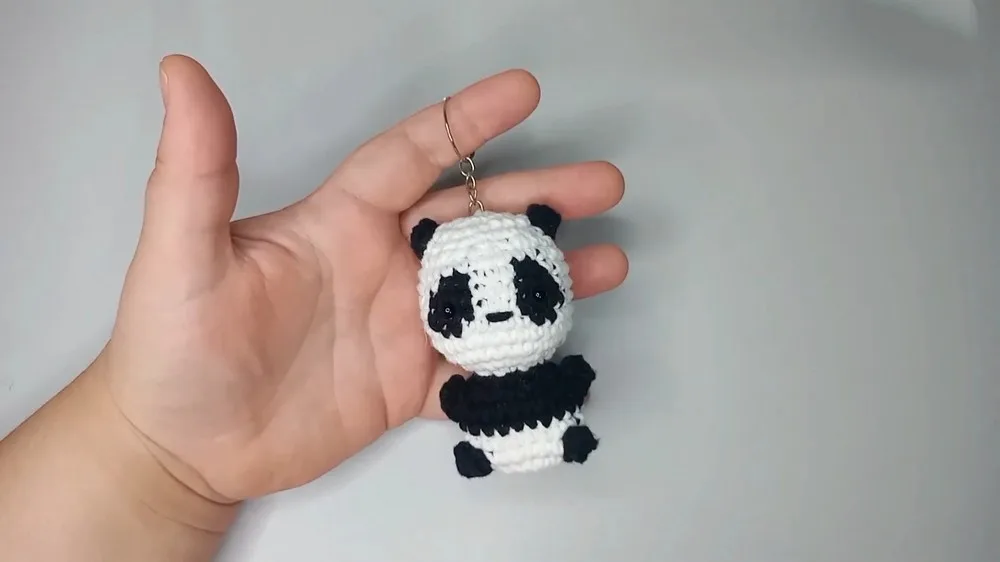
A compact panda amigurumi keychain worked in six rounds
Six-round panda amigurumi keychain in single crochet (UK: double crochet), with popcorn-stitch ears and a mid-round colour change.
- Skill
- Intermediate
- Time
- 4-6 hours
- Yarn weight
- Worsted
- Hook
- 1.75 mm

Intermediate
What the original write-up called it. Nothing here is graded again.

Worsted
What the sample was worked in. Any weight works; the size moves with it.

4-6 hours
What the original page reckoned. Your own pace is the one that matters.
About this pattern
This is a one-piece panda amigurumi worked in single crochet (UK: double crochet) over six rounds, sized for a keychain rather than a full toy. It needs a 1.75 mm hook, white and black cotton yarn, 5 mm safety eyes and stuffing. The only shaping beyond increases is a popcorn stitch for each ear, placed with a mid-round colour change on round 5, then closed by pulling the front loops of the last round tight.
This panda belongs to the amigurumi family, built almost entirely from single crochet (UK: double crochet) worked in continuous rounds. At only six rounds for the body and head, it sits at the small end of amigurumi scale, which is what makes it suited to a keychain rather than a shelf toy. The main interest comes from a pair of popcorn-stitch bumps worked straight into the round to form the ears, rather than being added as separate pieces afterwards.
Materials
- 1.75 mm crochet hook (vary the hook size for different sizes)
- 100% cotton yarn in black and white
- Safety eyes, 5 mm
- Stuffing material
- Tapestry needle
- Scissors
The list is the pattern's own wording.
Instructions
Every round is printed as the pattern wrote it, brackets and all. Open the key beside a round to see only the short forms that round uses.
Body and Head
- Rounds 1–4
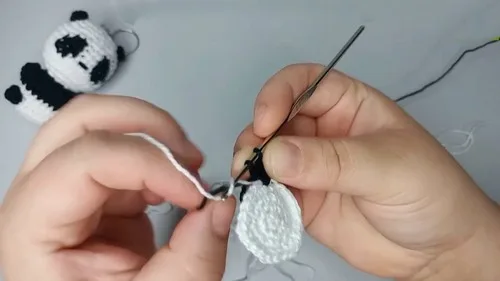
Start with white yarn. Make a magic ring and work 6 single crochets into it for the first round. Use the following pattern for each round:
- (18)Round 2
Increase in each stitch around (12 stitches) For Round 3: 1 single crochet, 1 increase repeat 6 times (18 stitches)
- (24)Round 4
2 single crochets, 1 increase repeat 6 times (24 stitches)
- (24)Round 5
Begin color changes. Start with 8 single crochets in white. On the 8th stitch, switch to black yarn mid-stitch and make a popcorn stitch with black (4 double crochets in the same stitch, pull through the first double crochet loop to complete the popcorn stitch). Switch back to white yarn and do 6 single crochets in white, repeat the switching process and make another popcorn stitch in black. Finish with 8 single crochets in white (24 stitches).For Round 6: 24 single crochets in white.
- Rounds 7–10
Complete these rounds in black: For round 7, work 24 single crochets in black. In Round 8: Feature a pattern of single crochets and popcorn stitches.
- Round 9
1 single crochet, 1 decrease repeat 8 times (16 stitches). For Round 10: Perform 8 decreases after stuffing the body, then switch to white yarn in the last stitch.Rounds 11-14: Work these rounds in white. For round 11, do 8 increases. Rounds 12 to 14 involve increasing patterns ending round 14 with 30 stitches, ensuring expansion for the head.Rounds 15-18: Introduce facial details with color changes: For Round 15: Begins with 12 single crochets in white, introduces black yarn for detailing, and ends in white (30 stitches).Follow similar patterns for rounds 16 to 18, shaping the face with single crochets and decreases, maintaining 30 stitches.Rounds 19-23: Finalize head and add facial features:Round 19: 30 single crochets in white. Place safety eyes between rounds 16 and 17, spaced 5 stitches apart. Embroider the nose between rounds 15 and 16.For Round 20: 1 single crochet, 1 decrease repeat 10 times (20 stitches).For rounds 21 to 23, continue shaping the head with decreases and stuffing adjustments, ending with round 23 working 10 decreases.
Making up
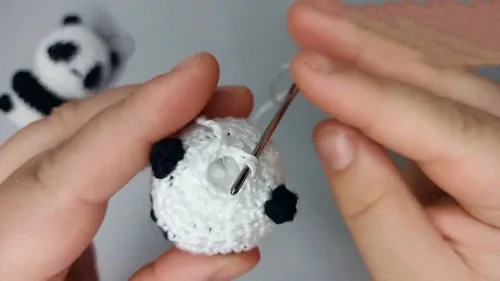
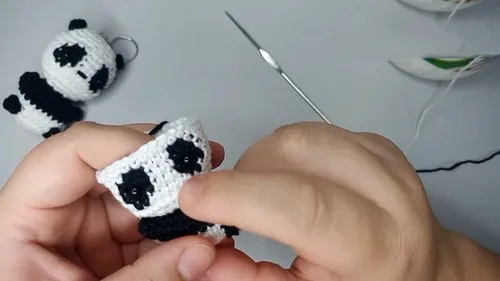
- Step 1Cut the yarn, leaving a long tail for closing the opening. Use a tapestry needle to thread through the front loops of the remaining stitches, pull tight to close, and secure with a knot. Sew on a keychain loop if desired.
Notes from the pattern
- A 1.75 mm hook keeps stitches tight enough to hold safety eyes and stuffing at this small scale; sizing up the hook will loosen the fabric and may let stuffing show through.
- Because the body and head are worked as one continuous spiral with no row joins, a stitch marker on round 1 makes it easier to track where each round starts, especially through the increase rounds.
- Cotton yarn has little stretch, so tension should stay even but not overly tight across rounds 2 to 4, where stitch count jumps from 6 to 24; uneven tension here shows as a visibly stepped shape.
- Stuff the head and body before closing, working stuffing into the shape gradually rather than packing it in at the end, since the single closing opening at the top is the only access point.
The essentials
- Rounds
- 6
- Level
- Intermediate
- Time
- 4-6 hours
- Hook
- 1.75 mm
- Yarn
- Worsted
Stitches you will use
- Magic ring start Used to begin the body and head in round 1; keep the initial loop pulled fully closed before working the first 6 single crochets into it so no gap is visible at the centre.
- Popcorn stitch Placed twice in round 5 to form the ears, each made from 4 double crochets (UK: treble crochets) worked into one stitch and drawn through the first loop; keep tension even so both ears come out the same size.
Troubleshooting
The popcorn-stitch ears look flat instead of raised
This happens when the 4 double crochets of the popcorn are worked too loosely or the loop isn't pulled through firmly at the end; tighten the final pull-through so the stitch pops forward rather than lying flush with round 5.
The closing opening puckers or leaves a visible gap
This comes from threading the tapestry needle through both loops instead of just the front loops of the final round, or from not pulling the tail tight enough before knotting; redo the gather through front loops only and pull firmly before securing.
Substituting yarn
- 100% acrylic, worsted weight
- Produces a similar finished size to the cotton original but with softer drape and less stitch definition; the 1.75 mm hook can stay the same, though stitches may look slightly less crisp around the popcorn ears.
- Cotton blend, fingering or sport weight
- Makes the finished panda noticeably smaller and better suited to a keyring, but requires a smaller hook than 1.75 mm to keep stitches tight enough to hide stuffing.
- Wool blend, DK weight
- Increases the overall size well beyond keychain scale and needs a larger hook than 1.75 mm; the extra loft also means slightly less stuffing is needed to fill the same shape.
Washing and care
- Hand wash the finished panda in cool water, since 100% cotton yarn can shrink or felt slightly at higher temperatures; avoid wringing and press out excess water in a towel instead.
- Dry flat, reshaping the head and body by hand while still damp so the white and black sections keep their rounded shape, then store away from direct sunlight to stop the white cotton yellowing against the black.
The photographs taken while this was being made
Every one was taken by whoever published the pattern, in the order the source listed them.
FAQs
Questions
Why are the body and head worked as one piece instead of two?
Working both in a single continuous spiral avoids a neck seam and keeps the small keychain scale from becoming bulky. It also means the only closing needed is at the very top, through the front loops of the last round.
Can embroidered eyes replace the 5 mm safety eyes?
Yes, embroidered eyes can be worked after stuffing instead of inserted as safety eyes. This is a reasonable swap for giving the panda to a young child, since safety eyes, despite the name, are still a small hard part.
How much black yarn is needed compared to white?
Black is only used for the two popcorn-stitch ears in round 5, so the amount needed is small compared to the white used throughout rounds 1 to 6. A short length wound off separately is enough to avoid managing a full skein for such a small area.
What is the best way to close the final opening neatly?
Thread the long tail left after round 6 onto a tapestry needle, pass it through the front loops only of each remaining stitch, then pull tight before knotting off. This draws the top closed without leaving the visible seam a whole-stitch gather would create.
These answers came from whoever first published the pattern, kept word for word.