 EVERY CROCHET
 Amigurumi 50 rounds No account, no download
Amigurumi snowman crochet pattern for beginners
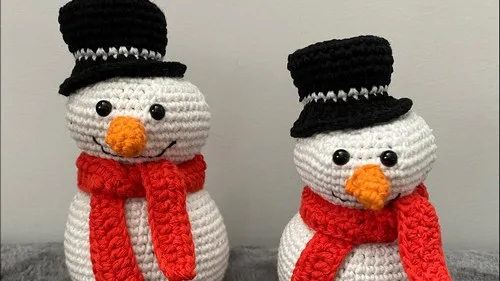
A beginner amigurumi snowman worked in single crochet (UK double crochet); both US and UK stitch terms given.
- Skill
- Beginner
- Time
- 3-4 hours
- Yarn weight
- 4-ply (Fingering)
- Hook
- 2 mm

Beginner
What the original write-up called it. Nothing here is graded again.

4-ply (Fingering)
What the sample was worked in. Any weight works; the size moves with it.

3-4 hours
What the original page reckoned. Your own pace is the one that matters.
About this pattern
This pattern makes a five-part amigurumi snowman: a 25-round body, a 16-round head with safety eyes set in between rounds 8 and 9, a 14-round hat with a white stripe near the brim, a 4-round nose, and a 3-row scarf, all worked in single crochet (UK double crochet) from a magic circle (or a starting chain for the scarf). It calls for a 2mm hook, safety eyes, stuffing, and polythene balls for a weighted base, plus basic sewing to assemble the finished pieces.
This snowman is built from five separate amigurumi pieces worked in single crochet (UK: double crochet): a rounded body, a shaped head, a fitted hat, a small carrot-style nose, and a simple scarf. The stitch family keeps the fabric dense and even, which matters for a toy that will be stuffed and stand on its own rather than hang loosely. Each part begins with the same magic circle start (or a starting chain for the scarf) before increases and decreases shape it into a sphere, cone, or flat strip. You can customize the colours of the hat and scarf to match your own winter decor theme.
Construction works in continuous spiral rounds rather than joined rounds, so most rows grow without a seam or turning chain interrupting the surface. The body shapes up from a magic circle through 25 rounds, widening then narrowing again, before it is stuffed with fiberfill and optional weighted pellets. The head is worked as its own separate piece over 16 rounds, with the safety eyes inserted between rounds 8 and 9 and the head stuffed firmly before the last three rounds close it flat. The 14-round hat starts and ends in black, with a two-round white stripe worked partway up, then finishes with two brim rounds before being sewn on. Once each piece is finished off, the nose, hat and scarf are sewn onto the body to complete the snowman.
Materials
- White, Black, Red, and Orange yarn
- 2mm crochet hook
- Two safety eyes
- Stitch marker, needle, scissors, stuffing
Optional
- polythene plastic balls for weight in the base
The list is the pattern's own wording.
Instructions
Every round is printed as the pattern wrote it, brackets and all. Open the key beside a round to see only the short forms that round uses.
Snowman Body
- Round 1
Magic Circle with 6 sc (6)
Key1
- sc
- single crochet
- Round 2
inc in every stitch (12)
Key1
- inc
- increase
- Round 3
(1 sc, inc) repeat (18)
Key2
- inc
- increase
- sc
- single crochet
- Round 4
(2 sc, inc) repeat (24)
Key2
- inc
- increase
- sc
- single crochet
- Round 5
(3 sc, inc) repeat (30)
Key2
- inc
- increase
- sc
- single crochet
- Round 6
(4 sc, inc) repeat (36)
Key2
- inc
- increase
- sc
- single crochet
- Round 7
(5 sc, inc) repeat (42)
Key2
- inc
- increase
- sc
- single crochet
- Round 8
BLO (6 sc, inc) repeat (48)
Key3
- inc
- increase
- blo
- back loops only
- sc
- single crochet
- Round 9
(7 sc, inc) repeat (54)
Key2
- inc
- increase
- sc
- single crochet
- Rounds 10–17
54 sc around
Key1
- sc
- single crochet
- Round 18
(7 sc, dec) repeat (48)
Key2
- dec
- decrease
- sc
- single crochet
- Round 19
48 sc around
Key1
- sc
- single crochet
- Round 20
(6 sc, dec) repeat (42)
Key2
- dec
- decrease
- sc
- single crochet
- Round 21
42 sc around
Key1
- sc
- single crochet
- Round 22
(5 sc, dec) repeat (36)
Key2
- dec
- decrease
- sc
- single crochet
- Round 23
(4 sc, dec) repeat (30)
Key2
- dec
- decrease
- sc
- single crochet
- Round 24
(3 sc, dec) repeat (24)
Key2
- dec
- decrease
- sc
- single crochet
- Round 25
(2 sc, dec) repeat (18)Stuff with fiberfill and optional pellets
Key2
- dec
- decrease
- sc
- single crochet
Snowman Head
- Round 1
inc in every stitch (36)
Key1
- inc
- increase
- Round 2
(5 sc, inc) repeat (42)
Key2
- inc
- increase
- sc
- single crochet
- Round 3
(6 sc, inc) repeat (48)
Key2
- inc
- increase
- sc
- single crochet
- Round 4
(7 sc, inc) repeat (54)
Key2
- inc
- increase
- sc
- single crochet
- Rounds 5–8
54 sc aroundInsert safety eyes between Rounds 8 and 9
Key1
- sc
- single crochet
- Round 9
(7 sc, dec) repeat (48)
Key2
- dec
- decrease
- sc
- single crochet
- Round 10
(6 sc, dec) repeat (42)
Key2
- dec
- decrease
- sc
- single crochet
- Round 11
(5 sc, dec) repeat (36)
Key2
- dec
- decrease
- sc
- single crochet
- Round 12
(4 sc, dec) repeat (30)
Key2
- dec
- decrease
- sc
- single crochet
- Round 13
(3 sc, dec) repeat (24)Stuff head firmly
Key2
- dec
- decrease
- sc
- single crochet
- Round 14
(2 sc, dec) repeat (18)
Key2
- dec
- decrease
- sc
- single crochet
- Round 15
(1 sc, dec) repeat (12)
Key2
- dec
- decrease
- sc
- single crochet
- Round 16
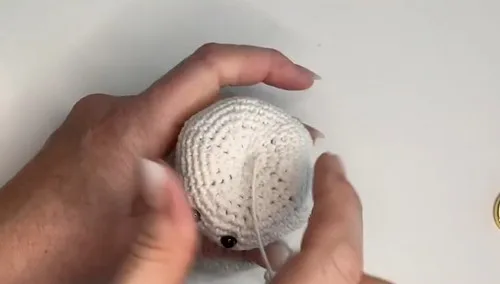
dec around (6)Finish and weave closed, shaping the base flat
Key1
- dec
- decrease
Hat
- Round 1
Magic Circle with 6 sc in black (6)
Key1
- sc
- single crochet
- Round 2
inc in every stitch (12)
Key1
- inc
- increase
- Round 3
(1 sc, inc) repeat (18)
Key2
- inc
- increase
- sc
- single crochet
- Round 4
(2 sc, inc) repeat (24)
Key2
- inc
- increase
- sc
- single crochet
- Round 5
(3 sc, inc) repeat (30)
Key2
- inc
- increase
- sc
- single crochet
- Round 6
BLO 30 sc (30)
Key2
- blo
- back loops only
- sc
- single crochet
- Rounds 7–9
30 sc around
Key1
- sc
- single crochet
- Round 10
(3 sc, dec) repeat, change to white at last stitch (24)
Key2
- dec
- decrease
- sc
- single crochet
- Round 11
24 sc in white, change back to black (24)
Key1
- sc
- single crochet
- Round 12
24 sc in black (24)
Key1
- sc
- single crochet
- Round 13
ch 2, hdc brim (1 hdc, hdc inc) repeat (36)
Key3
- hdc
- half double crochet
- inc
- increase
- ch
- chain
- Round 14
ch 1, sc brim (2 sc, inc) repeat (48)Finish and sew
Key3
- inc
- increase
- ch
- chain
- sc
- single crochet
Nose
- Round 1
Magic Circle with 4 sc (4)
Key1
- sc
- single crochet
- Round 2
(1 sc, inc) repeat (6)
Key2
- inc
- increase
- sc
- single crochet
- Round 3
6 sc around
Key1
- sc
- single crochet
- Round 4
(2 sc, inc) repeat (8)Finish and sew to face
Key2
- inc
- increase
- sc
- single crochet
Scarf
- Round 1
Chain 70
- Round 2
Starting in 3rd ch, 1 hdc, then dc across (68)
Key3
- hdc
- half double crochet
- ch
- chain
- dc
- double crochet
- Round 3
ch 2, turn, hdc across (68)Finish and weave ends
Key2
- hdc
- half double crochet
- ch
- chain
Making up
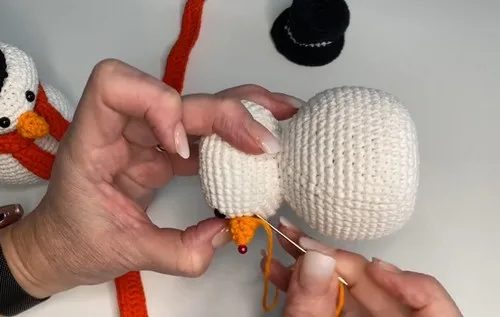
- Step 1Sew nose to face under eyes
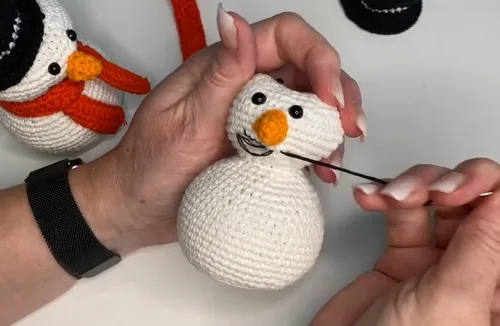
- Step 2Embroider smile with black yarn
- Step 3Attach hat on head
- Step 4Wrap scarf around neck
Notes from the pattern
- The pattern calls for a small 2mm hook, well below what's usually paired with standard yarn; this tightens the fabric so stuffing doesn't show through, but it also slows tension, so working a test round or two before starting the head is worth the time.
- A stitch marker is essential because every round is worked continuously rather than joined; without one, the start of the round is easy to lose across the 25 rounds of the body and the 16 rounds of the head.
- Stuffing needs to be firm enough to hold shape, but the polythene balls are added specifically in the base for weight, not throughout the body, so keep the two fillings separate rather than mixing them evenly.
The essentials
- Rounds
- 50
- Parts
- 5
- Level
- Beginner
- Time
- 3-4 hours
- Hook
- 2 mm
- Yarn
- 4-ply (Fingering)
Stitches you will use
- Magic circle start Used to begin all four round-based parts (body, head, hat, nose); pull the tail snug before working the first round so the centre doesn't leave a hole.
- Increase and decrease shaping (inc/dec) Drives every widening and narrowing round on the body and head; work into the correct stitch each time to keep the shaping even rather than spiralling off-count.
- Sewing and safety-eye placement Needed to attach the nose, hat and scarf to the body and to set the eyes into the head; place both the eyes and the nose before final stuffing so their position can still be adjusted.
Troubleshooting
The base doesn't sit flat and the
This happens when the polythene balls are too few or bunched to one side; distribute them evenly across the base before adding regular stuffing on top.
The head or body cups inward instead of
This is usually caused by increases worked too tightly with the 2mm hook; ease tension slightly on increase stitches so the fabric can curve outward rather than pull in.
The rounds appear to spiral unevenly
This points to a missed or shifted stitch marker; check that it sits in the same stitch each round and recount against the target number given at the end of each round.
Substituting yarn
- Cotton, DK weight
- Gives crisper stitch definition and a firmer amigurumi surface for the smooth spheres of the body and head, though a slightly larger hook than 2mm may be needed to keep the fabric workable.
- Acrylic, worsted (Aran) weight
- A close match to a typical amigurumi choice, with good stitch coverage and a wide colour range for the hat and scarf, though tension will need loosening from the pattern's 2mm hook to suit the thicker strand.
- Wool or wool-blend, DK weight
- Adds softness and drape, especially useful for the scarf, but wool can felt if machine washed, so hand finishing and gentle reshaping matter more than with cotton or acrylic.
Washing and care
- As no specific fibre is listed in the materials, treat the finished snowman as a hand wash item: use cool water and reshape while damp, since stuffed amigurumi pieces distort easily under agitation or heat.
- Store flat or upright away from direct heat sources such as radiators, which can flatten stuffing or dull colour on both cotton and acrylic yarns; avoid hanging the piece by the scarf or hat, which pulls the shaping out over time.
The photographs taken while this was being made
Every one was taken by whoever published the pattern, in the order the source listed them.
FAQs
Questions
Why does this pattern use such a small, 2mm hook?
A tight gauge keeps the amigurumi fabric dense enough that stuffing doesn't peek through the stitches. It also gives the small nose and hat crisp, defined shaping despite their short round counts.
Can the polythene balls in the base be left out?
They can, though the snowman will sit less steadily without added weight at the bottom. If leaving them out, pack the base rounds with extra stuffing to help it resist tipping.
Why is a stitch marker necessary if the rounds aren't joined?
Every round here is worked in a continuous spiral, so there's no slip stitch to mark where one round ends and the next begins. Moving the marker up each round is the only reliable way to track position across the many rounds worked for the body and head.
Can the hat and scarf colours be changed from those listed?
Yes, the colours given are a starting point rather than a fixed requirement. Any yarn in the same weight and hook size will work, since the shaping comes from the stitch counts rather than the colour itself.
When should the safety eyes go in?
Safety eyes are set into the face between rounds 8 and 9 of the head, before the head is closed and stuffed, since fastening the backing washer needs access to the inside of the piece. Placing the nose loosely first can help judge eye spacing before finishing either.
These answers came from whoever first published the pattern, kept word for word.