 EVERY CROCHET
 Amigurumi 15 rounds No account, no download
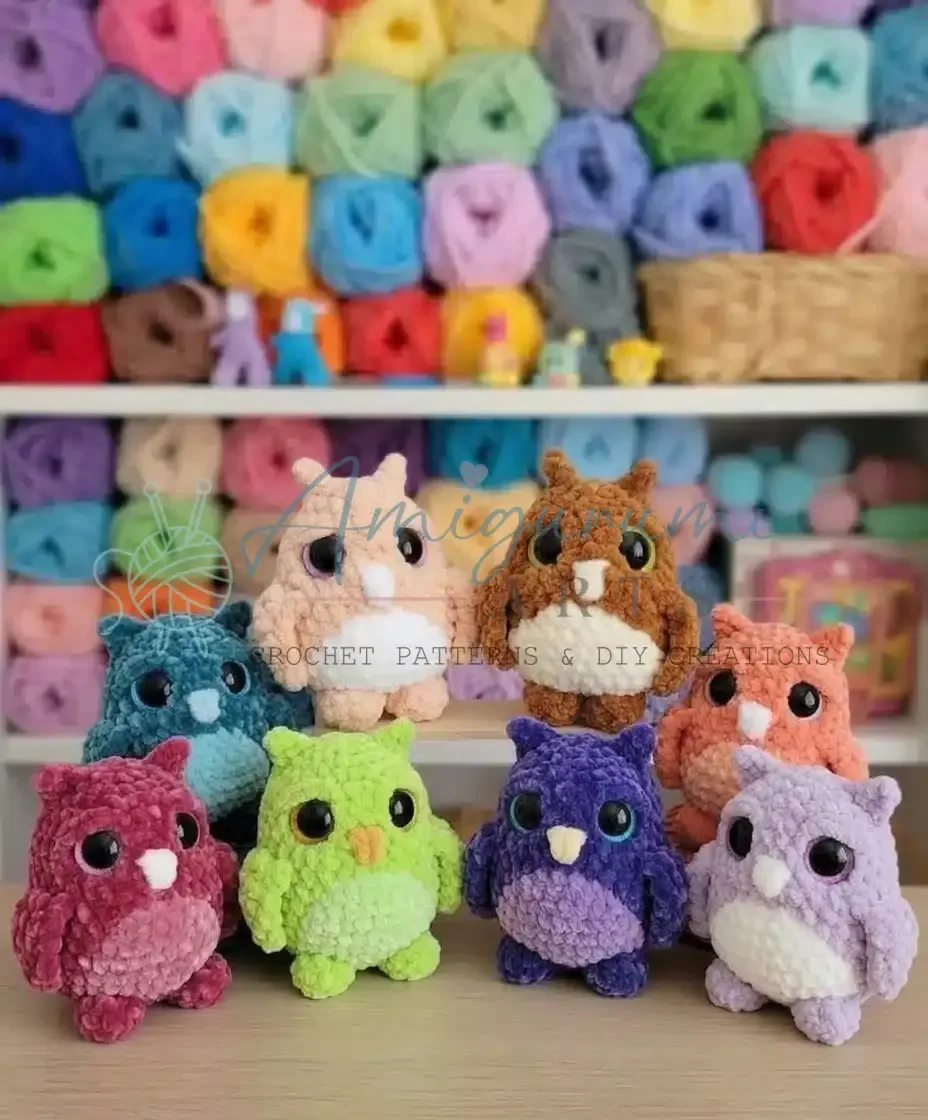
Mini amigurumi owl pattern for confident beginners
A mini amigurumi owl in single crochet (UK: double crochet), with both US and UK terms given throughout.
- Skill
- Beginner
- Time
- 3-5 hours
- Yarn weight
- Worsted (chenille/plush)
- Hook
- 4.0 mm

Beginner
What the original write-up called it. Nothing here is graded again.

Worsted (chenille/plush)
What the sample was worked in. Any weight works; the size moves with it.

3-5 hours
What the original page reckoned. Your own pace is the one that matters.
About this pattern
A small amigurumi owl worked in single crochet (UK: double crochet) with a 4.0 mm hook and plush chenille-style yarn, finished with safety eyes and embroidery-floss facial sculpting. The pattern covers two three-round legs and a twelve-round body worked in continuous spirals, joined using front-loop and remaining-loop stitches. It suits a confident beginner comfortable with increases, decreases and basic shaping.
This mini owl belongs to the amigurumi tradition, built almost entirely from single crochet (UK: double crochet) worked in continuous spirals rather than joined rounds. The stitch stays small and dense throughout, which is what gives amigurumi its firm, sculptural surface and keeps stuffing from peeking through the plush yarn. A stitch marker tracks the start of each round since there is no slip stitch join to mark it, and increases and decreases do all the shaping work.
Construction starts with two identical legs, worked flat at the base rounds then folded and seamed closed. The body is built by joining directly onto both legs in one continuous piece: stitches are picked up through the front loop only around each leg, then through the remaining loops, before the two leg tops are closed off with increases and the body rounds continue upward. A contrasting white or cream section is centred on the belly partway through the twelve body rounds, and the face is finished afterward with embroidery floss drawn through the stuffed head to create soft eye indentations.
Materials
- Plush yarn (like Wolans Bunny Baby or similar chenille yarn): approximately 18g of your main color, 5g of white or cream for the belly, and small amounts of an accent color for the eyelids and beak.
- 4.0 mm crochet hook
- 16-18 mm safety eyes (colored for extra charm!)
- Polyester fiberfill for stuffing
- Tapestry needle for weaving in ends and sculpting
- Strong embroidery floss or matching yarn for facial sculpting
- Scissors
The list is the pattern's own wording.
Instructions
Every round is printed as the pattern wrote it, brackets and all. Open the key beside a round to see only the short forms that round uses.
Legs (Make 2)
Using your main color yarn.
- Round 1
6 sc in a MR (6)
Key2
- MR
- magic ring
- sc
- single crochet
- Round 2
\ 1 sc, inc\ \*3 (9)
Key2
- inc
- increase (2 sc in same stitch)
- sc
- single crochet
- Round 3
7 sc, dec (8)Fold the leg flat and sc 4 stitches through both layers to close the opening.
Key2
- dec
- decrease (single crochet 2 stitches together)
- sc
- single crochet
Your little legs are taking shape! For the first leg, fasten off and weave in the tail. For the second leg, do not fasten off. We’ll connect it to the first leg and begin the body.
Body
Continuing with the main color yarn from the second leg.
Ch 2, then join with a sc to the first leg. This first sc will be the back of our owl, so place a stitch marker here.
- Round 1
Working in the FLO around the first leg: 4 sc, turn, then working in the remaining loops of the first leg: 4 sc, 2 inc in the 2 ch stitches, working in the FLO around the second leg: 4 sc, turn, then working in the remaining loops of the second leg: 4 sc, 2 sc in the 2 ch stitches (22)
Key4
- inc
- increase (2 sc in same stitch)
- FLO
- front loop only
- ch
- chain
- sc
- single crochet
This first round can be a little tricky, but you’ve got this! Just make sure your stitches are even.
Rnd 2: Make sure your white color will be centered on the belly. Adjust with slip stitches if needed.
4 sc, CC to white, 5 sc, 2 inc, 5 sc, CC to main color, 6 sc (24)
Isn’t that belly just adorable already?
- Round 3
3 sc, inc, 1 sc, CC to white, \ 3 sc, inc\ \*2, 3 sc, dec, CC to main color, inc, 3 sc, inc, 1 sc (28)
Key4
- inc
- increase (2 sc in same stitch)
- dec
- decrease (single crochet 2 stitches together)
- sc
- single crochet
- CC
- change color
- Round 4
7 sc, CC to white, 11 sc, dec, CC to main color, inc, 7 sc (28)
Key4
- inc
- increase (2 sc in same stitch)
- dec
- decrease (single crochet 2 stitches together)
- sc
- single crochet
- CC
- change color
- Round 5
8 sc, CC to white, 9 sc, dec, CC to main color, inc, 8 sc (28)
Key4
- inc
- increase (2 sc in same stitch)
- dec
- decrease (single crochet 2 stitches together)
- sc
- single crochet
- CC
- change color
- Round 6
9 sc, CC to white, 7 sc, dec, CC to main color, inc, 9 sc (28)
Key4
- inc
- increase (2 sc in same stitch)
- dec
- decrease (single crochet 2 stitches together)
- sc
- single crochet
- CC
- change color
- Round 7
10 sc, CC to white, 5 sc, dec, CC to main color, inc, 10 sc (28)
Key4
- inc
- increase (2 sc in same stitch)
- dec
- decrease (single crochet 2 stitches together)
- sc
- single crochet
- CC
- change color
- Round 8
11 sc, CC to white, dec, 1 sc, dec, CC to main color, 12 sc (26)Fasten off the white yarn and weave in the ends securely. We’re done with the color changes for the belly!
Key3
- dec
- decrease (single crochet 2 stitches together)
- sc
- single crochet
- CC
- change color
Rnd 9: This round forms the wings. Ensure they are symmetrical. Adjust with slip stitches if needed before starting.
7 sc, in FLO of next st: 1 sc, ch 7, starting from the 3rd ch from hook: 5 dc, in FLO of same st as previous sc: 1 sc, 3 sc through both loops, in BLO of next 2 sts: 2 sc, 3 sc through both loops, in FLO of next st: 1 sc, ch 7, starting from the 3rd ch from hook: 5 dc, in FLO of same st as previous sc: 1 sc, 7 sc through both loops (26)
Your owl is growing wings! How lovely!
- Round 10
7 sc, in BLO of Rnd 8 (underneath the wings): 2 sc, 4 sc through both loops, inc, 3 sc, in BLO of Rnd 8 (underneath the wings): 2 sc, 7 sc through both loops (27)
Key3
- inc
- increase (2 sc in same stitch)
- BLO
- back loop only
- sc
- single crochet
- Rounds 11–12
27 sc (2 rounds) Start stuffing the body firmly as you go. Make sure it’s evenly filled!
Key1
- sc
- single crochet
- Round 13
\ 2 sc, dec\ \*6, 1 sc, dec (20)
Key2
- dec
- decrease (single crochet 2 stitches together)
- sc
- single crochet
- Round 14
\ 2 sc, dec\ \*5 (15)Insert safety eyes between Rnds 12 and 13, with 5 stitches visible between them. Adjust placement until you love it!
Key2
- dec
- decrease (single crochet 2 stitches together)
- sc
- single crochet
Rnd 15: This round creates the ears. Ensure they are symmetrical. Adjust with slip stitches if needed.
1 sc, dec, 1 sc, (1 sc, ch 3, starting from the 2nd ch from hook: 1 sc, 1 sc in the base stitch) – all in one stitch, \ dec, 1 sc\ \*2, dec, (1 sc, ch 3, starting from the 2nd ch from hook: 1 sc, 1 sc in the base stitch) – all in one stitch, 1 sc (11)
Almost there! The ears give our owl so much character.
- Round 16
In this round, we will skip the stitches that form the ears. 5 dec, 1 sc (6)Fasten off, leaving a long tail. Thread the tail onto your tapestry needle and weave it through the front loop of the remaining 6 stitches. Pull tight to close the opening. Weave in the end.Score: 0 Can you guess this Pattern?
Key2
- dec
- decrease (single crochet 2 stitches together)
- sc
- single crochet
Making up
- Step 1Now for the fun part – bringing all those lovely stitches to life!
- Step 2Facial Sculpting (Eye Indentations):
- Step 3Using a strong piece of embroidery floss or matching yarn, insert your needle into the color change line between Rnds 1 and 2 of the body (let's call this Point 1). Bring the needle out just to the right of the left eye (Point 2). Insert the needle just to the left of the left eye (Point 3) and bring it out at Point 4, which is one stitch away from Point 1, towards the front. Gently pull the thread to create a slight indentation around the left eye, then tie a knot at Point 1 and Point 4, securing it.
- Step 4Repeat for the right eye: Insert the needle into Point 1 again, bring it out just to the left of the right eye (Point 5). Insert the needle just to the right of the right eye (Point 6) and bring it out at Point 1. Gently pull to create the indentation for the right eye. Tie a knot at Point 1 to secure. Hide the tails inside the body.
- Step 5Embroidering the Beak:
- Step 6Using your accent color yarn, insert your tapestry needle into Point 1 (the center of the color change line). Bring it out at Point 2 (the center point between the eyes, usually between Rnds 12 and 13). Make two more stitches from Point 1 to Point 2 to build up the beak.
- Step 7Next, insert your needle into Point 1 again and bring it out at Point 3 (a stitch to the left of Point 2). Make two stitches from Point 1 to Point 3.
- Step 8Now, bring your needle from Point 3 to Point 2, passing the yarn under the existing stitches to fill out the beak shape. Return to Point 2, then bring the needle back to Point 1. Tie a knot and hide the tails.
- Step 9Embroidering Eyelids:
- Step 10Using your accent color yarn, embroider a small, curved line of two stitches just above each safety eye. This gives your owl a sleepy, sweet expression.
- Step 11Securing the Legs:
- Step 12While the legs are already attached, sometimes they can splay out a bit. To give your owl more stability and a polished look, use a few small stitches of matching yarn to gently secure the sides of each leg to the bottom of the body. This helps them stay neatly positioned.
Notes from the pattern
- A 4.0 mm hook with chenille or plush yarn can feel tighter than the same hook used with smooth yarn; keep tension consistent so the fabric stays dense enough to hide stuffing.
- Place a stitch marker in the first stitch of every round, since the piece is worked in continuous spirals with no joining slip stitch, and move the marker up as each round is completed.
- Check that the white or cream section is centred on the belly as instructed partway through the body rounds, adjusting with slip stitches before continuing if it has drifted off-centre.
- Stuff firmly before closing the legs and before finishing the body, since the plush yarn's loft can mask thin spots that would otherwise show through a less textured fabric.
The essentials
- Rounds
- 15
- Parts
- 2
- Level
- Beginner
- Time
- 3-5 hours
- Hook
- 4.0 mm
- Yarn
- Worsted (chenille/plush)
Stitches you will use
- Front loop only and remaining loop crochet Used in Rnd 1 of the body to join both legs; working into the wrong loop will distort the seam where leg meets body.
- Invisible increases and decreases Shapes the legs across their three rounds and the body across its twelve; check stitch counts against those given after each round.
- Needle sculpting with embroidery floss Used in the Putting It All Together step to pull eye indentations into the stuffed head; keep tension even on both sides to avoid a lopsided face.
Troubleshooting
The legs do not sit flat once folded
The fold line was not aligned with the Rnd 3 stitches before seaming; fold at the marked point and work the 4 closing stitches evenly through both layers on each side.
The white belly patch ends up off-centre
The colour change was started at the wrong point relative to the back marker; check placement after the early body rounds as instructed and shift with slip stitches before working further.
The eyes look uneven after sculpting
Floss tension was pulled unevenly between the marked points; redo the sculpting stitch with gentle, even tension and compare both sides before trimming the floss.
Substituting yarn
- Acrylic chenille or plush yarn, similar weight
- Keeps the same soft texture and stitch definition as the recommended yarn; hook stays at 4.0 mm and the 18g/5g amounts given remain a close match.
- Cotton, DK weight, non-plush
- Gives firmer stitches and a visible rather than fuzzy surface, which makes the front-loop and remaining-loop body join easier to see; a slightly smaller hook, around 3.5 mm, helps keep stitches tight enough to hide stuffing.
- Wool-blend, worsted weight
- Adds warmth and a light halo with good stitch definition; the 4.0 mm hook still works, but check the finished piece for felting risk before washing.
Washing and care
- Hand wash in cool water only, since plush and chenille fibres can shed or flatten under machine agitation; reshape the owl gently while still damp.
- Air dry flat away from direct heat, brushing the pile back into shape once dry, and store the finished owl somewhere dry to stop the plush texture from being crushed flat.
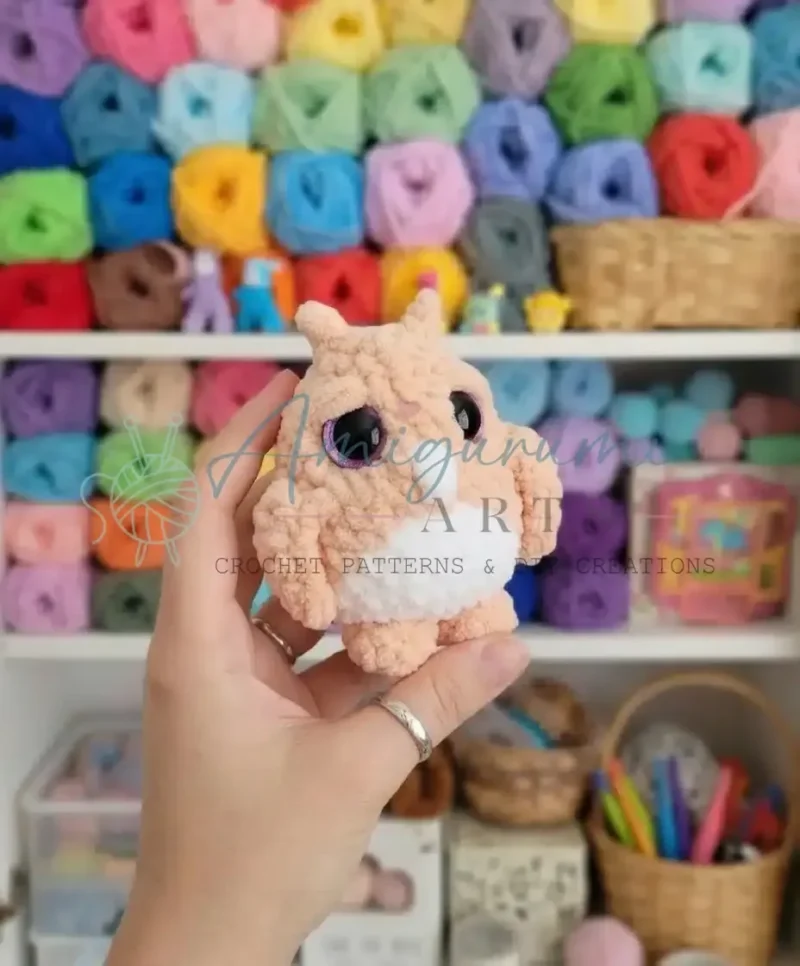
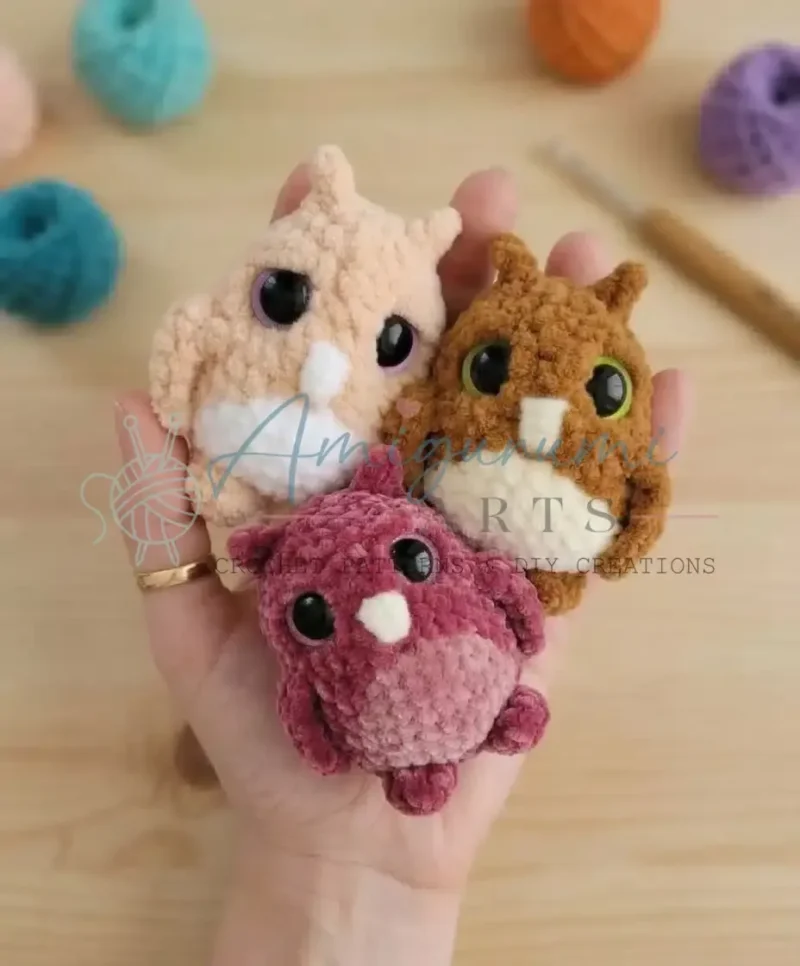
The photographs taken while this was being made
Every one was taken by whoever published the pattern, in the order the source listed them.
FAQs
Questions
Can this pattern be made with a standard smooth yarn instead of plush yarn?
Yes, though the finished owl will look less velvety and the stitch definition will show more clearly. A smooth yarn also makes the front-loop and remaining-loop join on the body easier to see and position.
What size safety eyes does this pattern use?
The pattern calls for 16-18mm safety eyes, and either size suits the finished owl without needing any adjustment. Choose based on how prominent the eyes should look against the face.
Is this pattern written in US or UK crochet terms?
It is written in US terminology throughout, so single crochet refers to the stitch UK crocheters call double crochet. No other term substitutions are needed elsewhere in the pattern.
How much yarn does one owl take?
About 18g of the main colour, 5g of white or cream for the belly, plus small amounts of an accent colour for the eyelids and beak. These amounts assume a plush or chenille-style yarn worked at a tight gauge.
Why is the piece worked in continuous spirals rather than joined rounds?
Continuous spirals avoid a visible seam line and keep the amigurumi shape smooth, which matters on a piece this small. A stitch marker placed in the first stitch of each round and moved up every round keeps track of where each round begins.
These answers came from whoever first published the pattern, kept word for word.