 EVERY CROCHET
 Amigurumi 8 rounds No account, no download
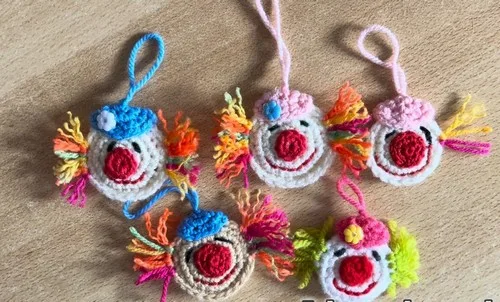
Crochet clown head with hat, hair and nose details
Amigurumi clown head in single crochet (UK: double crochet), with hat, nose and hair details. US and UK terms given.
- Skill
- Intermediate
- Time
- 4-6 hours
- Yarn weight
- DK
- Hook
- 2 mm

Intermediate
What the original write-up called it. Nothing here is graded again.

DK
What the sample was worked in. Any weight works; the size moves with it.

4-6 hours
What the original page reckoned. Your own pace is the one that matters.
About this pattern
This is an amigurumi clown head made from a cream face, a two-piece red nose, and a colourful hat, all worked in single crochet (UK: double crochet) from a magic ring. The nose pieces are joined by single crocheting their edges together, and the hat increases to 18 stitches before closing. A 2 mm hook suits the cotton nose, while a 3 mm hook suits the wool face and hat.
This clown head is a small amigurumi project built from several separate crocheted pieces: a cream face, a red nose worked as two identical discs, and a colourful hat. All the shaping relies on single crochet (UK: double crochet), the dense stitch that gives amigurumi its firm, gap-free surface and allows stitch counts to increase in tight, controlled steps. Two different hook sizes keep the fabric equally tight across the cotton nose and the wool face and hat, which use different yarn weights.
The nose is worked as two identical flat pieces, each starting from a magic ring and increasing to 12 stitches over two rounds, then joined by single crocheting around the paired edges and closing with a slip stitch — the same build-and-join method used for many amigurumi shapes. The hat begins the same way, increasing to 18 stitches by round three before being slip stitched shut and sewn to the head using the long tail left for that purpose.
Materials
Yarn
- Cream or white yarn (for the face)
- Colorful wool yarn (for the hat and fringe)
- Plain colored yarn (optional contrast)
- Red yarn (cotton or wool for nose)
- Small scraps for embellishments
- Two cotton yarns for embroidering eyes
Tools
- 2 mm crochet hook (for cotton yarn nose)
- 3 mm crochet hook (for the face and hat)
- Thin crochet hook (for weaving ends)
- Stitch markers
- Scissors
- Sewing needle
- Hot glue gun (optional for beads)
- Ruler
- Decorative beads (optional)
The list is the pattern's own wording.
Instructions
Every round is printed as the pattern wrote it, brackets and all. Open the key beside a round to see only the short forms that round uses.
Make Two Identical Pieces
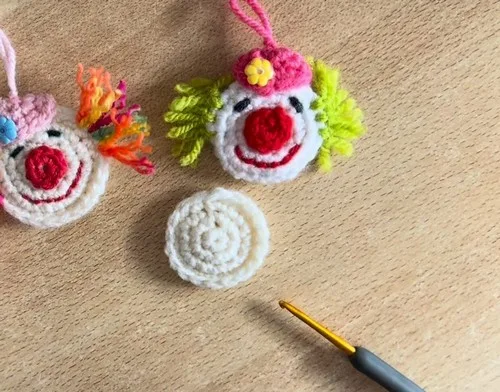
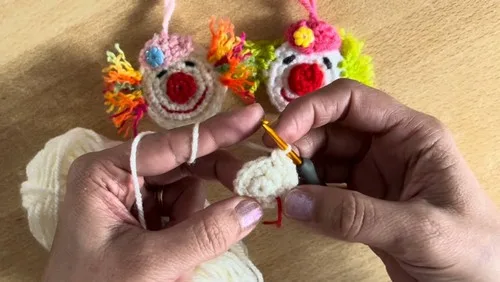
Use cream yarn and a 3 mm hook Make a magic ring
- Round 1
6 sc into the ring
Key1
- sc
- single crochet
- (12)Round 2
2 sc in each stitch (12 stitches)
Key1
- sc
- single crochet
- Round 3
1 sc, inc repeat around (18 stitches) For the first piece, fasten off For the second piece, do not fasten off
Key2
- inc
- increase
- sc
- single crochet
Crocheting the Hat
Use colorful yarn and 3 mm hook Make a magic ring
- Round 1
6 sc
Key1
- sc
- single crochet
- (12)Round 2
2 sc in each stitch (12 stitches)
Key1
- sc
- single crochet
- Round 3
1 sc, inc repeat around (18 stitches) Slip stitch to close, leave a long tail for sewing
Key2
- inc
- increase
- sc
- single crochet
Crocheting the Nose
Use red yarn and 2 mm hook Make a magic ring
- Round 1
6 sc
Key1
- sc
- single crochet
- (12)Round 2
2 sc in each stitch (12 stitches) Fasten off first nose piece Make second piece and leave a long tail for sewing and embroidering the mouth
Key1
- sc
- single crochet
Making up
- Step 1Place both pieces together
- Step 2Single crochet around the entire edge, joining the two
- Step 3Slip stitch to close
- Step 4Cut and pull the yarn through
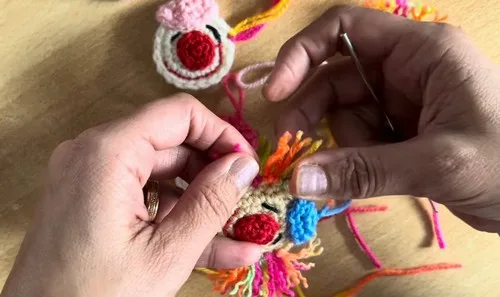
- Step 5Attach the hat using small stitches
- Step 6Create a hanging loop at the top of the hat
- Step 7Sew the nose pieces together and then onto the face
- Step 8Embroider the mouth in a curved smile
- Step 9Embroider the eyes with slight slants for expression
- Step 10Cut strands of colorful yarn (~13 cm) for the fringe hair
- Step 11Fold in half and pull the loop through a stitch
- Step 12Pull yarn ends through the loop to knot
- Step 13Fray the yarn (optional) and trim to shape
- Step 14 (optional)Use a hot glue gun to add small beads onto the hat for a festive, decorative look
Notes from the pattern
- The two nose pieces must match in size before joining; the long tail left on the second piece is used both for sewing and for embroidering the mouth, so leave it generous.
- Rounds are worked continuously without joining slip stitches, except where the hat closes with a slip stitch in Round 3, so a stitch marker at the start of each round helps prevent miscounting on the face and nose.
- The hat increases from 6 to 12 to 18 stitches over three rounds, worked in colourful wool with the same 3 mm hook as the cream face, so keep tension consistent between the two yarns.
The essentials
- Rounds
- 8
- Parts
- 3
- Level
- Intermediate
- Time
- 4-6 hours
- Hook
- 2 mm
- Yarn
- DK
Stitches you will use
- Magic ring Used to start the face, both nose pieces and the hat; pull the tail firmly so no hole remains at the centre once stitches are worked.
- Single crochet increases (UK: double crochet increases) Used through nose Round 2 and hat Rounds 2-3 to shape flat discs; space increases evenly around the round so the piece lies flat rather than cupping.
- Edge joining with single crochet Used to join the two nose pieces around their paired edge; check both pieces have matching stitch counts before starting the join round.
Troubleshooting
The two nose pieces do not line up when joined.
One piece has likely gained or lost a stitch during the increase round; count stitches at the end of Round 2 (should be 12) on both pieces before starting the joining round.
The hat disc cups instead of lying flat.
The increases in Round 3 have bunched together rather than spread evenly; check the piece against the previous round's stitch count and redistribute the increases evenly around the round.
The nose feels loose or floppy after joining.
The cotton yarn was worked too loosely at the 2 mm hook or the joining round was spaced too far apart; rework the join with tighter, even tension using the smaller hook consistently on both pieces.
Substituting yarn
- Acrylic, worsted (UK: aran) weight
- Keeps roughly the same weight as the cream face yarn but drapes softer; no change needed to the 3 mm hook.
- Wool blend, DK weight
- Substituting for the colourful hat yarn keeps stitches easy to read but may need a slightly smaller hook, around 2.5-3 mm, to keep the hat firm.
- Mercerised cotton, 4-ply
- Substituting for the red nose yarn keeps crisp stitch definition at the 2 mm hook but produces a slightly smaller finished nose than the pattern's stated stitch counts suggest.
Washing and care
- Hand wash the wool hat and cream face pieces in cool water, since wool can felt under heat and agitation; reshape while damp and dry flat.
- The cotton nose piece can be wiped clean or hand washed separately from the wool parts, and the finished head should be stored flat or loosely stuffed with tissue to keep its round shape rather than folded.
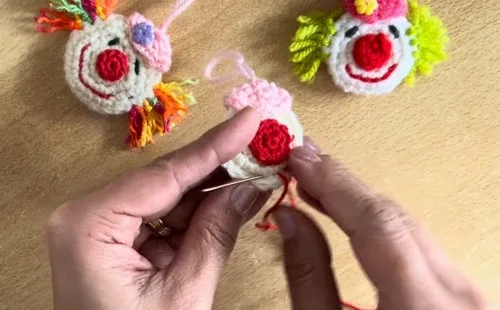
The photographs taken while this was being made
Every one was taken by whoever published the pattern, in the order the source listed them.
FAQs
Questions
What hook size does each part use?
The cream face and colourful hat are worked with a 3 mm hook, while the red cotton nose uses a smaller 2 mm hook for tighter stitch definition. A thin hook is kept aside separately for weaving in ends once pieces are finished.
Why are two identical nose pieces made instead of one?
The nose is built as two flat discs, each increased to 12 stitches, then placed together and single crocheted around the edge to form a rounded shape. The long tail left on the second piece is also used afterwards to embroider the mouth.
Are the eyes crocheted or embroidered?
The eyes are embroidered rather than crocheted, using two separate cotton yarns for definition. This happens after the main pieces are joined, using a sewing needle.
What are the decorative beads and hot glue gun for?
Both are listed as optional extras for embellishing the finished clown head, such as adding decorative beads to the hat or hair. Neither is required to complete the core pattern.
Does the pattern use UK or US crochet terms?
The instructions use US terms throughout, so single crochet (UK: double crochet) is the main stitch named in the rounds. Where it matters, the UK equivalent is given once for clarity.
These answers came from whoever first published the pattern, kept word for word.