 EVERY CROCHET
 Amigurumi 61 rounds No account, no download
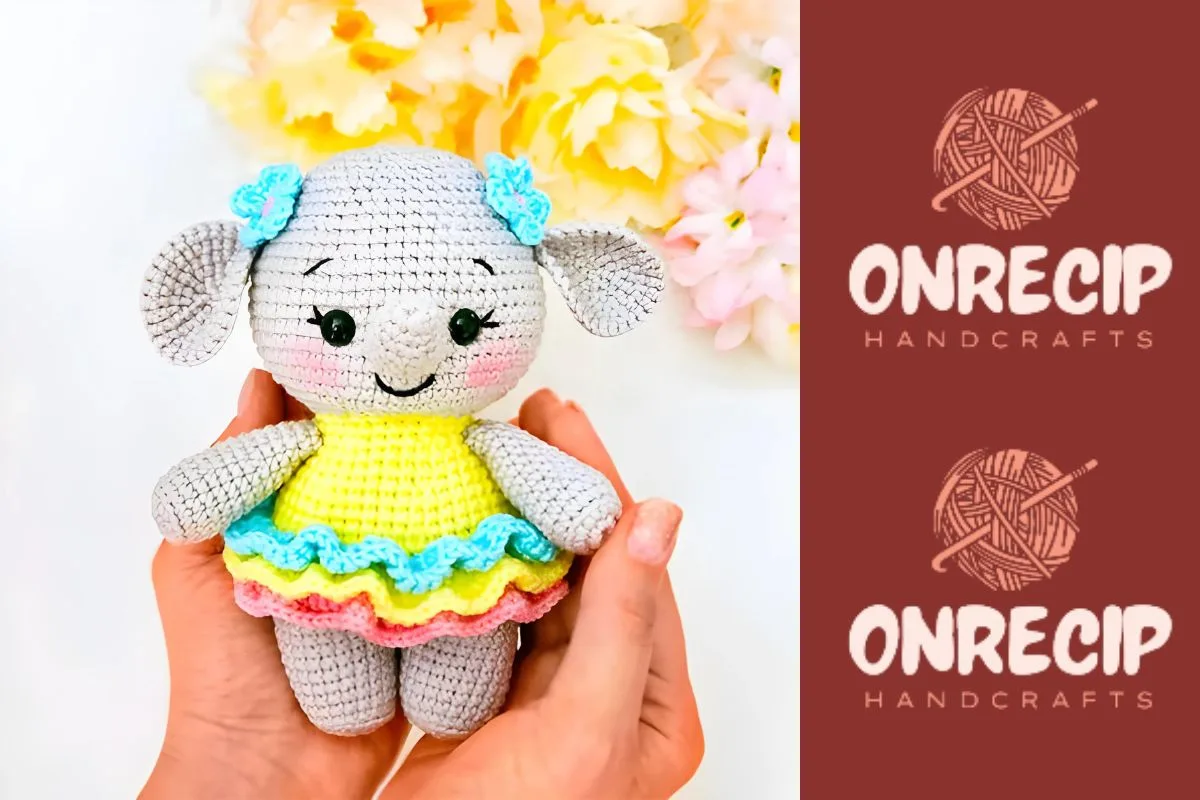
Crochet elephant in a dress amigurumi pattern
Amigurumi elephant pattern using single crochet (UK double crochet); US and UK stitch terms both given throughout.
- Skill
- Intermediate
- Time
- 4-6 hours
- Yarn weight
- Sport
- Hook
- 8 mm

Intermediate
What the original write-up called it. Nothing here is graded again.

Sport
What the sample was worked in. Any weight works; the size moves with it.

4-6 hours
What the original page reckoned. Your own pace is the one that matters.
About this pattern
A crocheted elephant amigurumi wearing a small dress, made in sport-weight yarn with a 2 mm hook and 8 mm safety eyes. The body, head, limbs, ears and trunk are worked in single crochet (UK double crochet) in continuous rounds, with the legs joined directly into the body rather than sewn. Firm stuffing throughout and careful colour changes on the body give the finished piece its shape and definition.
This elephant is worked almost entirely in single crochet (UK double crochet), the dense stitch family that gives amigurumi its firm, stuffing-tight fabric. A short row-count dress and small crocheted flowers add contrast in colour and texture, but the body, head, ears, trunk, arms and legs all rely on the same base stitch worked in continuous spiral rounds, which is what keeps the surface even and the shaping readable as it grows.
Construction starts from the limbs outward: legs are made first, and the right leg is left unfastened so the body can be built directly onto it, joining the left leg in the same round. The head, ears and trunk are worked separately and sewn on afterwards, with the trunk position anchored across two rounds so it sits centrally and can be bent upward once attached. The dress is added last, as a short two-round piece rather than a garment worked in the round from the neck down.
Materials
• Sport yarn
- Grey (Alize Cotton gold 200)
- Pink (YarnArt Jeans 42 )
- Yellow (YarnArt Jeans 67)
- Blue (YarnArt Jeans 76)
- Black thread to embroider the face
- Safety eyes 8 mm
- Crochet hook 2 mm
- Stuffing (Polyester fiber fill)
The list is the pattern's own wording.
Instructions
Every round is printed as the pattern wrote it, brackets and all. Open the key beside a round to see only the short forms that round uses.
Arms
Crochet with the grey yarn.
Stuff only 2/3 of the arm.
- Round 1
8 sc into a magic ring. (8)
Key1
- sc
- single crochet
- Round 2
8 inc. (16)
Key1
- inc
- increase
- Round 3
BLO: 16 sc. (16)
Key2
- BLO
- back loop only
- sc
- single crochet
- Rounds 4–5
16 sc (2 rounds). (16)
Key1
- sc
- single crochet
- Round 6
(6sc,dec)*2. (14)
Key1
- dec
- decrease
- Rounds 7–9
14 sc (3 rounds). (14)
Key1
- sc
- single crochet
- Round 10
(5sc,dec)*2. (12)
Key1
- dec
- decrease
- Rounds 11–13
12 sc (3 rounds). (12)
Key1
- sc
- single crochet
- Round 14
(4sc,dec)*2. (10)
Key1
- dec
- decrease
- Rounds 15–16
10 sc (2 rounds). (10)Fasten off and cut the yarn, leaving a tail for sewing.
Key1
- sc
- single crochet
Legs
Crochet with the grey yarn. Stuff as you go.
- Round 1
7 sc into a magic ring. (7)
Key1
- sc
- single crochet
- Round 2
7 inc. (14)
Key1
- inc
- increase
- Round 3
(sc,inc)*7. (21)
Key2
- inc
- increase
- sc
- single crochet
- Round 4
BLO: 21 sc. (21)
Key2
- BLO
- back loop only
- sc
- single crochet
- Rounds 5–10
21 sc (6 rounds). (21)For the left leg: Fasten off and cut the yarn.
Key1
- sc
- single crochet
For the right leg: Don't cut the yarn, we will continue with the body.
Body
Continue crocheting with the grey yarn.
- Round 1
Crochet 6 sc more on the right leg, join the left leg and crochet 21 sc on it. Crochet 21 sc on the right leg and put the marker here. (42)
Key1
- sc
- single crochet
- Round 2
inc, 18 sc, 4 inc, 18 sc, inc. (48)
Key2
- inc
- increase
- sc
- single crochet
- Rounds 3–5
48 sc (3 rounds). (48)Change the yarn to yellow color before Round 6.
Key1
- sc
- single crochet
- Round 6
BLO: 48 sc. (48)
Key2
- BLO
- back loop only
- sc
- single crochet
- Round 7
BLO: 48 sc. (48)
Key2
- BLO
- back loop only
- sc
- single crochet
- Round 8
BLO: 48 sc. (48)
Key2
- BLO
- back loop only
- sc
- single crochet
- Round 9
48 sc. (48)
Key1
- sc
- single crochet
- Round 10
(6sc,dec)*6. (42)
Key1
- dec
- decrease
- Rounds 11–12
42 sc (2 rounds). (42)
Key1
- sc
- single crochet
- Round 13
(5sc,dec)*6. (36)
Key1
- dec
- decrease
- Rounds 14–15
36 sc (2 rounds). (36)
Key1
- sc
- single crochet
- Round 16
(4sc,dec)*6. (30)
Key1
- dec
- decrease
- Round 17
30 sc. (30)
Key1
- sc
- single crochet
- Round 18
(3sc,dec)*6. (24)Stuff the body firmly, especially in the neck.Cut the yellow yarn, we will continue with the head, but first we need to finish the dress.
Key1
- dec
- decrease
Dress
Crochet with the body turned upside down.
Attach the pink yarn in the front loops of round 6 of the body for this first layer.
- Round 1
Ch 2, (2 dc in one st)*48, sl st. (96)
Key3
- sl st
- slip stitch
- ch
- chain
- dc
- double crochet
- Round 2
96 sc. (96)Make a sl st, fasten off and hide the yarn.Now attach the yellow yarn in the front loops of round 7 of the body and repeat the same 2 rounds.Make a sl st, fasten off and hide the yarn.Now attach blue yarn in the front loops of round 8 of the body and repeat the same 2 rounds.Make a sl st, fasten off and hide the yarn.
Key2
- sl st
- slip stitch
- sc
- single crochet
Head
Continue crocheting from the body. Change the yarn to grey color. Stuff as you go.
- Round 1
(sc,inc)*12. (36)
Key2
- inc
- increase
- sc
- single crochet
- Round 2
(2sc,inc)*12. (48)
Key1
- inc
- increase
- Round 3
(7sc,inc)*6. (54)
Key1
- inc
- increase
- Round 4
4 sc, inc, (8sc,inc)*5, 4 sc. (60)
Key2
- inc
- increase
- sc
- single crochet
- Rounds 5–12
60 sc (8 rounds). (60)
Key1
- sc
- single crochet
- Round 13
4 sc, dec, (8sc,dec)*5, 4 sc. (54)
Key2
- dec
- decrease
- sc
- single crochet
- Round 14
54 sc. (54)
Key1
- sc
- single crochet
- Round 15
(7sc,dec)*6. (48)
Key1
- dec
- decrease
- Round 16
48 sc. (48)Insert the safety eyes between rounds 8-9 with 9 sc between them. There must be 7 sc visible.
Key1
- sc
- single crochet
- Round 17
3 sc, dec, (6sc,dec)*5, 3 sc. (42)
Key2
- dec
- decrease
- sc
- single crochet
- Round 18
42 sc. (42)
Key1
- sc
- single crochet
- Round 19
(5sc,dec)*6. (36)
Key1
- dec
- decrease
- Round 20
2 sc, dec, (4sc,dec)*5, 2 sc. (30)
Key2
- dec
- decrease
- sc
- single crochet
- Round 21
(3sc,dec)*6. (24)
Key1
- dec
- decrease
- Round 22
(sc,dec)*8. (16)
Key2
- dec
- decrease
- sc
- single crochet
- Round 23
8 dec. (8)Make sure that the head is stuffed firmly.Close the opening and hide the yarn inside.Using a black thread embroider the eyebrows in round 12. Embroider the mouth in round 5.
Key1
- dec
- decrease
Color the cheeks with pink blush.
Ears
Crochet with the grey yarn.
- Round 1
6 sc into a magic ring. (6)
Key1
- sc
- single crochet
- Round 2
6 inc. (12)
Key1
- inc
- increase
- Round 3
(sc,inc)*6. (18)
Key2
- inc
- increase
- sc
- single crochet
- Round 4
sc, inc, (2sc,inc)*5, sc. (24)
Key2
- inc
- increase
- sc
- single crochet
- Round 5
(3sc,inc)*6. (30)
Key1
- inc
- increase
- Round 6
30 sc. (30)Fold the ear in half and crochet 2 sc through both sides.Fasten off and cut the yarn, leaving a tail for sewing.
Key1
- sc
- single crochet
Trunk
Crochet with the grey yarn. Stuff a little.
- Round 1
8 sc into a magic ring. (8)
Key1
- sc
- single crochet
- Round 2
8 sc. (8)
Key1
- sc
- single crochet
- Round 3
(3sc,inc)*2. (10)
Key1
- inc
- increase
- Rounds 4–5
10 sc (2 rounds). (10)
Key1
- sc
- single crochet
- Round 6
(4sc,inc)*2. (12)
Key1
- inc
- increase
- Rounds 7–9
12 sc (3 rounds). (12)Make a sl st, fasten off and cut the yarn, leaving a tail for sewing.
Key2
- sl st
- slip stitch
- sc
- single crochet
Flowers
Start crocheting with the pink yarn.
- Round 1
5 sc into a magic ring.Change the yarn to blue color before Round 2.
Key1
- sc
- single crochet
- Round 2
(ch 2, 2 dc, ch 2, sl st)*5.Fasten off and cut the yarn, leaving a tail for sewing.
Key3
- sl st
- slip stitch
- ch
- chain
- dc
- double crochet
Making up
- Step 1Sew the arms to the body between rounds 16-17.
- Step 2Sew the ears to the sides of the head in round 15.
- Step 3Sew the trunk to the head in rounds 7-8. Bend it upwards.
- Step 4Sew the flowers near the ears.
Notes from the pattern
- Use the 2 mm hook consistently across all parts; amigurumi worked at this gauge relies on a tight fabric to hide stuffing, so a looser hook will show gaps between stitches.
- Place a stitch marker at the start of the body round after the leg join, since the spiral has no natural round marker and losing the start point makes later shaping (increases, BLO rounds) hard to place accurately.
- Stuff the arms only two-thirds full so they stay soft and posable, but stuff the body firmly, especially at the neck, to support the weight of the head once assembled.
- Change to yellow before round 6 of the body cleanly at the round's start, and secure both yarn ends afterwards so the colour transition does not stretch out of line as the piece is stuffed.
The essentials
- Rounds
- 61
- Parts
- 8
- Level
- Intermediate
- Time
- 4-6 hours
- Hook
- 8 mm
- Yarn
- Sport
Stitches you will use
- Joining pieces mid-round The body begins by crocheting across the right leg, joining the left leg, then continuing around both; keep tension even where the two legs meet or the join will pucker.
- Back loop only (BLO) rounds Used on the arms, legs and twice on the body to create a visible ridge marking a shape change; work into the back loop only and leave the front loop free.
Troubleshooting
The join between the legs and the body
This usually happens when the six extra stitches crocheted on the right leg before joining the left leg are worked at a looser tension than the rest of the round; slow down at the join and keep stitches snug.
The BLO ridge rounds on the arms, legs
This means the front loop was accidentally caught along with the back loop; check that only the back loop is picked up on that round, working slightly more slowly if needed.
The head sits crooked or leans once the
The trunk is anchored across rounds 7-8 and the ears at round 15, so if these are sewn at uneven heights on either side the head will tilt; mark both attachment points before sewing and check they sit level.
Substituting yarn
- Cotton, DK weight
- Produces a slightly larger, firmer elephant than the sport-weight original; move up to a 2.5 mm hook to keep the fabric dense enough to hold stuffing.
- Acrylic, sport weight
- Matches the original size and hook closely, giving a lighter, more affordable alternative with similar stitch definition, though drape will be a touch stiffer.
- Cotton-acrylic blend, sport weight
- Keeps the pattern's stated 2 mm hook and stitch count unchanged while giving a softer handle than pure cotton, useful if the toy is for a young child.
Washing and care
- Both the cotton and acrylic-blend yarns used here can generally be hand washed in cool water; avoid soaking for long periods since the polyester stuffing can take a while to dry through completely.
- Reshape the elephant while damp, gently pressing the body, ears and trunk back into form, then lay it flat away from direct heat to dry and store it stuffed rather than flattened to keep its shape.
FAQs
Questions
Can the dress be left off?
Yes, the two-round dress is added after the body is complete and is not structural, so the elephant is fully finished without it. Skipping it simply leaves the grey and yellow body visible.
Why is the right leg not fastened off like the left?
The right leg's yarn is left attached so round 1 of the body can be crocheted directly from it, joining the left leg in the same round. This avoids a separate seam between the legs and the body.
Is a smaller hook than 2 mm usable for a tighter finish?
A smaller hook will tighten the fabric further and hide stuffing well, but it will also reduce the finished size slightly and make each round more effort to work through. The stated 2 mm hook is calibrated to the sport-weight yarn used throughout.
Where exactly does the trunk attach?
The trunk is sewn to the head across rounds 7-8, then bent upward once secured. Marking these two rounds before sewing helps keep the trunk centred.
How firm should the body stuffing be compared to the arms?
The body should be stuffed firmly, especially at the neck, since it carries the head's weight, while the arms are only stuffed two-thirds full to stay soft and bendable. This difference in firmness is intentional and affects how the finished toy poses.
These answers came from whoever first published the pattern, kept word for word.