 EVERY CROCHET
 Amigurumi 3 rounds No account, no download
Snowman amigurumi crochet pattern with hat and scarf
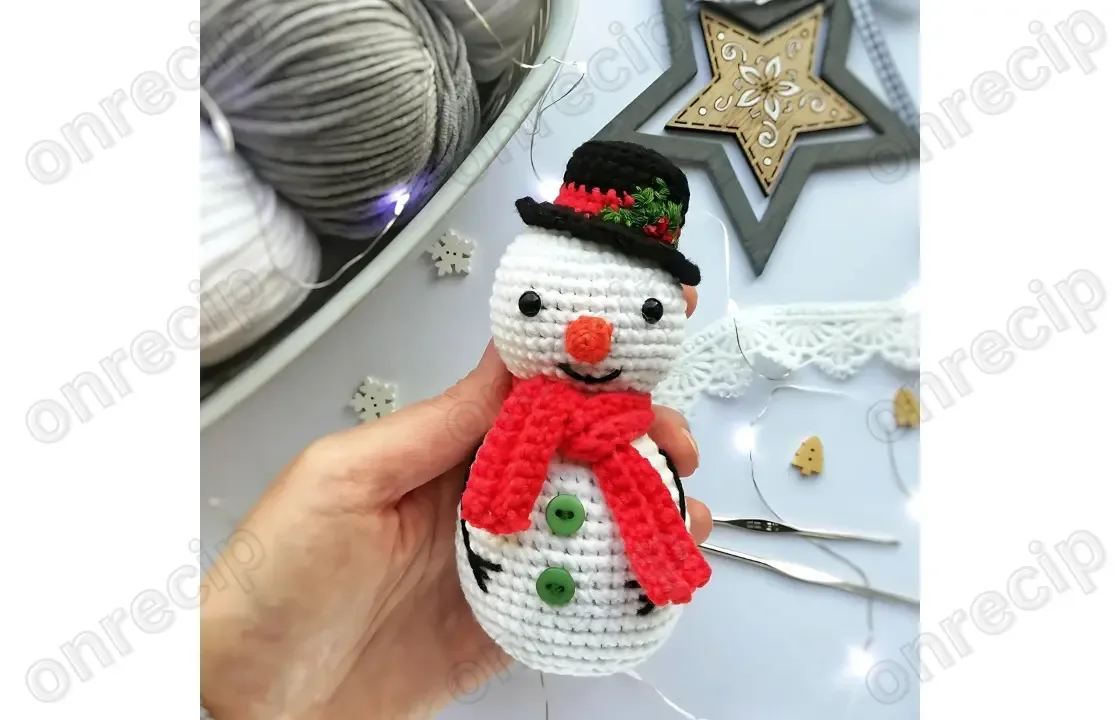
Single crochet (UK double crochet) snowman amigurumi with hat, scarf and carrot nose; US and UK stitch terms both given.
- Skill
- Intermediate
- Time
- 4-6 hours
- Yarn weight
- Sport
- Hook
- 1.75 mm

Intermediate
What the original write-up called it. Nothing here is graded again.

Sport
What the sample was worked in. Any weight works; the size moves with it.

4-6 hours
What the original page reckoned. Your own pace is the one that matters.
About this pattern
This is a crocheted snowman amigurumi worked in single crochet (UK double crochet) with a 1.75 mm hook, two yarn weights, 6 mm safety eyes, two buttons and black embroidery floss. The pattern builds a head and body, a separate hat, a scarf, and a carrot nose, then joins them by sewing. Expect several hours of continuous single-crochet rounds, careful eye placement, and firm stuffing throughout.
This snowman amigurumi is worked almost entirely in single crochet (UK: double crochet), the firm, dense stitch family that amigurumi depends on to hold its round shape and keep fibrefill from showing through the fabric. The finished toy is built from four separate pieces — the head and body, a carrot nose, a knitted-look hat, and a scarf — each worked before being joined by hand. Two buttons and black embroidery floss finish the face and front, alongside a pair of 6 mm safety eyes.
Construction starts unusually for amigurumi: rather than a magic ring, round 1 works back loop only (BLO) across a foundation chain, which leaves a neat ridge of front loops free for a later seam or trim. The head decreases from round 10 to round 11 down to 48 stitches, with the 6 mm safety eyes inserted between those two rounds, spaced eight stitches apart. Each section — head, hat, scarf and carrot — is finished separately and stuffed before the hat is sewn to the head using round 10 as the attachment line.
Materials
Yarn
- YarnArt Jeans (white, black, red), YarnArt Begonia (orange)
- Hook size: 1.75 mm
- 6 mm safety eyes
- Two buttons
- Black embroidery floss
- Sewing needle and scissors
- Fiberfill
The list is the pattern's own wording.
Instructions
Every round is printed as the pattern wrote it, brackets and all. Open the key beside a round to see only the short forms that round uses.
R 1
- Round 1
From the 2nd ch from hook: BLO 52 sc, turn
Key3
- blo
- back loops only
- ch
- chain
- sc
- single crochet
R 7
- Rounds 8–14
42 sc (7 rows) Insert safety eyes between R 10 and R 11 at the distance of 8 st from each other.
Key3
- st
- stitch
- sc
- single crochet
- R
- round
R 10
- Round 11
48 sc F.o. Stuff with fiberfill. Sew the hat to the head using the R 10 of the hat.
Key2
- sc
- single crochet
- R
- round
Carrot
R 4
1 sc, inc, (2 sc, inc)*5, 1 sc (24)
R 6
2 sc, inc, (4 sc, inc)*5, 2 sc (36)
R 16
2 sc, dec, (4 sc, dec)*5, 2 sc (30)
R 18
1 sc, dec, (2 sc, dec)*5, 1 sc (18)
R 20
Stuff with fiberfill.
R 22
2 sc, inc, (4 sc, inc)*5, 2 sc (36)
R 26
3 sc, inc, (6 sc, inc)*5, 3 sc (48)
R 36
3 sc, dec, (6 sc, dec)*5, 3 sc (42)
R 38
2 sc, dec, (4 sc, dec)*5, 2 sc (30)
R 40
1 sc, dec, (2 sc, dec)*5, 1 sc (18)
R 41
Finish stuffing.
R 42
F.o.
Hat
With black yarn:
R 4
1 sc, inc, (2 sc, inc)*6, 1 sc (24)
R 6-7
24 sc (2 rows) Change to red yarn:
R 8-9
24 sc (2 rows) Change to black yarn:
R 3
(You can crochet the carrot in the back loop only).
F.o. and leave a long tail for sewing.
Scarf
With red yarn: Make 53 ch.
R 3
Assembly Embroider arms and mouth with black thread.
Sew buttons on the belly. Decorate the hat with some applique or embroidery.
Designed and photos by @fayni_toys Translated by onrecip Enjoy!
Notes from the pattern
- The 1.75 mm hook is small for the yarn weight used, which is what keeps the fabric tight enough that fibrefill will not peek through between stitches.
- Place a stitch marker at the start of every round from round 1 onward; because the body is a continuous spiral with changing counts, it is easy to lose the round start without one.
- Insert the safety eyes between round 10 and round 11 before any stuffing goes in, counting eight stitches between them so the face reads evenly from the front.
- Stuff the head and body firmly as the rounds close in, particularly before the decrease at round 11, since access gets harder once the opening narrows.
The essentials
- Rounds
- 3
- Parts
- 22
- Level
- Intermediate
- Time
- 4-6 hours
- Hook
- 1.75 mm
- Yarn
- Sport
Stitches you will use
- Continuous spiral rounds The head and body are worked round after round without joining; a stitch marker at the start of each round prevents drift as the stitch count changes.
- Back loop only foundation round Round 1 works 52 single crochet into the back loop only of a foundation chain, which leaves the front loops free and needs even tension to lie flat.
- Safety eye placement before stuffing The 6 mm eyes go in between round 10 and round 11, spaced eight stitches apart, while the head is still open and the posts can be checked from inside.
Troubleshooting
The safety eyes sit uneven or too close together.
The eight-stitch spacing between round 10 and round 11 was not counted accurately; remove the eye and recount before pushing the post through again, checking from the right side before stuffing.
The starting edge rolls or cups instead of lying flat.
The back-loop-only round 1 leaves a ridge that can curl if the first few rounds are worked too loosely; keep tension firm through the first 3-4 rounds and the ridge settles flat once the piece is stuffed.
The hat tilts or sits off-centre once attached.
The hat was sewn to an uneven edge rather than the stated round; use round 10 of the hat as the guide and sew with even spacing all the way round to keep it level.
Substituting yarn
- Plain acrylic, DK or worsted weight
- Produces a larger finished snowman and a softer, more flexible fabric; size up the hook slightly and expect looser stitch definition, so stuffing needs to be firmer to compensate.
- Cotton or cotton-blend, 4-ply or fingering
- Gives a smaller, denser toy with crisp stitch definition and little stretch; drop down a hook size to match and use less stuffing since the fabric itself holds shape.
- Plush or chenille, worsted weight
- Adds a soft, fuzzy surface that hides stitch lines almost completely; a larger hook is usually needed, and extra stuffing is required because the bulky fibre compresses more than smooth yarn.
Washing and care
- Hand wash in cool water with a mild detergent and avoid wringing; press out excess water in a towel, then reshape the head, hat and scarf while damp and dry flat away from direct heat.
- Store the finished toy dry and uncompressed rather than packed tightly, since squashing a stuffed cotton-acrylic blend for long periods can flatten the shaping and loosen the safety eye posts over time.
FAQs
Questions
Can a magic ring replace the back loop only start in round 1?
Yes, though the pattern specifically works 52 single crochet into the back loop of a foundation chain to leave a textured front-loop ridge. A magic ring will close the base smoothly instead, which loses that ridge detail but still works structurally.
When should the safety eyes go in?
They are inserted between round 10 and round 11, spaced eight stitches apart, while the head is still open. Doing this before stuffing allows the posts to be checked and adjusted from inside.
Why does the head decrease to 48 stitches at round 11?
That decrease shapes the closing area at the top of the head and sets the point where the piece is fastened off and stuffed. It also establishes round 10 as the reference used later for attaching the hat.
How is the hat fixed to the head?
It is sewn on using round 10 of the hat as the placement guide. Matching that round keeps the brim level once the head has been rounded out with fibrefill.
Does the carrot nose need stuffing of its own?
Yes, the carrot is worked and finished as its own small piece and stuffed before being sewn onto the face. The hat and scarf are likewise completed separately before final assembly.
These answers came from whoever first published the pattern, kept word for word.