 EVERY CROCHET
 Amigurumi 58 rounds No account, no download
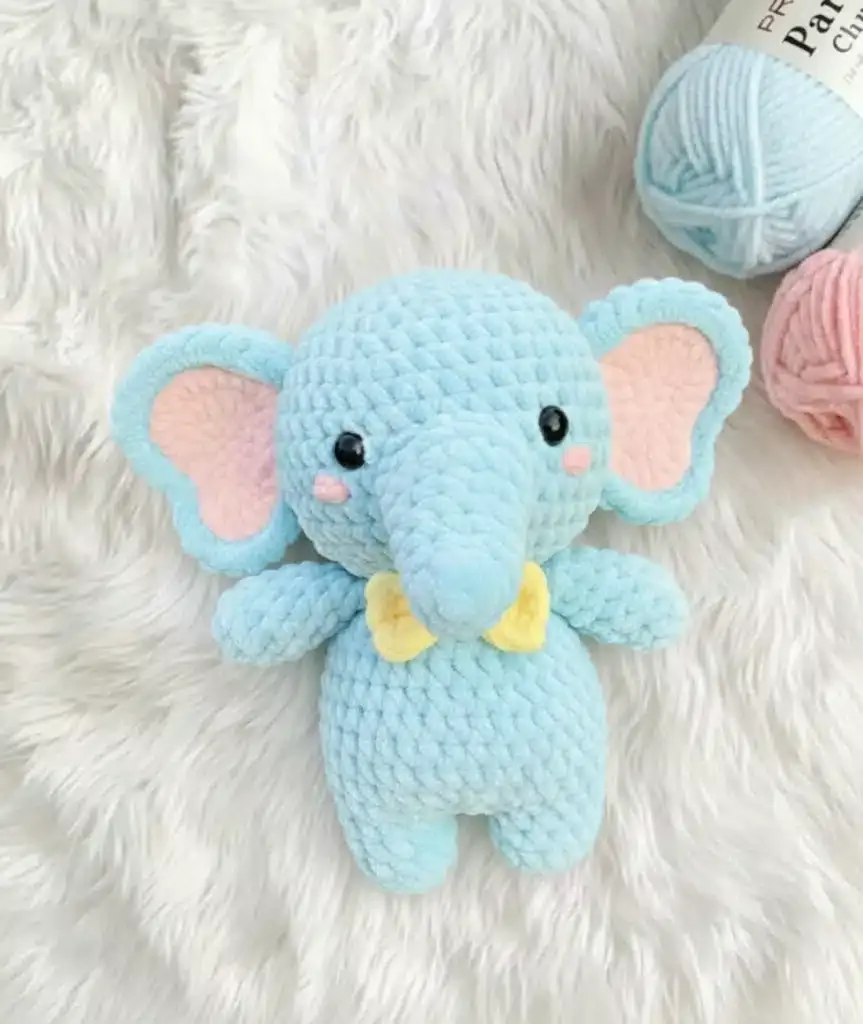
Crochet an amigurumi elephant in single crochet
Amigurumi elephant pattern in single crochet (UK double crochet); both US and UK stitch names are given throughout.
- Skill
- Intermediate
- Time
- 4-6 hours
- Yarn weight
- Worsted
- Hook
- 5 mm

Intermediate
What the original write-up called it. Nothing here is graded again.

Worsted
What the sample was worked in. Any weight works; the size moves with it.

4-6 hours
What the original page reckoned. Your own pace is the one that matters.
About this pattern
This is a stuffed elephant amigurumi made from seven separately crocheted parts—head, trunk, two ears, two legs, body and two arms—plus a small bow, worked in single crochet (UK double crochet) on a 4-5mm hook with Himalaya Dolphin Baby yarn. The head alone runs 13 rounds, and 12mm safety eyes are set between rounds 8 and 9 before the head is stuffed and joined to the body.
This elephant amigurumi is built entirely from single crochet (UK: double crochet), the dense, gap-free stitch that gives stuffed toys their firm, huggable shape and lets safety eyes and embroidery sit cleanly on the surface. Seven separate parts—head, trunk, two ears, two legs, body, two arms and a bow—come together into a soft, sculptural figure, with the wide-set eyes and big fanning ears that read instantly as elephant even at amigurumi scale.
Each piece is worked in continuous rounds from a magic ring, increasing steadily outward before levelling off, then fastened off and set aside; the head takes 13 rounds, the body 12, the trunk 10 and the ears 8. The trunk and ears are made separately and sewn on afterwards rather than crocheted directly into the head, which gives far more control over their curve and angle once stuffing and shaping are underway.
Materials
Crochet hook
- 4-5mm for chunky yarn
Yarn
- Himalaya Dolphin Baby (less than one skein per color)
Primary color
- Light Blue or Soft Gray for main body
Secondary color
- Pink for ears
Accent color
- Yellow or White for decoration
- Safety eyes: 12mm
Safety nose
- Optional (or use black yarn for embroidery)
Other supplies
- Fiberfill stuffing
- Stitch marker
- Yarn needle
- Scissors
The list is the pattern's own wording.
Instructions
Every round is printed as the pattern wrote it, brackets and all. Open the key beside a round to see only the short forms that round uses.
Head
Work in continuous rounds using Light Blue or Soft Gray yarn.
Fasten off and cut the yarn.
Eye Placement: Insert 12mm safety eyes between rounds 8-9, spacing them about 6-7 stitches apart for that characteristic wide-set elephant look.
Stuff the head firmly and fully before moving to the next section.
Nose: Using black yarn, embroider a small nose between rows 11-12 of the head. Alternatively, you can use a plastic safety nose if preferred.
Cheeks: With pink yarn, sew small blush marks on both cheeks to add extra cuteness to your elephant's face.
- Round 1
Mr 8sc. (8)
Key1
- Mr
- magic ring or make ch 2 and crochet into the first ch
- Round 2
8inc. (16)
- Round 3
(sc, inc)*8. (24)
Key2
- Inc
- increase
- Sc
- single crochet
- Round 4
(3sc, inc)*6. (30)
Key1
- Inc
- increase
- Round 5
2sc, inc, (4sc, inc)*5, 2sc. (36)
Key1
- Inc
- increase
- Round 6
(5sc, inc)*6. (42)
Key1
- Inc
- increase
- Round 7
42sc. (42)
- Round 8
42sc. (42)
- Round 9
42sc. (42)
- Round 10
42sc. (42)
- Round 11
(5sc, dec)*6. (36)
Key1
- Dec
- decrease (invisible dec)
- Round 12
(3sc, dec)*6. (24)
Key1
- Dec
- decrease (invisible dec)
- Round 13
sc, dec, (2sc, dec)*5, sc. (18)
Key2
- Dec
- decrease (invisible dec)
- Sc
- single crochet
Trunk
The trunk is worked separately and sewn on later, giving you better control over its positioning and curve.
Fasten off, leaving a long tail for sewing.
Stuff the trunk lightly with fiberfill to create a natural curved shape. Sew it to the center-front of the head between rows 9-11, positioning it to point slightly downward like a real elephant's trunk.
- Round 1
Mr 6sc. (6)
Key1
- Mr
- magic ring or make ch 2 and crochet into the first ch
- Round 2
6inc. (12)
- Round 3
12sc. (12)
- Round 4
12sc. (12)
- Round 5
12sc. (12)
- Round 6
12sc. (12)
- Round 7
12sc. (12)
- Round 8
12sc. (12)
- Round 9
(sc, dec)*4. (8)
Key2
- Dec
- decrease (invisible dec)
- Sc
- single crochet
- Round 10
8sc. (8)
Ears
Make two identical ears—these are signature elephant features, so make them generous in size.
Fasten off, leaving a long tail for sewing.
Do not stuff the ears. Keep them soft and floppy for an authentic elephant appearance. Sew both ears to the sides of the head between rows 5-8, positioning them to fan out slightly.
- Round 1
Mr 6sc. (6)
Key1
- Mr
- magic ring or make ch 2 and crochet into the first ch
- Round 2
6inc. (12)
- Round 3
(sc, inc)*6. (18)
Key2
- Inc
- increase
- Sc
- single crochet
- Round 4
(2sc, inc)*6. (24)
Key1
- Inc
- increase
- Round 5
24sc. (24)
- Round 6
24sc. (24)
- Round 7
(4sc, dec)*4. (20)
Key1
- Dec
- decrease (invisible dec)
- Round 8
20sc. (20)
Legs
The body is constructed by joining two legs and then working upward. Use Light Blue or Soft Gray yarn.
Leg 1: Fasten off and cut the yarn.
Leg 2: Do not cut the yarn. Continue by making 3 chains, then join to the first leg.
- Round 1
Mr 5sc. (5)
Key1
- Mr
- magic ring or make ch 2 and crochet into the first ch
- Round 2
5inc. (10)
- Round 3
10sc. (10)
- Round 4
10sc. (10)
Body
Fasten off, leaving a long tail to sew to the head.
Stuffing: This is crucial—stuff the body VERY well to achieve that adorable chubby appearance. The body should feel firm and rounded.
- Round 1
10sc + 3sc (first side of the chains) + 10sc + 3sc (other side of the chains). (26)
- Round 2
(3sc, inc)*6, 2sc. (32)
Key1
- Inc
- increase
- Round 3
32sc. (32)
- Round 4
32sc. (32)
- Round 5
32sc. (32)
- Round 6
32sc. (32)
- Round 7
32sc. (32)
- Round 8
32sc. (32)
- Round 9
(14sc, dec)*2. (30)
Key1
- Dec
- decrease (invisible dec)
- Round 10
30sc. (30)
- Round 11
(3sc, dec)*6. (24)
Key1
- Dec
- decrease (invisible dec)
- Round 12
Sc, dec, (2sc, dec)*5, sc. (18)
Key2
- Dec
- decrease (invisible dec)
- Sc
- single crochet
Arms
Create two arms using Light Blue or Soft Gray yarn.
- Round 1
Mr 4sc. (4)
Key1
- Mr
- magic ring or make ch 2 and crochet into the first ch
- Round 2
4inc. (8)
- Round 3
8sc. (8)
- Round 4
8sc. (8)
- Round 5
8sc. (8)
- Round 6
8sc. (8)
- Round 7
8sc. (8)Fasten off, leaving a long tail for sewing.
The arms can be left unstuffed for a floppy look, or you can add light stuffing if you prefer more structure. Sew both arms to the sides of the body at row 15.
Bow
Add a charming finishing touch with a simple yellow bow.
Fasten off and sew to the neck area between the head and body. Alternatively, create a small flower in yellow or pink for variety.
- Round 1
Mr 4sc. (4)
Key1
- Mr
- magic ring or make ch 2 and crochet into the first ch
- Round 2
4inc. (8)
- Round 3
(sc, inc)*4. (12)
Key2
- Inc
- increase
- Sc
- single crochet
- Round 4
12sc. (12)
Making up
- Step 1Head to Body: Using the tail left from body row 16, sew the head securely to the body
- Step 2Trunk: Position and sew the trunk centrally on the face between rows 9-11
- Step 3Ears: Attach both ears to the sides of the head between rows 5-8
- Step 4Eyes: Ensure safety eyes were inserted before final stuffing
- Step 5Arms: Sew arms to both sides of the body at row 15
- Step 6Bow/Collar: Add your decorative accent at the neck
- Step 7Final Check: Before declaring your elephant complete, check that all parts are firmly stuffed, especially the head and trunk. Add more fiberfill if needed.
Notes from the pattern
- The pattern calls for a 4-5mm hook with Himalaya Dolphin Baby yarn; using the smaller end of that range gives a tighter fabric that hides stuffing better across the head's 13 rounds.
- Every part is worked in continuous rounds rather than joined rounds, so a stitch marker moved up at the start of each round is the only reliable way to track where counts like the body's 12 rounds begin and end.
- Stuff the head and body generously and shape as the stuffing goes in rather than waiting until the final round is closed; leave the ears completely unstuffed so all 8 rounds stay soft and floppy.
- Three colours are used—main body, pink for the ears, and an accent for the bow—each under one skein, and each piece is worked in a single colour rather than carried mid-round, with colour joins made by sewing during assembly.
- Read through the entire pattern before picking up your hook.
- Stuff the head and body generously—more than you think! A chubby elephant is an adorable elephant
- Shape as you stuff rather than waiting until the end
- Take breaks and stay hydrated during session
- Use a stitch marker to track your rounds
- You can customize the size by adjusting yarn weight and hook size
- The finished elephant stands approximately 4-5 inches (10-13 cm) tall using the recommended Himalaya Dolphin Baby yarn and 4-5mm hook; to make it bigger use bulky yarn with a 5-6mm hook, or to make it smaller use thinner yarn with a 3-4mm hook.
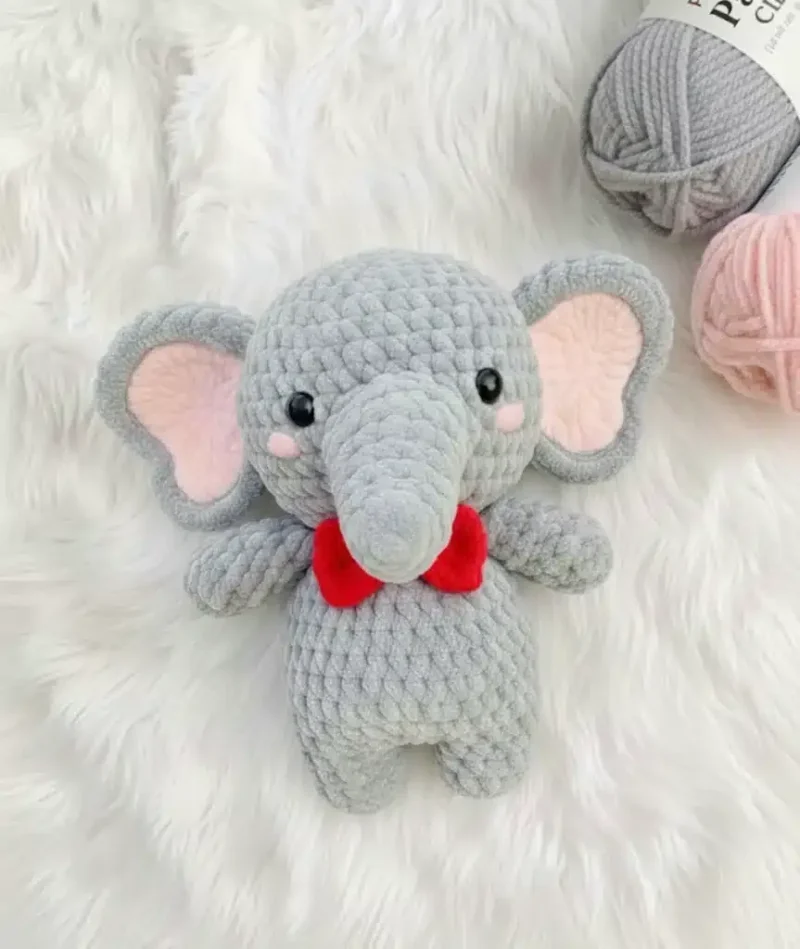
- color variations, try: Classic (Light Blue body, Pink inner ears, Yellow bow), Gray Elephant (Soft Gray body, White inner ears, Blue bow), Pink Elephant (Pale Pink body, White inner ears, Purple bow), or White Elephant (Off-white body, Blue inner ears, Pink bow).
The essentials
- Rounds
- 58
- Parts
- 7
- Level
- Intermediate
- Time
- 4-6 hours
- Hook
- 5 mm
- Yarn
- Worsted
Stitches you will use
- Invisible decrease (dec) Used to taper the head, ears, legs and arms as each part closes; work it loosely so the decrease round does not pull tighter than the rounds either side of it.
- Magic ring start (Mr) Every one of the seven parts begins with Mr, so a snug centre with no visible hole matters most on the head and body; keep a stitch marker in the first stitch of each round since the work is continuous, with no slip-stitch join.
- Safety-eye placement and part assembly 12mm eyes go in between rounds 8-9 of the head, spaced 6-7 stitches apart, and the trunk and ears are sewn on afterwards rather than joined in-round; mark eye positions before inserting so the finished face stays symmetrical.
Troubleshooting
The head or ears come out lumpy or
Uneven tension on the increase-heavy early rounds pushes some stitches forward; count stitches after each increase round to confirm the totals given (8, 16, 24, 30, 36 for the head) before continuing.
The trunk looks flat instead of curved
The trunk needs light stuffing across its 10 rounds to hold a curve, while the ears should stay unstuffed across all 8 rounds; sew the ears along a slightly wider arc at the base so they fan outward rather than lying flush.
The safety eyes look uneven once the head is fully stuffed.
Insert the 12mm eyes between rounds 8-9, spaced 6-7 stitches apart, and check placement against both side edges before pushing the backs on, since stuffing afterwards can shift the fabric and make an earlier placement look crooked.
The head feels too loose or floppy.
Decrease hook size or use thinner yarn for tighter tension.
The trunk won't hold its shape.
Add more fiberfill and consider stiffening with fabric starch.
The safety eyes keep falling out.
Use stronger thread and secure with multiple passes through the head.
The ears feel too stiff.
Reduce any stuffing and consider using softer yarn.
The body looks lopsided.
Double-check your stitch count and ensure stuffing is distributed evenly.
Substituting yarn
- Cotton, DK or light worsted weight
- Gives a crisper, less fuzzy surface than the baby-acrylic yarn named in the pattern, with cleaner stitch definition; use a slightly tighter gauge on a 3.5-4mm hook to keep the fabric dense enough to hold stuffing.
- Acrylic-cotton blend, worsted weight
- The closest match to the softness and drape of Himalaya Dolphin Baby; the same 4-5mm hook range and round counts should produce a finished elephant close to the original size.
- Chunky or bulky weight yarn
- Produces a noticeably larger elephant from the same round counts, since each round covers more distance; move up to a 5.5-6mm hook and use extra stuffing per part to fill the looser fabric.
Washing and care
- Hand wash the finished elephant in cool water with a mild detergent; the acrylic-microfibre yarn used for the body and ears holds its shape better without the agitation of a machine cycle.
- Reshape the head, ears and trunk by hand while still damp and dry flat away from direct heat; store the finished toy stuffed and unsquashed so the seams and safety eyes don't develop permanent creases.
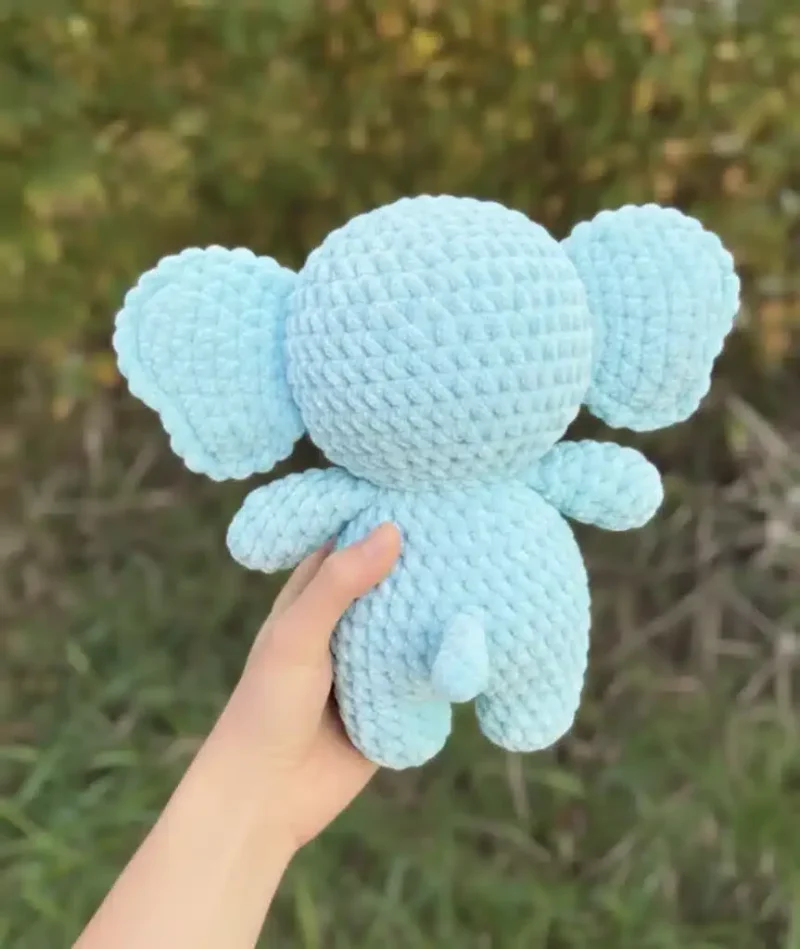
The photographs taken while this was being made
Every one was taken by whoever published the pattern, in the order the source listed them.
FAQs
Questions
What yarn weight works best for this elephant pattern?
This pattern is designed for chunky yarn like Himalaya Dolphin Baby with a 4-5mm hook. However, you can use any yarn weight—just adjust your hook size accordingly. Thicker yarn creates a larger elephant, while thinner yarn makes a smaller one.
Can the safety eyes be left out?
Yes; the nose is already listed as optional, and black yarn embroidery can stand in for either eyes or nose if a fully soft toy is wanted for a small child.
Why are the trunk and ears made separately instead of worked into the head?
Working them as their own pieces, 10 rounds for the trunk and 8 for the ears, gives control over curve and angle that isn't possible mid-round, so they can be positioned and sewn on once the head shape is settled.
How much should the head and body be stuffed?
Generously, and shaped as the stuffing goes in rather than left until the last round is closed, since the head runs 13 rounds and the body 12 and both need to hold their form once the other parts are attached.
Do the ears need stuffing?
No; the ears are deliberately left unstuffed across all 8 rounds so they stay soft and floppy, which is part of what makes them read as elephant ears rather than stiff discs.
How do I prevent the elephant's trunk from drooping?
Stuff the trunk firmly but not too tightly, and consider adding a small amount of fabric starch to help it hold its shape. You can also insert a pipe cleaner inside the trunk before stuffing for poseable shaping.
Can I make this pattern safe for babies and young children?
Yes! Use securely attached safety eyes (or embroider eyes with yarn instead), ensure all parts are sewn very tightly, and avoid small decorative pieces like buttons. Always supervise young children with handmade toys.
These answers came from whoever first published the pattern, kept word for word.