 EVERY CROCHET
 Amigurumi 26 rounds No account, no download
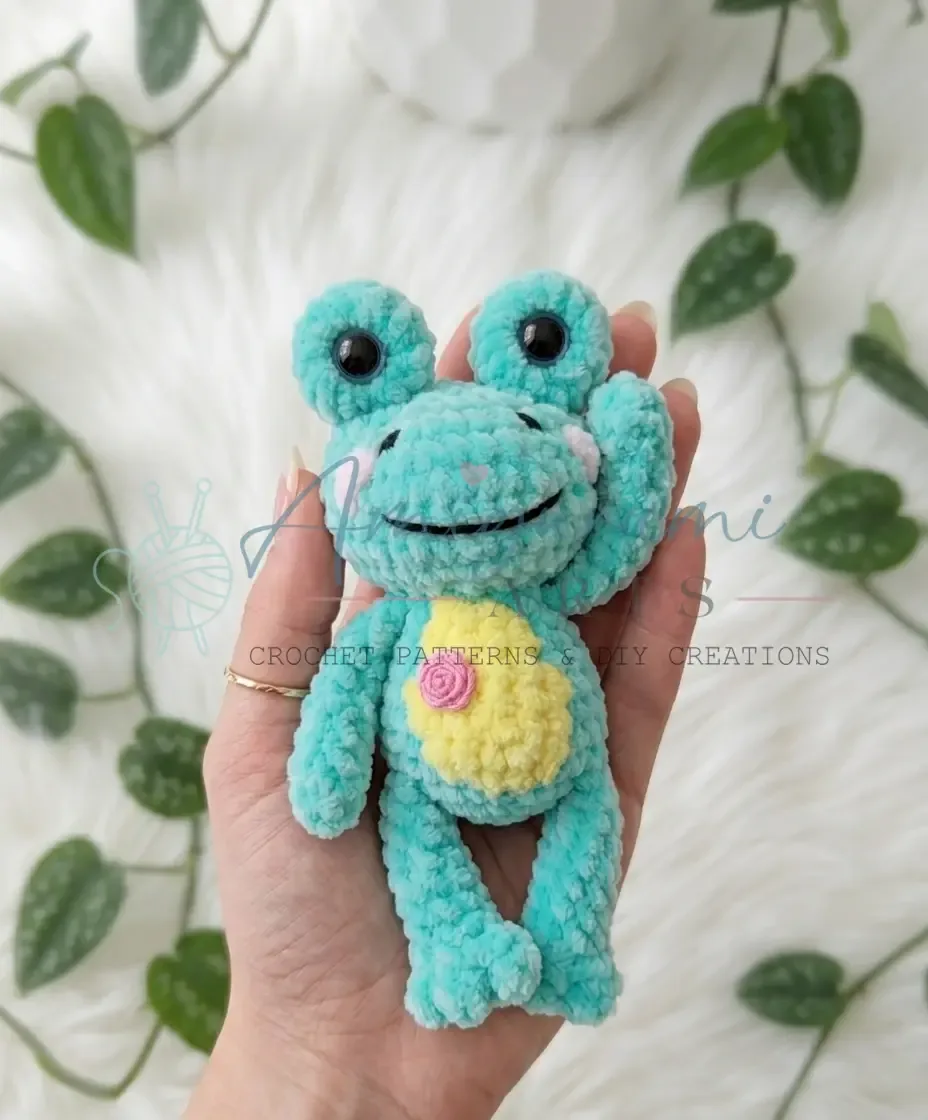
Crochet frog amigurumi pattern in plush yarn
A plush frog amigurumi worked in single crochet (UK double crochet); both US and UK terms given.
- Skill
- Intermediate
- Time
- 4-6 hours
- Yarn weight
- DK (plush/chenille)
- Hook
- 4 mm

Intermediate
What the original write-up called it. Nothing here is graded again.

DK (plush/chenille)
What the sample was worked in. Any weight works; the size moves with it.

4-6 hours
What the original page reckoned. Your own pace is the one that matters.
About this pattern
This pattern makes a small amigurumi frog from plush or chenille yarn, worked mainly in single crochet (UK double crochet) with a G-6/4mm hook. The eyes and four legs are crocheted separately, while the body and head form one continuous spiral piece stuffed as the rounds progress. Safety eyes, polyester filling, and embroidery floss for the face are also needed; the project suits confident beginners through intermediate amigurumi makers.
This crochet frog amigurumi is built from single crochet (UK double crochet), the dense, low stitch that gives amigurumi its firm, huggable fabric. Worked in a plush or chenille yarn rather than standard worsted, the frog takes on a soft, slightly fuzzy finish that suits its rounded shape. The pattern uses US crochet terminology throughout, so the stitch most crocheters call double crochet in the UK appears here simply as single crochet — worth noting once before starting, since the two naming systems otherwise run in parallel for every other stitch used.
Construction keeps pieces separate before assembly. The eyes are two small worked pieces made over four rounds with safety eyes inserted mid-round, the legs are four identical pieces started from a six-chain foundation and shaped with a bobble stitch for defined toes, and the body and head are worked as a single continuous spiral piece across sixteen rounds, stuffed gradually from round six onward. A stitch marker tracks the start of each round throughout, since the spiral is never joined, and all pieces are sewn together only once each is complete.
Materials
Yarn
- Plush yarn (Fingering-to-DK weight plush/chenille), approximately 35g in main color; small amount of a contrast color for the belly (optional)
Hook
- G-6 / 4 mm
Safety eyes
- Trapezoid style, 14 mm — 1 pair
Stuffing
- Polyester fiberfill
- Stitch markers
- Yarn needle / tapestry needle
- Scissors
Optional notions
- embroidery floss or yarn for mouth, nose, and cheek details; any decorative additions of your choice
The list is the pattern's own wording.
Instructions
Every round is printed as the pattern wrote it, brackets and all. Open the key beside a round to see only the short forms that round uses.
Eyes (Make 2)
Do not stuff.
- Round 1
8 sc in MR. (8)
Key2
- MR
- Magic Ring
- sc
- Single Crochet
- Round 2
inc in each st around. Insert safety eyes through the magic ring center before tightening. (16)
Key1
- inc
- Increase (2 sc in same stitch)
- Round 3
16 sc. (16)
Key1
- sc
- Single Crochet
- Round 4
10 dec. (6 — remaining sts) Close the opening and leave a long yarn tail for sewing.
Key1
- dec
- Invisible Decrease (insert hook in front loop of next 2 sts, yarn over, pull through both loops, yarn over, pull through 2 loops)
Legs (Make 4)
Do not stuff.
Foundation: Ch 6. Starting in the 2nd ch from hook:
- Round 1
(bob, 1 sc) repeat twice, bob in the last chain; working along the second side of the foundation chain: 5 sc. (10)
Key2
- bob
- Bobble Stitch (4 dc bobble: 4 double crochets worked into same stitch with shared top)
- sc
- Single Crochet
- Round 2
10 sc. (10)
Key1
- sc
- Single Crochet
- Round 3
(dec, 3 sc) repeat twice. (8)
Key2
- dec
- Invisible Decrease (insert hook in front loop of next 2 sts, yarn over, pull through both loops, yarn over, pull through 2 loops)
- sc
- Single Crochet
- Rounds 4–5
8 sc. (2 rounds) (8)
Key1
- sc
- Single Crochet
- Round 6
(dec, 2 sc) repeat twice. (6)
Key2
- dec
- Invisible Decrease (insert hook in front loop of next 2 sts, yarn over, pull through both loops, yarn over, pull through 2 loops)
- sc
- Single Crochet
- Rounds 7–8
6 sc. (2 rounds) (6)Fold the leg flat. Work 3 sc through both layers to close. Add 1 sl st if needed to secure. Leave a yarn tail for attaching to the body.
Key2
- sl st
- Slip Stitch
- sc
- Single Crochet
Body & Head (One Piece)
Stuff gradually as you work from Round 6 onward.
Foundation: Ch 4. Starting in the 2nd ch from hook:
- Round 1
inc, 1 sc, 4 sc in last ch; working along the second side: 1 sc, inc. (10)
Key3
- inc
- Increase (2 sc in same stitch)
- ch
- Chain
- sc
- Single Crochet
- Round 2
2 inc, 1 sc, 4 inc, 1 sc, 2 inc. (18)
Key2
- inc
- Increase (2 sc in same stitch)
- sc
- Single Crochet
- Round 3
(1 sc, inc) twice, 1 sc, (1 sc, inc) 4 times, 1 sc, (1 sc, inc) twice. (26)
Key2
- inc
- Increase (2 sc in same stitch)
- sc
- Single Crochet
- Round 4
2 sc, 3 sc attaching the first leg (work 1 sc into the body st and the corresponding leg st simultaneously for each of the 3 sts), 4 sc, 3 sc attaching the second leg, 14 sc. (26)
Key1
- sc
- Single Crochet
- Round 5
26 sc. Switch to contrast color for the belly here if desired. (26)
Key1
- sc
- Single Crochet
- Round 6
14 sc, (dec, 1 sc) 4 times. (22)
Key2
- dec
- Invisible Decrease (insert hook in front loop of next 2 sts, yarn over, pull through both loops, yarn over, pull through 2 loops)
- sc
- Single Crochet
- Round 7
14 sc, 4 dec. Decreases fall along the back. (18)
Key2
- dec
- Invisible Decrease (insert hook in front loop of next 2 sts, yarn over, pull through both loops, yarn over, pull through 2 loops)
- sc
- Single Crochet
- Rounds 8–9
18 sc. (2 rounds) (18)
Key1
- sc
- Single Crochet
- Round 10
1 sc, 3 sc attaching the third leg, 6 sc, 3 sc attaching the fourth leg, 5 sc. Add 1 sl st if needed to align. (18)
Key2
- sl st
- Slip Stitch
- sc
- Single Crochet
- Round 11
(1 sc, dec) 6 times. (12)
Key2
- dec
- Invisible Decrease (insert hook in front loop of next 2 sts, yarn over, pull through both loops, yarn over, pull through 2 loops)
- sc
- Single Crochet
- Round 12
inc in each st around. (24)
Key1
- inc
- Increase (2 sc in same stitch)
- Round 13
(2 sc, inc) 8 times. (32)
Key2
- inc
- Increase (2 sc in same stitch)
- sc
- Single Crochet
- Rounds 14–16
32 sc. (3 rounds) (32)
Key1
- sc
- Single Crochet
- Round 17
(2 sc, dec) 8 times. (24)
Key2
- dec
- Invisible Decrease (insert hook in front loop of next 2 sts, yarn over, pull through both loops, yarn over, pull through 2 loops)
- sc
- Single Crochet
- Round 18
24 sc. (24)
Key1
- sc
- Single Crochet
- Round 19
(1 sc, dec) 8 times, sl st to close. (16)
Key3
- sl st
- Slip Stitch
- dec
- Invisible Decrease (insert hook in front loop of next 2 sts, yarn over, pull through both loops, yarn over, pull through 2 loops)
- sc
- Single Crochet
Making up
- Step 1Finish stuffing the body and head firmly through the remaining opening before closing.
- Step 2Fold the head opening flat and sew it closed using your yarn tail and a whipstitch through both edges.
- Step 3Position each eye piece at the outer corners of the head, using the long yarn tail to sew them securely in place. The eyes should sit wide and proud for that classic frog look.
- Step 4Using embroidery floss or a length of yarn, embroider a curved smile, small nose, and rosy cheeks onto the face.
- Step 5Weave in all yarn ends securely.
Notes from the pattern
- Use a true G-6/4mm hook; plush yarn's loft can make stitches look looser than they are, so keep tension snug to stop the filling from peeking through the fabric.
- Place a stitch marker at the start of every round in the body and head section, since it is worked as one continuous spiral with sixteen rounds and no join to mark progress otherwise.
- Stuff the body and head gradually from round six onward rather than all at once, adding small amounts as the piece grows to keep the shape even and rounded.
- Gauge is not critical for this project; consistent, firm tension is more important than hitting an exact measurement, since it prevents the stuffing from showing through the fabric.
The essentials
- Rounds
- 26
- Parts
- 3
- Level
- Intermediate
- Time
- 4-6 hours
- Hook
- 4 mm
- Yarn
- DK (plush/chenille)
Stitches you will use
- Magic ring Used to start both eye pieces in round 1; keep the centre pulled tight so no gap shows once the safety eye is inserted through it.
- Bobble stitch Worked along the foundation chain of each leg to shape the toes; keep tension even so all four legs match in size.
- Continuous spiral construction The body and head are worked without joining rounds; a stitch marker at the start of each round is the only way to track progress across all sixteen rounds.
- Attaching legs mid-round When you reach the leg-attachment rounds, hold the leg flat against the body piece and insert your hook through both the body stitch and the edge stitch of the leg at the same time — this creates a seamless attachment that won't shift over time.
Troubleshooting
The finished frog looks thin or the
Plush yarn's halo can disguise loose tension; check that the hook matches G-6/4mm and that stitches stay close together, since the yarn's own loft isn't enough to hide gaps on its own. Go down a hook size if gaps appear between stitches.
The safety eyes sit off-centre or the
Insert the safety eyes through the centre of the magic ring before tightening it in round 2, and position both eye pieces at the outer corners of the head before sewing, as set out in assembly.
The head feels soft or loses its
Finish stuffing firmly through the remaining opening before closing it; a head that is under-stuffed at that stage will not firm up once the whipstitch is in. Add fiberfill in small pinches rather than big clumps for a smooth, rounded shape.
The bobble toes on the legs look stiff or irregular.
Bobble stitches can feel stiff to work in plush yarn — pull each loop up a touch more generously than usual, and don't worry if they look irregular before moving on; they flatten and fluff beautifully once the leg is finished.
The head opening doesn't fold flat
Make sure the last round is positioned so the fold line runs across the top of the head, not ear to ear; pull gently to orient it correctly before sewing through both layers.
Substituting yarn
- Worsted weight acrylic
- A standard worsted weight acrylic can be substituted for the plush yarn, though the texture and look will be quite different — plush yarn gives the soft, velvety surface that defines this frog's toylike quality, while acrylic produces a firmer, more textured finish. Consider dropping to a 3.5 mm hook to keep tension tight and stitches even.
Washing and care
- As a plush or chenille yarn, the finished frog is best hand washed in cool water and gently squeezed rather than wrung, since twisting flattens the pile that gives the yarn its texture.
- Lay the piece flat to dry away from direct heat, reshaping the legs and head by hand while still damp; once dry, store away from direct sunlight to keep the colour from fading.
The photographs taken while this was being made
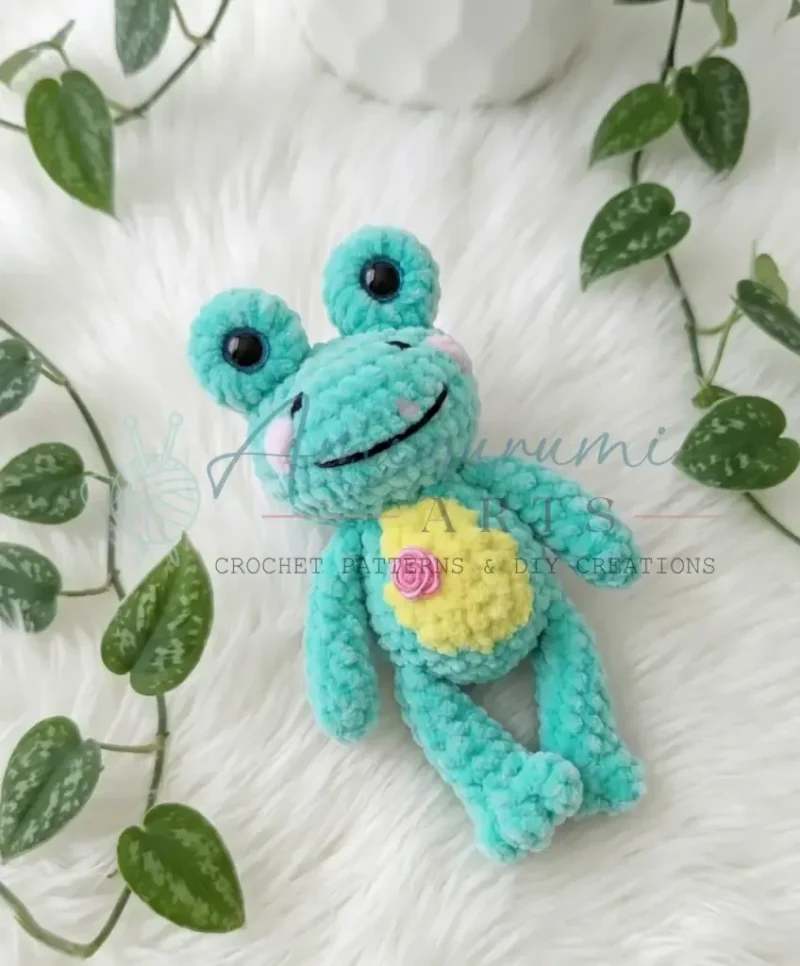
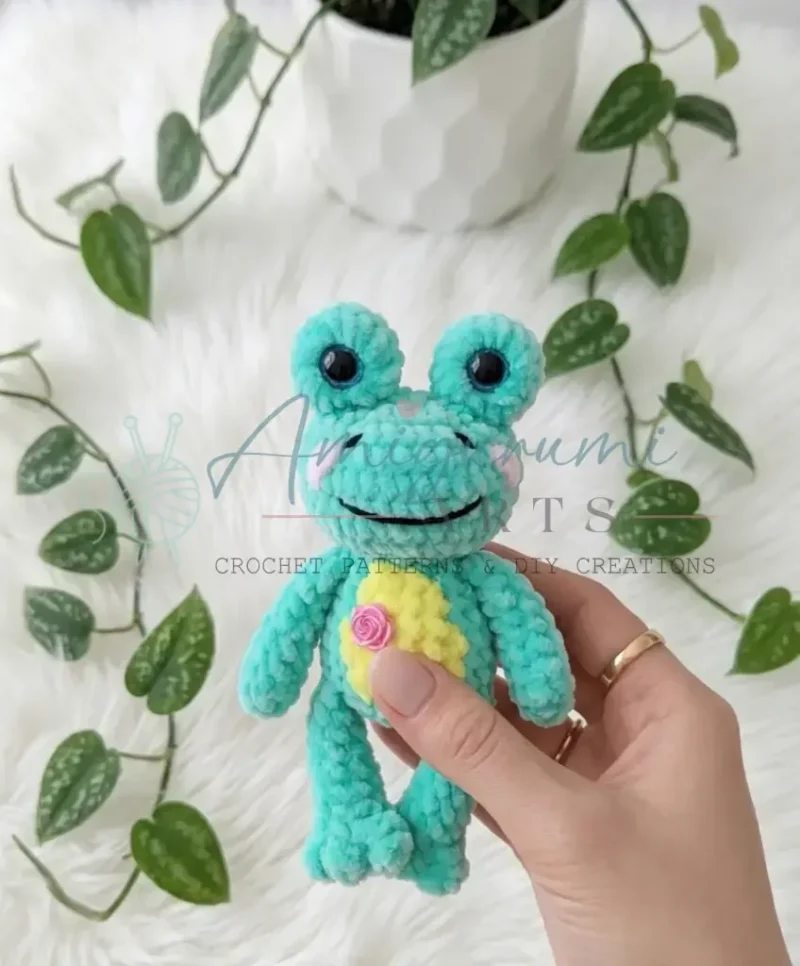
Every one was taken by whoever published the pattern, in the order the source listed them.
FAQs
Questions
Can I use regular acrylic yarn instead of plush yarn for this frog?
Yes, you can substitute standard worsted weight acrylic yarn — just be aware that the texture and look will be quite different. Plush yarn creates the soft, velvety surface that gives this frog its toylike quality, so a regular acrylic will produce a firmer, more textured finish. If you do substitute, consider dropping to a 3.5 mm hook to keep your tension tight and your stitches even.
Why do I insert the safety eyes into the magic ring of the eye pieces rather than the body?
Inserting the safety eyes through the center of the magic ring gives them a perfectly framed, raised appearance — the crocheted rounds act as a sculpted eye socket, which is exactly the look this pattern is designed for. It also makes placement much easier, since you secure the eye before sewing the entire eye piece onto the head. Once the washer is locked on the back, the eye isn't going anywhere.
My leg bobble toes are uneven — how do I fix that?
Bobble stitches in plush yarn can look a little inconsistent while you're working them, but they tend to even out once you move past that section and the yarn relaxes. To help, make sure you're pulling each loop of the bobble to a consistent height before finishing the stitch. If the toes still look uneven after finishing, a gentle steam hover (not direct contact) from an iron can help the plush fibers fluff back up evenly — always test on a yarn swatch first.
These answers came from whoever first published the pattern, kept word for word.