 EVERY CROCHET
 Amigurumi 7 rounds No account, no download
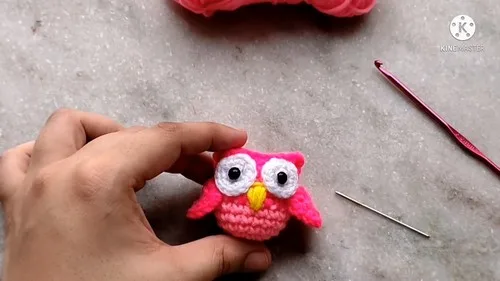
A small amigurumi owl worked in single crochet
A mini amigurumi owl made with single crochet (UK double crochet); both US and UK stitch terms are given.
- Skill
- Intermediate
- Time
- 4-6 hours
- Yarn weight
- Worsted
- Hook
- 3 mm

Intermediate
What the original write-up called it. Nothing here is graded again.

Worsted
What the sample was worked in. Any weight works; the size moves with it.

4-6 hours
What the original page reckoned. Your own pace is the one that matters.
About this pattern
This pattern makes a small amigurumi owl worked in single crochet (UK: double crochet) from a magic circle, increasing from 6 to 18 stitches across the body before a belly colour change partway through round 7. Separate white eye circles, a yellow beak, wings in the face colour, and a keyring finish the piece. It calls for two main yarn colours, small amounts of white and yellow, black beads, stuffing, and a 3mm hook.
This mini owl amigurumi is built almost entirely from single crochet (UK: double crochet), the dense, firm stitch family that gives amigurumi its structure and keeps stuffing from showing through the fabric. The scale is small, with just six stitches at the centre of the first round, so the finished owl suits a keyring rather than standing as a larger toy on its own. Two yarn colours separate the face and wings from the belly, while small amounts of white and yellow mark out the eyes and beak.
The body starts at a magic circle and increases steadily through the early rounds, moving from 6 to 12 to 18 stitches, before a belly colour change breaks the single-colour field partway through round 7. Eyes are worked separately as a small white circle using the same 6-to-12 increase, then finished with glued-on beads. Wings, a beak and a keychain ring are added afterwards, with assembly limited to sewing the eyes and wings onto the body and gluing the beaded eyes in place.
Materials
- Two colors of yarn (one for the face and wings, and one for the belly)
- A little bit of white yarn for the eyes
- A little bit of yellow yarn for the beaks
- Black beads for the eyes (or white beads painted with black nail polish)
- Fabric glue (to attach the beads)
- Pillow fluff (for stuffing)
- Crochet hook (3mm recommended, or smaller than the yarn recommends)
- Stitch marker (or a paperclip)
- Scissors
- Needle (for sewing)
- Keychain ring or blank keyring
The list is the pattern's own wording.
Instructions
Every round is printed as the pattern wrote it, brackets and all. Open the key beside a round to see only the short forms that round uses.
Body (main color)
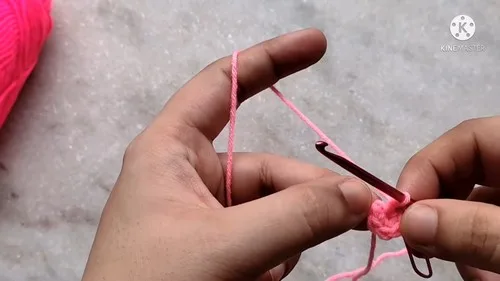
Magic Circle: Loop yarn over finger, cross, pull loop up.
Chain 1 to complete Magic Circle.
- Round 1
6 single crochets (SC) into magic circle. Pull thread to cinch circle. Mark last stitch with stitch marker.
Key1
- sc
- single crochet
- Round 2
Increase in every stitch (place 2 SC in each stitch from previous round) for a total of 12 SC.
Key1
- sc
- single crochet
- Round 3
1 SC in the first stitch, 2 SC (increase) in the next stitch repeat ** around for a total of 18 SC.
Key1
- sc
- single crochet
- Round 4
1 SC in each stitch around (18 SC, no increases).
Key1
- sc
- single crochet
- Rounds 5–6
Repeat Round 4 (1 SC in each stitch with no increases).
Key1
- sc
- single crochet
Change Color (for belly)
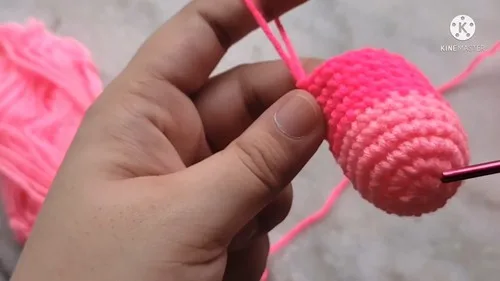
8. Start with a normal single crochet but finish the stitch with the new yarn color.
Cut the old color, leaving a tail.
- Round 7
Continue with the new color, working over the yarn tails to weave them in.
Finishing Body
- Rounds 8–11
Repeat the pattern from Round 7 for Rounds 8-11.
Gently stuff the body with pillow fluff.
Sew the opening shut with slip stitches or needle and thread.
Eyes (white yarn)
Magic Circle: Repeat as for body.
Chain 1, then 6 SC into the circle.
Join to first SC with a slip stitch, chain 1, 2 SC in each stitch around for a total of 12 SC.
Beak (yellow yarn)
Embroider the beak onto the face by inserting yellow yarn and shaping it as desired.
Wings (use face color)
Magic Circle, chain 2 (counts as first double crochet).
6 double crochets (DC) into the magic circle.
Chain 1 and turn work, 2 SC in each stitch across (12 SC).
Keychain
Attach the keychain ring to the top of the amigurumi owl.
Making up
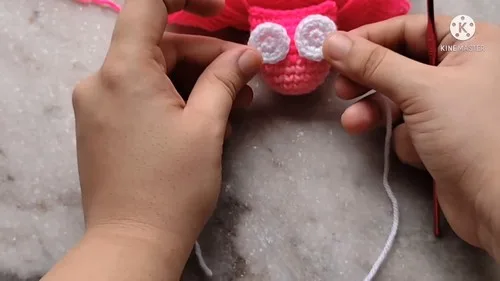
- Step 1Sew the eyes and wings to the body.
- Step 2Attach black beads for eyes using fabric glue.
Notes from the pattern
- Use a 3mm hook, or one size smaller than the yarn band recommends, so the single crochet (UK double crochet) fabric stays tight enough that the pillow fluff stuffing does not peek through between stitches.
- Mark the last stitch of round 1 with a stitch marker (or paperclip) and move it up each round, since the body is worked continuously without joining and it is easy to lose track of where a round starts.
- Keep tension snug throughout the body and eyes, not only at the magic circle; a loose gauge on a piece this small leaves gaps that the stuffing can push through.
- the belly colour change, finish the final single crochet of the old colour with the new colour's last pull-through rather than cutting first, and leave tails long enough to weave in as the round continues.
The essentials
- Rounds
- 7
- Parts
- 7
- Level
- Intermediate
- Time
- 4-6 hours
- Hook
- 3 mm
- Yarn
- Worsted
Stitches you will use
- Magic circle (magic ring) starts Used to begin both the body and the eye pieces; pull the starting loop snug before and after round 1 so no hole shows at the centre.
- Stitch increasing in rounds Rounds 2 and 3 take the body from 6 to 12 to 18 stitches; watch that increases land evenly or the piece will cup rather than lie flat.
- Mid-round colour change Appears at round 7 for the belly; finish the last stitch of the old colour with the new colour's final pull-through, then work the first stitches over both tails.
Troubleshooting
The centre of the magic circle leaves a visible hole.
This comes from pulling the starting tail loosely; tighten it firmly before working round 1 and again once round 1 is complete, which is the most common point where the hole is left open.
The body cups or bells outward instead
Uneven increases in rounds 2 and 3 are the usual cause; check that round 2 places an increase in every stitch and that round 3's increase repeat lands in the correct stitch each time.
A harsh jog or gap appears where the belly colour starts.
This happens when the old colour is cut before the final pull-through of the last stitch; finish that stitch with the new colour instead, and work the next few stitches over both yarn tails to secure them.
Substituting yarn
- Cotton, DK weight
- Gives crisper stitch definition and a slightly larger owl than the yarn used here; a 3mm hook still works but stitches may need to sit a touch tighter to keep the stuffing hidden.
- Acrylic, worsted weight
- Closest match to typical amigurumi yarn and holds its shape well for a keyring piece that gets handled; size stays close to the finished owl described here.
- Wool-blend, aran weight
- Produces a softer, slightly fuzzier finish with less sharp stitch definition and a noticeably larger owl; dropping toward a 2.5mm hook helps compensate, and this fibre can felt if machine-washed.
Washing and care
- Because the beaded eyes are attached with fabric glue rather than sewn, avoid fully submerging the owl; spot clean with a damp cloth and a little mild soap instead, keeping the glued area dry.
- Reshape the stuffed body gently by hand while still slightly damp from spot cleaning, then let it air dry completely before fitting it to the keychain ring, so no moisture stays trapped around the stuffing.
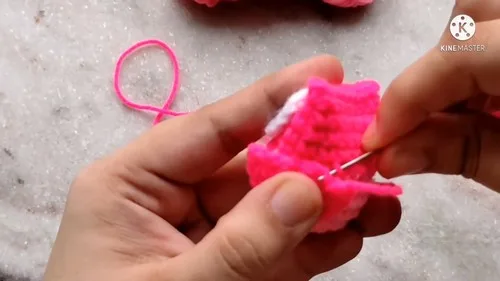
The photographs taken while this was being made
Every one was taken by whoever published the pattern, in the order the source listed them.
FAQs
Questions
What does "single crochet (UK double crochet)" mean for this pattern?
US single crochet and UK double crochet refer to the same stitch, and this pattern uses it throughout the body, eyes, wings and beak. Either name applies depending on the stitch terminology a maker learned first.
Why does the pattern recommend a smaller hook than the yarn label suggests?
A tighter gauge from a 3mm hook, or one size down from the yarn's recommendation, keeps the stitches dense enough that the pillow fluff stuffing does not show through. This matters more on a piece this small, where any gaps are easy to spot.
How is the belly colour change worked without a visible seam?
The last single crochet before the change is started in the main colour but finished by pulling the new colour through for the final loop. Round 7 then continues in the belly colour with the cut tails worked over as stitching proceeds.
Why use black beads instead of embroidered eyes?
Beads glued in place give the mini owl a fixed, defined eye that holds up at this small scale, where embroidered eyes can look uneven. White beads painted with black nail polish work as a substitute if black beads aren't to hand.
Can this owl be made without the keyring?
Yes; the keychain ring or blank keyring is only attached at the very end of assembly. Skipping that step and sewing the opening closed turns the same owl into a small standalone amigurumi instead.
These answers came from whoever first published the pattern, kept word for word.