 EVERY CROCHET
 Amigurumi 44 rounds No account, no download
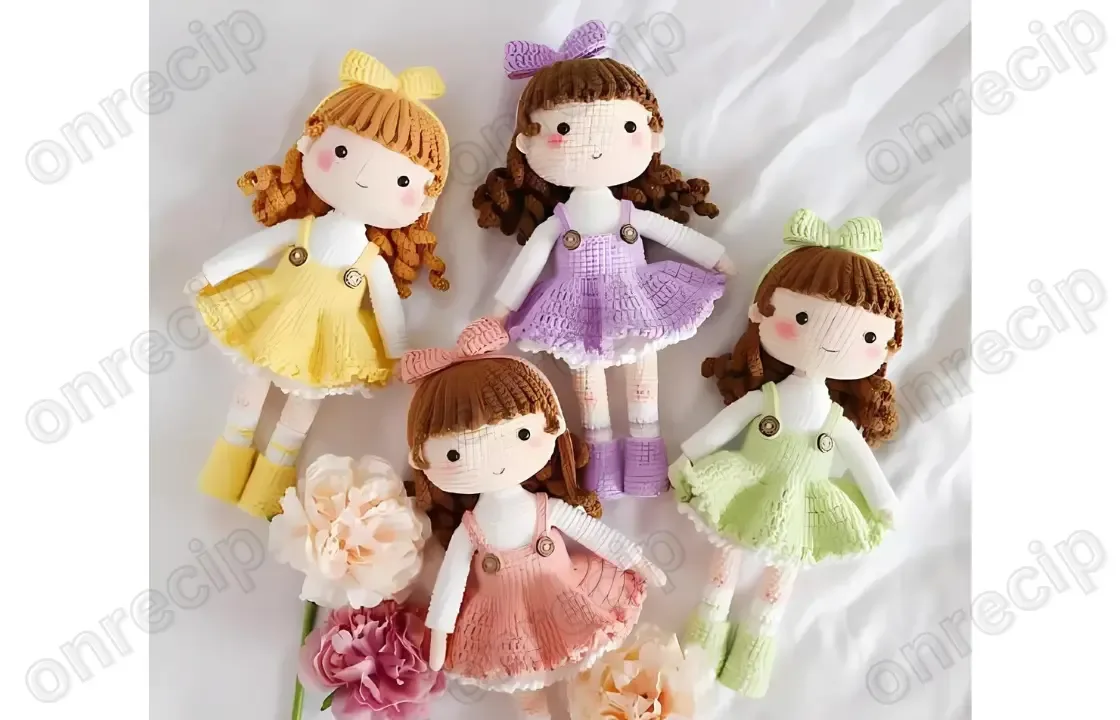
Amigurumi doll crochet pattern with jointed button limbs
A single crochet (UK: double crochet) amigurumi doll pattern with jointed limbs and colour-changed legs; both US and UK terms given.
- Skill
- Intermediate
- Time
- 4-6 hours
- Yarn weight
- Worsted

Intermediate
What the original write-up called it. Nothing here is graded again.

Worsted
What the sample was worked in. Any weight works; the size moves with it.

4-6 hours
What the original page reckoned. Your own pace is the one that matters.
About this pattern
This is a written amigurumi doll pattern using single crochet (double crochet in UK terms) throughout, with a twenty-two-round head, two seven-round arms and two fifteen-round legs joined into a continuous body. It calls for safety eyes, toy stuffing, two buttons, blush for shading and a sewing needle for finishing. Suits confident beginners already comfortable with magic rings, increases and decreases.
This piece is an amigurumi doll, worked almost entirely in single crochet (double crochet in UK terms) to create the tight, dense fabric needed to hold stuffing and shape. The head, at twenty-two rounds, is the largest single component, while the arms and legs are worked separately in shorter round counts before being joined to the body. Safety eyes, a blush finish and buttons at the joints give the doll its finished character.
Construction follows the usual amigurumi order: the head is worked first and stuffed before the final decrease rounds close it, then the arms and legs are made separately and set aside unstuffed at the tips for sewing. The two legs are worked to match, and the second is extended with a short chain that joins it to the first so the body can be crocheted in one continuous piece rather than assembled afterwards. The two buttons in the materials list are used where the limbs attach, a common way to let amigurumi joints pivot.
Materials
- Yarn (any yarn suitable for amigurumi)
- Crochet hook
- Safety eyes
- Toy stuffing
- 2 buttons
- Dry pastel or blush
- Glue
- Needle for sewing parts
- Scissors
The list is the pattern's own wording.
Instructions
Every round is printed as the pattern wrote it, brackets and all. Open the key beside a round to see only the short forms that round uses.
Head
- Round 1
7 sc in MR. (7)
Key2
- MR
- Magic Ring
- sc
- Single Crochet
- Round 2
7 inc. (14)
Key1
- inc
- Increase
- Round 3
(sc, inc) x 7. (21)
Key2
- inc
- Increase
- sc
- Single Crochet
- Round 4
(2 sc, inc) x 7. (28)
Key2
- inc
- Increase
- sc
- Single Crochet
- Round 5
sc, inc, (3 sc, inc) x 6, 2 sc. (35)
Key2
- inc
- Increase
- sc
- Single Crochet
- Round 6
(4 sc, inc) x 7. (42)
Key2
- inc
- Increase
- sc
- Single Crochet
- Round 7
(6 sc, inc) x 6. (48)
Key2
- inc
- Increase
- sc
- Single Crochet
- Round 8
48 sc. (48)
Key1
- sc
- Single Crochet
- Round 9
(7 sc, inc) x 6. (54)
Key2
- inc
- Increase
- sc
- Single Crochet
- Round 10
3 sc, inc, (8 sc, inc) x 5, 5 sc. (60)
Key2
- inc
- Increase
- sc
- Single Crochet
- (60)Rounds 11–19
60 sc. (60) (9 rows)Insert the eyes between rows 18 and 19, with a distance of 9 stitches between them.
Key1
- sc
- Single Crochet
- Round 20
(9 sc, inc) x 6. (66)
Key2
- inc
- Increase
- sc
- Single Crochet
- (66)Rounds 21–24
66 sc. (66) (4 rows)
Key1
- sc
- Single Crochet
- Round 25
(9 sc, dec) x 6. (60)
Key2
- dec
- Decrease
- sc
- Single Crochet
- Round 26
(8 sc, dec) x 6. (54)
Key2
- dec
- Decrease
- sc
- Single Crochet
- Round 27
(7 sc, dec) x 6. (48)
Key2
- dec
- Decrease
- sc
- Single Crochet
- Round 28
(4 sc, dec) x 8. (40)
Key2
- dec
- Decrease
- sc
- Single Crochet
- Round 29
(3 sc, dec) x 8. (32)Start stuffing the piece before continuing with the decreases.
Key2
- dec
- Decrease
- sc
- Single Crochet
- Round 30
(2 sc, dec) x 8. (24)
Key2
- dec
- Decrease
- sc
- Single Crochet
- Round 31
(sc, dec) x 8. (16)
Key2
- dec
- Decrease
- sc
- Single Crochet
- (16)Rounds 32–41
BLO 16 sc. (16) (10 rows)
Key2
- BLO
- Back Loop Only
- sc
- Single Crochet
- Round 42
8 dec. (8)Cut the yarn, fasten off, and tuck the neck inside the head.
Key1
- dec
- Decrease
Arms
This is the Left Arm pattern.
- Round 1
6 sc in MR. (6)
Key2
- MR
- Magic Ring
- sc
- Single Crochet
- Round 2
(sc, inc) x 3. (9)
Key2
- inc
- Increase
- sc
- Single Crochet
- Round 3
9 sc. (9)
Key1
- sc
- Single Crochet
- Round 4
inc in hdc, 8 sc. (10)
Key3
- hdc
- Half Double Crochet
- inc
- Increase
- sc
- Single Crochet
- Round 5
dec, 8 sc. (9)
Key2
- dec
- Decrease
- sc
- Single Crochet
- (9)Rounds 6–21
9 sc. (9) (16 rows)
Key1
- sc
- Single Crochet
- Round 22
7 sc, finish off.
Key1
- sc
- Single Crochet
Right Arm: crochet the same as the Left Arm through Round 21, then work 2 sc and finish off (instead of 7 sc).
Do not stuff the arms. Leave a long tail for sewing.
Legs
Start with white yarn.
- Round 1
Ch 5; starting in the 2nd chain from the hook: inc, 2 sc, 4 sc in 1 stitch, 2 sc, inc. (12)
Key3
- inc
- Increase
- ch
- Chain
- sc
- Single Crochet
- Round 2
2 inc, 2 sc, 4 inc, 2 sc, 2 inc. (20)
Key2
- inc
- Increase
- sc
- Single Crochet
- (20)Rounds 3–5
20 sc. (20) (3 rows)
Key1
- sc
- Single Crochet
- Round 6
7 sc, 3 dec, 7 sc. (17)
Key2
- dec
- Decrease
- sc
- Single Crochet
- Round 7
6 sc, dec, sc, dec, 6 sc. (15)
Key2
- dec
- Decrease
- sc
- Single Crochet
- Round 8
5 sc, dec, sc, dec, 5 sc. (13)
Key2
- dec
- Decrease
- sc
- Single Crochet
- (13)Rounds 9–13
13 sc. (13) (5 rows)Change to pink (or yellow) yarn before Round 14.
Key1
- sc
- Single Crochet
- Round 14
13 sc. (13)Change to white yarn before Round 15.
Key1
- sc
- Single Crochet
- (13)Rounds 15–17
13 sc. (13) (3 rows)Change to skin color before Round 18.
Key1
- sc
- Single Crochet
- (13)Rounds 18–19
13 sc. (13) (2 rows)
Key1
- sc
- Single Crochet
- Round 20
sc, inc, 5 sc, inc, 5 sc. (15)
Key2
- inc
- Increase
- sc
- Single Crochet
- Round 21
15 sc. (15)
Key1
- sc
- Single Crochet
- Round 22
8 sc, dec, 5 sc. (14)
Key2
- dec
- Decrease
- sc
- Single Crochet
- (14)Rounds 23–31
14 sc. (14) (9 rows)Change to white yarn before Round 32.
Key1
- sc
- Single Crochet
- Round 32
14 sc. (14)Cut the yarn after Round 32.
Key1
- sc
- Single Crochet
Making up
- Step 1Crochet the second leg the same as the first through Round 31, then work 7 more sc, chain 4, join to the first leg, and continue crocheting the body.
Notes from the pattern
- The materials list leaves the hook size open, so choose one that matches the yarn weight snugly rather than loosely — a tight gauge is what keeps stuffing from peeking through the single crochet fabric.
- Every part after the magic ring is worked in continuous rounds, so mark the beginning of each round to avoid losing count, especially across all twenty-two head rounds.
- Stuff the head firmly before working the rounds that close it, but leave the arms unstuffed entirely so they stay soft and easy to sew flat.
The essentials
- Rounds
- 44
- Parts
- 3
- Level
- Intermediate
- Time
- 4-6 hours
- Yarn
- Worsted
Stitches you will use
- Magic ring (MR) start Opens round 1 of the head and both arms; pull the ring snug before the first increase round so no gap shows at the centre.
- Joining a second piece mid-round The second leg is worked through round 31, then a short chain joins it to the first so the body continues in one piece; keep the chain and join snug or a gap will show at the crotch.
Troubleshooting
The top of the head looks lumpy or does not close cleanly.
Stuffing was likely added after the decrease rounds rather than before them; pack it in earlier, while there is still an opening to distribute it evenly.
The eyes end up crooked or too close together.
The eyes go in between rounds 18 and 19 with nine stitches between them; count stitches on both sides rather than judging the gap by eye before pushing the posts through.
The right arm looks identical to the
The right arm should only differ in the final round, finishing with 2 sc instead of 7 sc; check that shortened round was actually worked before sewing the arm on.
Substituting yarn
- Cotton, DK weight
- Gives crisper stitch definition and a slightly smaller doll; drop down a hook size from a worsted-weight version so the single crochet stays tight enough to hold stuffing.
- Acrylic, worsted weight
- Produces a lofty, lightweight doll that machine washes easily; the hook can follow the yarn band, since acrylic still needs a firm gauge for amigurumi work.
- Cotton-acrylic blend, sport weight
- Makes a smaller, denser finished doll needing less stuffing overall; a smaller hook keeps the fabric dense enough that stuffing does not show through.
Washing and care
- If a cotton or cotton-blend yarn was used, hand wash the finished doll in cool water and reshape it while still damp, easing the head and limbs back into round before it dries flat.
- Store away from direct sunlight and damp, both of which can loosen the glued safety eyes and buttons over time; keep the doll stuffed and shaped rather than flattened in storage.
FAQs
Questions
Can the doll be made with any yarn?
Yes — the materials list simply calls for any yarn suitable for amigurumi, so the exact fibre and weight are left open. The hook should be matched to whichever yarn is chosen so the fabric stays dense enough to hold its stuffing.
Why does the right arm not match the left arm exactly?
The right arm is worked the same as the left through most of the pattern, then finished with 2 sc instead of 7 sc. This small difference mirrors the hand shape so the pair looks natural rather than identical.
What are the two buttons for?
They are used where the limbs attach to the body, giving the finished doll movable joints. This is separate from the safety eyes, which are used for the face.
Should the arms be stuffed like the head?
No — the arms are left unstuffed, with a long tail left for sewing instead. Only the head is stuffed, and that happens before its final decrease rounds close it.
These answers came from whoever first published the pattern, kept word for word.