 EVERY CROCHET
 Amigurumi 67 rounds No account, no download
Chunky tiger amigurumi pattern in bulky plush yarn
Bulky-yarn tiger amigurumi worked in single crochet (UK double crochet); US and UK terms given.
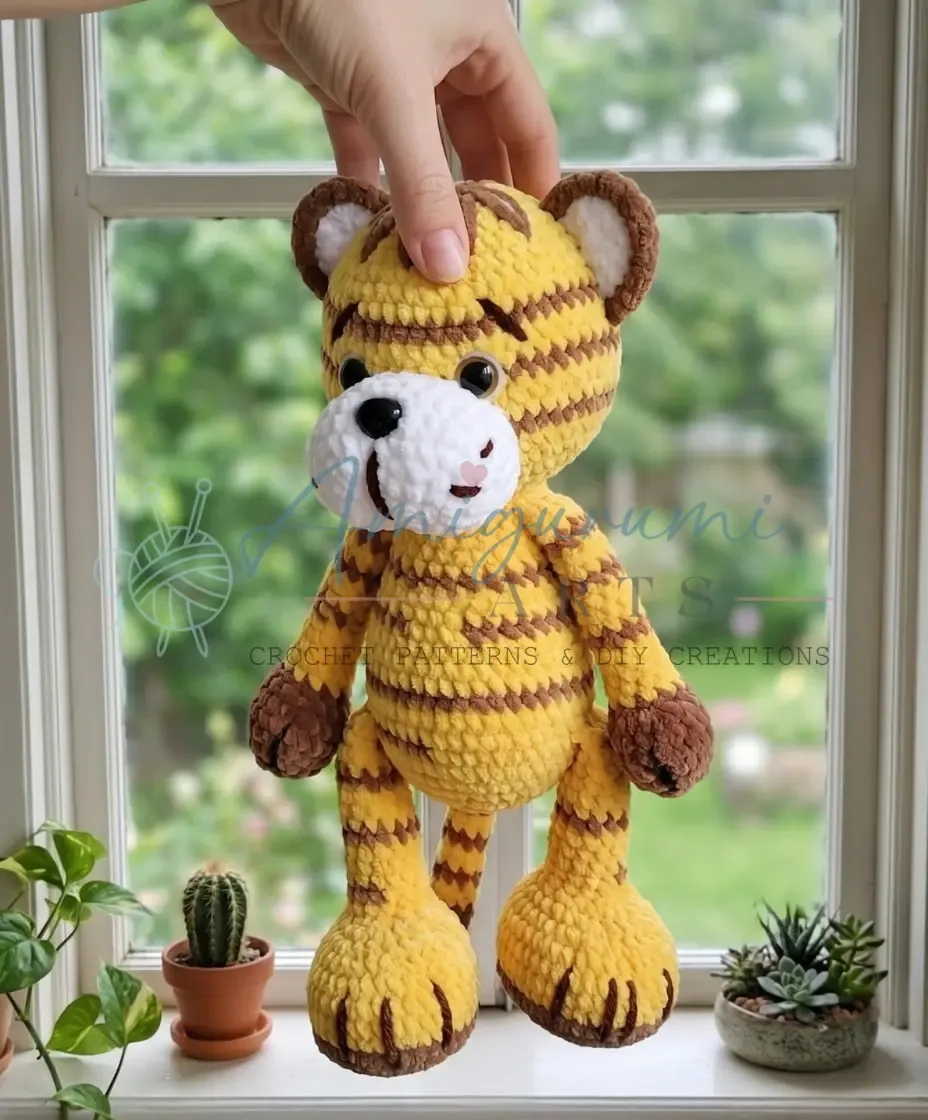
- Skill
- Intermediate
- Time
- 6-9 hours
- Yarn weight
- Bulky
- Hook
- 4 mm

Intermediate
What the original write-up called it. Nothing here is graded again.

Bulky
What the sample was worked in. Any weight works; the size moves with it.

6-9 hours
What the original page reckoned. Your own pace is the one that matters.
About this pattern
This is a stuffed tiger toy worked mainly in single crochet (UK double crochet) using bulky weight yarn and a 4 mm hook, finished with plastic half-bead eyes, a plastic nose and fibrefill stuffing. The body and head are worked in one continuous spiral piece; feet, legs, arms, four ears, a tail and a muzzle are made separately, then sewn on and stuffed as assembly proceeds.
The tiger amigurumi is a stuffed toy built almost entirely from single crochet (UK double crochet), the dense stitch that gives amigurumi its firm, sculptable surface. Feet, legs, arms, body, head, ears and tail are each worked as separate rounds or rows before assembly, with the contrast colour reserved for the foot soles and two of the four ears. Worked in bulky yarn on a 4 mm hook, the finished toy grows chunkier and faster than the same pattern in a finer weight, making it suitable for a crocheter already comfortable with amigurumi basics but new to plush-scale toys.
Construction follows a typical amigurumi order: feet and legs are made first and set aside, arms are shaped through four increase rounds, then the body and head are worked as one continuous piece across 33 rounds, widening and narrowing to form the head without a seam at the neck. Ears are the exception — worked flat in back-and-forth rows with a turning chain, then paired in main and contrast colour before being sewn on. Stuffing is added gradually as the body and head rounds close, rather than all at once at the end.
Materials
- Yarn (Main Color): Himalaya Dolphin Baby, color 80316 — 2 skeins (100% polyester, Bulky weight, 120m/100g) Substitute: YarnArt Dolce color 778
- Yarn (Contrast Color): Himalaya Dolphin Baby, color 80765 — 0.5 skein
Hook
- E-4 / 4 mm
Stuffing
- Polyester fiberfill
Safety eyes
- Plastic half-bead eyes, 14 mm diameter — 2
Nose
- Plastic nose, 18×20 mm — 1
- Yarn needle / tapestry needle
- Scissors
- Clear craft glue
The list is the pattern's own wording.
Instructions
Every round is printed as the pattern wrote it, brackets and all. Open the key beside a round to see only the short forms that round uses.
Feet (Make 2)
Begin with contrast color yarn.
- Round 1
Ch 7, starting in the 2nd ch from hook: 5 sc, 4 sc in one st, working along the opposite side of the foundation chain: 5 sc, 4 sc in one st. (18)
Key2
- ch
- Chain
- sc
- Single Crochet
- Round 2
5 sc, (inc) ×4, 5 sc, (inc) ×4. (26)
Key2
- inc
- Increase (2 sc in same stitch)
- sc
- Single Crochet
- Round 3
5 sc, (sc, inc) ×4, 5 sc, (sc, inc) ×4. (34)
Key2
- inc
- Increase (2 sc in same stitch)
- sc
- Single Crochet
- Round 4
5 sc, (2 sc, inc) ×4, 5 sc, (2 sc, inc) ×4. (42)Change to main color yarn.
Key2
- inc
- Increase (2 sc in same stitch)
- sc
- Single Crochet
- Round 5
BLO: 42 sc. (42)
Key2
- BLO
- Back Loop Only
- sc
- Single Crochet
- Rounds 6–8
42 sc. (3 rounds) (42)
Key1
- sc
- Single Crochet
- Round 9
5 sc, (2 sc, dec) ×4, 5 sc, (2 sc, dec) ×4. (34)
Key2
- dec
- Invisible Decrease (insert hook in front loop of next 2 sts, yarn over, pull through both loops, yarn over, pull through remaining 2 loops)
- sc
- Single Crochet
- Round 10
5 sc, (sc, dec) ×4, 5 sc, (sc, dec) ×4. (26)
Key2
- dec
- Invisible Decrease (insert hook in front loop of next 2 sts, yarn over, pull through both loops, yarn over, pull through remaining 2 loops)
- sc
- Single Crochet
- Round 11
5 sc, (dec) ×4, 5 sc, (dec) ×4. (18)
Key2
- dec
- Invisible Decrease (insert hook in front loop of next 2 sts, yarn over, pull through both loops, yarn over, pull through remaining 2 loops)
- sc
- Single Crochet
- Round 12
(sc, dec) ×6. (12)Close the opening and weave in the end.Rejoin contrast color yarn to Rnd 4 and work in FLO: 42 sc, sl st to join. Fasten off and weave in the end.
Key5
- sl st
- Slip Stitch
- dec
- Invisible Decrease (insert hook in front loop of next 2 sts, yarn over, pull through both loops, yarn over, pull through remaining 2 loops)
- FLO
- Front Loop Only
- Rnd
- Round
- sc
- Single Crochet
Legs (Make 2)
- Round 1
Ch 19, starting in the 2nd ch from hook: 18 sc, join into a round. (18)
Key2
- ch
- Chain
- sc
- Single Crochet
- Rounds 2–14
18 sc. (13 rounds) (18)Fasten off, leaving a long tail for sewing. Sew this end of the leg to the foot. Do not stuff. The opposite end (where you began) will be worked directly into the body.
Key1
- sc
- Single Crochet
Arms (Make 2)
- Round 1
6 sc in MR. (6)
Key2
- MR
- Magic Ring
- sc
- Single Crochet
- Round 2
(inc) ×6. (12)
Key1
- inc
- Increase (2 sc in same stitch)
- Round 3
(sc, inc) ×6. (18)
Key2
- inc
- Increase (2 sc in same stitch)
- sc
- Single Crochet
- Round 4
(2 sc, inc) ×6. (24)
Key2
- inc
- Increase (2 sc in same stitch)
- sc
- Single Crochet
- Rounds 5–7
24 sc. (3 rounds) (24)
Key1
- sc
- Single Crochet
- Round 8
(2 sc, dec) ×6. (18)
Key2
- dec
- Invisible Decrease (insert hook in front loop of next 2 sts, yarn over, pull through both loops, yarn over, pull through remaining 2 loops)
- sc
- Single Crochet
- Round 9
(dec) ×6, 6 sc. (12)
Key2
- dec
- Invisible Decrease (insert hook in front loop of next 2 sts, yarn over, pull through both loops, yarn over, pull through remaining 2 loops)
- sc
- Single Crochet
- Rounds 10–24
12 sc. (15 rounds) (12)Stuff only the lower (paw) section. Fold the piece in half and work 5 sc through both layers to close. Fasten off, leaving a long tail for sewing. Sew arms to the body.
Key1
- sc
- Single Crochet
Body and Head
- Round 1
6 sc in MR. (6)
Key2
- MR
- Magic Ring
- sc
- Single Crochet
- Round 2
(inc) ×6. (12)
Key1
- inc
- Increase (2 sc in same stitch)
- Round 3
(inc) ×12. (24)
Key1
- inc
- Increase (2 sc in same stitch)
- Round 4
(3 sc, inc) ×6. (30)
Key2
- inc
- Increase (2 sc in same stitch)
- sc
- Single Crochet
- Round 5
(4 sc, inc) ×6. (36)
Key2
- inc
- Increase (2 sc in same stitch)
- sc
- Single Crochet
- Round 6
(5 sc, inc) ×6. (42)
Key2
- inc
- Increase (2 sc in same stitch)
- sc
- Single Crochet
- Round 7
(6 sc, inc) ×6. (48)
Key2
- inc
- Increase (2 sc in same stitch)
- sc
- Single Crochet
- Round 8
Join legs — 8 sc together with leg (working through both the body stitch and the open edge of the leg simultaneously), 16 sc, 8 sc together with leg, 16 sc. (48)
Key1
- sc
- Single Crochet
- Rounds 9–15
48 sc. (7 rounds) (48)
Key1
- sc
- Single Crochet
- Round 16
(6 sc, dec) ×6. (42)
Key2
- dec
- Invisible Decrease (insert hook in front loop of next 2 sts, yarn over, pull through both loops, yarn over, pull through remaining 2 loops)
- sc
- Single Crochet
- Round 17
(5 sc, dec) ×6. (36)
Key2
- dec
- Invisible Decrease (insert hook in front loop of next 2 sts, yarn over, pull through both loops, yarn over, pull through remaining 2 loops)
- sc
- Single Crochet
- Round 18
8 sc, (dec) ×6, 16 sc. (30)
Key2
- dec
- Invisible Decrease (insert hook in front loop of next 2 sts, yarn over, pull through both loops, yarn over, pull through remaining 2 loops)
- sc
- Single Crochet
- Rounds 19–22
30 sc. (4 rounds) (30)
Key1
- sc
- Single Crochet
- Round 23
(3 sc, dec) ×6. (24)
Key2
- dec
- Invisible Decrease (insert hook in front loop of next 2 sts, yarn over, pull through both loops, yarn over, pull through remaining 2 loops)
- sc
- Single Crochet
- Round 24
(dec) ×12. (12)
Key1
- dec
- Invisible Decrease (insert hook in front loop of next 2 sts, yarn over, pull through both loops, yarn over, pull through remaining 2 loops)
The body is complete. Begin the head without breaking yarn — continue directly.
- Round 25
(inc) ×12. (24)
Key1
- inc
- Increase (2 sc in same stitch)
- Round 26
(sc, inc) ×12. (36)
Key2
- inc
- Increase (2 sc in same stitch)
- sc
- Single Crochet
- Round 27
(5 sc, inc) ×6. (42)
Key2
- inc
- Increase (2 sc in same stitch)
- sc
- Single Crochet
- Round 28
(6 sc, inc) ×6. (48)
Key2
- inc
- Increase (2 sc in same stitch)
- sc
- Single Crochet
- Round 29
(7 sc, inc) ×6. (54)
Key2
- inc
- Increase (2 sc in same stitch)
- sc
- Single Crochet
- Round 30
(8 sc, inc) ×6. (60)
Key2
- inc
- Increase (2 sc in same stitch)
- sc
- Single Crochet
- Rounds 31–34
60 sc. (4 rounds) (60)
Key1
- sc
- Single Crochet
- Round 35
(8 sc, dec) ×6. (54)
Key2
- dec
- Invisible Decrease (insert hook in front loop of next 2 sts, yarn over, pull through both loops, yarn over, pull through remaining 2 loops)
- sc
- Single Crochet
- Round 36
(7 sc, dec) ×6. (48)
Key2
- dec
- Invisible Decrease (insert hook in front loop of next 2 sts, yarn over, pull through both loops, yarn over, pull through remaining 2 loops)
- sc
- Single Crochet
- Rounds 37–38
48 sc. (2 rounds) (48)
Key1
- sc
- Single Crochet
- Round 39
(6 sc, dec) ×6. (42)
Key2
- dec
- Invisible Decrease (insert hook in front loop of next 2 sts, yarn over, pull through both loops, yarn over, pull through remaining 2 loops)
- sc
- Single Crochet
- Round 40
42 sc. (42)
Key1
- sc
- Single Crochet
- Round 41
(5 sc, dec) ×6. (36)
Key2
- dec
- Invisible Decrease (insert hook in front loop of next 2 sts, yarn over, pull through both loops, yarn over, pull through remaining 2 loops)
- sc
- Single Crochet
- Round 42
(4 sc, dec) ×6. (30)
Key2
- dec
- Invisible Decrease (insert hook in front loop of next 2 sts, yarn over, pull through both loops, yarn over, pull through remaining 2 loops)
- sc
- Single Crochet
- Round 43
(3 sc, dec) ×6. (24)
Key2
- dec
- Invisible Decrease (insert hook in front loop of next 2 sts, yarn over, pull through both loops, yarn over, pull through remaining 2 loops)
- sc
- Single Crochet
- Round 44
(2 sc, dec) ×6. (18)
Key2
- dec
- Invisible Decrease (insert hook in front loop of next 2 sts, yarn over, pull through both loops, yarn over, pull through remaining 2 loops)
- sc
- Single Crochet
- Round 45
(sc, dec) ×6. (12)
Key2
- dec
- Invisible Decrease (insert hook in front loop of next 2 sts, yarn over, pull through both loops, yarn over, pull through remaining 2 loops)
- sc
- Single Crochet
- Round 46
(dec) ×6. (6)Fasten off, pull the opening closed, and weave in the end.
Key1
- dec
- Invisible Decrease (insert hook in front loop of next 2 sts, yarn over, pull through both loops, yarn over, pull through remaining 2 loops)
Ears (Make 4 — 2 in Main Color, 2 in Contrast Color)
Worked in flat rows. Begin each new row with 1 turning chain (ch 1).
- Round 1
Ch 2, 3 sc in the 2nd ch from hook. (3)
Key2
- ch
- Chain
- sc
- Single Crochet
- Round 2
Inc, sc, inc. (5)
Key2
- inc
- Increase (2 sc in same stitch)
- sc
- Single Crochet
- Round 3
Inc, 3 sc, inc. (7)
Key2
- inc
- Increase (2 sc in same stitch)
- sc
- Single Crochet
- Rounds 4–5
7 sc. (2 rows) (7)Fasten off the main color pieces and weave in ends. Hold one main color piece and one contrast color piece together and sc around the perimeter to join them. Turn the work and sc around once more. Fasten off, leaving a long tail for sewing.Sew ears to the head, positioned 3 stitches back from the center top. Leave 10 stitches between the ears.
Key1
- sc
- Single Crochet
Tail
Begin with main color yarn.
- Round 1
7 sc in MR. (7)
Key2
- MR
- Magic Ring
- sc
- Single Crochet
- Rounds 2–3
7 sc. (2 rounds) (7)Change to contrast color.
Key1
- sc
- Single Crochet
- Round 4
7 sc. (7)Change to main color.
Key1
- sc
- Single Crochet
- Rounds 5–6
7 sc. (2 rounds) (7)Change to contrast color.
Key1
- sc
- Single Crochet
- Round 7
7 sc. (7)Change to main color.
Key1
- sc
- Single Crochet
- Rounds 8–25
Continue repeating Rnds 5–7, alternating colors as established. (18 rounds) (7)Do not stuff. Fold the tail flat and work 3 sc through both layers to close. Fasten off, leaving a long tail for sewing. Sew the tail in the round directly after where the legs were joined into the body.
Key1
- sc
- Single Crochet
Muzzle
- Round 1
Ch 7, starting in the 2nd ch from hook: 5 sc, 4 sc in one st, working along the opposite side of the foundation chain: 5 sc, 4 sc in one st. (18)
Key2
- ch
- Chain
- sc
- Single Crochet
- Round 2
5 sc, (inc) ×4, 5 sc, (inc) ×4. (26)
Key2
- inc
- Increase (2 sc in same stitch)
- sc
- Single Crochet
- Round 3
5 sc, (sc, inc) ×4, 5 sc, (sc, inc) ×4. (34)
Key2
- inc
- Increase (2 sc in same stitch)
- sc
- Single Crochet
- Rounds 4–7
34 sc. (4 rounds) (34)Fasten off, leaving a long tail for sewing. Sew the muzzle to the head, starting 3 rounds up from the neck, extending 6 rounds upward.
Key1
- sc
- Single Crochet
Making up
- Step 1Sew each Leg to its corresponding Foot using the yarn tail, aligning the open end of the leg with the top of the foot. Use whipstitch for a secure join.
- Step 2Confirm the Legs are correctly positioned in Rnd 8 of the Body — they should be on opposite sides, 16 stitches apart.
- Step 3Begin stuffing the Body firmly as you close Rnds 23–24. Continue stuffing the Head section as you decrease from Rnd 35 onward. Stop adding fiberfill at Rnd 43 so closing is easy.
- Step 4Sew the Muzzle to the front of the Head , 3 rounds up from the neck seam, centered, extending 6 rounds upward.
- Step 5Glue the eyes (14 mm half-bead) just above the muzzle, with 8 stitches between them.
- Step 6Glue the nose (18×20 mm) centered in Rnd 3 of the muzzle.
- Step 7Using contrast color yarn, embroider a vertical line from the nose downward for several rounds. Add whiskers with short random stitches if desired.
- Step 8Embroider a fringe/fringe-style forelock: use stitch markers to plan strands starting at the center top, extending 5 rounds down. Space each strand 3 stitches from the edge. Work two strands of contrast color yarn per section and one strand of main color in the center of each section.
- Step 9Using main color yarn, embroider small white areas beside each eye for highlights.
- Step 10Sew the Arms to the sides of the body using the yarn tails, positioning them at approximately Rnds 16–18.
- Step 11Sew the Ears to the top of the head, 3 stitches back from center, 10 stitches apart.
- Step 12Sew the Tail to the back of the body in the round directly after the leg join.
- Step 13Embroider 3 small “claw” lines on each paw, spacing them 3 stitches apart.
- Step 14Weave in all remaining ends.
Notes from the pattern
- Because the body, head, feet, legs and arms are worked in continuous spiral without joining, a stitch marker at the start of each round is essential to keep the count accurate, particularly across the 33 rounds of the body and head.
- Contrast colour appears only in the foot soles (Rnd 1) and two of the four ears, so colour changes are limited to those two spots rather than occurring mid-round anywhere in the body.
- Stuffing is added firmly while closing Rnds 23–24 of the body, continues through the head decreases from Rnd 35, and should stop by Rnd 43 so the final rounds stay easy to close; the legs are left unstuffed since one end is worked directly into the body.
- Gauge is not critical for this project — consistent tension matters more than hitting an exact stitch gauge. Work tightly enough that stuffing doesn't show through the stitches.
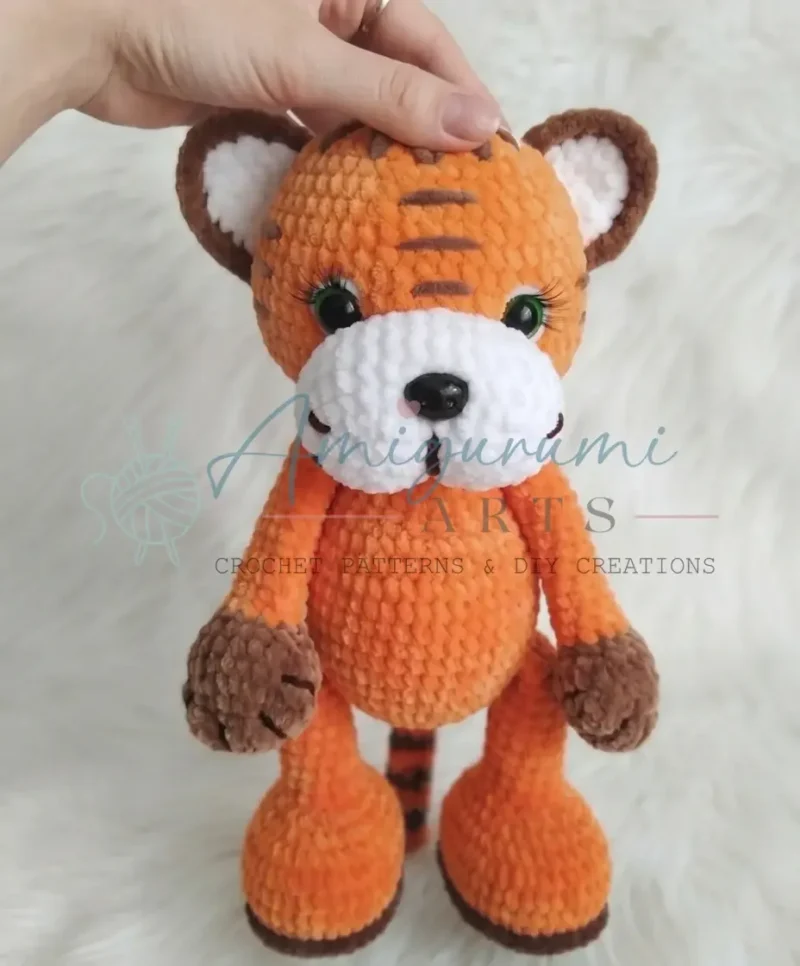
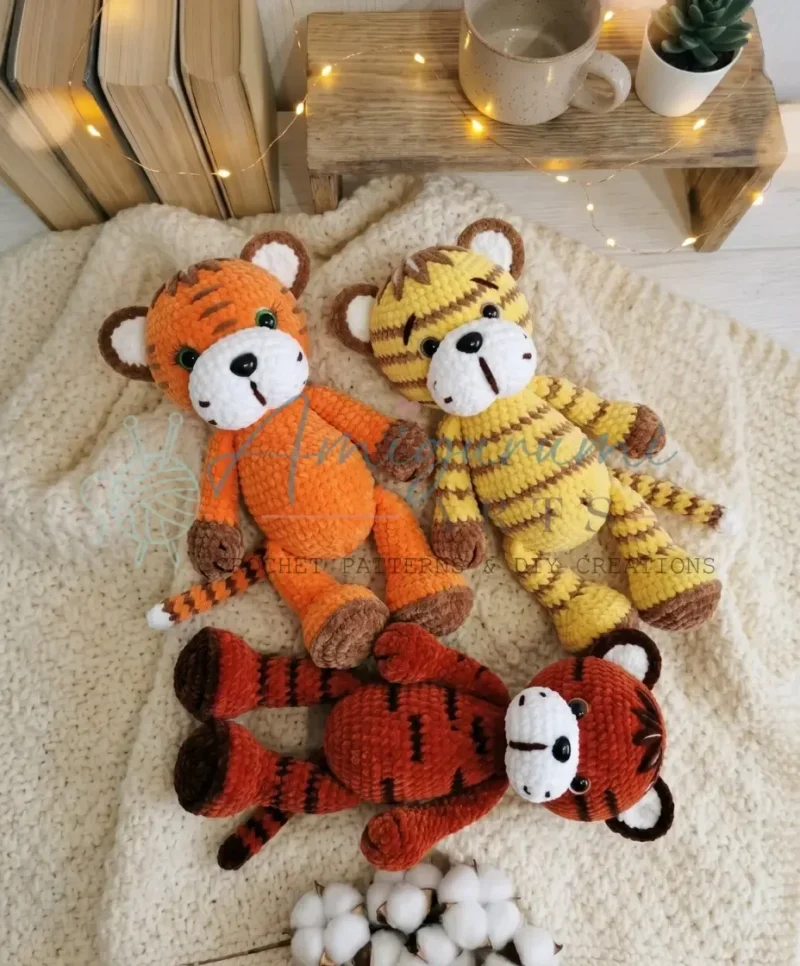
- The tiger can be worked in any two-colour combination — classic orange and black, or sunny yellow and brown — using the main colour for the body and the contrast colour for the foot soles, two of the four ears, and embroidered stripe details.
The essentials
- Rounds
- 67
- Parts
- 7
- Level
- Intermediate
- Time
- 6-9 hours
- Hook
- 4 mm
- Yarn
- Bulky
Stitches you will use
- Continuous spiral single crochet (UK double crochet) Used throughout the feet, legs, arms and the 33-round body and head; no joining happens at the end of each round, so losing track of the round start is the main risk.
- Amigurumi increasing and decreasing Seen in the arms' four increase rounds and the feet's early increase rounds; keep increase points evenly spaced around the round to avoid puckering or a lopsided shape.
- Flat rows with a turning chain Used only for the four ears, worked back and forth over four rows in main and contrast colour; turn consistently each row so the two halves of each ear match before sewing them together.
Troubleshooting
The foot comes out lopsided rather than oval.
The increase of 4 sc in one stitch at each end of Rnd 1 needs to land in the same place on both the starting and opposite sides of the foundation chain; recount the 5 sc sections before each increase to keep both ends symmetrical.
The arms look shorter or narrower than the legs.
This is expected: the arms reach only 24 stitches around after Rnd 4, while the legs are worked at 18 stitches around from a longer 19-chain start, so the two limbs are proportioned differently by design rather than by error.
The body puckers or narrows unevenly
Stuffing added too early or unevenly before the neck decreases around Rnd 35 can bunch inside the narrowing rounds; keep stuffing light and even through the decreases and stop adding fibrefill by Rnd 43 as directed.
Substituting yarn
- Acrylic, bulky (chunky) weight
- Closest match to the pattern's yarn in thickness and stitch definition; the 4 mm hook and stated stuffing amount can be used without adjustment.
- Cotton blend, aran or worsted weight
- Thinner than the pattern's yarn, so the finished toy comes out noticeably smaller and less plush; drop to a 3.5–4 mm hook and stuff more firmly to compensate for the lighter fabric.
- Wool blend, super bulky weight
- Thicker than the pattern's yarn, producing a larger, softer toy with a looser fabric; move up to a 5–6 mm hook and use slightly less stuffing since the yarn itself adds loft.
Washing and care
- The main and contrast yarns are 100% polyester, so hand wash in cool water and reshape the toy while still damp, avoiding hot water or a tumble dryer, which can flatten the fibre's loft.
- Dry flat away from direct heat and store the finished tiger loosely rather than compressed, so the bulky yarn's texture and the ear shaping keep their form over time.
The photographs taken while this was being made
Every one was taken by whoever published the pattern, in the order the source listed them.
FAQs
Questions
What hook size does this pattern use?
A single E-4 / 4 mm hook is used for every part of the tiger, including the feet, legs, arms, body, head, ears and tail, so no hook changes are needed. Because the yarn is bulky weight, this hook size produces a dense, plush fabric.
How much contrast colour yarn is needed?
The materials list calls for half a skein of contrast colour, which covers the foot soles and two of the four ears. The main colour, used for everything else, needs two full skeins.
Are the legs stuffed separately before attaching them?
No, the legs are left unstuffed. The end where the leg began is worked directly into the body, while the opposite end is sewn to the foot with a whipstitch.
Why are the ears made differently from the rest of the toy?
The ears are the only flat piece in the pattern, worked back and forth over four rows with a turning chain at the start of each row, rather than in continuous spiral rounds like the other parts. Four ears are made in total, two in main colour and two in contrast, then paired and sewn on.
When should stuffing stop while working the body and head?
Stuffing begins firmly at Rnds 23–24 of the body, continues through the head decreases from Rnd 35, and should stop by Rnd 43 so the final rounds are easy to close. Adding too much fibrefill after that point makes closing the last stitches difficult.
These answers came from whoever first published the pattern, kept word for word.