 EVERY CROCHET
 Accessories 3 rounds No account, no download
Simple turned-band ear warmer in half double crochet
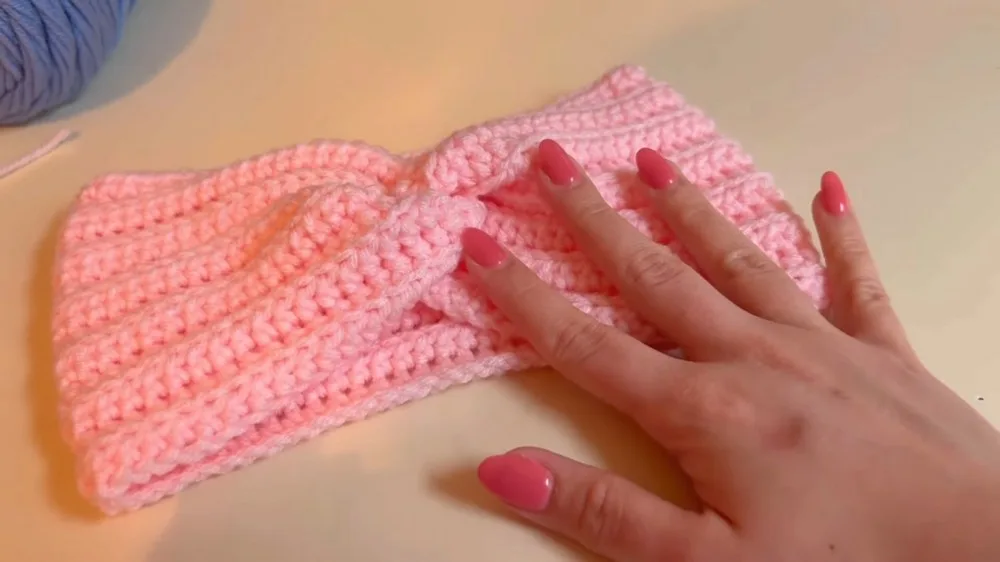
A half double crochet (UK half treble) ear warmer worked in turned rows, then seamed into a twisted band. US and UK terms given.
- Skill
- Intermediate
- Time
- 4-6 hours
- Yarn weight
- Worsted
- Hook
- 5.5 mm

Intermediate
What the original write-up called it. Nothing here is graded again.

Worsted
What the sample was worked in. Any weight works; the size moves with it.

4-6 hours
What the original page reckoned. Your own pace is the one that matters.
About this pattern
This is a flat, ribbed ear warmer worked entirely in half double crochet (UK half treble crochet), using a worsted weight acrylic yarn and a 5.5 mm hook. The maker chains to fit the head, works a setup row plus 12 more rows in back loop only for a ridged texture, then folds and seams the short ends into a twisted band. No shaping, colour changes or advanced stitches are involved.
This ear warmer belongs to the half double crochet (UK: half treble crochet) family, a stitch that sits between single and double crochet in height and produces a dense, warm fabric well suited to a headband worn against the ears in cooler months. Worked as a single flat panel rather than in the round, it is a straightforward project for a maker comfortable with a turning chain and a consistent stitch count across many rows.
Construction starts from a foundation chain sized to head circumference, with a setup row of half double crochet across that chain to establish the stitch count. Every following row turns with a single chain and works into the back loop only, which builds a horizontal ridged texture rather than a smooth one. Once the panel reaches 13 rows, the ends are folded and seamed together in a twist, so the flat strip becomes a shaped headband rather than a plain loop.
Materials
- Worsted weight acrylic yarn ('I Love This Yarn' brand recommended)
- 5.5 mm crochet hook
The list is the pattern's own wording.
Instructions
Every round is printed as the pattern wrote it, brackets and all. Open the key beside a round to see only the short forms that round uses.
Main Pattern
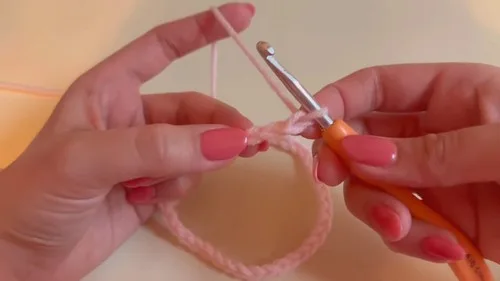
Begin by making a chain long enough to fit around your head (for reference, a head circumference of about 21.5 inches was mentioned, and approximately 76 chains were made).
After completing Row 1, measure the piece around your head to ensure it fits comfortably without needing to stretch it.
Continue the pattern for a total of 13 rows, or until you've reached the desired width of your headband.
At the end of Row 13, chain one, then cut your yarn, leaving about a 10-inch tail for sewing.
- Round 1
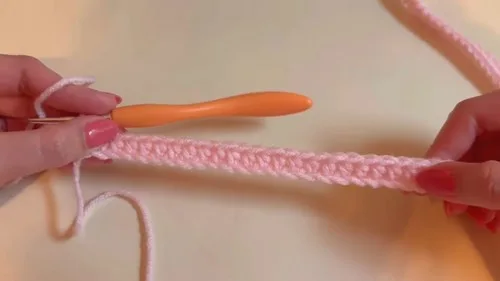
Setup Row In the second chain from the hook, create the first HDC (yarn over, insert hook into second chain, yarn over again and pull through the chain for three loops on hook, yarn over once more and pull through all three loops); continue to make one HDC in each chain along the starting chain. (75 HDC)
Key1
- hdc
- half double crochet
- Round 2
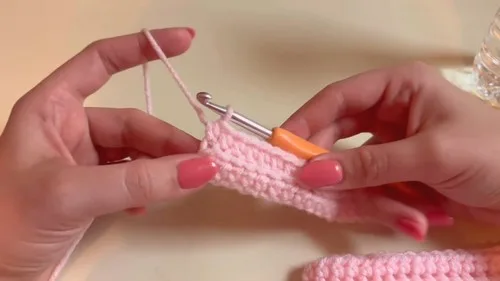
Ch 1, turn; working in the back loop only of each stitch (yarn over, insert hook into the back loop of the first stitch of the previous row, complete the HDC as usual), continue making one HDC in the back loop only of each stitch across the row. (75 HDC)
Key2
- hdc
- half double crochet
- ch
- chain
- Rounds 3–13
Repeat Row 2 (ch 1, turn, HDC in back loop only of each stitch across), maintaining the same stitch count with no increasing or decreasing. (75 HDC)
Key2
- hdc
- half double crochet
- ch
- chain
Making up
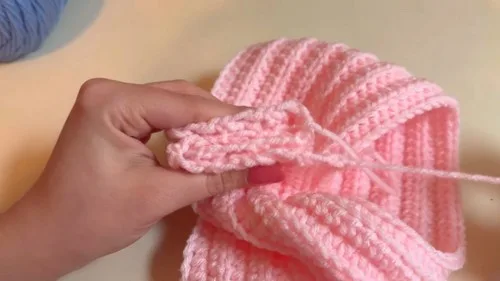
- Step 1Lay the headband flat, fold the edges towards one another, and then fold them inward.
- Step 2Overlap the folds on top of each other, ensuring they are evenly matched.
- Step 3Sew the overlapped sections together, making sure your sewing needle goes through all four layers, weaving back and forth until the seam is secure.
- Step 4Tie off and weave in any remaining yarn tails.
- Step 5Once all ends are woven in, flip the headband right side out.
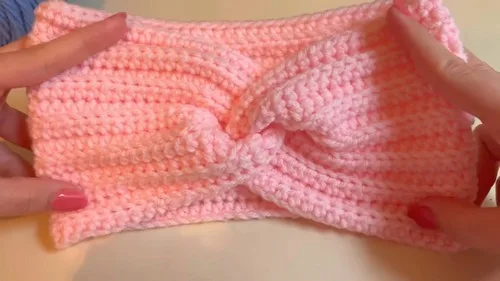
- Step 6The seam you've created will have a knotted effect in the middle, adding a decorative touch to the headband.
Notes from the pattern
- The pattern is worked with a 5.5 mm hook and worsted weight acrylic yarn; a smaller or larger hook will change the finished width and how snugly the band fits.
- After the setup row, check the fit around the head before continuing — the piece should sit comfortably without stretching, since the row count is not adjustable once seaming is done.
- The full panel runs to 13 rows for the width used in the sample; fewer rows give a narrower band and more give a wider one, so decide on width before starting Row 3.
- This pattern uses a single colour throughout with no colour changes; any colour swap should happen at the start, since joining a new shade mid-row would show clearly in the ribbed back-loop texture.
- You can personalize the headband with your choice of yarn color or by adjusting the number of rows to change the width.
The essentials
- Rounds
- 3
- Level
- Intermediate
- Time
- 4-6 hours
- Hook
- 5.5 mm
- Yarn
- Worsted
Stitches you will use
- Half double crochet (UK half treble crochet) Used for every row of the panel; keep the stitch height consistent so the fabric doesn't wave along its length.
- Working in the back loop only Applied from Row 2 onward to create the ridged texture; missing a back loop and catching both loops flattens the ribbing and is easy to spot by comparing rows.
- Folding and seaming through four layers Used at assembly, where the two short ends are folded and overlapped before sewing; keep the seam snug so the finished twist sits flat rather than puckering.
Troubleshooting
The finished band feels too loose or slips down
The starting chain was longer than the actual head circumference, or the fabric stretched during seaming. Re-check the fit after the setup row next time, and unravel a few chains before restarting if the band is already loose.
The ribbed texture looks flat instead of ridged
One or more rows were worked into both loops instead of the back loop only. Check each row against the previous one for a visible ridge, and unpick back to the last correct row if needed.
The seam doesn't sit flat or the twist looks lopsided
The folds weren't matched evenly before sewing through all four layers. Lay the band flat, align the folded edges again, and re-pin before resewing.
Substituting yarn
- Wool, worsted weight
- Adds warmth and a softer drape than acrylic, but the finished band may need light blocking to lie flat and should be handled more carefully in the wash.
- Acrylic-wool blend, worsted weight
- Keeps a similar hook size and stitch gauge to the original while adding a touch more warmth and softness, with easier care than pure wool.
- Cotton, worsted weight
- Produces a firmer, less elastic fabric with less stretch across the ribbing, so the starting chain may need to be slightly longer for the same fit.
Washing and care
- As the pattern uses acrylic yarn, the finished ear warmer can typically be machine washed on a gentle cycle and should be laid flat to dry rather than hung, which prevents the band from stretching out of shape.
- Reshape the band gently while damp to keep the ribbed texture even, and store it folded flat rather than rolled to preserve the twisted seam shape between wears.
The photographs taken while this was being made
Every one was taken by whoever published the pattern, in the order the source listed them.
FAQs
Questions
Can this ear warmer be made for a child instead of an adult?
Yes — chain to fit the child's head circumference before Row 1, following the same fitting check described after the setup row. The row count of 13 can also be reduced slightly for a narrower band suited to a smaller head.
Why is the fabric worked in the back loop only?
Working in the back loop only across Rows 2-13 creates the horizontal ridged texture that gives the band its structured look. Working into both loops instead would produce a flatter, smoother fabric.
How is the width of the band adjusted?
Width is controlled by the number of rows worked after the setup row, with 13 rows used for the sample. Fewer rows give a narrower band and more rows give a wider one.
What does the finished seam look like?
Folding the ends inward before overlapping and sewing through all four layers creates a twisted, knotted effect at the seam once the band is turned right side out. This is a design feature of the assembly, not a mistake.
Does the hook size need to match the yarn exactly?
The pattern is written for a 5.5 mm hook with worsted weight acrylic yarn, and matching this pairing keeps the stitch count and fit consistent with the sample. A different hook size will change the fabric density and the final measurement around the head.
These answers came from whoever first published the pattern, kept word for word.