 EVERY CROCHET
 Hats & Accessories 8 rounds No account, no download
A simple ruffled brim hat pattern for summer wear
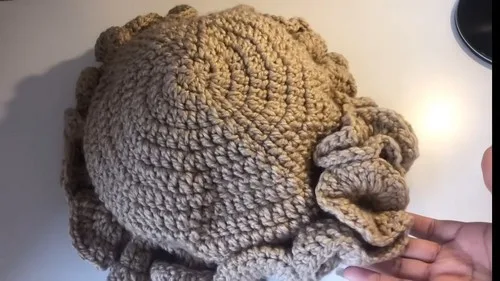
Double crochet ruffle hat worked in rounds from a magic circle, shaped by graduated increases, straight rounds, a decrease, and a flared
- Skill
- Beginner
- Time
- 2-3 hours
- Yarn weight
- Worsted

Beginner
What the original write-up called it. Nothing here is graded again.

Worsted
What the sample was worked in. Any weight works; the size moves with it.

2-3 hours
What the original page reckoned. Your own pace is the one that matters.
About this pattern
This is a double crochet hat worked from a magic circle in joined rounds, with a brim shaped by a repeating increase sequence, straight rounds, a decrease round, and a final flared round that together produce a ruffled edge rather than a flat one. It suits a maker comfortable with basic double crochet, decreases, and slip stitch joins, and takes a single evening of steady, repetitive rounds to complete.
This hat belongs to the double crochet (DC) family of stitches, built up in dense, solid rounds rather than open lace. The technique gives the crown enough body to hold its shape while leaving the brim loose enough to flare into ruffles, making it a good showcase for a single, dependable stitch used at different rates of increase.
Construction starts at the centre with a magic circle worked with the double crochet stitch, then moves outward in joined rounds rather than a continuous spiral. Each round is closed with a slip stitch before the next begins, and the ruffle takes shape as the increase pattern shifts from a full round of paired stitches to a repeating one-then-two sequence, spreading the fabric faster than the head opening grows.
Materials
- Yarn
- Crochet hook
The list is the pattern's own wording.
Instructions
Every round is printed as the pattern wrote it, brackets and all. Open the key beside a round to see only the short forms that round uses.
Main Pattern
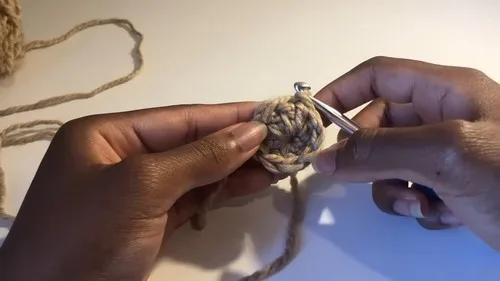
Starting with a Magic Circle: place the yarn over three fingers and wrap it to create a cross; secure the tail end and working yarn between your thumb and pinky; using the crochet hook, go under the first strand and grab the second strand to create a loop; pull the working yarn through to make a loop - this counts as one chain stitch.
- Round 1
Start with a double crochet (DC) into the magic circle:Step by step: Yarn over (YO), insert hook into the circle, pull up a loop (3 loops on hook); YO, pull through two loops (2 loops on hook); YO, pull through remaining two loops; make nine more DC into the circle, remembering to work over the two strands to secure the circle (10 DC total counting the beginning chain); pull the tail to close the magic circle gently to finish the round.
Key2
- dc
- double crochet
- yo
- yarn over
Joining the Round
Slip stitch (SLST) into the top of the initial chain two from the start of Round 1.
- Round 2
Chain 2 (this does not count as a stitch in this pattern). Make two DC into each stitch around (ignoring the chain 2 from the start), resulting in 20 stitches total.
Key1
- dc
- double crochet
- Round 3
Chain 2 (again, does not count as a stitch). One DC in the first stitch, then two DC in the next stitch, repeat from * to * around. End with a SLST at the top to join.
Key1
- dc
- double crochet
- Round 4
Chain 2. For this round, you'll do three DC, with the fourth DC being worked into the same stitch as the third DC.
Key1
- dc
- double crochet
- Round 5
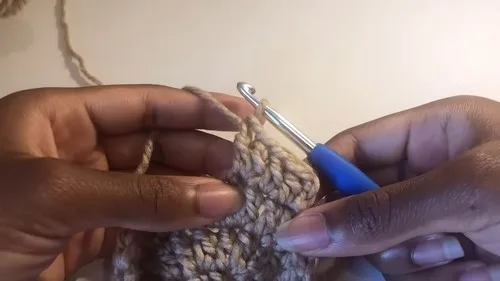
Chain 2. Place four DC, one in each stitch, and then the fifth DC in the same stitch as the fourth DC.Continue this pattern - with the increases (where additional DCs are placed in the same stitch) occurring in the last stitch of the repeat - until you reach your desired size.
Key1
- dc
- double crochet
When the text refers to "eight rows," it likely means you continue increasing in this manner until you have completed a total of eight increasing rounds.
- Straight DC Rounds
After completing your increase rows, work several rounds of one DC in each stitch without increasing to create the sides of the hat.
Key1
- dc
- double crochet
- Decrease Round
Chain 1. Insert the hook into the first stitch, pull up a loop, insert the hook into the second stitch, pull up another loop, YO and pull through all three loops to make a decrease. Continue this decrease around.
Key1
- yo
- yarn over
- Brim Flare Round
Proceed with a few rounds of straight DC as instructed, but work three DC in each stitch to create a flare for the brim.
Key1
- dc
- double crochet
Making up
- Step 1After the last round of your increases for the brim, join with a SLST and chain one to secure.
- Step 2Cut the yarn, leaving a tail for weaving in.
- Step 3Turn your work inside out and weave in all loose ends to finish.
Notes from the pattern
- The materials list names only yarn and hook without specifying weight or size, so match the hook to the yarn's ball band recommendation rather than following a fixed number.
- A stitch marker on the first stitch of each round is worth using, since the joining slip stitch depends on returning to the exact starting point each time.
- Keep tension even across each round; the ruffle effect comes entirely from the increase count, so loose or tight stitching in different sections will make the flare uneven rather than smooth.
- The pattern includes no colour changes, so any stripe or contrast edge would need to be added independently at a round join rather than mid-round.
The essentials
- Rounds
- 8
- Parts
- 2
- Level
- Beginner
- Time
- 2-3 hours
- Yarn
- Worsted
Stitches you will use
- Magic circle start Used to begin Round 1 with ten double crochet (DC) stitches worked over the loop; keep the strands tight so the centre doesn't gap.
- Joined rounds with slip stitch Every round closes with a slip stitch into the top of the starting chain two; work this snugly so the join doesn't stand proud on the finished brim.
- Paced increasing Round 2 doubles every stitch, then later rounds shift to a one-then-two repeat; miscounting either pattern is the main cause of an uneven ruffle.
- Working the brim decrease The decrease round pulls up a loop in two consecutive stitches, then yarns over and pulls through all three loops at once; keep tension even so the decrease sits flush before the flared round that follows.
Troubleshooting
The brim cups inward instead of lying
This usually means an increase round was skipped or worked with too few stitches added; check the stitch count against the pattern's stated totals before continuing.
The stitch count after Round 2 doesn't
Miscounted double crochet in Round 1 is the likely cause; recount the ten stitches around the magic circle, including the starting chain, before working the doubling round.
The join between rounds looks bulky or twists the fabric
A slip stitch worked too loosely or into the wrong loop causes this; slip stitch firmly into the top of the starting chain two each time, keeping the join consistent round to round.
Substituting yarn
- Cotton, DK weight
- Gives a crisper ruffle with less drape than a softer fibre; use a slightly smaller hook than for worsted weight to keep the crown from growing too large.
- Cotton-linen blend, worsted weight
- Holds its shape well and suits warm-weather wear like the original design; expect a firmer, less flexible fabric that benefits from steam blocking to relax the ruffle.
- Bamboo-cotton blend, sport weight
- Produces a softer, more fluid ruffle and a lighter finished hat; increase the number of rounds slightly or size down the hook to keep the crown fitted.
Washing and care
- cotton or cotton-blend yarns typical of summer hats, hand wash in cool water and lay flat to dry, reshaping the brim by hand while still damp so the ruffle sits evenly.
- Store flat rather than folded to avoid creasing the brim, and avoid hanging the finished hat, since the weight of the ruffle can stretch the crown out of shape over time.
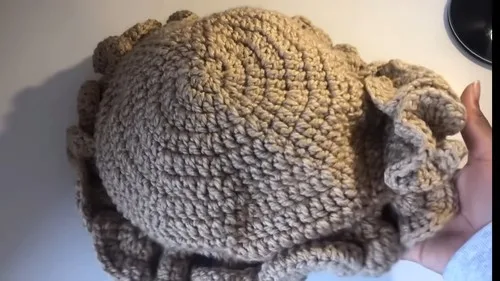
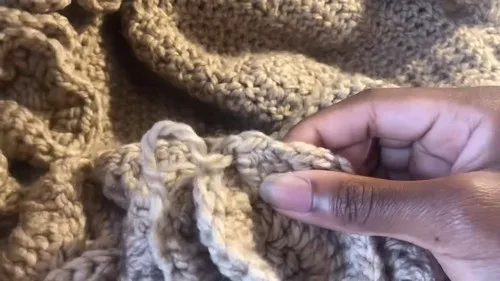
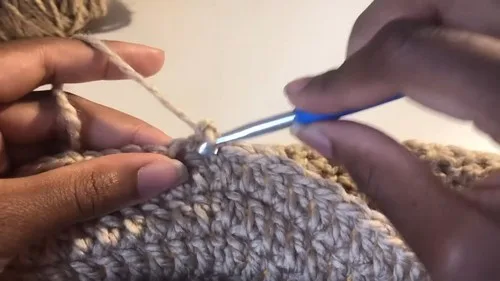
The photographs taken while this was being made
Every one was taken by whoever published the pattern, in the order the source listed them.
FAQs
Questions
Does the ruffle happen automatically or does it need shaping afterwards?
The ruffle comes directly from the increase pattern in the later rounds, not from blocking or shaping after the fact. As long as the stitch counts are followed, the flare develops on its own as the rounds are worked.
How many rounds make up the finished brim?
The brim increases run from Round 2 through a repeating one-then-two sequence for a total of eight increase rounds. After that, several straight rounds of one DC per stitch shape the sides, a single decrease round pulls the edge in, and a final round of three DC in each stitch flares the brim outward before it's finished off.
Why does Round 2 double every stitch while later rounds only increase every other stitch?
Round 2 doubles evenly to expand the flat centre quickly from ten to twenty stitches. Later rounds slow the rate of increase to a one-then-two repeat, which is what pushes the fabric to ruffle outward rather than continuing to lie flat.
Is a stitch marker necessary given that every round ends in a slip stitch join?
It is not strictly necessary but is recommended, since it is easy to lose track of the exact starting stitch across several joined rounds. A marker removes the guesswork when locating the top of the starting chain two for the join.
These answers came from whoever first published the pattern, kept word for word.