 EVERY CROCHET
 Hats 11 rounds No account, no download
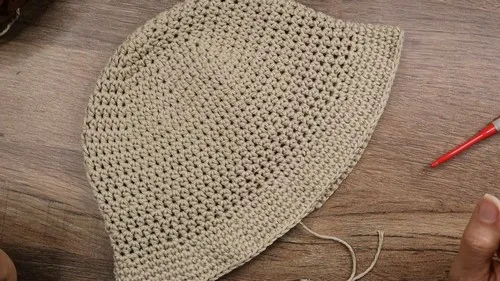
Simple crochet bucket hat pattern for beginners
A beginner-friendly crochet bucket hat pattern using half double crochet and single crochet, with a customizable crown, body, and brim
- Skill
- Beginner
- Time
- 4-6 hours
- Yarn weight
- Worsted
- Hook
- 5 mm

Beginner
What the original write-up called it. Nothing here is graded again.

Worsted
What the sample was worked in. Any weight works; the size moves with it.

4-6 hours
What the original page reckoned. Your own pace is the one that matters.
About this pattern
This is a top-down bucket hat worked in continuous rounds from a magic ring, using half double crochet for the crown and single crochet for the brim. A 5 mm hook and worsted-weight cotton yarn are standard, and sizing is calculated from head circumference divided by 3.14 rather than a fixed stitch count. Expect around 4-6 hours of repeat-driven crochet with no shaping beyond regular, evenly spaced increases.
This bucket hat is built almost entirely from the half double crochet stitch. The stitch gives the crown a firmer, less holey fabric than a taller stitch would, which matters on a piece meant to hold its own shape rather than drape. A section of single crochet, the shorter and denser cousin of the group, tightens the brim so it stands away from the head instead of flopping.
Construction runs top-down. A magic ring closes into eight stitches to open the crown, then the work continues in continuous rounds of increases with no joining, building outward until the flat disc matches the wearer's head diameter. The brim then takes over in single crochet: three rounds of spaced increases flare the fabric outward, four rounds worked straight bring the sides down to depth, and an optional smaller hook firms up the final edge.
This hat is fully customizable to fit any head size and can be worked up in your favorite yarn colors, making it an easy, fashionable addition to a handmade wardrobe for spring and summer.
Materials
- Cotton yarn (e.g., Lily Sugar'n Cream)
- Size 5 mm crochet hook (or suitable for your yarn)
- Tape measure
- Stitch marker
- Yarn needle
- Scissors
The list is the pattern's own wording.
Instructions
Every round is printed as the pattern wrote it, brackets and all. Open the key beside a round to see only the short forms that round uses.
Starting the Hat
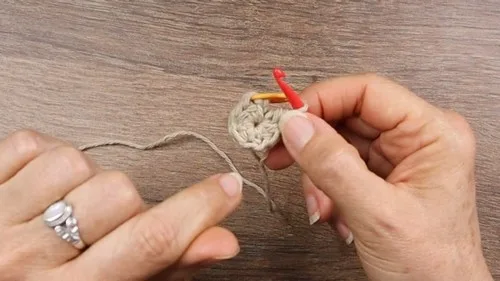
Create a magic ring.
- Round 1
Chain 1, work 8 HDC into the magic ring. Use stitch marker on first stitch. Pull yarn tail to close center.
Key1
- hdc
- half double crochet
Increase Rounds
- Round 2
2 HDC in each stitch around (16 sts)
Key2
- sts
- stitches
- hdc
- half double crochet
- Round 3
1 HDC, 2 HDC in next stitch repeat around (24 sts)
Key2
- sts
- stitches
- hdc
- half double crochet
- Round 4
1 HDC, 1 HDC, 2 HDC in next stitch repeat (32 sts)
Key2
- sts
- stitches
- hdc
- half double crochet
- Round 5
1 HDC in next 3, 2 HDC in next repeat (40 sts) Continue increasing by adding 1 regular stitch before each increase per round.
Key2
- sts
- stitches
- hdc
- half double crochet
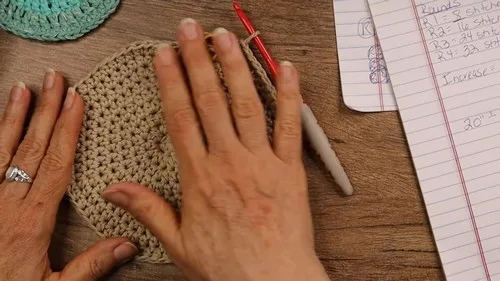
Stop when the crown reaches your target diameter.
Body of the Hat (Side)
Once the crown reaches your target diameter, stop increasing and continue straight in HDC to build the sides of the hat down to the desired depth.
- Body Rounds
No More Increases Continue working HDC in continuous rounds. Height Goal: 6.5–7 in from top of the crown for an adult size. Continue until desired depth is achieved.
Key1
- hdc
- half double crochet
Brim Rounds
Switch to Single Crochet: Use SC stitches and reintroduce increases. Optionally switch to a smaller hook for firmer brim.
- Round 1
4 SC, 2 SC in next stitch repeat around.
Key1
- sc
- single crochet
- Round 2
5 SC, 2 SC in next stitch repeat around.
Key1
- sc
- single crochet
- Round 3
6 SC, 2 SC in next stitch repeat around.
Key1
- sc
- single crochet
- Rounds 4–7
SC around without increases.
Key1
- sc
- single crochet
Adjust length as desired.
Finishing Touches
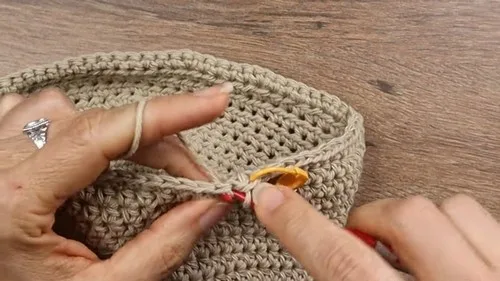
Blend the final round and close up the hat with an invisible join for a seamless finish.
- Finishing
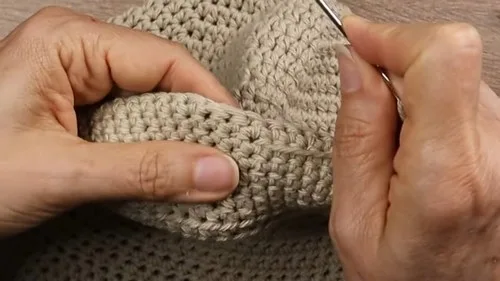
Work 3 slip stitches to blend final round. Cut yarn and pull through loop to secure.Use yarn needle for invisible join: insert needle through both bars of next V-stitch, then bring back into base of last stitch. Weave in yarn tail on the inside of the hat to hide.
Notes from the pattern
- A 5 mm hook is the standard size for the crown and early brim rounds; check gauge against the yarn weight before starting if substituting.
- Place the stitch marker on the first stitch of Round 1 and move it up every round, since the spiral construction has no join to mark the start otherwise.
- Measure head circumference just above the eyebrows and divide by 3.14 (π) to find the target crown diameter (e.g., 20 in ÷ 3.14 = ~6.4 in). Stop the Increase Rounds only once the flat crown diameter matches this calculated measurement, not at a fixed round number.
The essentials
- Rounds
- 11
- Parts
- 5
- Level
- Beginner
- Time
- 4-6 hours
- Hook
- 5 mm
- Yarn
- Worsted
Stitches you will use
- Magic ring start Round 1 of Starting the Hat closes eight stitches into a ring; pull the tail snug so the centre of the crown doesn't leave a gap.
- Continuous spiral rounds The crown and Increase Rounds work without joining or turning, so a stitch marker on the first stitch is the only reliable way to track where each round begins.
- Evenly spaced increases Increase Rounds add one plain stitch before each increase per round; skipping or doubling an increase throws the crown out of round before it reaches the target diameter.
Troubleshooting
The crown cups instead of lying flat
The increases were stopped before the disc reached the calculated diameter. Continue the Increase Rounds pattern, adding one plain stitch before each increase, until the diameter matches head circumference divided by 3.14.
The brim flares outward like a cone
One of the Brim Rounds 1-3 increases was placed unevenly or repeated extra. Recount stitches at the end of each brim round against the 4, 5, 6-stitch repeat before its increase.
The finished hat is too loose or too tight around the head
The circumference-to-diameter maths wasn't matched to the actual head being fitted. Remeasure above the eyebrows, recalculate the diameter, and unravel back to the correct Increase Round if the crown has already gone past it.
Substituting yarn
- Mercerised cotton, worsted weight
- Sharper stitch definition on the same 5 mm hook; the fabric holds its shape well enough that no stuffing or blocking aid is needed.
- Cotton-acrylic blend, worsted weight
- Softer drape and less crisp brim; the pattern's own suggestion of sizing down a hook for the brim becomes more useful here to keep the edge firm.
- Linen-cotton blend, worsted weight
- Cooler, more breathable finished hat with a slightly looser hand; expect the crown to need a touch more rounds to reach the same calculated diameter.
Washing and care
- Hand wash or use a gentle cool-water machine cycle; cotton doesn't felt, but heavy agitation can stretch the brim out of shape.
- Reshape while still damp over a bowl or form close to the calculated crown diameter, then lay flat to dry and store flat rather than folded to stop the brim creasing permanently.
The photographs taken while this was being made
Every one was taken by whoever published the pattern, in the order the source listed them.
FAQs
Questions
How is this hat sized for different head measurements?
Measure head circumference above the eyebrows and divide by 3.14 to get the target crown diameter. Stop the Increase Rounds as soon as the flat crown reaches that measurement, then move on to the Brim Rounds.
Why does the stitch marker matter if the rounds aren't joined?
Starting the Hat and the Increase Rounds are worked in a continuous spiral with no joins, so there's no natural end point to a round. The marker on the first stitch is the only way to know where each round begins and ends when counting increases.
Can the brim be worked without any increases?
No. Brim Rounds 1-3 each include a spaced increase to flare the fabric into a flat band before the following four rounds are worked straight without increases.
What determines how deep the finished hat sits?
The straight single crochet rounds after the brim increases continue until the piece measures 6.5-7 in from the top of the crown for an adult size. Working more or fewer of these rounds adjusts the depth for a different fit.
These answers came from whoever first published the pattern, kept word for word.