 EVERY CROCHET
 Hats 6 rounds No account, no download
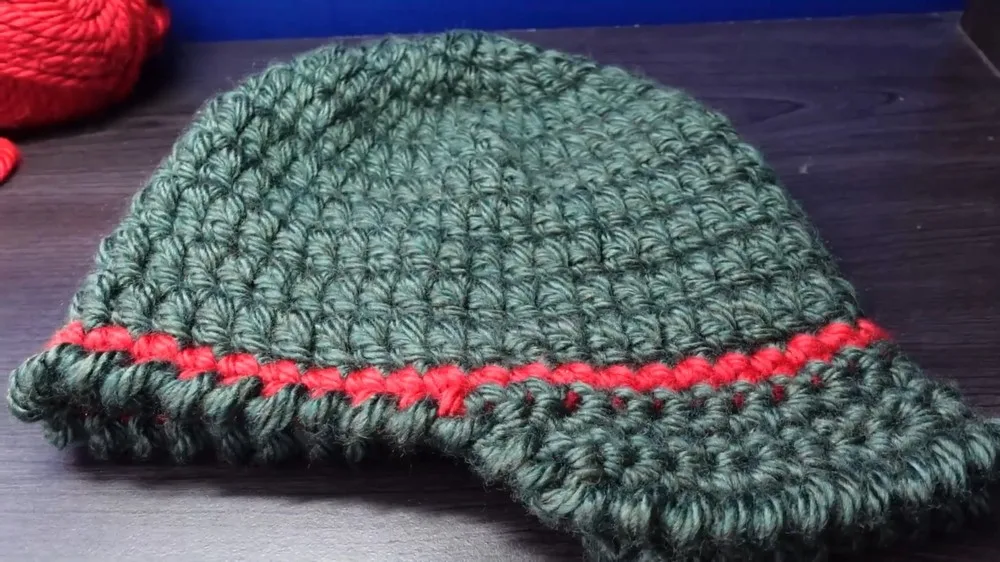
Men’s crochet hat with a sloped double crochet brim
A men's hat worked in double crochet (UK treble) with a single crochet (UK double) sloped brim, given in US and UK terms.
- Skill
- Intermediate
- Time
- 4-6 hours
- Yarn weight
- Worsted
- Hook
- 6.5 mm

Intermediate
What the original write-up called it. Nothing here is graded again.

Worsted
What the sample was worked in. Any weight works; the size moves with it.

4-6 hours
What the original page reckoned. Your own pace is the one that matters.
About this pattern
This is a men's crochet hat with a two-colour construction: a four-round double crochet (UK treble crochet) body increasing out from a ring, finished with a two-row single crochet (UK double crochet) brim worked flat and shaped with repeating increases to slope outward. Basic ring starts, stitch counting and a colour change are the main requirements.
This hat belongs to the double crochet (UK treble crochet) family, the mainstay stitch for close, warm headwear that holds its shape without being bulky. The dense fabric this stitch produces suits a men's hat well, giving enough structure for the crown to stand on its own while remaining comfortable against the head. A contrasting colour on the brim adds definition without extra texture.
The body is built from the centre outward, beginning with a ring and increasing steadily over four rounds to form a flat circle before the sides turn upward into the crown. The brim is added afterward in a second colour, worked in turned rows of single crochet (UK double crochet) rather than in the round, with a repeating increase pattern that pushes the outer edge wider than the inner edge so the brim curves outward rather than lying flat.
Materials
For the body
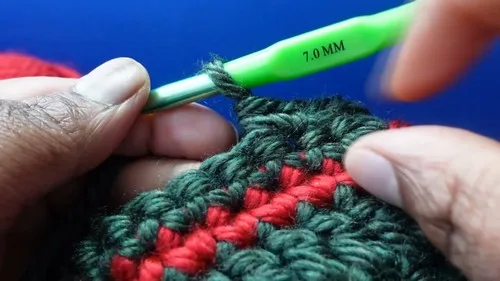
- 6.5 mm (K) hook, but a 7 mm hook is used in the video due to tight tension.
For the brim
- 5.5 mm (I) hook, but a 6 mm hook is used in the video due to tight tension.
The list is the pattern's own wording.
Instructions
Every round is printed as the pattern wrote it, brackets and all. Open the key beside a round to see only the short forms that round uses.
Starting with the Body
- Round 1
Start with a slip knot. Chain 4 and join with a slip stitch to form a ring. Chain 3 (counts as the first double crochet).Make 11 more double crochets into the ring.
You will have a total of 12 stitches for this round.
- Round 2
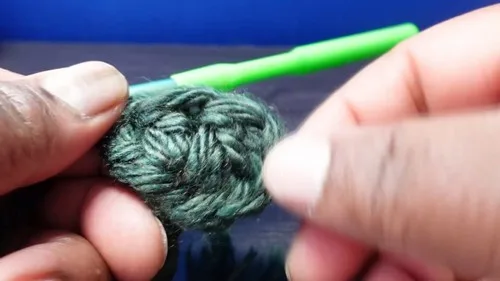
Slip stitch into the top chain of the starting chain-3. Chain 3 (counts as one double crochet).In this round, put two double crochets in every stitch around.
You will have 24 stitches for this round.
In Round 3: Chain 3 (counts as one double crochet).
2 double crochets in the next stitch, 1 double crochet in the next stitch - repeat around.
You will end up with 36 stitches for this round.
- Round 4
Chain 3. For Double Crochet Even: Work 1 double crochet into each of the next 4 stitches.After 4 "even" stitches, do 2 double crochet in the next stitch.Repeat 4 even stitches, 2 in the next around. This increases your stitch count evenly.
- Rounds 5–9
Chain 3 and turn. Work 1 double crochet into each stitch around. These rounds are worked even without increases.Transitioning to Secondary Color & Working the Brim: After completing Round 9, attach the secondary color without cutting the main color.
Part 3
- Round 1
of Brim: Chain 1 with the new color. Work 1 single crochet into each stitch around.
- Round 2
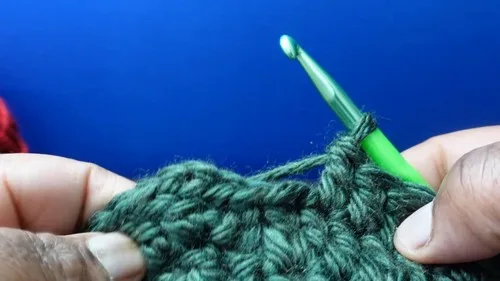
of Brim: Chain 1 and turn your work. Skip the first stitch, 2 single crochets in the next.Follow with a pattern of 4 single crochets even, 2 single crochets in the next stitch around the brim.Continue with 3 even, and then 2 in the next stitch, following the pattern to create a sloped brim effect.
Notes from the pattern
- The pattern calls for a 6.5 mm (K) hook for the Body and a 5.5 mm (I) hook for the Brim, but the sizes up to 7 mm and 6 mm respectively because the maker's tension ran tight; swap up a hook size if your own stitches tend to come out firm.
- A stitch marker on the first stitch of each round in the Body makes it far easier to track the increase pattern across all four rounds without losing count.
- Because the Body is worked in joined rounds and the Brim is worked in turned rows, check tension separately for each section rather than assuming one gauge swatch covers both.
- The colour change happens at the start of the Brim's Row 1; cut and join the new colour cleanly at the join point so the colour break sits neatly along one seam line rather than spiralling around the hat.
The essentials
- Rounds
- 6
- Parts
- 2
- Level
- Intermediate
- Time
- 4-6 hours
- Hook
- 6.5 mm
- Yarn
- Worsted
Stitches you will use
- Starting a ring with a chain and slip stitch Used at the very start of the Body in Round 1; keep the ring snug so the first round of double crochets doesn't gape at the centre.
- Even double crochet increasing Rounds 1-2 of the Body double the stitch count by working two double crochets into each stitch; miscounting here throws off every later round.
- Colour change with a shaping repeat The Brim starts with a new colour and uses a repeating increase sequence across its two rows; watch the stitch pattern closely so the slope comes out even all the way round.
Troubleshooting
The crown doesn't sit flat and starts cupping or ruffling at the centre
This comes from too many increases relative to the round; recount the 12 stitches after Round 1 and the stitch total after Round 2 before continuing, since an extra increase here compounds quickly.
The brim doesn't flare outward and instead stays straight or curls inward
The increase sequence in Row 2 of the Brim (the 2-in-next-stitch repeats) is what creates the outward slope; check that each repeat of the pattern lands on the correct stitch count rather than drifting off by one stitch.
The colour join at the Brim looks loose or leaves a visible gap
A loose join usually means the first chain-1 of Brim Row 1 was worked too loosely; pull the new colour's first stitch snug against the last round of the Body before continuing.
Substituting yarn
- Acrylic, worsted weight
- Closest match to the original gauge; keeps the hook sizes as given and produces a firm, warm fabric suited to the double crochet body.
- Wool-blend, worsted weight
- Adds more drape and a softer hand to the brim's turned rows, though stitches may need slightly firmer tension to hold the sloped shaping crisply.
- Cotton, worsted weight
- Produces a crisper, less stretchy fabric; expect to go down a hook size from the one given to avoid a looser, less structured crown.
Washing and care
- Hand wash in cool water and lay the hat flat to dry, reshaping the crown and smoothing the brim's curve by hand while still damp so it dries to the intended sloped shape.
- Store flat rather than folded to avoid creasing the brim, and avoid hanging the hat by the crown, which can stretch the double crochet fabric out of shape over time.
The photographs taken while this was being made
Every one was taken by whoever published the pattern, in the order the source listed them.
FAQs
Questions
Does the Brim need to be worked in the same colour as the Body?
No, the Brim is specifically worked in a new colour starting at Row 1, which is part of the design rather than an optional substitution. A contrasting colour highlights the sloped shaping of the brim against the plain Body.
How many rounds make up the Body before the Brim is added?
The Body is worked over four rounds before the Brim begins. Each round's stitch count should be checked, starting from the 12 stitches established after Round 1.
Why is the Brim worked in turned rows instead of joined rounds?
Turning the work row by row for the Brim's two rows allows the increase repeats to build a sloped, flared edge rather than a flat circular extension. Working it in the round instead would prevent the outward slope the pattern is designed to produce.
These answers came from whoever first published the pattern, kept word for word.