 EVERY CROCHET
 Hats 6 rounds No account, no download
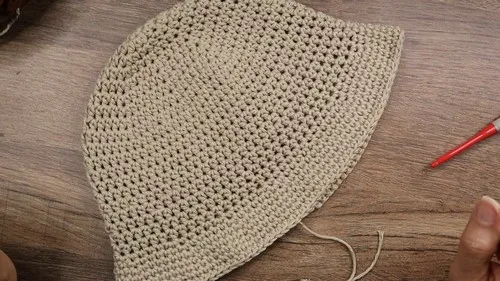
Crochet sun bucket hat with a flat brim
Crochet bucket hat pattern in single crochet (UK double crochet); both US and UK stitch names are given.

- Skill
- Intermediate
- Time
- 4-6 hours
- Yarn weight
- Worsted

Intermediate
What the original write-up called it. Nothing here is graded again.

Worsted
What the sample was worked in. Any weight works; the size moves with it.

4-6 hours
What the original page reckoned. Your own pace is the one that matters.
About this pattern
This is a crocheted sun hat built in continuous rounds from a magic ring, moving from half double crochet (UK: half treble) at the crown to single crochet (UK: double crochet) at the brim. It calls for cotton yarn, a size 5 hook, a stitch marker to track the round start, and basic comfort with increase patterns, stitch counting, and an invisible join to finish.
Materials
- Cotton Yarn (Lily Sugar 'n Cream suggested)
- Crochet Hook (Size 5 for this particular yarn)
- Stitch Marker
- Tape Measure
- Yarn Needle
- Scissors
The list is the pattern's own wording.
Instructions
Every round is printed as the pattern wrote it, brackets and all. Open the key beside a round to see only the short forms that round uses.
Increasing the Diameter
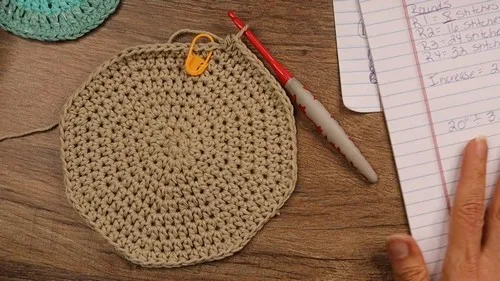
To increase the diameter to match the head circumference (example given is 20″ divided by pi (3.14), rounding to 6.4 inches for the diameter), you'll increase in a pattern:
- Round 1
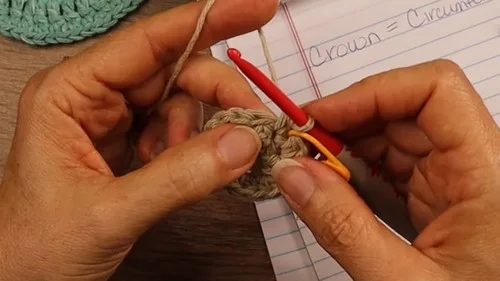
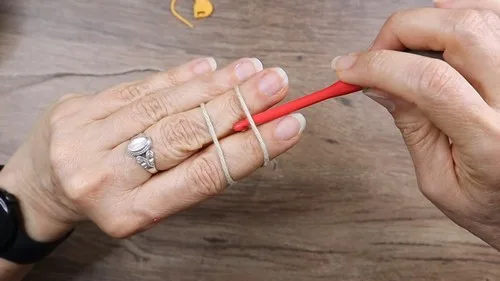
8 HDC inside the magic ring.Step by step: Create a magic ring/circle; chain one; place eight half double crochets (HDC) into the ring; pull the tail to close the ring and create a circle; mark the first stitch with a stitch marker since you will be working in continuous rounds.
Key1
- hdc
- half double crochet
- Round 2
Increase by making two HDC in each stitch around (16 HDC total).
Key1
- hdc
- half double crochet
- Round 3
2 HDC, then 1 increase repeat around (24 HDC total).Continue the increase pattern for each round, increasing by 8 stitches each round until you reach the desired diameter (6.4 inches for the example).
Key1
- hdc
- half double crochet
Building the Side of the Hat
Once you reach the desired diameter, you’ll work on building the height of the hat.
Crochet around the edge without increasing until you reach the desired height. This typically ranges from 6.5-7 inches from the crown to start the brim or to just above the eyebrow/top of the ears.
Creating the Brim
Start by doing an increase pattern similar to the crown, but switch to single crochet stitches.
- Round 1
4 single crochets (SC) then 1 increase. Repeat around.
Key1
- sc
- single crochet
- Round 2
5 SC then 1 increase.
Key1
- sc
- single crochet
- Round 3
6 SC then 1 increase.Continue the brim until you’ve done 4 rounds of SC without increasing, or until the brim is as wide as you'd like.
Key1
- sc
- single crochet
Final Touches
Tidy up any loose ends by weaving them in with your yarn needle to prevent any unraveling.
Making up
- Step 1Once the brim is completed, use slip stitches to blend the pattern into a smooth finish.
- Step 2Cut a long tail of yarn, pull through to secure it, and weave the tail back into your work with a yarn needle for an invisible join, making sure it doesn’t show on the front side.
Notes from the pattern
- The pattern is built around a size 5 hook with worsted-weight cotton; swapping either without checking gauge will throw off the roughly 6.4in crown diameter the increases are calculated around.
- A stitch marker is essential from round one, since the hat is worked in continuous rounds with no joining slip stitch to mark where each round starts.
- Cotton has very little give, so tension should stay even and slightly relaxed rather than tight — an overly firm gauge makes the brim curl under instead of sitting flat.
- The brim's increase sequence (four stitches then an increase, five then an increase, six then an increase) must track exactly with the round count, so it helps to check stitch totals before starting each new round.
The essentials
- Rounds
- 6
- Parts
- 4
- Level
- Intermediate
- Time
- 4-6 hours
- Yarn
- Worsted
Stitches you will use
- Magic ring Starts the crown with eight stitches; pull the tail firmly enough that no hole remains at the very centre once the round is closed.
- Continuous-round increasing Used through the crown and brim; the stitch marker must move up every round or the increase spacing drifts and the piece stops lying flat.
- Slip stitch join and invisible finish Used where the brim's last round meets the edge; keep the slip stitches loose and weave the tail along the wrong-side bumps so it doesn't show on the front.
Troubleshooting
The crown cups like a bowl instead of lying flat.
There are too few increases for the round being worked; recount the stitches against the target for that round and add increases evenly rather than clustering them.
The brim ruffles or wavers instead of sitting flat.
Too many increases have been worked relative to the round size; follow the four-five-six stitch increase spacing exactly and stop increasing once the diameter matches the head measurement.
A visible ridge or bump shows where the
The slip stitch join was pulled too tight or the tail wasn't woven invisibly; redo the join more loosely and weave the tail through the back loops on the wrong side.
Substituting yarn
- Acrylic, worsted weight
- Lighter and cheaper than cotton but with more stretch, so the brim holds its shape less crisply; a slightly smaller hook can help firm up the fabric.
- Linen or linen-blend, DK weight
- Produces a crisper, more structured brim that suits sun hats well, but the thinner yarn needs a smaller hook and more rounds to reach the same diameter.
- Cotton-acrylic blend, worsted weight
- Keeps a similar structure and weight to pure cotton with a softer feel and a touch more stretch; the size 5 hook generally still works but gauge should be rechecked.
Washing and care
- Hand wash in cool water with a mild detergent; cotton can lose its shape with machine agitation and may shrink slightly if exposed to heat, so avoid the dryer.
- While still damp, reshape the crown rounds by hand and press the brim flat, then dry flat on a towel; store flat or loosely padded rather than folded to keep the brim from creasing.
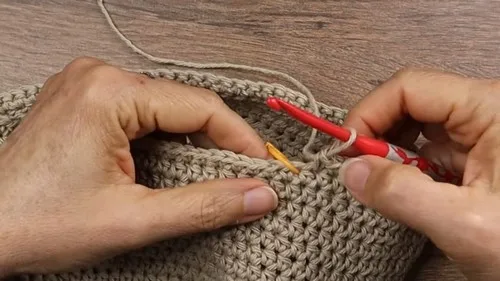
The photographs taken while this was being made
Every one was taken by whoever published the pattern, in the order the source listed them.
FAQs
Questions
What hook size does this pattern use?
It calls for a size 5 hook paired with worsted-weight cotton yarn. Checking gauge against this hook and yarn combination before starting keeps the finished diameter on target.
How is the crown sized to fit a specific head?
The head circumference is divided by pi to get the crown diameter — for a 20in head, that works out to roughly 6.4in across. Increases continue until the crown reaches that measurement before the brim begins.
Why does the hat change from half double crochet to single crochet?
Half double crochet grows the rounded crown quickly, while single crochet produces a denser fabric for the brim so it holds its shape rather than flopping. Both stitches are worked seamlessly in the same continuous rounds.
How is the start of each round tracked without a joining stitch?
The hat is worked in continuous rounds, so a stitch marker placed at the first stitch and moved up each round shows where the new round begins. Without it, increase counts are easy to lose track of.
How is the hat finished off at the end?
Once the brim's single crochet rounds are complete, slip stitches blend the last round into a smooth edge. The tail is then pulled through, secured, and woven invisibly into the wrong side with a yarn needle.
These answers came from whoever first published the pattern, kept word for word.