 EVERY CROCHET
 Bags 12 rounds No account, no download
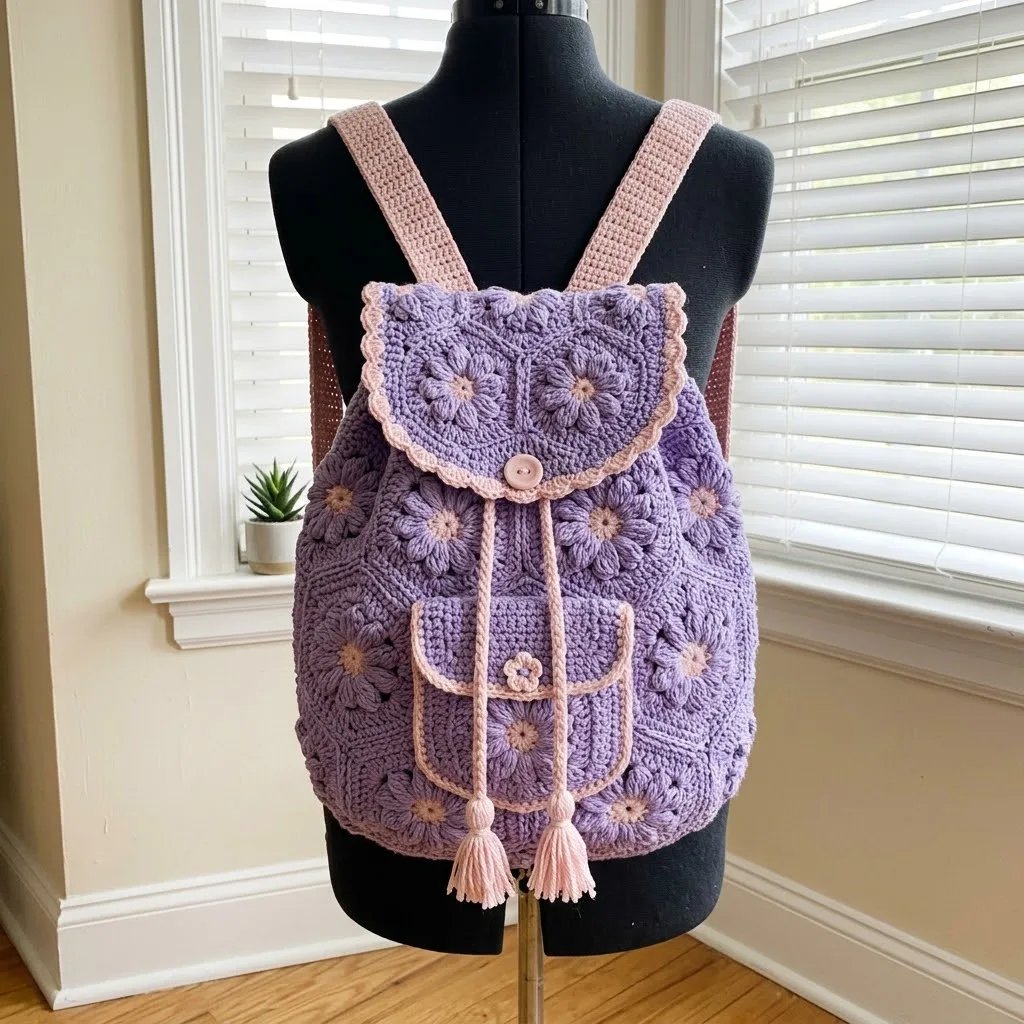
Granny square backpack with puff stitch panels
Granny square backpack using puff stitches and single crochet (UK double crochet), joined with flat slip stitch seams.
- Skill
- Intermediate
- Time
- 4-6 hours
- Yarn weight
- Worsted
- Hook
- 5.0 mm

Intermediate
What the original write-up called it. Nothing here is graded again.

Worsted
What the sample was worked in. Any weight works; the size moves with it.

4-6 hours
What the original page reckoned. Your own pace is the one that matters.
About this pattern
This is an intermediate granny-square backpack worked from puff flower squares in lavender purple with pale pink contrast detailing. It uses a 5.0mm hook, roughly 550 grams of worsted weight yarn across both colours, a flat slip stitch join between squares, decrease shaping for a rounded bottom, and a shell-stitch scallop edging on the flap and front pocket. A single button finishes the closure.
This backpack belongs to the granny square family, built from puff flower squares worked in the round and finished with single crochet (UK: double crochet) edging throughout. The lavender main colour sets the body of each square, while a pale pink contrast picks out the joins, the bottom shaping and the scalloped flap edge, giving the finished piece a clear two-colour structure rather than a blended one.
Construction runs panel by panel: the front panel's squares are joined first, then the back panel, using a flat slip stitch join that sits on the right side as a visible seam line. A bottom panel is attached to the front, then to the back, with the sides seamed last and a round of decreases worked at the corners to turn a flat base into a gently rounded one. The flap and a two-square front pocket are added afterwards, both finished with the same contrast-colour scallop edging.
Materials
- Main Color (MC): 400 grams of worsted weight yarn in lavender purple
- Contrast Color (CC): 150 grams of worsted weight yarn in pale pink
- 5.0mm (H/8) crochet hook
- Yarn needle for weaving ends
- One 1-inch button in coordinating color
- Scissors
The list is the pattern's own wording.
Instructions
Every round is printed as the pattern wrote it, brackets and all. Open the key beside a round to see only the short forms that round uses.
Notions
Yarn needle for weaving ends Stitch markers One 1-inch button in coordinating color Fabric lining (optional but recommended)
Scissors Gauge
Work one puff flower square and measure. Your square should be approximately 4 inches by 4 inches after blocking. If your square is larger, try a smaller hook. If smaller, go up a hook size.
Gauge matters here because it affects the final bag dimensions and how the squares fit together. Take five minutes to check. Your future self will thank you.
Skill Level This pattern is intermediate level . You should be comfortable with: Working in the round Puff stitches Joining granny squares
Basic increasing and decreasing
If you’ve never made a puff stitch before, don’t panic. I’ll explain it fully below, and you can practice on a swatch before starting your squares.
Abbreviations and Stitch Definitions ch = chain: Wrap yarn over hook, pull through loop on hook sl st = slip stitch: Insert hook, yarn over, pull through stitch and loop on hook in one motion
sc = single crochet: Insert hook, yarn over, pull up a loop (2 loops on hook), yarn over, pull through both loops
dc = double crochet: Yarn over, insert hook, yarn over, pull up a loop (3 loops on hook), yarn over, pull through 2 loops, yarn over, pull through remaining 2 loops
hdc = half double crochet: Yarn over, insert hook, yarn over, pull up a loop (3 loops on hook), yarn over, pull through all 3 loops
puff st = puff stitch: (Yarn over, insert hook in stitch, yarn over, pull up a loop) 3 times in same stitch (7 loops on hook), yarn over, pull through all 7 loops. Think of it as a chunky, textured cluster. sp = space st(s) = stitch(es)
Puff Flower Granny Square Pattern
You’ll need 30 squares total for the main body, flap, and pocket. Make all squares in MC (lavender), then add CC (pink) details during assembly.
- Round 1
With MC, make a magic ring. Ch 1, work 8 sc into ring. Sl st to first sc to join. Pull ring closed. (8 sts)
Key5
- sl st
- slip stitch
- sts
- stitches
- ch
- chain
- st
- stitch
- sc
- single crochet
- Round 2
Ch 1, (sc in first st, ch 2) around, working sc in each st with ch 2 between each sc. Sl st to first sc to join. (8 sc, 8 ch-2 spaces)
Key4
- sl st
- slip stitch
- ch
- chain
- st
- stitch
- sc
- single crochet
- Round 3
Sl st into first ch-2 sp. Ch 1, work (puff st, ch 2, puff st) in same ch-2 sp. This creates your first petal. *Ch 1, skip next ch-2 sp, (puff st, ch 2, puff st) in next ch-2 sp.* Repeat from * to * around, working petals in every other ch-2 sp. Sl st to top of first puff st to join. (8 puff stitches forming 4 petals)
Key4
- sl st
- slip stitch
- puff
- puff stitch
- ch
- chain
- st
- stitch
- Round 4
Ch 3 (counts as first dc). Working behind petals into the skipped ch-2 spaces from Round 2, dc in first skipped sp. *Ch 2, 2 dc in next skipped sp.* Repeat from * to * around. Ch 2, sl st to top of beginning ch-3. (8 dc, 4 ch-2 spaces)
Key4
- sl st
- slip stitch
- ch
- chain
- st
- stitch
- dc
- double crochet
- Round 5
Ch 3, dc in next dc. *(2 dc, ch 2, 2 dc) in corner ch-2 sp. Dc in next 2 dc.* Repeat from * to * around, ending with (2 dc, ch 2, 2 dc) in last corner. Sl st to top of beginning ch-3. (24 dc, 4 corner spaces)
Key4
- sl st
- slip stitch
- ch
- chain
- st
- stitch
- dc
- double crochet
- Round 6
Ch 3, dc in each dc across side. *(2 dc, ch 2, 2 dc) in corner sp. Dc in each dc across next side.* Repeat around all four sides. Sl st to join. (40 dc, 4 corner spaces)Fasten off. Weave in ends. Make 29 more squares.
Key4
- sl st
- slip stitch
- ch
- chain
- st
- stitch
- dc
- double crochet
Assembling the Backpack Body Lay out your squares in the following arrangement: Front Panel: 3 squares wide by 4 squares tall (12 squares)
Back Panel: 3 squares wide by 4 squares tall (12 squares)
Bottom
Joining Method Use the flat slip stitch join for a neat, visible seam that adds texture.
Hold two squares with wrong sides together. Working through both layers, insert hook through corner ch-2 space of both squares. With CC, pull up a loop. Ch 1, sl st through both loops of next stitch on both squares. Continue across the edge, keeping tension even. Fasten off at the end of each seam.
Join the front panel squares first, then the back panel. Attach the bottom row to the front panel’s lower edge. Then join the back panel to the bottom. Finally, seam up the sides.
Creating the Rounded Bottom
To give your backpack structure, work a round of sc with CC around the entire bottom edge, decreasing at corners to create a gentle curve.
- Round 1
With CC, join yarn at any bottom corner. Sc evenly around the bottom perimeter, working sc2tog (single crochet two together) at each corner to ease the fabric inward. Sl st to join. (approximately 36 sts)
Key5
- sc2tog
- single crochet 2 stitches together (decrease)
- sl st
- slip stitch
- sts
- stitches
- st
- stitch
- sc
- single crochet
- Round 2
Ch 1, sc in each st around. Sl st to join. Fasten off. Backpack Flap The flap uses 4 joined squares arranged 2 by 2, with a decorative scalloped edge.Join 4 squares using the same slip stitch join method. Then add the scallop border:
Key4
- sl st
- slip stitch
- ch
- chain
- st
- stitch
- sc
- single crochet
Scallop Edging
With CC, join yarn at any corner of the flap’s curved edge.
- Round 1
Sc evenly across the three sides that will be visible (not the side that attaches to the bag). Turn.
Key1
- sc
- single crochet
- Round 2
Ch 1, sc in first st. *Skip 2 sts, 5 dc in next st (shell made), skip 2 sts, sc in next st.* Repeat from * to * across. Fasten off.
Key6
- shell
- shell stitch
- sts
- stitches
- ch
- chain
- st
- stitch
- sc
- single crochet
- dc
- double crochet
Front Pocket
Use 2 squares arranged vertically. Join them together, then add CC edging around three sides (leaving the top open).
Edging: With CC, sc evenly around the sides and bottom. At each lower corner, work 3 sc to turn smoothly.
Work a small tab with a flower button closure:
Button Tab: Ch 8. Sc in 2nd ch from hook and across. (7 sc). Rows 2 to 4: Ch 1, turn, sc across. Fasten off. Make a small puff flower (Rounds 1 to 3 only) and sew it centered on the tab.
Attach the tab to the pocket flap center. Sew button to pocket body below.
Backpack Straps Make 2 straps.
Part 5
- Round 1
With CC, ch 9. Sc in 2nd ch from hook and across. (8 sc)
Key2
- ch
- chain
- sc
- single crochet
- Round 2
to 90: Ch 1, turn, sc across. (8 sc) This creates a strap approximately 24 inches long. Adjust row count for your preferred length.Fasten off, leaving a long tail for sewing.Drawstring Closure Chain: With CC, ch 150. Sc in 2nd ch from hook and across. (149 sc)Fasten off.
Key2
- ch
- chain
- sc
- single crochet
Tassels (make 2):
Cut 20 strands of CC yarn, each 8 inches long. Fold in half, thread folded end through the end of your drawstring, pull cut ends through the loop, and tighten. Wrap another strand around the tassel head about half an inch down. Secure and trim ends evenly.
Assembly Instructions 1. Sew the flap to the back panel’s top edge, centering it across all three squares.
2. Weave the drawstring through the top row of squares, going in and out of the corner spaces. The tassels should hang at the front center.
3. Attach straps to the back panel. Position them about 2 inches from each side edge. Sew the top of each strap to the upper back corners. Sew the bottom of each strap to the lower back corners, adjusting placement so straps sit comfortably on your shoulders.
4. Sew the pocket to the front panel center, leaving the top open.
5. Sew the button to the front panel, positioned to align with the flap’s center.
Optional Lining
For extra durability and to protect your belongings, add a fabric lining. Cut fabric to match the bag’s interior dimensions, adding half an inch seam allowance. Sew the lining pieces together, press seams, and hand stitch the lining inside the bag along the top edge.
Finishing Touches
Weave in all remaining ends. Block your completed backpack by misting with water and shaping it over a towel-stuffed form. Let it dry completely before using.
Care Instructions
Hand wash in cool water with mild detergent. Lay flat to dry. If using acrylic yarn, you can spot clean as needed. Avoid wringing, which can distort the squares.
Tips for Success
Start with your squares. Making all 30 squares first lets you get into a rhythm. You’ll memorize the pattern quickly, and the repetitive work becomes almost meditative.
Check your tension. Puff stitches can pull tight if you’re nervous. Keep your loops loose and relaxed for puffy, dimensional flowers.
Use stitch markers liberally. Mark your corners, your joining points, and the beginning of each round. They’re your best friends in a project with this many pieces.
Try one square first. If you’ve never made a puff stitch, practice the flower center on scrap yarn. Once you feel confident, start your official squares.
This Lavender Fields Purple Granny Backpack crochet pattern brings together classic granny square charm with modern functionality. The puff flower texture adds visual interest, while the practical design means you’ll actually use this bag every day. I hope you love making it as much as I loved designing it.
Thank you so much for choosing this pattern. If you make your own version, I would absolutely love to see it! Tag me on Instagram or share a photo in my Facebook group. Seeing your finished projects genuinely makes my day.
Save this crochet backpack pattern to your Pinterest boards so you can find it when you’re ready to cast on. And if you make one, please drop a comment below. I love hearing which color combinations you choose and how the project works up for you!
Notes from the pattern
- Check gauge before joining any squares: a single puff flower square should block to approximately 4 inches by 4 inches on a 5.0mm (H/8) hook, and sizing up or down a hook size will shift the finished bag's dimensions.
- Fasten off cleanly at colour changes between main colour squares and contrast colour joins or edging; the flat slip stitch join relies on a fresh contrast-colour loop pulled through both layers at the start of each seam.
- Work the bottom's corner decreases evenly on both sides of each corner so the curve stays symmetrical rather than pulling the base out of shape.
- The optional fabric lining listed in notions is worth adding before closing the sides if a looser yarn such as cotton blend is used, since lining keeps contents from showing through the stitch gaps.
The essentials
- Rounds
- 12
- Parts
- 4
- Level
- Intermediate
- Time
- 4-6 hours
- Hook
- 5.0 mm
- Yarn
- Worsted
Stitches you will use
- Puff stitch squares Forms every granny square in the body; keep loop counts and tension consistent so squares block out to the same size before joining.
- Flat slip stitch join Used to seam front-panel squares, back-panel squares, the bottom, and the sides; work through both corner ch-2 spaces evenly so the visible seam stays straight.
- Shell (scallop) edging Worked across the flap's three visible sides and the front pocket; the skip-2, 5dc, skip-2 repeat needs an even stitch count or the shells bunch at one end.
Troubleshooting
The bottom panel cups upward instead of lying flat
The corner decreases were likely uneven or worked too close together; redo the shaping round keeping the decrease count the same on each corner so the curve is gradual.
Squares come out noticeably different sizes once joined
This usually means the gauge square was skipped; block every square to the same approximate 4 by 4 inch target before starting the flat slip stitch join.
The scallop edging on the flap sits unevenly or one shell is tighter than the rest
The skip-2 stitch count has likely drifted across the row; recount the stitches on the visible sides before starting Row 2 so the shell repeat divides evenly.
Substituting yarn
- DK weight cotton blend
- Produces a smaller, firmer backpack with crisper stitch definition; drop to a 4.0mm hook and expect the squares to finish under 4 inches, so more squares are needed for the same panel size.
- Bulky weight acrylic
- Builds the same backpack faster with fewer squares, but go up a hook size from 5.0mm and expect a noticeably larger, heavier finished bag.
- 100% worsted weight cotton
- Gives the firmest structure and best stitch definition for the puff squares, at the cost of a heavier finished bag and less give in the shoulder straps than an acrylic blend.
Washing and care
- an acrylic or acrylic-blend version, hand wash in cool water and lay flat to dry away from direct heat, reshaping the squares and the rounded bottom while still damp.
- If a cotton or cotton-blend version is made, expect more drape over time; store the bag stuffed with tissue paper when not in use to help the granny squares and scallop edging hold their shape.
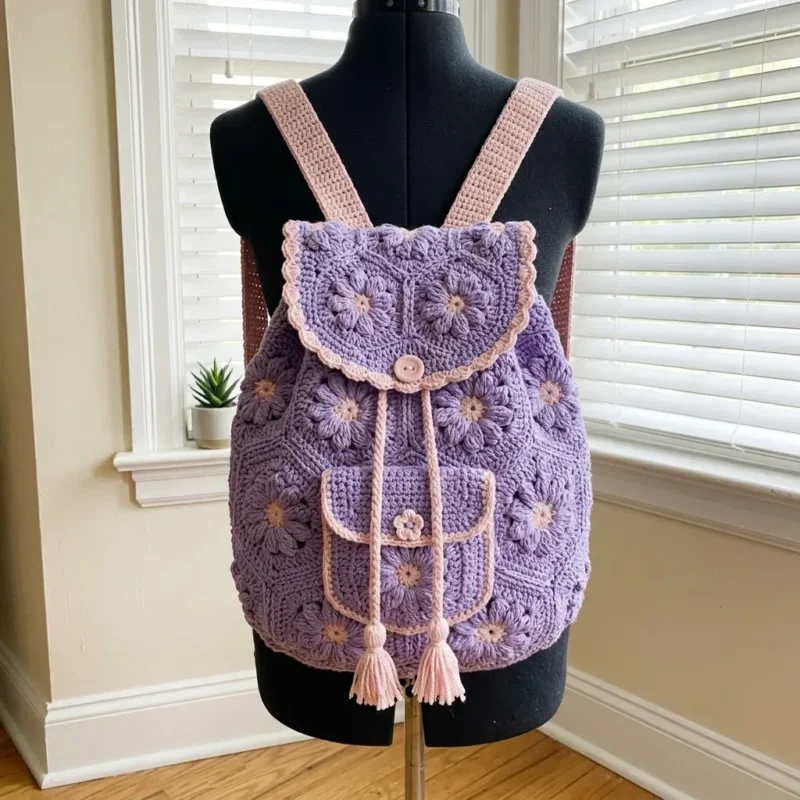
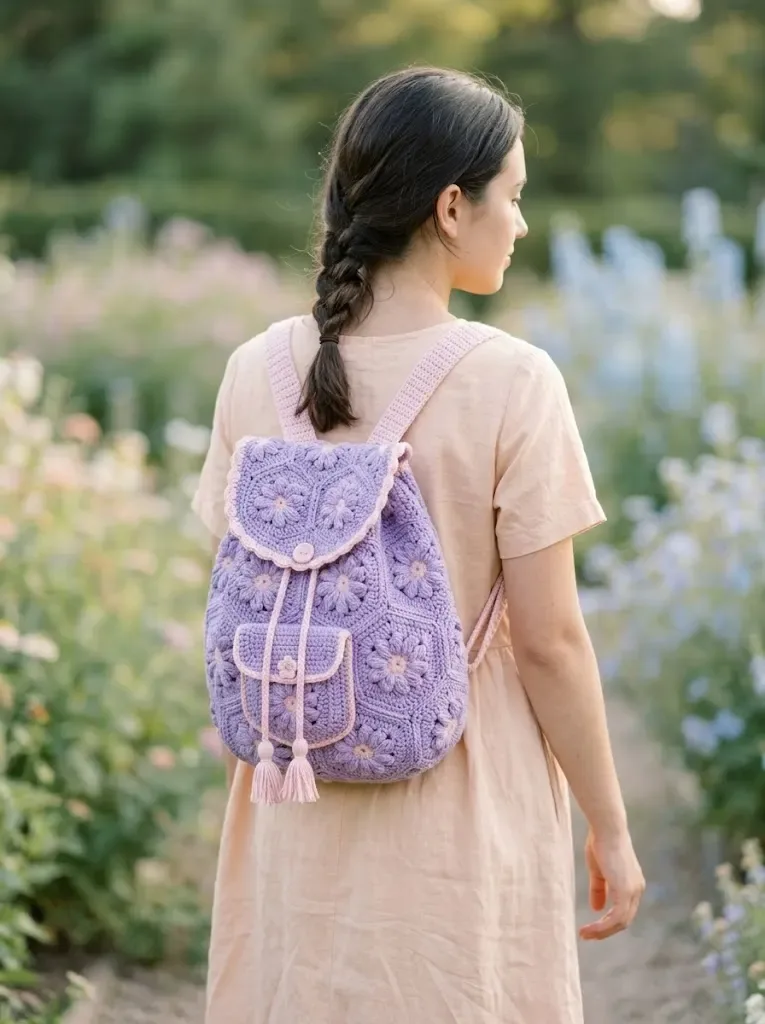
The photographs taken while this was being made
Every one was taken by whoever published the pattern, in the order the source listed them.
FAQs
Questions
Can the backpack be made in a single colour instead of two?
Yes, the main colour can be used throughout, though the flat slip stitch joins and scallop edging will then blend into the squares rather than standing out as a contrast detail. The 150 grams allocated to the contrast colour can simply be added to the main colour total.
How much yarn does the whole bag use?
The materials list calls for 400 grams of main colour and 150 grams of contrast colour, for roughly 550 grams of worsted weight yarn in total. This covers the squares, joins, bottom shaping and all edging.
Is the fabric lining required?
No, it is listed as optional in the notions. It is recommended mainly to keep the bag's contents from showing through the open puff stitch squares.
Why does the gauge square matter so much for a bag pattern?
Because the finished size is built entirely from repeated squares, a gauge mismatch compounds across the whole panel rather than staying local to one area. Checking that a single square blocks to about 4 inches by 4 inches before joining avoids reworking panels later.
Can the button closure be swapped for something else?
Yes, the single 1-inch button is a straightforward closure point and can be substituted with a toggle or drawstring without affecting the squares, bottom shaping or edging construction.
These answers came from whoever first published the pattern, kept word for word.