 EVERY CROCHET
 Amigurumi 7 rounds No account, no download
Hanging plant basket crochet pattern for beginners
A beginner hanging plant crochet pattern built from single crochet (UK double crochet); US and UK stitch terms both given.
- Skill
- Intermediate
- Time
- 4-6 hours
- Yarn weight
- Worsted

Intermediate
What the original write-up called it. Nothing here is graded again.

Worsted
What the sample was worked in. Any weight works; the size moves with it.

4-6 hours
What the original page reckoned. Your own pace is the one that matters.
About this pattern
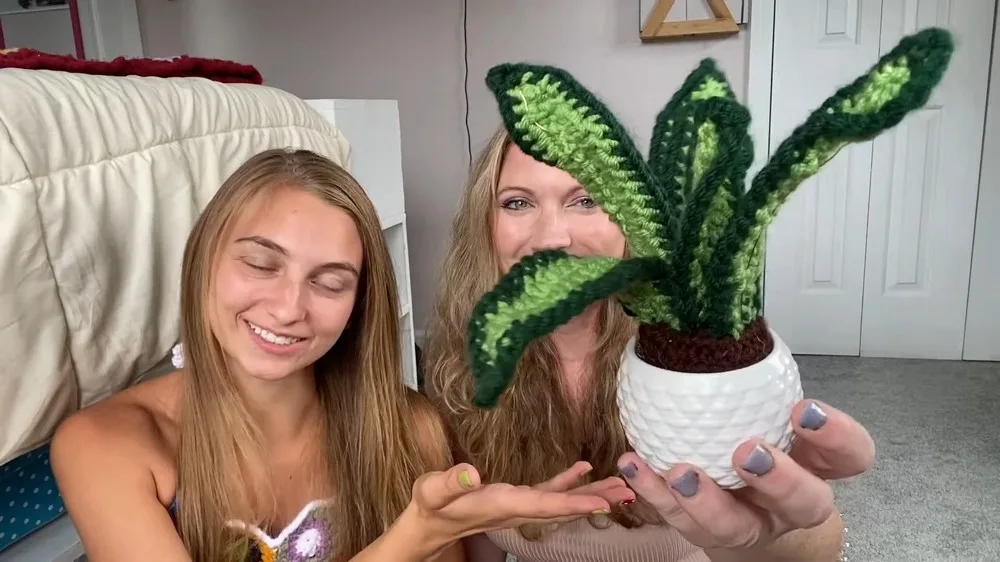
This is a three-part crochet project -- a hanging basket, a dirt insert, and a leafy plant -- worked almost entirely in single crochet (UK double crochet) from magic rings, with a double crochet (UK treble) finishing round and bobble-stitch leaves. It needs a 4.5mm hook, a stitch marker, scissors, and yarn in three colours, and finishes by sewing the three pieces together and weaving in tails.
This project builds a hanging plant basket from the single crochet (UK double crochet) family, worked in continuous rounds from a magic ring. The piece is amigurumi in spirit rather than in form: instead of a stuffed animal, three flat or shallow components come together to resemble a potted plant suspended by three straps, making it a useful next step after a first amigurumi ball or pot.
Construction happens in three separate pieces -- a basket, a dirt insert, and a plant -- each started from its own magic ring and built outward through increase rounds before the shaping settles into straight rounds. The basket finishes with a double crochet (UK treble) round and three long chained straps; the dirt and plant pieces are smaller and simpler, then all three are stacked and sewn together at the end rather than joined as the work progresses.
Materials
- Yarn in the desired colors for the hanging basket, the dirt, and the plant.
- A 4.5 millimeter crochet hook.
- Stitch marker or a piece of yarn.
- Scissors.
The list is the pattern's own wording.
Instructions
Every round is printed as the pattern wrote it, brackets and all. Open the key beside a round to see only the short forms that round uses.
Basket
The exact number of rows for the Next Rounds section will be mentioned in the video (not specified in this text).
For the Hanging Straps: Count 6 stitches over, attach yarn, and chain 40; repeat this step three times to create three evenly spaced hanging loops.
- Round 1
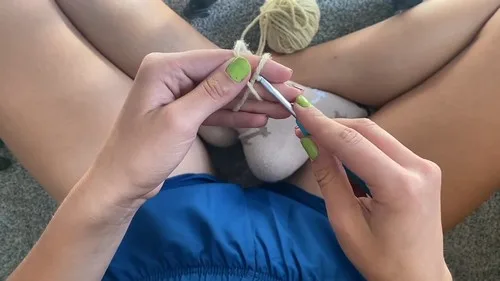
Loop the yarn to form an X, insert hook underneath the first strand, pull the working yarn through to create a loop, chain one to secure it; make 8 single crochets inside the magic ring, pull the tail to close the ring. (8)
- Round 2
Make 2 single crochets in each stitch around. (16)
- Round 3
Do 3 single crochets, followed by an increase (2 single crochets in one stitch); repeat this sequence for the entire round. (20)Next Rounds: Continue with one single crochet in each stitch around for a number of rows until the pot starts to curve inward.Final Round: Chain 2, then perform a double crochet in the same stitch; continue with double crochets all around; to create the hanging loop, chain 40 at the end of the round, cut the yarn leaving a tail, and pull through to secure.
Dirt
Usually a couple of rounds to get a flat circle that matches the size of the basket's opening.
- Round 1
Begin with 8 single crochets in the magic ring, pull the tail to tighten. (8)Next Rounds: Increase in each stitch around, following the video's instructions for the number of rounds.
Plant
- Round 1
Start with a slip knot and chain 2; in the first chain from the hook, work 4 double crochets.
- Round 2
Create a bobble stitch: remove hook from the loop, insert it from front to back through the top of the first double crochet, reinsert it into the working loop, and pull it tight; chain as instructed for the stem's length, and create more bobble stitches at set intervals for the leaves.
- Round 3
Create various lengths of stems with chains and bobble stitches as described in the pattern, to mimic a more natural-looking plant.
Making up
- Step 1Attach the "Dirt" to the Basket: Sew the brown "dirt" part inside the basket's opening.
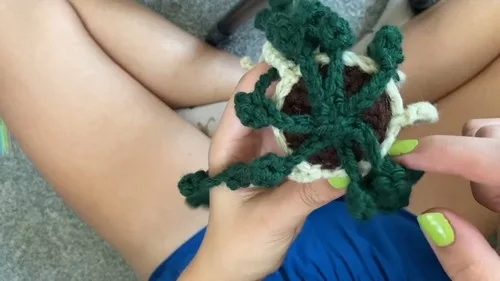
- Step 2Attach the Plant: Sew the plant part onto the "dirt," arranging the stems as preferred.
- Step 3Finish: Hide all leftover yarn tails by weaving them into your work.
Notes from the pattern
- The 4.5mm hook is sized for a firm, structural fabric on the basket; a looser gauge will leave the sides floppy once the hanging straps take the plant's weight.
- A stitch marker (or a scrap of contrasting yarn) is essential on the basket and dirt rounds, since the spiral rounds have no natural stitch to mark the start otherwise.
- Keep tension even but not tight through the basket's increase rounds (Rounds 2-3): the piece should curve gently inward on its own in the unspecified straight rounds rather than being forced by over-tight stitches.
- Yarn colour is left open for the basket, dirt, and plant, so settle on three colours before starting rather than partway through, since the dirt and plant pieces are sewn on rather than crocheted in place.
The essentials
- Rounds
- 7
- Parts
- 3
- Level
- Intermediate
- Time
- 4-6 hours
- Yarn
- Worsted
Stitches you will use
- Magic ring (MR) start Used to begin the basket, dirt, and plant pieces; keep the centre loop snug and pull the tail firmly so the opening round does not leave a gap.
- Working increase rounds in continuous spirals The basket and dirt pieces grow through staged increases (doubling, then spaced increases); keep a stitch marker in the first stitch of each round so the increase count stays accurate.
- Bobble stitch Used for the plant's leaves in Rounds 2 and 3; pull the loop tight when reinserting the hook so the bobble sits raised rather than flattening into the chain.
Troubleshooting
The basket cups inward or flares outward instead of forming a straight-sided pot
This points to an uneven stitch count carried over from Round 2 or 3; recount to confirm 16 and then 20 stitches before continuing into the straight rounds.
The dirt piece is noticeably smaller or larger than the basket's opening
The dirt's increase rounds are open-ended by design to match the basket, so add or stop increase rounds on the dirt piece until it sits flush against the basket's inner edge before sewing.
The three hanging straps sit unevenly or twist when the basket is suspended
This usually comes from inconsistent stitch counts between the straps; count exactly 6 stitches between each attachment point and chain exactly 40 for each of the three loops.
Substituting yarn
- Cotton, worsted weight
- Gives the basket more structure and crisper stitch definition with the same 4.5mm hook, though the fabric will be slightly stiffer to shape by hand.
- Acrylic, worsted weight
- Keeps drape soft and the piece lightweight for hanging, with colour options wider than cotton; hook size and stitch counts stay as given.
- Chunky weight yarn (any fibre)
- Produces a larger basket and plant overall; move up to roughly a 6mm hook and expect the finished piece to use noticeably more yarn and finish faster in round count.
Washing and care
- No specific fibre is named in the materials list, so match washing to whatever yarn is chosen: acrylic can usually be hand washed in cool water, while cotton tolerates a gentle machine wash on a delicate cycle.
- Reshape the basket and straps by hand while still damp and let the piece dry flat or hanging in its intended position, since the straps hold their shape best if they dry under the same light tension they will carry once hung.
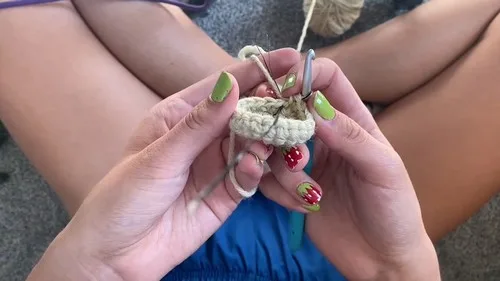
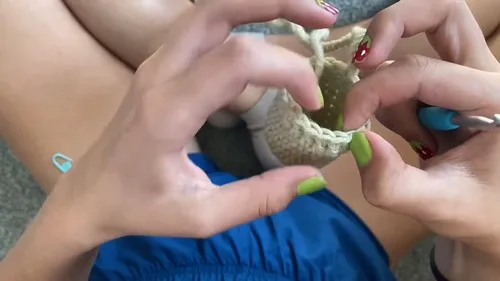
The photographs taken while this was being made
Every one was taken by whoever published the pattern, in the order the source listed them.
FAQs
Questions
Does this pattern need stuffing?
No stuffing is listed in the materials. The basket holds its shape through firm single crochet (UK double crochet) stitches and the 4.5mm hook rather than fibre fill.
What is the difference between US and UK stitch terms in this pattern?
The abbreviations given (sc, dc) follow US naming. In UK terms, sc is double crochet and dc is treble crochet; the stitch itself is identical, only the name changes.
How many hanging straps does the basket need?
Three straps are made in total, each attached 6 stitches apart around the final round and chained 40 stitches long. This spacing keeps the basket level once it is filled and hung.
In what order are the three pieces assembled?
The dirt piece is sewn inside the basket's opening first, then the plant is sewn onto the dirt with its stems arranged as preferred, and finally all loose yarn tails are woven in to finish.
These answers came from whoever first published the pattern, kept word for word.