 EVERY CROCHET
 Bags & Accessories 8 rounds No account, no download
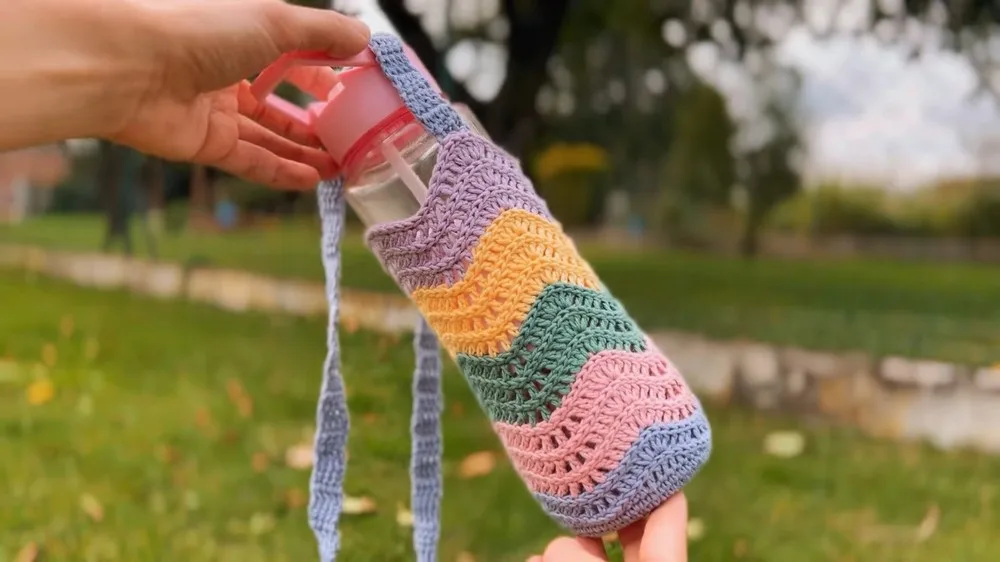
Crochet a wavy water bottle bag from a magic circle
Round water bottle bag worked in single crochet (UK double crochet); both US and UK stitch terms given throughout.
- Skill
- Intermediate
- Time
- 4-6 hours
- Yarn weight
- Sport
- Hook
- 3 mm

Intermediate
What the original write-up called it. Nothing here is graded again.

Sport
What the sample was worked in. Any weight works; the size moves with it.

4-6 hours
What the original page reckoned. Your own pace is the one that matters.
About this pattern
A crocheted carrier for a standard water bottle, built from a magic circle in single crochet (UK double crochet) across eight joined rounds of increases. It uses sport weight yarn, a 3mm hook and about 40g of yarn, with a strap sewn through the back loops afterwards. Suitable for a confident beginner comfortable with magic circles and counting increases; no stuffing is involved.
This water bottle bag belongs to the single crochet (UK double crochet) family, the dense, short stitch that gives amigurumi and small round vessels their firm, gap-free surface. Worked entirely in the round from a magic circle, the base grows through a sequence of evenly spaced increase rounds, taking the stitch count from 6 up past 36 as the circle widens to match the footprint of a standard bottle before the sides begin.
Construction starts with a magic circle and a chain of 6, then proceeds as eight continuous rounds joined with a slip stitch and a turning chain of 1. Each increase round places extra stitches at regular intervals — inc, then sc, inc, then sc, sc, inc, and so on — so the circle expands without puckering or rippling at the edge. The strap is sewn on afterwards through the back loops left at the top, which is what gives the finished bag its named wavy detail.
Materials
- Sport weight yarn (40g)
- 3mm hook
- Stitch markers (optional)
- Yarn needle
The list is the pattern's own wording.
Instructions
Every round is printed as the pattern wrote it, brackets and all. Open the key beside a round to see only the short forms that round uses.
Magic circle
Make a magic circle and chain 6.
- Round 1
Crochet 6 sc into the circle. Join with sl st to the first sc. Ch 1.
Key4
- sl st
- slip stitch
- ch
- chain
- st
- stitch
- sc
- single crochet
- Round 2
Inc in each sc around. Join with sl st to the first sc. Ch 1. (12 sc) For Round 3: Inc, sc around. Join with sl st to the first sc. Ch 1. (18 sc)
Key5
- sl st
- slip stitch
- inc
- increase
- ch
- chain
- st
- stitch
- sc
- single crochet
- Round 4
Sc, inc around. Join with sl st to the first sc. Ch 1. (24 sc)
Key5
- sl st
- slip stitch
- inc
- increase
- ch
- chain
- st
- stitch
- sc
- single crochet
- Round 5
Sc, sc, inc around. Join with sl st to the first sc. Ch 1. (30 sc) For Round 6: Sc, sc, sc, inc around. Join with sl st to the first sc. Ch 1. (36 sc)
Key5
- sl st
- slip stitch
- inc
- increase
- ch
- chain
- st
- stitch
- sc
- single crochet
- Rounds 7–10
Repeat rounds 6-10. (60 sc)
Key1
- sc
- single crochet
- Round 11
Ch 2 (does not count as a stitch), dc in the next stitch, dc in the second stitch, hdc in the third stitch, sc in the fourth stitch, sc in the fifth stitch, sc in the sixth stitch, sl st in the seventh stitch, sl st in the eighth stitch, sl st in the ninth stitch, sc in the tenth stitch, sc in the eleventh stitch, sc in the twelfth stitch, hdc in the thirteenth stitch, dc in the fourteenth stitch, dc in the fifteenth stitch. Repeat this 15-stitch repeat around. Join with sl st to the first dc. Ch 1.For Round 12: Sl st in each stitch around. Join with sl st to the first sl st. Ch 1.
Key6
- sl st
- slip stitch
- hdc
- half double crochet
- ch
- chain
- st
- stitch
- sc
- single crochet
- dc
- double crochet
- Round 13
Ch 2 (counts as a stitch), 2 dc in the same stitch, dc in the next 3 stitches, skip the next stitch, dc in the next stitch. Repeat this 4 times. Dc in the next 2 stitches, 3 dc in the last stitch. Repeat this 15-stitch repeat around. Join with sl st to the first dc. Ch 3, turn.
Key4
- sl st
- slip stitch
- ch
- chain
- st
- stitch
- dc
- double crochet
- Round 14
Sl st in each stitch around. Join with sl st to the first sl st. Ch 1. Repeat rounds 13 and 14: Repeat these two rounds until the bag is long enough for you.
Key3
- sl st
- slip stitch
- ch
- chain
- st
- stitch
Making up
- Step 1Weave in any loose ends.
Notes from the pattern
- A 3mm hook is specified for sport weight yarn; going up a size will loosen the fabric and may leave the base too open for a bottle to sit securely.
- Stitch markers are optional but useful here, since every round is joined with a slip stitch and a chain 1 — losing track of the join point makes the increase pattern hard to follow.
- Keep tension even across each increase round; a tight first sc after every inc is a common cause of a base that doesn't sit flat.
- No stuffing is used in this pattern — it is a functional, single-layer container rather than an amigurumi shape, so gauge and stitch count matter more than firmness.
The essentials
- Rounds
- 8
- Level
- Intermediate
- Time
- 4-6 hours
- Hook
- 3 mm
- Yarn
- Sport
Stitches you will use
- Magic circle start Used to begin the base; pull the centre closed firmly before chaining 6 so no hole remains once weight is added.
- Evenly spaced increases (inc) Each round from Round 2 onward adds stitches at set intervals — watch the plain-stitch count between increases, since it grows by one every round.
- Working through back loops The strap is sewn through the back loops rather than both loops, which is what creates the raised, wavy line where it attaches — keep the stitches identifiable by not crushing them while working the earlier rounds.
Troubleshooting
The base cups upward instead of lying flat
Too few increases were worked relative to the round, or they were bunched together rather than spaced evenly; check the stitch count against the pattern's bracketed totals and redo the round if it falls short.
The base ruffles or ripples at the edge
This means more increases went in than the round called for; recount from the previous round's total before starting the next increase sequence.
The centre of the magic circle leaves a visible gap once the base is finished
The circle wasn't pulled tight enough before working Round 1; go back and cinch the starting tail firmly, then weave it through the last few stitches to hold it closed.
Substituting yarn
- Mercerised cotton, sport weight
- Produces a crisper, more structured bag that holds its round shape well; stitch definition improves but the fabric has less give, so keep the same 3mm hook.
- Acrylic blend, DK weight
- Makes a slightly larger, bulkier bag from the same round count; size the hook up to around 3.5-4mm to keep the fabric from stiffening.
- Wool-blend, fingering weight
- Gives a smaller, softer bag with more drape; drop to a 2.5mm hook to keep the stitches dense enough to hold a bottle's weight.
Washing and care
- Fibre isn't specified for the sport weight yarn used here, so care should follow the actual yarn's ball band; as a general rule, hand wash in cool water and avoid wringing to protect stitch definition on the base.
- Lay the bag flat to dry and reshape the circular base by hand while still damp, easing it into shape rather than stretching it, then store unfolded so the increases don't crease.
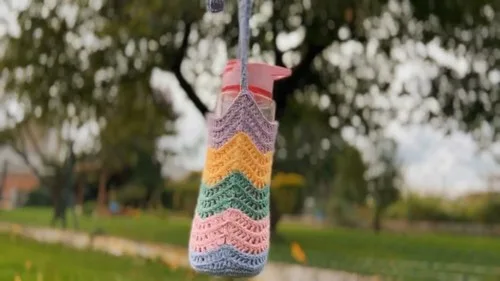
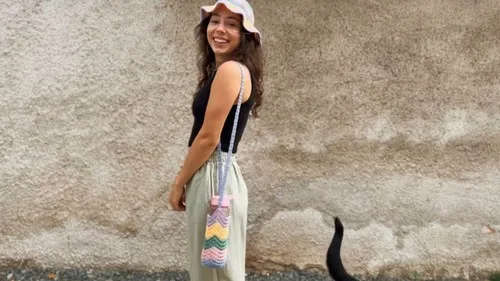
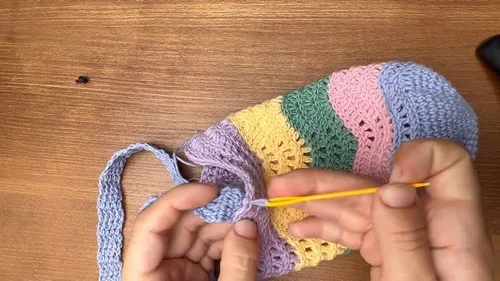
The photographs taken while this was being made
Every one was taken by whoever published the pattern, in the order the source listed them.
FAQs
Questions
Why does the pattern specify a 3mm hook with sport weight yarn?
That combination produces a firm, closely worked fabric able to support the weight of a filled bottle. A larger hook would loosen the stitches and let the base sag.
What are the stitch markers for if the pattern already says to join each round?
They mark the first stitch of a round so the join point stays easy to find while counting increases. This is optional, but helpful over eight rounds worked in a single colour with no other visual cue.
Why chain 6 before Round 1 instead of going straight into the magic circle?
The 6 chains set the starting stitch count that Round 1's 6 sc build on. Skipping or miscounting this step will throw off every increase total that follows.
Why does the strap attach through the back loops rather than both loops?
Sewing through the back loops only leaves the front loops sitting proud, which produces the wavy line referenced in the bag's name. It also keeps the seam slightly raised rather than flush.
Can the base be made larger to fit a bigger bottle?
Extra increase rounds can be added following the same pattern of adding one more plain stitch between increases each time. Keep a stitch marker at the round start to track the new totals accurately.
These answers came from whoever first published the pattern, kept word for word.