 EVERY CROCHET
 Accessories 10 rounds No account, no download
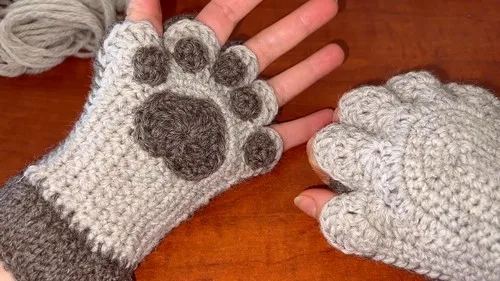
Crochet cat paw fingerless mittens with textured paw pads
Fingerless mittens worked in double crochet (UK treble crochet), with US and UK stitch terms given throughout.
- Skill
- Intermediate
- Time
- 4-6 hours
- Yarn weight
- 5 Ply (Sport)
- Hook
- 3.5 mm

Intermediate
What the original write-up called it. Nothing here is graded again.

5 Ply (Sport)
What the sample was worked in. Any weight works; the size moves with it.

4-6 hours
What the original page reckoned. Your own pace is the one that matters.
About this pattern
This is a pair of fingerless mittens with a cat paw motif on the palm, worked in double crochet (UK treble crochet) using 5 ply yarn and a 3.5 mm hook. The glove body is made flat then joined, the large triangle paw pad and ten small circle paw pads are worked in the round from a magic ring in a contrast colour, and a separate front-loop-only ribbing forms the cuff. Assembly involves seaming the paw pads on and slip stitching the body closed while leaving five finger openings.
These fingerless mittens pair a fitted glove body with a raised paw-pad motif worked onto the palm, giving each mitt a distinct cat-paw silhouette. The body of the glove is built mainly in double crochet (UK treble crochet), a firm, closely packed stitch that keeps a fitted accessory like this from stretching out of shape. Half double crochet and treble crochet appear briefly in the paw pad and ribbing, adding the toe shaping and stretch where the mitten needs to move.
Each glove body is worked flat in rows across four rounds of shaping before being fastened off and joined into a tube, with the paw pad worked separately in the round from a magic ring and sewn onto the palm afterwards. The wrist ribbing is added last as its own strip, worked back and forth in front-loop-only rows along the cuff edge, then closed and joined into the wrist opening. Finger openings are formed during assembly by slip stitching the two glove layers together only at set points, leaving five gaps free.
Materials
- 5 ply yarn (main color and contrast for paw pads)
- 3.5 mm hook
- Darning needle
- Scissors
- Stitch marker
The list is the pattern's own wording.
Instructions
Every round is printed as the pattern wrote it, brackets and all. Open the key beside a round to see only the short forms that round uses.
The Glove Body (Make 2)
- Round 1
ch 16, 13 dc, 6 dc in last st, 13 dc (32)
Key3
- ch
- chain
- dc
- double crochet
- st
- stitch
- Round 2
ch 2, 13 dc, inc x6, 13 dc (38)
Key3
- inc
- increase
- ch
- chain
- dc
- double crochet
- Round 3
ch 2, 13 dc, (dc, inc) x6, 13 dc (44)
Key3
- inc
- increase
- ch
- chain
- dc
- double crochet
- Round 4
ch 2, 13 dc, (inc, 2 dc) x6, 13 dc, fo (50)
Key4
- inc
- increase
- ch
- chain
- dc
- double crochet
- fo
- fasten off
- Round 5
insert hook in 14th st from right bottom, sc, (skip st, 6 dc in next, skip st, sc) x5, sl st, fo (36)
Key5
- sl st
- slip stitch
- sc
- single crochet
- dc
- double crochet
- fo
- fasten off
- st
- stitch
- Round 6
ch 2, 14 dc, sc, (2 dc, 2 dc inc, 2 dc, sc) x5, 15 dc, weave in ends (74)
Key4
- inc
- increase
- ch
- chain
- sc
- single crochet
- dc
- double crochet
Large Triangle Paw Pad (Make 2)
- Round 1
mr, ch 2, 12 dc, inv join (12)
Key4
- inv join
- invisible join
- mr
- magic ring
- ch
- chain
- dc
- double crochet
- Round 2
ch 2, 12 inc, inv join (24)
Key3
- inv join
- invisible join
- inc
- increase
- ch
- chain
- Round 3
ch 2, dc, tc, dc inc, 5 sl st, sc, hdc inc, sc, 5 sl st, dc inc, tc, dc, ch 2, 5 sl st, fo, inv join (27)
Key10
- inv join
- invisible join
- sl st
- slip stitch
- hdc
- half double crochet
- inc
- increase
- ch
- chain
- sc
- single crochet
- dc
- double crochet
- tc
- treble crochet
- fo
- fasten off
- st
- stitch
Small Circle Paw Pads (Make 10)
- Round 1
mr, 10 hdc, fo, inv join (10)
Key4
- inv join
- invisible join
- hdc
- half double crochet
- mr
- magic ring
- fo
- fasten off
Ribbing (Wrist Cuff)
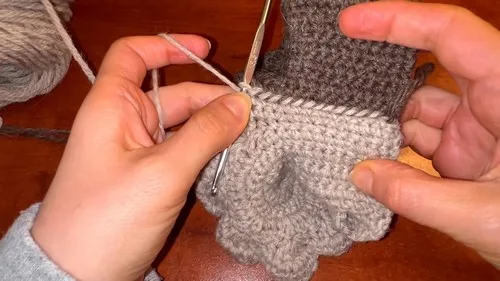
Ch 6 in any st on glove opening.
5 sc, skip 1 st, 3 sl st, turn.
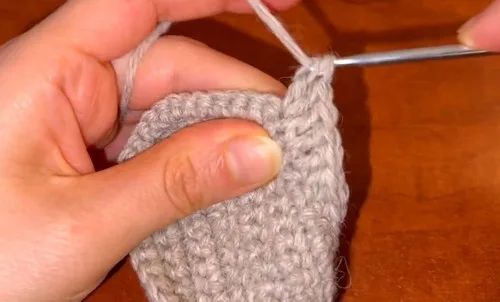
Repeat: FLO 5 sc, ch 1, turn, FLO 5 sc, skip st, 3 sl st, turn.
Continue until reaching first row.
Sl st across first row, fo.
Join ribbing edges with sl st, weave in ends.
Making up
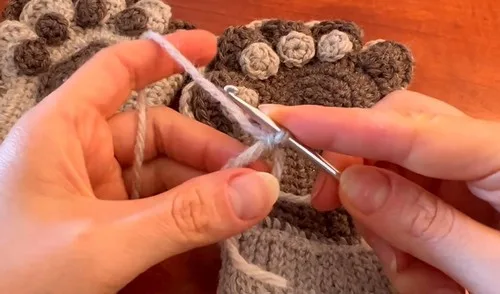
- Step 1Sew paw pads onto the palm area of the glove body.
- Step 2Place glove edges back-to-back and sl st 15–16 times to close.
- Step 3Work finger openings: (8 sl st front piece only, sl st both pieces) x5.
- Step 4Continue sl st both pieces until end.
- Step 5Sl st around wrist opening, working 2 sl st per dc, fo, inv join.
Notes from the pattern
- Use a 3.5 mm hook throughout; a smaller hook will make the paw pad rounds hard to work into after the dense increase rounds.
- Keep a stitch marker on the first stitch of every round in the Large Triangle Paw Pad, since the inv join relies on knowing exactly where the round began.
- Work the glove body's early rows (R1–R4) at an even tension so the 13 dc sections either side of the increases stay flat rather than flaring.
- The mittens can be customized with any favourite yarn colors for the main body and paw pad contrast to match personal style.
The essentials
- Rounds
- 10
- Parts
- 4
- Level
- Intermediate
- Time
- 4-6 hours
- Hook
- 3.5 mm
- Yarn
- 5 Ply (Sport)
Stitches you will use
- Magic ring and invisible join Used to start and close each round of the Large Triangle Paw Pad and Small Circle Paw Pads; keep the ring cinched tight before working the first round so the centre does not leave a gap.
- Front-loop-only ribbing The Ribbing (Wrist Cuff) is worked entirely in front loops across repeated rows; work loosely and check that each row's stitch count stays even before turning.
- Selective slip stitching for openings Assembly joins the two glove layers with sl st, working through both pieces except where finger openings are left (8 sl st front piece only, sl st both pieces, x5); miscounting here shifts the openings out of line.
Troubleshooting
The paw pad cups instead of lying flat against the palm.
This usually means the 12 increases in R2 were not spaced evenly around the round; count stitches between each inc before joining and adjust before moving to R3.
The finger openings come out narrower
This happens when the 8-stitch front-only sections in the assembly step are counted inconsistently; mark the start of each 8 sl st section with a stitch marker so all five openings match.
The wrist edge puckers after the ribbing is sewn on.
The ribbing strip is worked separately and can end up shorter or longer than the wrist opening; ease it slightly as it is slip stitched round rather than stretching it flat to fit.
Substituting yarn
- Cotton, 5 ply/sport weight
- Gives crisper stitch definition on the paw pad but less stretch at the wrist, so the ribbing may need a slightly looser tension to pull on comfortably.
- Wool-blend, fingering weight
- Adds warmth and natural elasticity to the fit; the finished mittens can be blocked to even out the paw pad rounds but should be kept slightly damp rather than soaked.
- Acrylic, DK weight
- Produces a bulkier, warmer mitten and pairs best with a slightly larger hook than the 3.5 mm specified, so gauge and glove length should be checked against the hand before finishing the ribbing.
Washing and care
- Hand wash the finished mittens in cool water and lay them flat to dry, easing the paw pad and ribbing back into shape while still damp rather than after they have dried stiff.
- Store folded flat rather than hung, since the fingerless cuffs and paw pad increases can stretch out of shape if left suspended by the wrist opening.
The photographs taken while this was being made
Every one was taken by whoever published the pattern, in the order the source listed them.
FAQs
Questions
Can the paw pads be made in a different contrast colour for each hand?
Yes; the paw pad is worked as a separate piece in its own colour and sewn on afterwards, so each glove can take a different contrast without affecting the main colour body.
How many finger openings does each mitten have?
Each mitten has five finger openings, formed during the assembly step that repeats the 8 sl st front piece only, sl st both pieces sequence five times.
Is the magic ring used anywhere other than the paw pads?
No; the magic ring and invisible join appear only in the Large Triangle Paw Pad and Small Circle Paw Pad rounds, while the Glove Body starts from a foundation chain instead.
Does the ribbing need to be worked as a separate piece?
Yes; the Ribbing (Wrist Cuff) is chained onto the glove opening and then worked back and forth in front-loop-only rows before being slip stitched shut, rather than being built directly into the glove rounds.
Is a stitch marker necessary if the round count is small?
It is recommended even on short rounds, since the inv join used throughout the paw pads depends on returning to the exact first stitch of the round each time.
These answers came from whoever first published the pattern, kept word for word.