 EVERY CROCHET
 Accessories 7 rounds No account, no download
Crochet lemon slice earrings and keychain pattern
Single crochet (UK: double crochet) lemon slice pattern for earrings or a keychain, with both US and UK terms given.

- Skill
- Beginner
- Time
- 2-3 hours
- Yarn weight
- Fingering (weight 2)
- Hook
- 2.5 mm

Beginner
What the original write-up called it. Nothing here is graded again.

Fingering (weight 2)
What the sample was worked in. Any weight works; the size moves with it.

2-3 hours
What the original page reckoned. Your own pace is the one that matters.
About this pattern
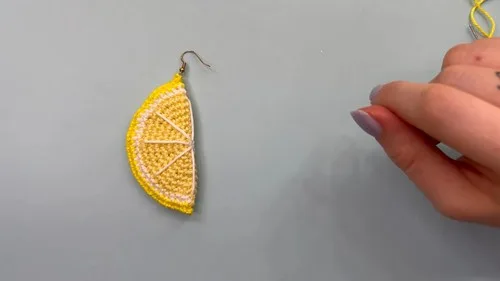
This pattern makes a flat crochet disc, folded and seamed into a lemon-slice charm for earrings or a keychain. It uses fine cotton yarn in three colours, a 2.5 mm hook, and single crochet worked in increasing rounds from a magic ring. White embroidery marks the segment lines before folding. The result is small and quick, suited to crocheters comfortable with basic increases and colour changes.
This lemon motif, made up as a pair of earrings or a single keychain charm, is built entirely from single crochet (called double crochet in the UK), the stitch used for most flat amigurumi discs. Worked in three shades of fine cotton, the design relies on steady, counted increases rather than any decorative stitch pattern, so the colour changes and the white pith line carry the visual detail instead of stitch texture.
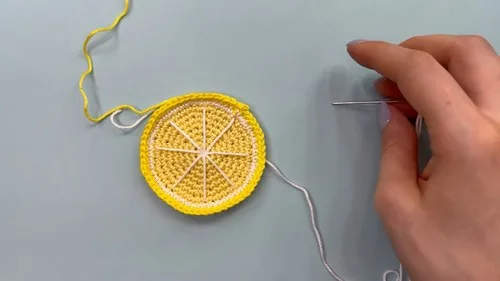
Each disc starts from a magic ring and grows through a run of increase rounds, moving from 6 stitches up to 42 and beyond before the yarn changes from pale yellow to white and then to brighter yellow for the outer peel. Once the disc is embroidered with segment lines and the ends are woven in, it is folded in half and the sides are sewn together using the long tail left from the final round, turning a flat circle into a rounded lemon slice ready for an earring hook or keychain ring.
Materials
- Pale yellow, brighter yellow, and white cotton yarn (weight 2, fine)
- Crochet hook (2.5 mm recommended)
The list is the pattern's own wording.
Instructions
Every round is printed as the pattern wrote it, brackets and all. Open the key beside a round to see only the short forms that round uses.
Main Pattern
- Round 1
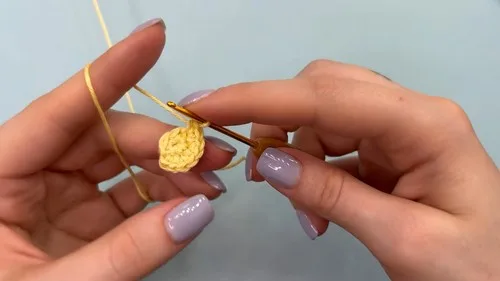
Make 6 single crochets (sc) into the ring, then slip stitch (sl st) to the first sc to join. (6 sc)
Key3
- sl st
- slip stitch
- st
- stitch
- sc
- single crochet
- Round 2
Chain 1 (ch 1), then 2 sc in each st around. You should have 12 sc in total. After Row 3: 1 sc in the next st, then 2 sc in the following st repeat around until you have 18 sc.
Key3
- ch
- chain
- st
- stitch
- sc
- single crochet
Increasing Rows
- Round 4
2 sc, 1 increase (inc) repeat around to make 24 stitches.
Key2
- inc
- increase
- sc
- single crochet
- Round 5
3 sc, 1 inc repeat around for a total of 30 stitches. For Row 6: 4 sc, 1 inc repeat around to achieve 36 stitches.
Key2
- inc
- increase
- sc
- single crochet
Changing to White Yarn:
- Round 7
5 sc, 1 inc repeat around, reaching 42 stitches in total. Swap to white yarn.
Key2
- inc
- increase
- sc
- single crochet
- Round 8
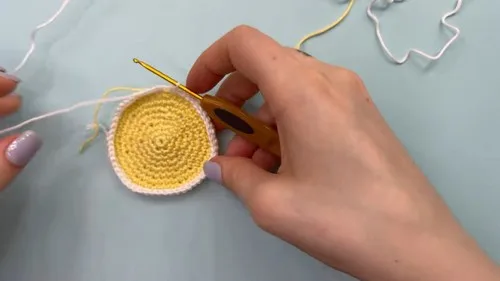
7 sc, 1 inc repeat around, change to bright yellow yarn at the end, resulting in 54 stitches.
Key2
- inc
- increase
- sc
- single crochet
With Bright Yellow Yarn:
- Round 9
Starting with bright yellow, 8 sc, 1 inc repeat around, ending up with 60 stitches.
Key2
- inc
- increase
- sc
- single crochet
Making up
- Step 1Embroidering Lemon Slices:: Using white yarn, embroider across the lemon slice to create segments, starting in the center and dividing the circle into sections.
- Step 2Weave in Ends:: Secure and weave in all loose ends.
- Step 3Assembly:: Fold the crochet piece in half, matching up the stitches.
- Step 4Using the long tail left after the last row, sew the sides together to create the earring shape.
- Step 5Adding Earring Hooks:: Attach earring hooks through the top of your lemon slice.
Notes from the pattern
- A 2.5 mm hook is recommended for the fine (weight 2) cotton used throughout; a larger hook loosens the stitches and lets gaps show at each increase point.
- Fine cotton reveals uneven tension more readily than heavier yarn, so keep stitches consistent in height and tightness across every round.
- Colour swaps happen at specific rounds rather than at random points; changing yarn exactly as instructed keeps the pale yellow, white and bright yellow boundaries crisp.
- The long tail left after the final round is used to sew the two folded sides together; leave it uncut until assembly rather than weaving it in early.
The essentials
- Rounds
- 7
- Parts
- 2
- Level
- Beginner
- Time
- 2-3 hours
- Hook
- 2.5 mm
- Yarn
- Fingering (weight 2)
Stitches you will use
- Magic ring Forms the starting point for the disc; keep the loop cinched tight so no hole shows at the centre once the increase rounds begin.
- Single crochet increases (UK: double crochet increases) Used through every round listed in the Increasing Rows section; count stitches at the end of each round rather than trusting stitch spacing by eye.
Troubleshooting
The disc cups or ruffles instead of lying flat.
The increase count has drifted from the numbers given, or the stitches are worked too tightly; recount stitches at the end of each round and ease tension slightly.
The colour join looks jagged where the yarn changes.
The new colour was picked up mid-stitch rather than on the final yarn-over of the last stitch; draw the new colour through the last two loops before cutting the old yarn.
The embroidered segment lines look uneven or off-centre.
Stitches were placed without marking the centre first; mark the centre of the disc before embroidering and divide the sections evenly from that point.
Substituting yarn
- Mercerised cotton, same fine (weight 2)
- Gives crisper stitch definition and a slightly stiffer drape, useful for keeping the disc flat; hook size stays at 2.5 mm.
- Light (weight 3) cotton or cotton blend
- Produces a larger finished lemon with a softer drape; move up to roughly a 3-3.5 mm hook and expect a heavier charm.
- Acrylic or acrylic-cotton blend, fine weight
- Lowers cost but gives a less structured disc that may need light pressing to lie flat; hook size is largely unaffected.
Washing and care
- As the pattern uses cotton yarn, hand wash the finished piece in cool water without wringing, then lay it flat to dry.
- Reshape the disc while still damp and press it flat under a book if the edges curl; store it flat rather than folded to keep the lemon shape true.
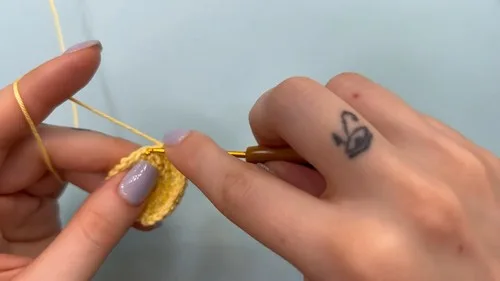
The photographs taken while this was being made
Every one was taken by whoever published the pattern, in the order the source listed them.
FAQs
Questions
What is the difference between the US and UK stitch names used here?
The pattern uses single crochet, the US term for the stitch called double crochet in the UK. Both names refer to the same stitch; the rest of the pattern uses the US term throughout.
Can the same piece be made into either an earring or a keychain?
Yes, the disc itself is identical either way; the only difference is whether an earring hook or a keychain ring is attached during assembly. Decide which finding to use before starting the embroidery step, since it does not affect the crochet part.
Does the hook size matter if a different cotton is used?
The 2.5 mm hook is matched to the fine (weight 2) cotton listed in the materials; a heavier yarn will need a larger hook to keep the fabric from stiffening. Always check that stitch counts still match the numbers given at each round.
What is the best way to keep the embroidered segments even?
Mark the centre of the disc before starting so all the segment lines radiate from the same point. Space the lines out evenly around the circle before stitching rather than adding them one at a time by eye.
These answers came from whoever first published the pattern, kept word for word.