 EVERY CROCHET
 Amigurumi 10 rounds No account, no download
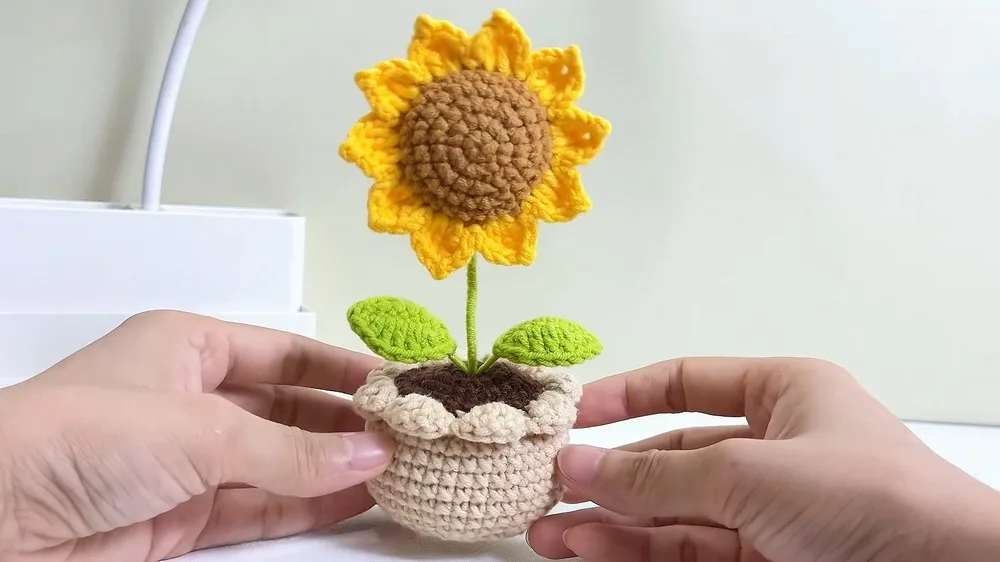
Crochet sunflower pot pattern with wire-leaf detail
A crochet sunflower pot pattern built in single crochet (UK double crochet), with US and UK stitch names given throughout.
- Skill
- Intermediate
- Time
- 4-6 hours
- Yarn weight
- Worsted

Intermediate
What the original write-up called it. Nothing here is graded again.

Worsted
What the sample was worked in. Any weight works; the size moves with it.

4-6 hours
What the original page reckoned. Your own pace is the one that matters.
About this pattern
This pattern makes a stuffed sunflower set into a crocheted pot, worked in single crochet (UK double crochet) with taller stitches shaping ten petals and a wire-supported leaf. The flower's centre, the pot, and a soil topper are each worked separately from a magic ring before being joined with stitching or glue. A hook, yarn in sunflower, green, and brown shades, 15 cm of wire, and cotton stuffing complete the project.
This sunflower-in-a-pot design combines a flat flower, ten petals, and a cylindrical pot into one amigurumi project. The core stitch family throughout is single crochet (UK double crochet), worked in rounds for the pot and the flower's centre disc. Taller stitches — double crochet and treble crochet in the US system — shape the petals and the leaf, giving the piece its layered, three-dimensional feel rather than a flat appliqué look.
Construction starts with the flower's centre, built from a magic ring through four increase rounds to a flat disc. Petals are joined directly onto that edge in sets of double crochet and treble crochet stitches, worked seven times, then three more for a total of ten, with a gap left unworked for stuffing. The pot is a separate piece worked from its own magic ring, widened over early rounds then continued straight before narrowing at the top; a wire-cored leaf and a soil disc are crocheted separately and joined by glue or stitching during assembly.
Materials
- Yarn (colors needed: sunflower colors, green for the stem and leaves, and brown for the soil and the pot)
- Crochet hook
- Scissors
- Wire, 15 cm piece (for the leaf)
- Cotton (for stuffing the pot)
- Glue
The list is the pattern's own wording.
Instructions
Every round is printed as the pattern wrote it, brackets and all. Open the key beside a round to see only the short forms that round uses.
Sunflower Center
- Round 1
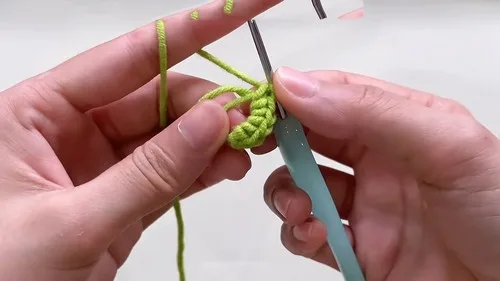
Start with a magic ring, crochet 6 single crochets (sc) into the ring, pull the yarn tight, and slip stitch (sl st) to the first sc to close the ring.
Key3
- sl st
- slip stitch
- st
- stitch
- sc
- single crochet
- Round 2
Chain 1, then make an increase (2 sc in the same stitch) all around (for a total of 6 increases). Slip stitch to the first sc.
Key1
- sc
- single crochet
- Round 3
Chain 1. Sc in the first, increase in the next stitch , repeat around . Finish with a sl st to the first sc.
Key3
- sl st
- slip stitch
- st
- stitch
- sc
- single crochet
- Round 4
Chain 1. Sc in the first 2 stitches, then make an increase. Repeat the pattern around. Finish with a sl st.
Key3
- sl st
- slip stitch
- st
- stitch
- sc
- single crochet
- Round 5
Chain 1. Sc in the first 3 stitches, then make an increase. Repeat the pattern around. Finish with a sl st, chain 1, and cut the yarn.
Key3
- sl st
- slip stitch
- st
- stitch
- sc
- single crochet
Stamens
In brown yarn, follow the same pattern as the seow (the center) to make the stamens.
Petals
Join yarn to the seow and stamen assembly.
- Petals
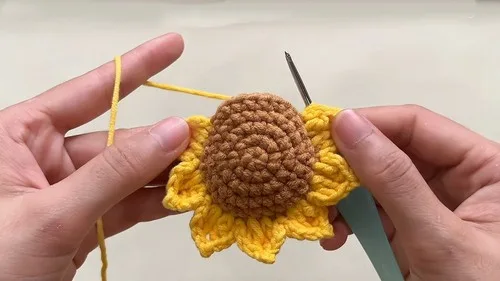
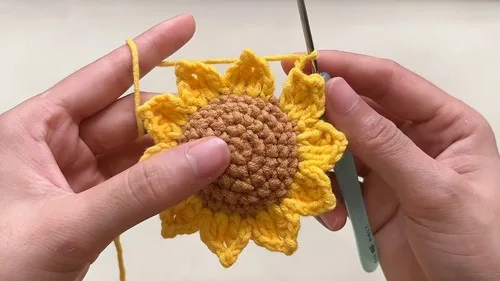
Chain 2, make a double crochet (dc) and a treble crochet (tr) into the same stitch. Chain 2, then slip stitch in the second chain from the hook. Repeat the pattern to create a total of 7 petals, leaving a space for stuffing. After the 7th petal, continue to crochet three more petals to complete the sunflower look with a total of 10 petals.
Key2
- dc
- double crochet
- tr
- treble crochet
Leaves
- Leaf
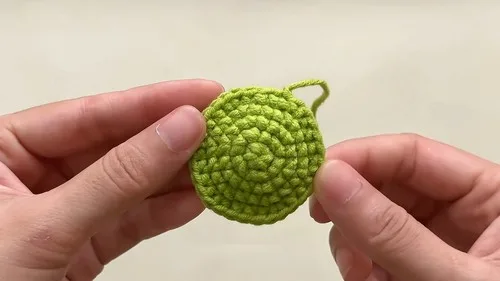
Begin with a slip knot. Chain 8. Lay the wire along the chain and crochet around it for structure. Follow a pattern that creates a leaf shape (sc, half-double crochet (hdc), dc in succession, finishing back to sc). Fasten off and secure wire ends.
Key3
- hdc
- half-double crochet
- sc
- single crochet
- dc
- double crochet
Pot
- Round 1
Start with a magic ring, make 8 sc into the ring. Pull tight and sl st to close.
Key3
- sl st
- slip stitch
- st
- stitch
- sc
- single crochet
- Round 2
Chain 1, then make an increase in each stitch around (8 times). Sl st to close. Continue following the pattern for the pot, increasing stitches for width and then continuing in sc for height for rows 7 to 12.Row 13: Start decreases to narrow the top of the pot. Add texture or decorative stitches as desired for the final rows.
Key3
- sl st
- slip stitch
- st
- stitch
- sc
- single crochet
Soil
- Soil Disc
Create a small disc using a magic ring and increase in a similar fashion to the pot's bottom.
Making up
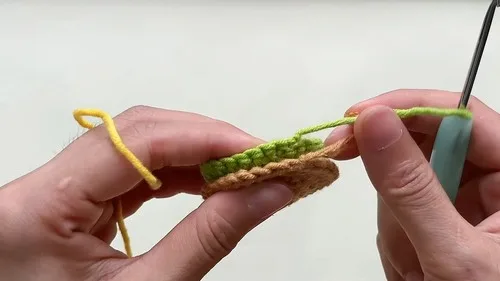
- Step 1Stuff the pot with cotton.
- Step 2Sew or glue the soil to the top of the pot.
- Step 3Insert the sunflower into the soil top.
- Step 4Use glue and yarn to create additional detail like branches or vines.
Notes from the pattern
- No hook size is given in the materials list; pick a hook that suits the yarn weight chosen and keep it the same across the centre, pot, and leaf for an even gauge.
- Place a stitch marker in the first stitch of each round on the centre and pot, since rounds close with a slip stitch rather than a continuous spiral.
- Work the pot a little more firmly than typical amigurumi tension, so the cotton-stuffed interior and glued soil disc don't show through the stitches.
- Add the cotton stuffing to the pot before gluing on the soil disc, and change yarn colour at the start of a round rather than mid-round for the petals, pot, and soil.
The essentials
- Rounds
- 10
- Parts
- 6
- Level
- Intermediate
- Time
- 4-6 hours
- Yarn
- Worsted
Stitches you will use
- Joined rounds in single crochet (UK double crochet) Used throughout the flower centre and the pot; each round closes with a slip stitch rather than a spiral join, so the first stitch of every round needs to stay findable.
- Petal shaping with mixed stitch heights The dc-plus-tr, chain-2 petal sequence is repeated ten times around the centre; watch that each chain-2 and stitch pair matches the last so the petals sit evenly.
- Crocheting around a wire core The leaf is worked as a chain of 8 with 15 cm of wire laid inside; keep stitches tight enough to fully cover the wire and secure both ends firmly at fasten-off.
Troubleshooting
The ten petals vary noticeably in size
Uneven chain-2 turns or a missed dc or tr at the base of a petal change its length; count both the two chain stitches and the stitch pair before closing each petal with its slip stitch.
The pot leans or its sides bow outward
This usually comes from missed increases in the early widening rounds or uneven decreases near row 13; recount stitches at the end of each round before adding the next.
The leaf flattens or the wire pokes through the stitches
Loose single crochet around the 15 cm wire lets it shift inside the work; crochet more tightly around the wire and fasten off securely at both ends before shaping the leaf.
Substituting yarn
- Cotton, DK weight
- Gives the petals and pot crisper stitch definition and a slightly stiffer wall; drop to a smaller hook to keep the stitches tight enough to hold the stuffing.
- Acrylic, worsted weight
- Produces a softer, lighter finished piece and easier colour changes between the sunflower and soil shades; match the hook to the yarn band as normal.
- Wool-blend, aran weight
- Thickens every round, so the pot reaches its height in fewer rows and the petals look fuller; size up the hook and work the leaf stitches a touch looser around the wire.
Washing and care
- Spot clean the finished piece rather than washing it fully, since the glued soil disc, wire-cored leaf, and cotton stuffing are not suited to water or a machine cycle.
- Store the pot upright in a dry spot out of direct sunlight, and reshape petals or the leaf by hand if they flatten, easing the wire back into its curve rather than re-crocheting it.
The photographs taken while this was being made
Every one was taken by whoever published the pattern, in the order the source listed them.
FAQs
Questions
Why do the petals combine a double crochet and a treble crochet in the same stitch?
Working a shorter stitch next to a taller one gives each petal a tapered point rather than a flat oval. The treble crochet (US term) pulls the tip further out, which gives the sunflower its layered look.
How much wire does the leaf actually need?
A single 15 cm piece of wire is laid along the starting chain of 8 and crocheted over. That length is enough to run the full leaf and still leave ends to secure once fastening off.
Can the pot stand up on its own before it is stuffed?
The pot is worked in rounds from a magic ring, widened for the base and continued straight for height, which gives it a stable shape on its own. Stuffing with cotton firms the walls further but is not what holds it upright.
Why does the petal pattern leave a gap after the seventh petal?
That gap is the opening used to stuff the flower before the final three petals close the ring up to ten. Skipping this step makes the centre hard to fill once all ten petals are in place.
How is the soil disc fixed to the top of the pot?
The soil is a separate small round piece, finished after its own increase row and cut yarn, then sewn or glued to the top edge of the pot. Glue is also used afterwards for any added detail such as vines or branches.
These answers came from whoever first published the pattern, kept word for word.