 EVERY CROCHET
 Hats & Accessories 6 rounds No account, no download
Crochet a straw-style bucket hat in double crochet
A crocheted straw-style bucket hat worked in double crochet (UK treble crochet), with both US and UK stitch names given.

- Skill
- Intermediate
- Time
- 4-6 hours
- Yarn weight
- Worsted

Intermediate
What the original write-up called it. Nothing here is graded again.

Worsted
What the sample was worked in. Any weight works; the size moves with it.

4-6 hours
What the original page reckoned. Your own pace is the one that matters.
About this pattern
This hat belongs to the double crochet (UK: treble crochet) family of stitches, the same firm, taller stitch used for structured sun hats and bucket-style brims. Worked with a smooth yarn and a 5 mm hook, it produces a straw-hat look without actual straw, giving the brim enough body to hold its shape rather than drape. The two-colour approach — yellow for the main body, red as an accent — keeps the construction simple while adding a clear visual break between crown and brim.
Construction starts at the centre of the crown with a magic ring and twelve double crochet stitches, building outward in continuous rounds. The brim is worked in two distinct stages: an opening round into the front loops only, which sets a crisp fold line, followed by a second stage worked into both loops that continues the increases before settling into plain double crochet rounds and a final round of single crochet (UK: double crochet) to smooth the edge. The piece is then joined with a slip stitch, finished off, and turned right side out for wear.
Materials
- Scissors
- Yarn Needle
The list is the pattern's own wording.
Instructions
Every round is printed as the pattern wrote it, brackets and all. Open the key beside a round to see only the short forms that round uses.
Material Needed
Yellow Yarn Red Yarn Crochet Hook (5 mm size)
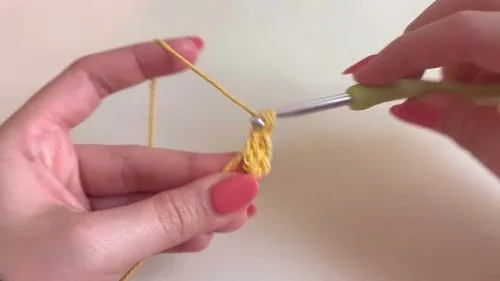
Scissors Yarn Needle Pattern Instructions: Start with a magic ring Start with a magic ring using yellow yarn and a 5 mm crochet hook.
Chain one (this does not count as a stitch), then chain one more for a total chain of two.
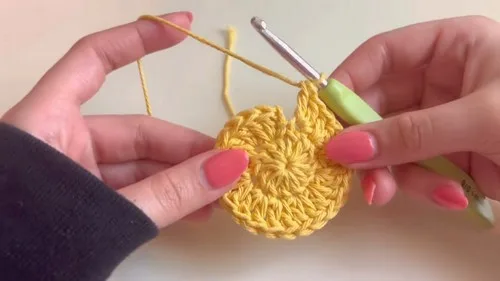
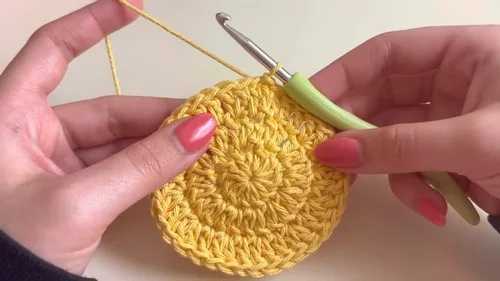
Work 12 double crochet into the magic ring.
Tug lightly on the tail to tighten the magic ring.
Slip stitch to the top of the first double crochet to join the round.
- Round 2
Chain two (does not count as a stitch), then work two double crochet (increase) into the same stitch.Work an increase into each stitch around, for a total of 24 stitches.In Round 3: Chain two, then double crochet into the same stitch.Double crochet in the next stitch, then increase in the following stitch.Repeat this pattern (one double crochet, then an increase in the next stitch) around for a total of 36 stitches.
- Round 4
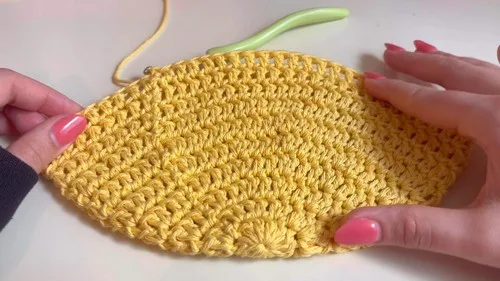
Chain two, and double crochet into the same stitch. Double crochet in each of the next two stitches, then do an increase in the third stitch.Repeat this pattern around (two double crochet, then an increase) for a total of 48 stitches.
- Round 5
Chain two, then double crochet into the same stitch. Double crochet in each of the next three stitches, then do an increase in the fourth stitch.Repeat this pattern around for a total of 60 stitches.For Round 6 (last round of increases): Chain two, then double crochet into the same stitch.Double crochet in the next nine stitches, then make an increase in the 10th stitch.Repeat this pattern around for a total of 66 stitches.
- Round 7
through Round 10: Chain two, then make one double crochet in each stitch around.Repeat for four rounds.
Begin the brim
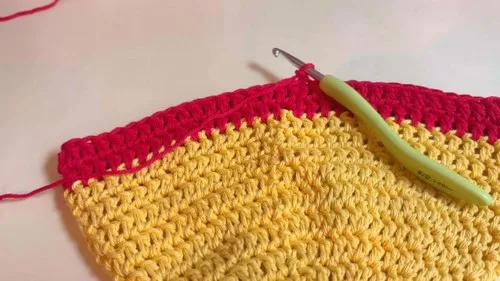
Chain two, and work into the front loops only.
Make one double crochet in the first front loop, then make an increase in the next front loop.
Repeat this pattern around (one double crochet, then an increase in the next front loop).
Finalize the brim
Chain two, and then work back into both loops of each stitch.
Double crochet in the first stitch, double crochet in the next, then increase in the third stitch.
Repeat this pattern all the way around.
For the next row, make one double crochet in each stitch around.
For the final row, add a row of single crochet stitches in each stitch around.
Finishing the hat
- Round 1
Slip stitch to the first single crochet to join the round.
- Round 2
Chain one, snip the yarn, and weave in the ends, Flip the hat inside out to finish off the work neatly.
Making up
- Step 1Slip stitch to the first single crochet to join the round.
- Step 2Chain one, snip the yarn, and weave in the ends,
- Step 3Flip the hat inside out to finish off the work neatly.
Notes from the pattern
- The pattern calls for a 5 mm hook throughout; a smaller hook will tighten the fabric and shrink the finished hat.
- Because the crown and both brim stages are worked in continuous rounds, a stitch marker at the start of each round makes it easier to track where increases fall.
- A firm, even tension matters here — the hat is meant to hold a straw-like shape rather than drape, so looser crochet leaves the brim floppy.
- The yellow and red yarns mark a clear colour break between sections; weave in colour-change ends on the inside before turning the hat right side out.
The essentials
- Rounds
- 6
- Parts
- 4
- Level
- Intermediate
- Time
- 4-6 hours
- Yarn
- Worsted
Stitches you will use
- Magic ring start Used to begin the crown; keep the tail snug so the opening round of twelve double crochet closes without a gap at the centre.
- Front loop only shaping Appears at the very start of the brim; picking the wrong loop here blurs the fold line meant to separate crown from brim.
- Even increasing across rounds Used through both brim stages to flare the fabric flat; a missed or doubled increase makes the brim ripple or cup instead of lying straight.
Troubleshooting
The brim cups upward instead of lying flat.
An increase was likely missed in one of the brim stages, leaving the outer rounds with fewer stitches than they need; count stitches at the end of each round and compare to the previous one before continuing.
The crown doesn't sit as a flat circle.
A loose magic ring or a miscounted opening round of twelve double crochet is the usual cause; pull the ring fully closed and recount that first round before building outward.
The fold between crown and brim looks blurred rather than crisp.
This happens when the front-loop-only round at the start of the brim accidentally picks up both loops; slow down on that single round and check each loop before inserting the hook.
Substituting yarn
- Cotton, DK weight
- Gives a crisper, more straw-like finish with the same 5 mm hook; stitches hold their shape well, though the fabric is a little stiffer to work.
- Raffia-effect ribbon yarn, light worsted
- Produces the most authentic straw texture; the flatter, bulkier strand often needs a slightly larger hook, around 6 mm, to stop stitches packing too tightly.
- Acrylic, worsted weight
- Softer and more affordable, but the brim will drape rather than hold a straw-hat stance; a firmer tension helps compensate.
Washing and care
- Hand wash in cool water and lay the hat flat to dry, reshaping the brim by hand while still damp so it sets in a flat, straw-like curve rather than a dome.
- Store flat or on a hat form rather than folded, since creasing the brim while dry can leave a permanent line in the double crochet fabric.
The photographs taken while this was being made
Every one was taken by whoever published the pattern, in the order the source listed them.
FAQs
Questions
Why does the pattern begin with exactly 12 double crochet stitches in the magic ring?
Twelve is the base stitch count the whole crown shaping is built from, giving a number that divides evenly as later rounds increase. Keeping to this count in the opening round keeps the rest of the shaping on track.
What's the difference between the 'Begin the brim' and 'Finalize the brim' sections?
The first works into the front loops only to create a defined fold line between crown and brim. The second works into both loops, continues the increases, then settles into plain double crochet rounds before a single crochet (UK: double crochet) finishing round.
Why work the first brim round into the front loops only?
Front-loop-only stitches leave the back loops exposed, which is what creates the crisp fold separating the crown from the brim. Skipping this step leaves the transition smooth and the brim less likely to hold its angle.
Can the hat be made in a single colour?
Yes; the yellow and red yarns mark different sections of the pattern rather than serving any structural purpose, so the whole hat can be made in one colour throughout.
How is the hat finished off?
The last round is joined with a slip stitch, followed by a single chain before the yarn is snipped and the ends woven in. The hat is then turned right side out to show the neat side of the work.
These answers came from whoever first published the pattern, kept word for word.