 EVERY CROCHET
 Footwear 16 rounds No account, no download
Simple crochet slippers you can finish in one evening
Flat panel and in-the-round slippers using single crochet (UK: double crochet); both US and UK terms given throughout.
- Skill
- Beginner
- Time
- 3-4 hours
- Yarn weight
- Worsted
- Hook
- 5 mm

Beginner
What the original write-up called it. Nothing here is graded again.

Worsted
What the sample was worked in. Any weight works; the size moves with it.

3-4 hours
What the original page reckoned. Your own pace is the one that matters.
About this pattern
This pattern makes a pair of single crochet (UK: double crochet) slippers, fitting shoe sizes 37 to 41, from one small rectangle: 8 chains form the base, single crochet rows build a 9-row panel, stitches added around the edge bring it to 21 stitches, and 16 rows shape the heel and side panel. The piece is joined into a round of 30 stitches, worked plain for 5 to 8 rounds, then toe decreases and a flattened closure finish the foot, with optional cuff rounds at the top.
These slippers are built from single crochet (UK: double crochet), the dense, low-profile stitch that gives a sturdy, non-curling fabric well suited to footwear. The stitch is worked in straight rows across a small rectangle before the piece is turned to work in continuous rounds, so the same stitch carries the sole, the heel, the side panel and the toe shaping. No stitch changes are needed from the first chain to the final round, which keeps the pattern easy to follow once the rectangle is established.
Construction starts with a small flat rectangle worked in rows, which becomes the sole once stitches are added around its edges to reach 21 stitches total. From there the piece is worked in rounds of 21 stitches for 16 rounds to shape the heel and side panel, then the toe is flattened and closed by single crocheting across both open sides. A final set of rounds at the ankle opening builds the cuff, so the whole slipper is made without seams beyond the toe closure.
Materials
Yarn
- Medium-weight yarn with a color gradient
Hook
- 5 mm crochet hook (or 4.5 mm for a tighter fit)
Stitch Marker
- For marking decreases or round starts
The list is the pattern's own wording.
Instructions
Every round is printed as the pattern wrote it, brackets and all. Open the key beside a round to see only the short forms that round uses.
Initial Rectangle
This section forms the Slipper Base (Sole and Heel), starting with the Initial Rectangle worked in straight rows.
- (7)Row 1
Chain 8 stitches. Skip the first chain, single crochet in the next 7 stitches. (7 stitches total)
- (7)Rows 2–9
Chain 1, turn, and single crochet across for 9 total rows.
Heel and Side Panel
Stitches are added around the edges of the rectangle to increase the count to 21, then rows are repeated to build the heel and side panel.
- (21)Setup
Work single crochet stitches around the edges of the rectangle to create 21 stitches total.
- (21)Rows 1–16
Chain 1, turn, and single crochet 21 stitches across. Repeat for 16 rows to build the heel and side panel.
Joining the Round
At the end of the heel and side panel, the piece is joined into a round to begin working the Slipper Body (Foot and Toe).
- (30)Join
At the end of the 16th row, chain 9 stitches. Join the chain to the start of the rows with a single crochet. (Total 30 stitches)
- (30)Rounds 1–8
Work 5 to 8 rounds of 30 single crochet stitches.
Toe Decreases
- (27)Round 1
Single crochet 9 stitches, decrease once. (27 stitches)
- (27)Round 2
Single crochet all stitches. (27 stitches)
- (24)Round 3
Single crochet 7 stitches, decrease once. (24 stitches)
- (24)Round 4
Single crochet all stitches. (24 stitches)
- (24)Round 5
Single crochet all stitches again. (24 stitches)
- (21)Round 6
Single crochet 6 stitches, decrease once. (21 stitches)
- Round 7
Repeat pattern of 2 single crochet, 1 decrease across. (Approx. 15 stitches)
- Round 8
Repeat pattern of 1 single crochet, 1 decrease across to close the toe.
Final Closure
After the Toe Decreases rounds, the toe is flattened and closed, finishing the Slipper Body (Foot and Toe).
- Close Toe
Flatten the toe and single crochet across both sides to close the opening.
- Weave Ends
Cut the yarn and weave in the ends.
Making up
- Step 1Rejoin yarn at the back heel.
- Step 2Round 1: Single crochet evenly around the slipper opening.
- Step 3Round 2: Single crochet around again for a neat finish.
- Step 4Optionally, add more rounds for a taller cuff.
- Step 5Fasten off and weave in all ends.
Notes from the pattern
- Because the heel, side panel and toe are worked in continuous rounds without a join, a stitch marker at the start of each round keeps decrease placement accurate across all 16 rounds.
- Keep row and round tension even through the 9-row rectangle and the 16-row heel and side panel so the piece stays a true rectangle before it is folded and closed at the toe.
- The gradient yarn named in the materials list handles colour change automatically as the ball is worked, so no separate colour-change technique is required anywhere in the pattern.
- This pattern is written to fit shoe sizes 37 to 41; adjust the number of rows in the Initial Rectangle or the number of rounds in the Heel and Side Panel to size the slipper up or down.
- The pattern can be customized easily with different yarn colors or cuff heights for a personal touch.
The essentials
- Rounds
- 16
- Parts
- 5
- Level
- Beginner
- Time
- 3-4 hours
- Hook
- 5 mm
- Yarn
- Worsted
Stitches you will use
- Working in continuous rounds Used from the 21-stitch heel and side panel through the toe decreases; a marker at the round start prevents drifting since there is no slip-stitch join.
- Single crochet decrease Used in the Toe Decreases rounds, reducing stitch counts to 27 and then 24; place decreases consistently so the toe closes symmetrically.
- Adding stitches evenly around an edge Used to bring the flat rectangle up to 21 stitches for the sole, and again around the ankle opening for the cuff; uneven spacing here causes puckering or gaps.
Troubleshooting
The toe does not lie flat after closing.
This usually comes from uneven decrease placement in the Toe Decreases rounds; check that the decreases fall at the stated points (after 9 stitches, then after 7 stitches) before flattening and closing across both sides.
The rectangle looks skewed rather than
Stitch count has likely crept above or below 7 stitches across one of the 9 rows; count stitches at the end of every row and adjust the turning chain to keep the count consistent.
The ankle opening feels too tight or too loose.
This comes from the two cuff rounds not matching the foot, or extra optional rounds added unevenly; work any additional cuff rounds evenly and check the stitch count around the opening after each one.
Substituting yarn
- Cotton, worsted weight
- Produces a firmer sole with less stretch and less give at the ankle opening; a slightly smaller hook keeps the stitches dense enough for footwear.
- Acrylic, worsted or aran weight
- Closest match to the original medium-weight gradient yarn, with similar drape and easy care; the 5mm hook as specified works without adjustment.
- Wool-blend, aran weight
- Adds warmth and a little more loft underfoot; the 4.5mm hook option gives a tighter, more durable fabric for the sole and side panel.
Washing and care
- The materials list names weight and colour rather than fibre, so care should follow the yarn band; as a general rule, hand wash in cool water and avoid wringing to protect the gradient colour bands.
- Reshape the slippers by hand while damp and dry flat, away from direct heat, so the sole and cuff hold the shape built into the pattern rather than curling as they dry.
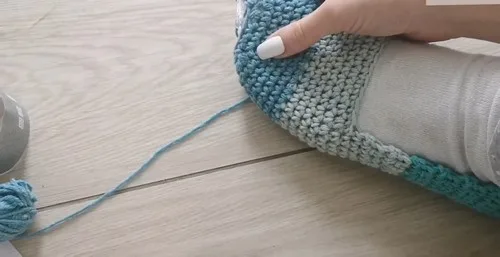
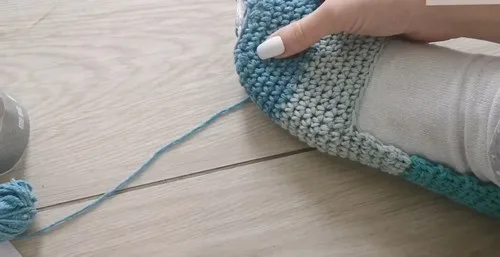
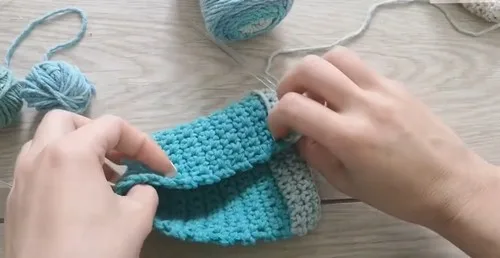
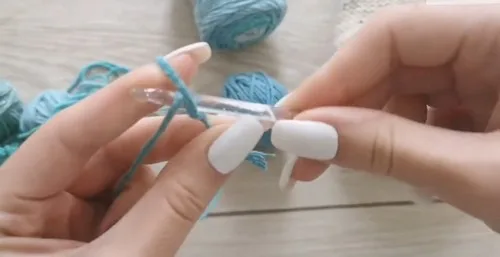
The photographs taken while this was being made
Every one was taken by whoever published the pattern, in the order the source listed them.
FAQs
Questions
Can these slippers be made in a different size?
The pattern is written to fit shoe sizes 37 to 41, so length is adjusted by adding or removing rows before the rectangle is folded, or by working extra plain rounds before the toe decreases begin.
What does flattening the toe mean in this pattern?
Once the Toe Decreases rounds are complete, the tube is pressed flat so the final round lines up front to back, and single crochet is worked straight across both layers to close the opening in one step.
Is any stuffing needed?
No stuffing is used; the slipper is a wearable shape formed by the single crochet fabric itself, with structure coming from stitch density rather than filling.
Can the cuff be made taller?
Yes, the finishing edge steps allow extra rounds to be added after the two base cuff rounds for a taller finish, worked in the same single crochet stitch throughout.
Why does the materials list offer two hook sizes?
The 4.5mm hook is given as an alternative to the standard 5mm to produce a tighter fabric, which suits a snugger fit or a firmer sole.
These answers came from whoever first published the pattern, kept word for word.