 EVERY CROCHET
 Amigurumi 10 rounds No account, no download
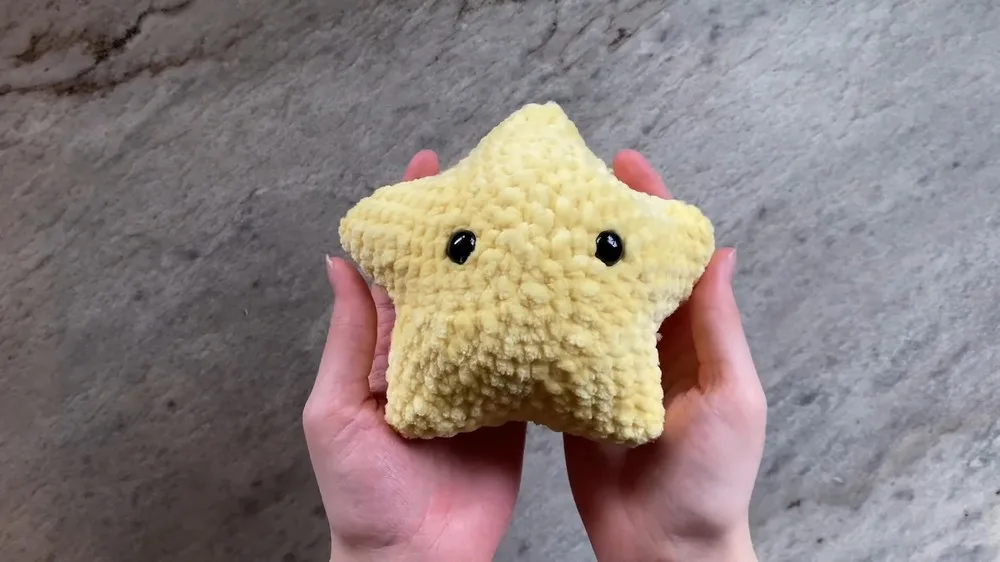
How to crochet a starfish amigurumi plushie
A single crochet (UK double crochet) starfish amigurumi guide, giving both US and UK stitch names throughout.
- Skill
- Intermediate
- Time
- 4-6 hours
- Yarn weight
- Bulky
- Hook
- 4 mm

Intermediate
What the original write-up called it. Nothing here is graded again.

Bulky
What the sample was worked in. Any weight works; the size moves with it.

4-6 hours
What the original page reckoned. Your own pace is the one that matters.
About this pattern
This pattern makes a small amigurumi starfish worked in single crochet (UK: double crochet) with a 4mm hook and bulky yarn. Five points are crocheted separately from a magic ring, joined into one piece, then decreased and stuffed before 12mm safety eyes are set between the last two rounds. The result is a plush, five-armed sea creature suited to crocheters comfortable with amigurumi shaping and basic assembly.
This amigurumi starfish is built almost entirely from single crochet (UK: double crochet), the short, tightly looped stitch that keeps amigurumi dense enough to hide its stuffing. It sits alongside other round-bodied amigurumi animals in technique, but its five separate points set the construction apart from the usual single-piece body, since each arm begins life as its own small shape before the whole creature is joined together.
Each of the five points starts from a magic ring and grows through four rounds of evenly spaced increases until it reaches eighteen stitches, repeated five times. Four finished points are then joined to the fifth, still-open point with nine single crochet stitches along each edge, bringing the whole starfish to forty-five stitches before the decrease rounds begin. From there the piece works as one continuous round, shrinking in stages, with stuffing added partway through and safety eyes set in place just before the last rounds close the back.
Materials
- 4 mm crochet hook
- Scissors
- Sewing or darning needle
- Stitch marker (or a bobby pin)
- 12 mm safety eyes
- Yellow bulky yarn
- Polyfill stuffing
The list is the pattern's own wording.
Instructions
Every round is printed as the pattern wrote it, brackets and all. Open the key beside a round to see only the short forms that round uses.
Main Pattern
- Round 1
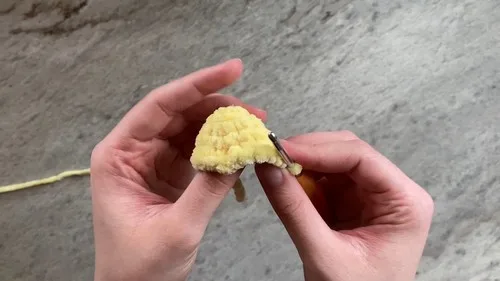
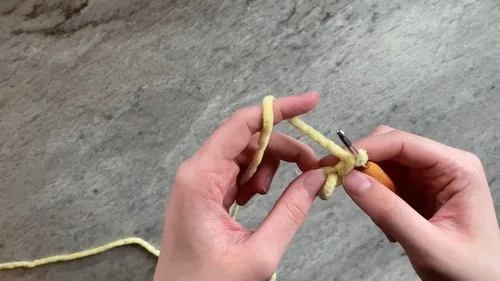
Start with a magic ring. Work 6 sc into the magic ring. Close off the ring.
Key1
- sc
- single crochet
- (12)Round 2
Sc 1, inc – repeat 3 times (9 stitches total). For Row 3: Sc 2, inc – repeat 3 times (12 stitches total).
Key2
- inc
- increase
- sc
- single crochet
- (15)Round 4
Sc 3, inc – repeat 3 times (15 stitches total).
Key2
- inc
- increase
- sc
- single crochet
- Round 5
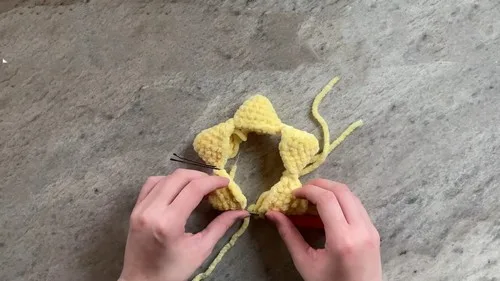
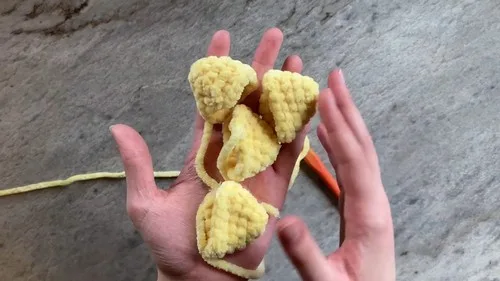
Sc 4, inc – repeat 3 times (18 stitches total). Make a total of 5 star points, but on the fifth one, do not fasten off.For Row 6: Attach each of the 4 completed points to the fifth one with 9 sc on each point.
Key2
- inc
- increase
- sc
- single crochet
Attaching Points
After attaching all points, you should have 45 stitches total.
- (40)Round 7
Sc 7, dec – repeat 5 times (40 stitches total).
Key2
- dec
- decrease
- sc
- single crochet
- (30)Round 8
Sc 6, dec – repeat 5 times (35 stitches total). For Row 9: Sc 5, dec – repeat 5 times (30 stitches total).
Key2
- dec
- decrease
- sc
- single crochet
- (25)Round 10
Sc 4, dec – repeat 5 times (25 stitches total).
Key2
- dec
- decrease
- sc
- single crochet
- (15)Round 11
Sc 3, dec – repeat 5 times (20 stitches total). Stuff the star at this point. For Row 12: Sc 2, dec – repeat 5 times (15 stitches total).
Key2
- dec
- decrease
- sc
- single crochet
- (10)Round 13
Sc 1, dec – repeat 5 times (10 stitches total).
Key2
- dec
- decrease
- sc
- single crochet
- Round 14
Dec 5 times around (5 stitches total). Slip stitch into the next stitch and fasten off, leaving a tail for sewing.
Key1
- dec
- decrease
Making up
- Step 1Weave the tail through the front loops of the remaining stitches and pull to close the opening. Tie a knot and weave in the end.
- Step 2Insert safety eyes between rows 11 and 12, securing with backings.
- Step 3Sew any gaps between the points closed with yarn and a needle.
Notes from the pattern
- Work with the 4mm hook specified; bulky yarn on this hook size produces a tight gauge that is intentional for amigurumi and should not be loosened to make the stitches easier to see.
- Since the body becomes one continuous round once the points are joined, place a stitch marker (or bobby pin) at the start of each round to track the forty-five-stitch count accurately.
- Stuffing is added at round 11, once the piece has decreased to twenty stitches; add it at that point, since the opening becomes too small to add more stuffing in later rounds.
- Safety eyes go in between rounds 11 and 12, so check their position against the body before locking the backings in place, since safety eyes cannot be removed once attached.
The essentials
- Rounds
- 10
- Parts
- 2
- Level
- Intermediate
- Time
- 4-6 hours
- Hook
- 4 mm
- Yarn
- Bulky
Stitches you will use
- Magic ring start Used to begin each of the five points; keep the first six stitches snug, since a loose centre leaves a visible hole once stuffing goes in.
- Even increasing across rounds Used in rounds 2 to 5 to grow each point from six stitches to eighteen; placing increases in the same position each round keeps all five points matching.
- Joining separate pieces into a continuous round Used when attaching four finished points to the fifth with nine stitches per edge; miscounting here is the usual cause of a total that does not land on forty-five.
Troubleshooting
The points curl or cup instead of lying flat.
This usually comes from increases drifting out of line across rounds 2 to 5; check that each point reaches exactly eighteen stitches by round 5 and that increases are spaced evenly rather than stacked.
Gaps show between the points after assembly.
This happens where the join stitches in round 6 do not fully close the seam between points; sew any remaining gaps closed with yarn and a needle, as described in the assembly steps, before weaving in ends.
The stitch count is off after joining all five points.
A total other than forty-five usually means one edge was joined with more or fewer than nine single crochet stitches; recount each joining edge before starting the decrease rounds.
Substituting yarn
- Aran-weight acrylic
- Produces a smaller, lighter starfish than the bulky yarn specified; drop to a 3.5mm hook and use slightly less stuffing to avoid overfilling the finer stitches.
- Worsted-weight cotton
- Gives firmer stitch definition and less fuzz than bulky yarn, but the finished piece comes out noticeably smaller on the same 4mm hook; expect a tighter, crisper surface overall.
- Chunky-weight wool blend
- Keeps the finished starfish close to the size the pattern describes but adds more drape and softness than bulky acrylic; move up to roughly a 5mm hook to match the intended gauge.
Washing and care
- The materials list names only 'bulky yarn' without specifying fibre, so check the yarn band for washing guidance before cleaning the finished starfish.
- If hand-washing suits the fibre used, wash in cool water, reshape the points while still damp, and dry flat away from direct heat to keep the stuffing from shifting or matting.
The photographs taken while this was being made
Every one was taken by whoever published the pattern, in the order the source listed them.
FAQs
Questions
How many stitches should each star point have before it's joined to the others?
Each point grows to eighteen stitches by round 5. All five points should match this count before the four completed ones are attached to the fifth.
When exactly should the safety eyes go in?
The eyes are inserted between rounds 11 and 12, after the piece has decreased to twenty stitches but before the final closing rounds. Fitting them at this stage keeps the backings reachable from inside the body.
Why does the stitch count read forty-five after joining the points?
Four completed points are joined to the fifth with nine single crochet stitches along each edge, and that total, plus the fifth point's own stitches, brings the round to forty-five before the decrease rounds start.
Is a stitch marker necessary, or will a bobby pin work?
Either works equally well; the materials list offers the bobby pin as a direct substitute. What matters is marking the start of each round once the points are joined into one continuous piece.
How much stuffing does the starfish need?
Stuffing is added once the decrease rounds reach twenty stitches, at round 11. Add enough to fill the points firmly without stretching the stitches, since more cannot easily be added after the opening closes further.
These answers came from whoever first published the pattern, kept word for word.