 EVERY CROCHET
 Amigurumi 29 rounds No account, no download
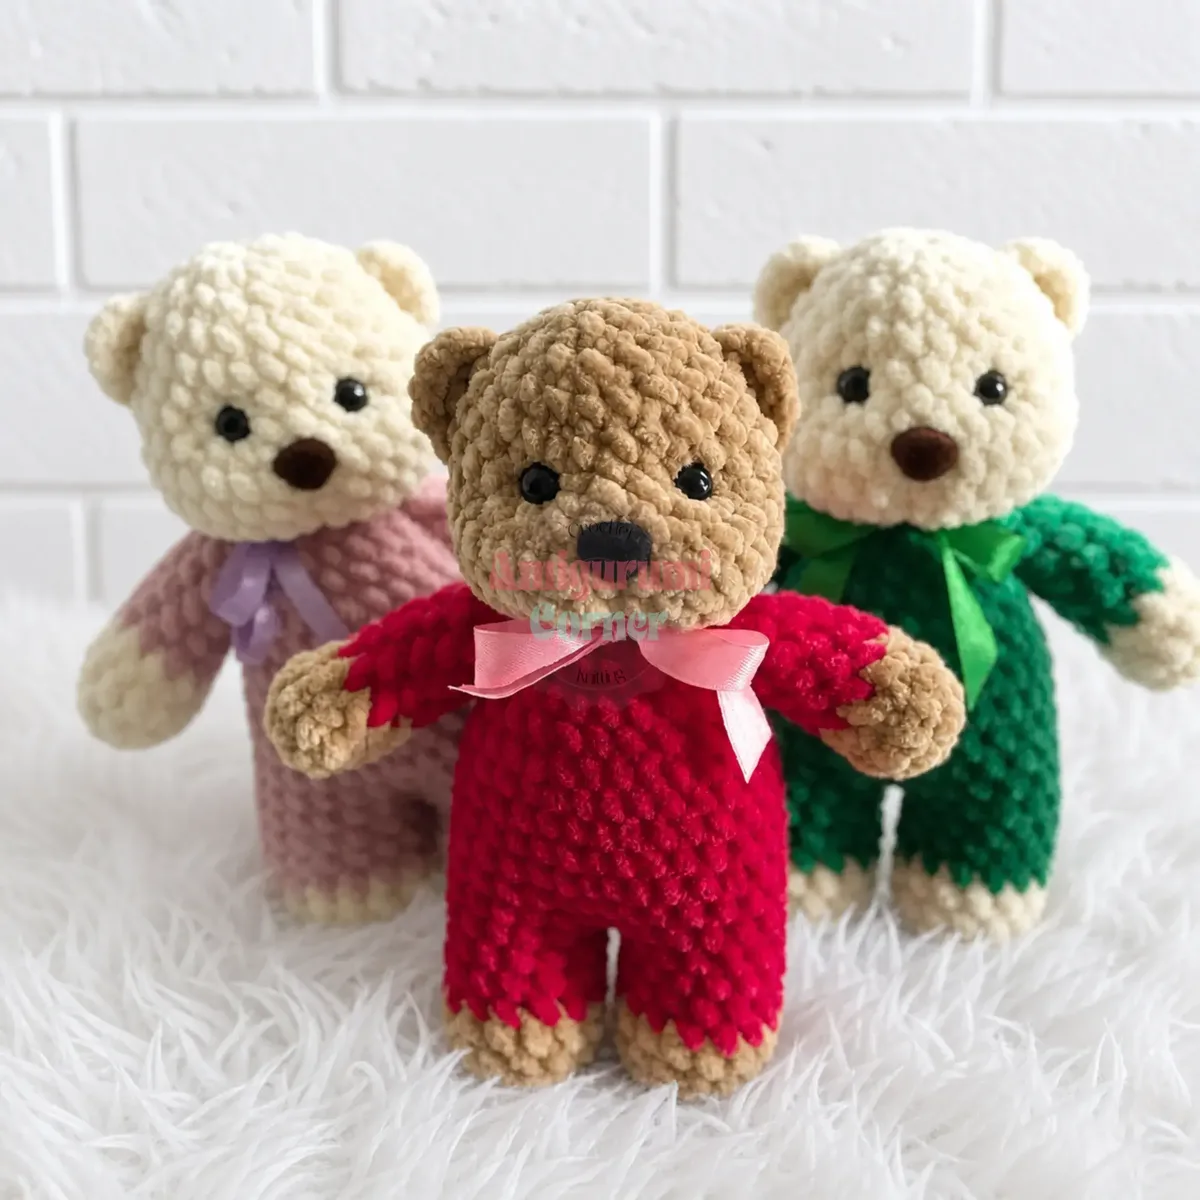
A soft-bodied amigurumi teddy bear in two colours
A chenille amigurumi bear worked in single crochet (UK double crochet); US and UK terms both given here.
- Skill
- Intermediate
- Time
- 4-6 hours
- Yarn weight
- Bulky
- Hook
- 4 mm

Intermediate
What the original write-up called it. Nothing here is graded again.

Bulky
What the sample was worked in. Any weight works; the size moves with it.

4-6 hours
What the original page reckoned. Your own pace is the one that matters.
About this pattern
This is a chenille amigurumi teddy bear made from single crochet (UK double crochet) worked in continuous spirals, with arms, legs, head, tail, and ears constructed as separate stuffed pieces. Legs and arms join directly into the body during construction, so sewing is limited mainly to the ears and safety-eye finishing. A 4mm or 4.5mm hook, safety eyes, and polyfill stuffing complete the materials.
Benny Bear belongs to the amigurumi tradition, built almost entirely from single crochet (UK double crochet) worked in tight, continuous rounds. The dense stitch keeps toy stuffing contained and gives the finished bear its characteristic plush, sculpted surface. Two colourways run through every piece — Colour A for the paws, head, and tail, Colour B for the body — so colour changes happen mid-round rather than at round ends, a detail that distinguishes this shaping from flat single-colour work.
Each limb and the head start from a magic ring and build outward through rounds of increases, plain rounds, and decreases, with the legs worked first and then joined directly into the body so no limb seaming is required later. The arms attach the same way partway through the body rounds. The head and body are stuffed progressively as rounds are completed rather than packed in at the end, and the ears are added last using one of two optional methods.
Finished size is about 7.5 inches (19 cm) tall, making Benny compact enough for a coat pocket yet detailed enough to feel like a proper keepsake. The pattern suits confident beginners and up — anyone comfortable working in a continuous spiral and able to execute a clean invisible decrease has every skill the bear requires.
Materials
Yarn
- Bulky chenille or velvet yarn (such as Himalaya Dolphin Baby or any equivalent), 2 colors — Color A (bear/paw color) and Color B (body/suit color); less than half a skein of each
Hook
- US G/6 (4 mm) or US G/6–7 (4.5 mm)
Safety eyes
- 8 mm, 1 pair
Safety Nose
- 15 × 13 mm, 1
Stuffing
- Polyfill stuffing
Notions & Tools
- Strong thread for face tightening and eye indenting
- Stitch marker
- Yarn needle / tapestry needle
- Scissors
- Ribbon for neck decoration (optional)
The list is the pattern's own wording.
Instructions
Every round is printed as the pattern wrote it, brackets and all. Open the key beside a round to see only the short forms that round uses.
Arms (make 2) — Begin with Color A
- Round 1
MR, 6 sc. (6)
Key2
- MR
- Magic Ring
- sc
- Single Crochet
- Round 2
Inc in each st around. (12)
Key1
- inc
- Increase (2 sc in same stitch)
- Round 3
Sc in each st around. (12)
Key1
- sc
- Single Crochet
- Round 4
Dec × 3, sc 6. (9)Change to Color B.
Key2
- dec
- Invisible Decrease (insert hook through front loops of next 2 sts, complete as one sc)
- sc
- Single Crochet
- Rounds 5–9
Sc in each st around. [5 rounds] (9)Stuff arm lightly.
Key1
- sc
- Single Crochet
- Round 10
(Sc 1, dec) × 3. (6)
Key2
- dec
- Invisible Decrease (insert hook through front loops of next 2 sts, complete as one sc)
- sc
- Single Crochet
- Round 11
Flatten the opening; working through both layers simultaneously, sc 3 to close. Fasten off, leaving a long tail for attaching.
Key1
- sc
- Single Crochet
Legs (make 2) — Begin with Color A
- Round 1
MR, 7 sc. (7)
Key2
- MR
- Magic Ring
- sc
- Single Crochet
- Round 2
Inc in each st around. (14)
Key1
- inc
- Increase (2 sc in same stitch)
- Round 3
Sc 14 BLO. (14)This back-loop-only round creates a visible ridge that forms the sole of Benny's foot and gives the base of the leg enough structure to help the finished bear stand upright; skipping it loses both the look and the function.
Key2
- BLO
- Back Loop Only
- sc
- Single Crochet
- Round 4
Sc in each st around. (14)Change to Color B.
Key1
- sc
- Single Crochet
- Rounds 5–7
Sc in each st around. [3 rounds] (14)First Leg: Fasten off and cut yarn. Set aside.Second Leg: Do NOT fasten off or cut yarn. Ch 1, then join to First Leg with 1 sl st. Continue directly into Body.
Key3
- sl st
- Slip Stitch
- ch
- Chain
- sc
- Single Crochet
Body — Color B (stuff as you go)
Continuing from Second Leg, work across both joined legs in a continuous spiral:
- Rounds 8–14
Sc in each st around. [7 rounds] (30)
Key1
- sc
- Single Crochet
- Round 15
(Sc 3, dec) × 6. (24)
Key2
- dec
- Invisible Decrease (insert hook through front loops of next 2 sts, complete as one sc)
- sc
- Single Crochet
- Round 16
Sc in each st around. (24)
Key1
- sc
- Single Crochet
- Round 17
(Sc 2, dec) × 6. (18)
Key2
- dec
- Invisible Decrease (insert hook through front loops of next 2 sts, complete as one sc)
- sc
- Single Crochet
- Round 18
Sc in each st around. (18)
Key1
- sc
- Single Crochet
- Round 19
(Sc 1, dec) × 6. (12)
Key2
- dec
- Invisible Decrease (insert hook through front loops of next 2 sts, complete as one sc)
- sc
- Single Crochet
- Round 20
Join Arms — sc 3, sc 3 holding First Arm against body stitches, sc 3, sc 3 holding Second Arm against body stitches. (12) Arms are spaced 3 stitches from the front and 3 stitches from the back. Work through both the body stitch and the corresponding edge of the flattened arm at the same time.Flatten each finished arm so the closed edge faces outward, hold it against the body at the correct position, and crochet through both the body stitch and the arm edge simultaneously; the arm ends up structurally integrated and won't shift, droop, or need reinforcement later.Change to Color A. Continue directly into Head.
Key1
- sc
- Single Crochet
Head — Color A (stuff as you go)
Hold off on adding stuffing until Round 26; stuffing the head earlier makes it harder to judge the finished spherical shape when positioning the eyes and nose, so wait until the head reaches that point before adding fiberfill.
- Round 21
Inc in each st around. (24)
Key1
- inc
- Increase (2 sc in same stitch)
- Round 22
(Sc 3, inc) × 6. (30)
Key2
- inc
- Increase (2 sc in same stitch)
- sc
- Single Crochet
- Round 23
(Sc 4, inc) × 6. (36)
Key2
- inc
- Increase (2 sc in same stitch)
- sc
- Single Crochet
- Rounds 24–26
Sc in each st around. [3 rounds] (36)
Key1
- sc
- Single Crochet
- Round 27
(Sc 4, dec) × 6. (30)
Key2
- dec
- Invisible Decrease (insert hook through front loops of next 2 sts, complete as one sc)
- sc
- Single Crochet
- Round 28
Sc in each st around. (30)Insert safety nose at center between Rnds 26 and 27. Insert safety eyes symmetrically between Rnds 28 and 29, 4 stitches apart from center. Continue stuffing firmly as you go — a firmly stuffed head at this stage holds its spherical shape, letting you see exactly where the face hardware will sit before it's permanently locked in.
Key1
- sc
- Single Crochet
- Round 29
(Sc 3, dec) × 6. (24)
Key2
- dec
- Invisible Decrease (insert hook through front loops of next 2 sts, complete as one sc)
- sc
- Single Crochet
- Round 30
(Sc 2, dec) × 6. (18)
Key2
- dec
- Invisible Decrease (insert hook through front loops of next 2 sts, complete as one sc)
- sc
- Single Crochet
- Round 31
(Sc 1, dec) × 6. (12)
Key2
- dec
- Invisible Decrease (insert hook through front loops of next 2 sts, complete as one sc)
- sc
- Single Crochet
- Round 32
Dec × 6. (6)Close remaining 6 stitches. Fasten off and weave yarn tail inside toy.
Key1
- dec
- Invisible Decrease (insert hook through front loops of next 2 sts, complete as one sc)
Tail — Color A
Step 1: Attach Color A between Rnds 11 and 12 at the center back of the body.
Step 2: Ch 2. Into the stitch where yarn was attached, work 4 dc — do NOT complete the final step of each dc; leave all loops on hook (5 loops total on hook).
Step 3: Draw yarn through all 5 loops at once to form a bobble.
Step 4: Sl st into the starting stitch to secure. Fasten off and weave in end.
Ears (make 2) — Choose one method
Method 1 — Sewn-on flat ear: Step 1: Work 5 sc into MR; pull ring snug but do NOT join.
Step 2: Turn work. Work 5 sc back across the opposite side.
Step 3: Fasten off, leaving a long tail for sewing. Make second ear identically.
Method 2 — Crocheted-on ear (no sewing required): Step 1: Attach yarn directly to the head at the desired ear position.
Step 2: Work 3 sl st vertically upward (as an edge finish).
Step 3: Work 3 sc back down vertically.
Step 4: Join border loops together with 3 sc.
Step 5: Turn work, sl st 1 into head, sc 3, sl st 1 into head. Fasten off and weave in end. Repeat for the second ear.
Making up
- Step 1The legs are already joined to the body during construction — no leg sewing required.
- Step 2The arms are already joined to the body at Rnd 20 — no arm sewing required.
- Step 3If you used Ear Method 1, pin each ear to the head 4 stitches from the corresponding eye, with approximately 3 rows of head stitches between the ears at the top center. Sew securely using the long yarn tail and a yarn needle, then weave in the end inside the head.
- Step 4Using strong thread, indent each safety eye by threading down through the head from the eye to the base and pulling firmly. Knot securely. Repeat for the second eye. Use the same technique to tighten and shape the muzzle area if desired.
- Step 5Tie a ribbon around Benny’s neck if using.
- Step 6Weave in all remaining yarn ends.
Notes from the pattern
- Either a 4mm (US G/6) or 4.5mm (US G/6–7) hook will work; the smaller hook gives a tighter fabric, which matters more with bulky chenille than with a standard worsted yarn.
- A stitch marker is essential throughout, since every piece is worked in a continuous spiral with no joining round to mark the start otherwise.
- Stitch tightly and add stuffing in small amounts as each section of the body and head is completed, since chenille's loose pile will let polyfill show through if the fabric is left too open.
The essentials
- Rounds
- 29
- Parts
- 6
- Level
- Intermediate
- Time
- 4-6 hours
- Hook
- 4 mm
- Yarn
- Bulky
Stitches you will use
- Magic ring (MR) start Opens Rnd 1 of the arms, legs, and head; pull the centre closed firmly so no gap remains once stuffed.
- Back loop only (BLO) Used at Rnd 3 of the legs to create a ridge line for the foot; pick up only the back loop consistently or the row above sits unevenly.
- Safety-eye indenting with strong thread Done during assembly before the head is fully closed; keep tension even on both sides so the face doesn't pull crooked.
- Invisible decrease (dec) technique Insert your hook through the front loops only of the next two stitches before completing the stitch as one. On a rounded head with 36 stitches at peak, every sloppy decrease shows; done cleanly, the shaping looks sculpted rather than crocheted.
- Tensioning chenille or velvet yarn Chenille and velvet yarns are forgiving in texture but generous with gaps; if stuffing shows through the stitches at all, drop to a 4 mm hook — a snug fabric is the foundation of a well-shaped amigurumi bear.
Troubleshooting
The head or body looks lumpy once stuffed
Stuffing was likely added all at once near the end rather than gradually; unstuff slightly and redistribute in smaller amounts round by round, pressing it evenly before continuing.
Stuffing fibres show through the surface of a limb
Stitches are too loose for the bulky chenille; drop to the smaller 4mm hook and keep stitches snug against each other, especially at the increase rounds.
The two arms or two legs come out different lengths
A round was likely skipped or an extra one added while counting in the continuous spiral; use the stitch marker at the start of every round and check the stitch count in parentheses before moving on.
Substituting yarn
- Acrylic chenille, bulky weight
- Keeps the same soft, plush finish and hook size, but is generally cheaper and may pill faster with handling than a premium chenille blend.
- Cotton-blend, worsted or DK weight
- Gives crisper stitch definition and less loft than chenille, so a smaller hook and firmer stuffing are needed to stop the fabric looking thin or gappy.
- Wool-blend, aran weight
- Adds warmth and more structure to the finished shape, but drapes less softly than chenille; check gauge against the stated stitch counts since wool blends often sit slightly larger per stitch.
Washing and care
- Hand wash the finished bear in cool water rather than machine washing, since agitation flattens the pile of chenille or velvet yarn; press out excess water in a towel instead of wringing.
- Lay flat to dry and reshape the ears, arms, and legs by hand while still damp, then store the bear upright or lying flat rather than compressed, to keep the stuffed shape even.
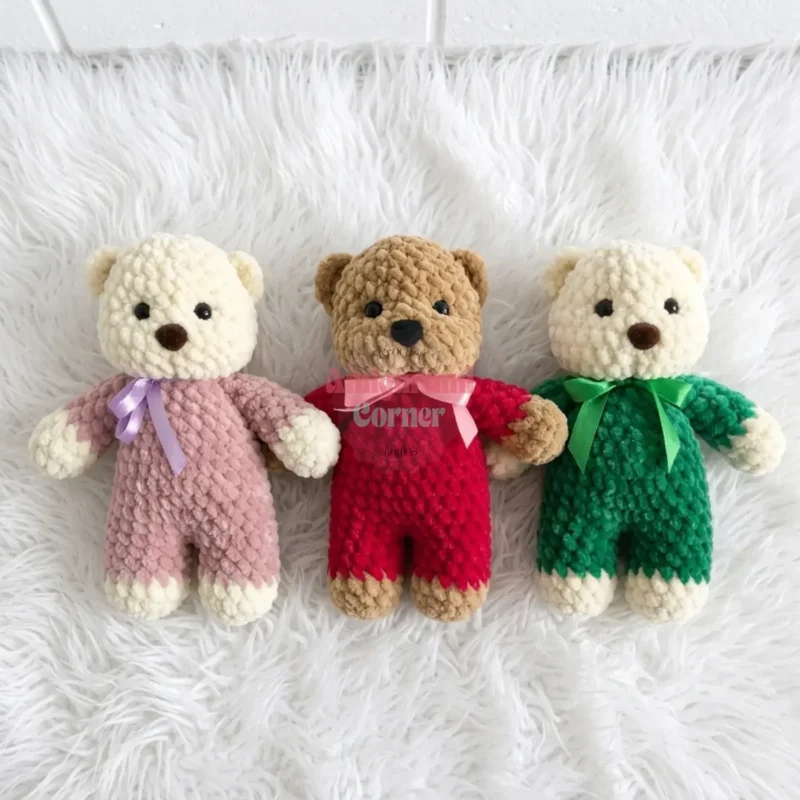
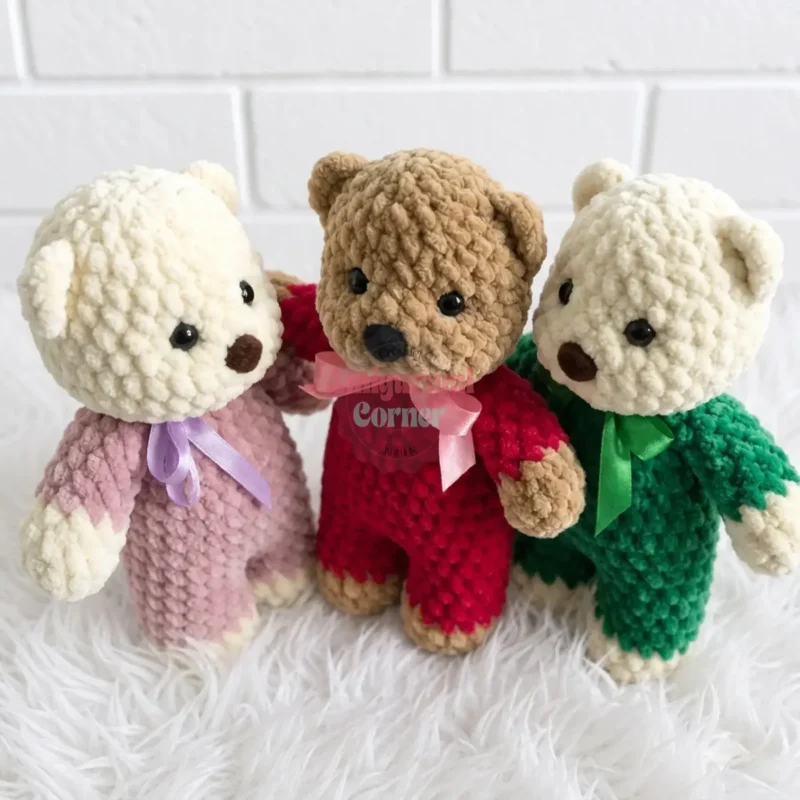
The photographs taken while this was being made
Every one was taken by whoever published the pattern, in the order the source listed them.
FAQs
Questions
Why does the pattern mention both US and UK stitch names?
The pattern is written in US crochet terminology throughout, where single crochet is the main stitch used. In UK terminology the same stitch is called double crochet, so UK crocheters should read every 'sc' as 'dc' when following the pattern.
Do the ears need to be sewn on?
That depends on which of the two ear methods is chosen. Method 1 is pinned in place and sewn with the long yarn tail; the alternative method is described separately in the pattern notes for those who prefer to avoid sewing.
Why are the legs and arms joined to the body during construction instead of being sewn on afterwards?
The pattern works in one continuous spiral, so the legs are joined directly when the body rounds begin, and the arms are joined at Rnd 20. This removes the separate leg- and arm-sewing steps that most amigurumi patterns require.
How much yarn is actually needed for each colour?
Less than half a skein of bulky chenille or velvet yarn is needed for each of Colour A and Colour B. This makes the project a good way to use up partial skeins left over from other projects.
Which hook size should be used, 4mm or 4.5mm?
Either a US G/6 (4mm) or US G/6–7 (4.5mm) hook is suitable, since gauge is not critical for this toy. Choose the smaller 4mm hook for a tighter fabric that hides stuffing more effectively with bulky chenille yarn.
Can I substitute a different yarn for this pattern?
Yes — any bulky chenille or velvet yarn will give you a comparable plush texture. If you use a thinner yarn, drop your hook size accordingly and expect a smaller finished bear. Avoid standard acrylic or wool for your first attempt; the texture of chenille is what creates Benny's distinctive look and hides tension variations that would show on a smoother yarn.
These answers came from whoever first published the pattern, kept word for word.