 EVERY CROCHET
 Amigurumi 75 rounds No account, no download
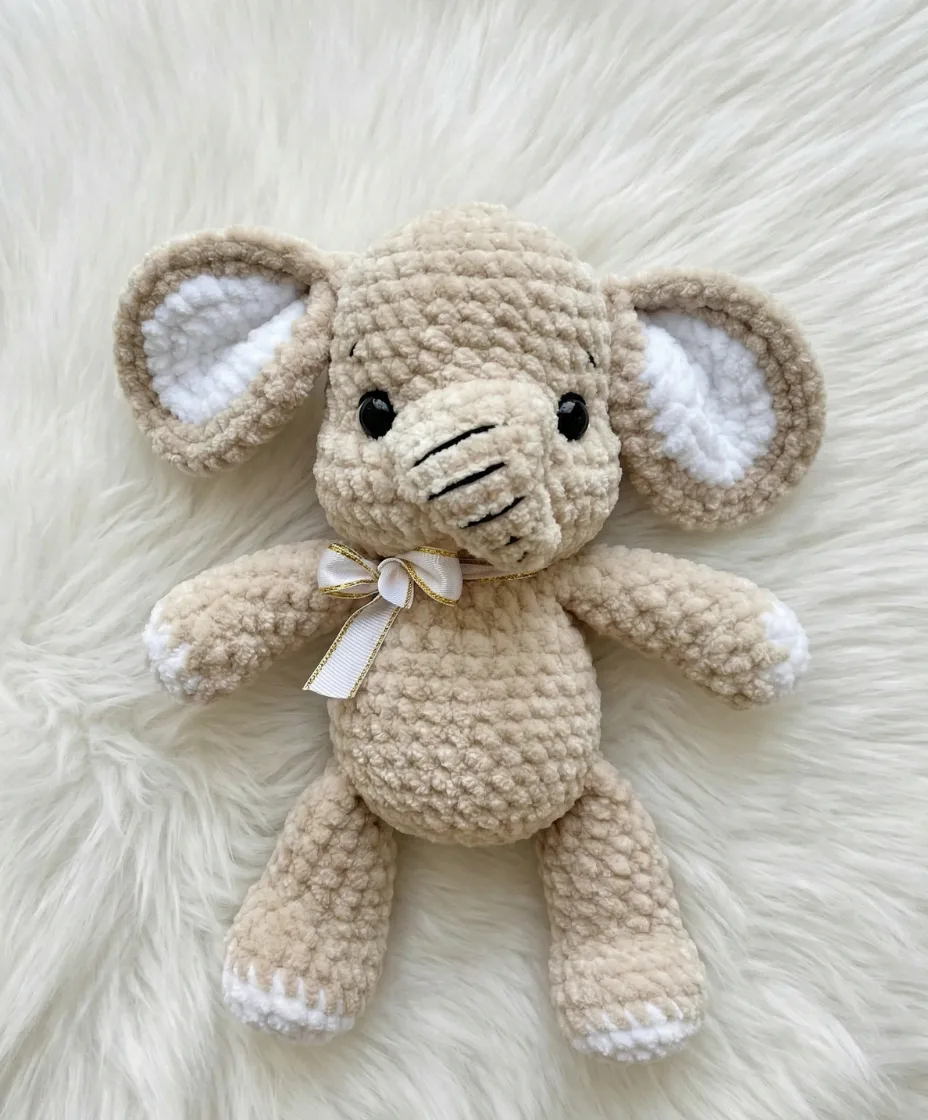
Amigurumi elephant crochet pattern with one-piece body
Single crochet (UK double crochet) amigurumi elephant pattern, worked in continuous rounds. US and UK terms both given.
- Skill
- Intermediate
- Time
- 6-9 hours
- Yarn weight
- Fingering
- Hook
- 2.75 mm

Intermediate
What the original write-up called it. Nothing here is graded again.

Fingering
What the sample was worked in. Any weight works; the size moves with it.

6-9 hours
What the original page reckoned. Your own pace is the one that matters.
About this pattern
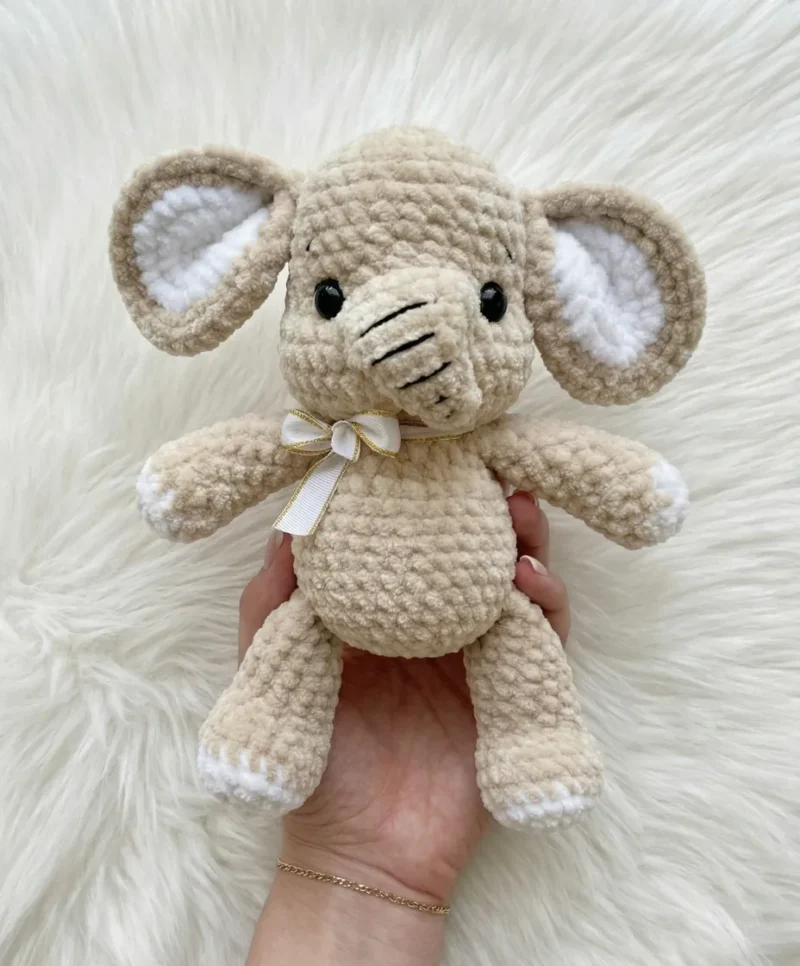
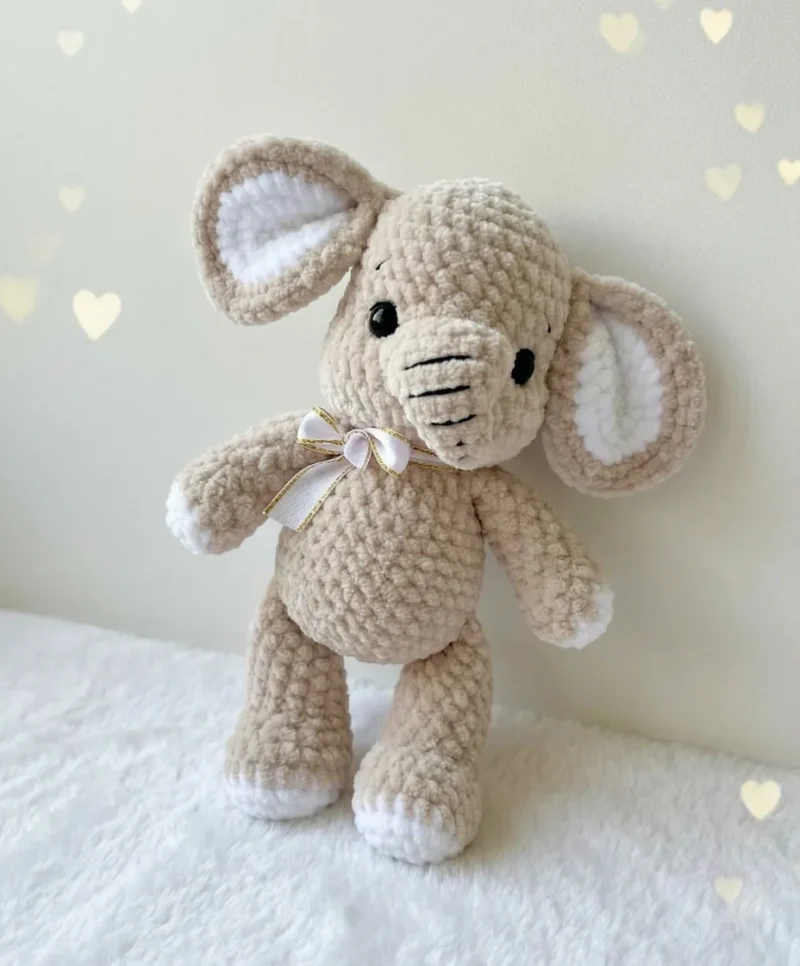
This pattern makes a stuffed elephant amigurumi from fingering-weight plush yarn on a 2.75 mm or 3.25 mm hook, using US single crochet (UK double crochet) throughout. The body, head, and trunk form one continuous 18-round spiral piece, while legs, arms, ears, and a tail are made separately and joined in-round or sewn on afterwards. Safety eyes, polyester fiberfill, and contrast yarn for facial details are needed.
The body, head, and trunk are worked as one continuous piece in a continuous spiral rather than joined rounds, which keeps the silhouette smooth and avoids a visible seam up the front. Legs and arms are worked separately and then joined in-round during that construction, at Round 29 for the arms and Round 37 for the legs, rather than sewn on afterwards. Ears, made from two colours joined at the edge, and the tail are completed separately and attached once the head is finished.
Materials
Main yarn
- Fingering-weight plush yarn (such as Himalaya Dolphin Fine, 175 m / 100 g) in your chosen main color
Contrast yarn
- A small amount of fingering-weight plush yarn in a contrasting color (for paw pads, inner ears, and hand pads)
Cotton yarn
- A small amount of cotton yarn in a contrast color for sculpting (tacking/shaping the face details, embroidering eyebrows, lashes, sclera, and trunk stripes)
Hook
- US C-2 / 2.75 mm or US D-3 / 3.25 mm
Safety eyes
- 8–10 mm, 1 pair
Stuffing
- Polyester fiberfill
Satin ribbon
- For the bow
Stitch markers
- To mark the beginning of each round
- Yarn needle / tapestry needle: For sewing parts and weaving in ends
- Scissors
The list is the pattern's own wording.
Instructions
Every round is printed as the pattern wrote it, brackets and all. Open the key beside a round to see only the short forms that round uses.
Legs (Make 2)
Begin with contrast color yarn.
- Round 1
Ch 6. Starting in the 2nd ch from hook: sc in next 4 ch, 3 sc in last ch; working along the other side of the foundation chain: sc in next 3 ch, inc in last ch. (12)
Key3
- inc
- Increase (2 sc in same stitch)
- ch
- Chain
- sc
- Single Crochet
- Round 2
Inc, sc in next 3 sts, inc 3 times, sc in next 3 sts, inc 2 times. (18)
Key2
- inc
- Increase (2 sc in same stitch)
- sc
- Single Crochet
- Round 3
Sc in next 1 st, inc, sc in next 4 sts, inc, sc in next 3 sts, inc, sc in next 4 sts, inc, sc in next 2 sts. (22)Switch to main color yarn.
Key2
- inc
- Increase (2 sc in same stitch)
- sc
- Single Crochet
- Round 4
Sc in each of next 22 sts. (22)
Key1
- sc
- Single Crochet
- Round 5
Sc in each of next 22 sts. (22)
Key1
- sc
- Single Crochet
- Round 6
Sc in next 6 sts, (dec, sc in next 1 st) × 4, sc in next 4 sts. (18)
Key2
- dec
- Invisible Decrease (insert hook into front loops of next 2 sts, pull up loop, yarn over, pull through all 3 loops)
- sc
- Single Crochet
- Round 7
Sc in next 5 sts, dec × 4, sc in next 5 sts. (14)
Key2
- dec
- Invisible Decrease (insert hook into front loops of next 2 sts, pull up loop, yarn over, pull through all 3 loops)
- sc
- Single Crochet
- Round 8
Sc in each of next 14 sts. (14)
Key1
- sc
- Single Crochet
- Round 9
Sc in each of next 14 sts. (14)
Key1
- sc
- Single Crochet
- Round 10
Sc in each of next 14 sts. (14)
Key1
- sc
- Single Crochet
- Round 11
Sc in each of next 14 sts. (14)
Key1
- sc
- Single Crochet
- Round 12
Sc in each of next 14 sts. (14)
Key1
- sc
- Single Crochet
- Round 13
(Sc in next 5 sts, dec) × 2. (12)
Key2
- dec
- Invisible Decrease (insert hook into front loops of next 2 sts, pull up loop, yarn over, pull through all 3 loops)
- sc
- Single Crochet
- Round 14
Sc in each of next 12 sts. (12)
Key1
- sc
- Single Crochet
- Round 15
Sc in each of next 12 sts. (12)Stuff the leg to medium firmness. Leave the upper portion of the leg unstuffed. Fold the leg flat, working any slip stitches needed to position the toe facing forward. Join across both layers: sc through both walls for 6 sts to close.
Key1
- sc
- Single Crochet
Arms (Make 2)
Begin with contrast color yarn.
- Round 1
6 sc in MR. (6)
Key2
- MR
- Magic Ring
- sc
- Single Crochet
- Round 2
Inc in each st around. (12)Switch to main color yarn.
Key1
- inc
- Increase (2 sc in same stitch)
- Round 3
Sc in each of next 12 sts. (12)
Key1
- sc
- Single Crochet
- Round 4
Sc in each of next 12 sts. (12)
Key1
- sc
- Single Crochet
- Round 5
Dec × 2, sc in next 8 sts. (10)
Key2
- dec
- Invisible Decrease (insert hook into front loops of next 2 sts, pull up loop, yarn over, pull through all 3 loops)
- sc
- Single Crochet
- Round 6
Sc in each of next 10 sts. (10)
Key1
- sc
- Single Crochet
- Round 7
Sc in each of next 10 sts. (10)
Key1
- sc
- Single Crochet
- Round 8
Sc in each of next 10 sts. (10)
Key1
- sc
- Single Crochet
- Round 9
Sc in each of next 10 sts. (10)
Key1
- sc
- Single Crochet
- Round 10
Sc in each of next 10 sts. (10)
Key1
- sc
- Single Crochet
- Round 11
Sc in each of next 10 sts. (10)
Key1
- sc
- Single Crochet
- Round 12
Sc in each of next 10 sts. (10)Stuff the arm to medium firmness. Leave the upper portion unstuffed. Fold flat, working any slip stitches as needed to align. Join across both layers: sc through both walls for 5 sts to close.
Key1
- sc
- Single Crochet
Tail
- Row 1
Ch 9. Starting in the 2nd ch from hook, sc in each of next 8 ch. (8)Leave a short yarn tail at both the beginning and end of the chain for attaching to the body.
Key2
- ch
- Chain
- sc
- Single Crochet
Ears (Make 2 — one contrast color piece + one main color piece per ear)
- Round 1
7 sc in MR. (7)
Key2
- MR
- Magic Ring
- sc
- Single Crochet
- Round 2
Inc in each st around. (14)
Key1
- inc
- Increase (2 sc in same stitch)
- Round 3
(Sc in next 1 st, inc) × 7. (21)
Key2
- inc
- Increase (2 sc in same stitch)
- sc
- Single Crochet
- Round 4
(Sc in next 2 sts, inc) × 7. (28)Make two identical circles — one in contrast color, one in main color. Do not fasten off the main color piece. Hold both circles with wrong sides together and join by working hdc through both layers around the entire edge. Leave a yarn tail for sewing on.Before attaching: fold each finished ear in half and secure with two stitches to hold the fold.
Key3
- hdc
- Half Double Crochet
- inc
- Increase (2 sc in same stitch)
- sc
- Single Crochet
Body & Head (One Continuous Piece)
- Round 1
6 sc in MR. (6)
Key2
- MR
- Magic Ring
- sc
- Single Crochet
- Round 2
Inc in each st around. (12)
Key1
- inc
- Increase (2 sc in same stitch)
- Round 3
(Sc in next 1 st, inc) × 6. (18)
Key2
- inc
- Increase (2 sc in same stitch)
- sc
- Single Crochet
- Round 4
(Sc in next 2 sts, inc) × 6. (24)
Key2
- inc
- Increase (2 sc in same stitch)
- sc
- Single Crochet
- Round 5
(Sc in next 3 sts, inc) × 6. (30)
Key2
- inc
- Increase (2 sc in same stitch)
- sc
- Single Crochet
- Round 6
Sc in each of next 30 sts. (30)
Key1
- sc
- Single Crochet
- Round 7
Sc in each of next 30 sts. (30)
Key1
- sc
- Single Crochet
- Round 8
Sc in each of next 30 sts. (30)
Key1
- sc
- Single Crochet
- Round 9
Sc in each of next 30 sts. (30)
Key1
- sc
- Single Crochet
- Round 10
Sc in each of next 30 sts. (30)Insert safety eyes in this round, or position them at either side of where the trunk opening will fall in the following rounds. Typical placement is approximately 8–10 sts apart, centered on the face.
Key1
- sc
- Single Crochet
- Round 11
Sc in next 10 sts, inc, sc in next 2 sts, ch 4, skip next 4 sts, sc in next 2 sts, inc, sc in next 10 sts. (32 + 4 ch)
Key3
- inc
- Increase (2 sc in same stitch)
- ch
- Chain
- sc
- Single Crochet
- Round 12
Sc in next 10 sts, inc, inc, sc in next 2 sts, sc in next 4 ch, sc in next 2 sts, inc, inc, sc in next 10 sts. (36)
Key3
- inc
- Increase (2 sc in same stitch)
- ch
- Chain
- sc
- Single Crochet
- Round 13
Sc in each of next 36 sts. (36)
Key1
- sc
- Single Crochet
- Round 14
Sc in each of next 36 sts. (36)
Key1
- sc
- Single Crochet
- Round 15
(Sc in next 4 sts, dec) × 6. (30)
Key2
- dec
- Invisible Decrease (insert hook into front loops of next 2 sts, pull up loop, yarn over, pull through all 3 loops)
- sc
- Single Crochet
- Round 16
(Sc in next 3 sts, dec) × 6. (24)
Key2
- dec
- Invisible Decrease (insert hook into front loops of next 2 sts, pull up loop, yarn over, pull through all 3 loops)
- sc
- Single Crochet
- Round 17
(Sc in next 2 sts, dec) × 6. (18)
Key2
- dec
- Invisible Decrease (insert hook into front loops of next 2 sts, pull up loop, yarn over, pull through all 3 loops)
- sc
- Single Crochet
- Round 18
(Sc in next 1 st, dec) × 6. (12)Pause here — do not fasten off. Set the head aside and work the trunk.
Key2
- dec
- Invisible Decrease (insert hook into front loops of next 2 sts, pull up loop, yarn over, pull through all 3 loops)
- sc
- Single Crochet
Trunk
Attach yarn at the bottom of the opening created in Rnds 11–12.
- Round 19
(Trunk Rnd 1): Sc in next 2 sts, inc in corner st, sc in next 4 sts, inc in corner st, sc in next 2 sts. (12)
Key2
- inc
- Increase (2 sc in same stitch)
- sc
- Single Crochet
- Round 20
Dec, sc in next 11 sts. (11 — note: the dec eases the trunk's curve)
Key2
- dec
- Invisible Decrease (insert hook into front loops of next 2 sts, pull up loop, yarn over, pull through all 3 loops)
- sc
- Single Crochet
- Round 21
Dec, sc in next 10 sts. (10)
Key2
- dec
- Invisible Decrease (insert hook into front loops of next 2 sts, pull up loop, yarn over, pull through all 3 loops)
- sc
- Single Crochet
- Round 22
Dec, sc in next 9 sts. (9)
Key2
- dec
- Invisible Decrease (insert hook into front loops of next 2 sts, pull up loop, yarn over, pull through all 3 loops)
- sc
- Single Crochet
- Round 23
Dec, sc in next 8 sts. (8)
Key2
- dec
- Invisible Decrease (insert hook into front loops of next 2 sts, pull up loop, yarn over, pull through all 3 loops)
- sc
- Single Crochet
- Round 24
Dec, sc in next 7 sts. (7)
Key2
- dec
- Invisible Decrease (insert hook into front loops of next 2 sts, pull up loop, yarn over, pull through all 3 loops)
- sc
- Single Crochet
- Round 25
Dec, sc in next 6 sts. (6)
Key2
- dec
- Invisible Decrease (insert hook into front loops of next 2 sts, pull up loop, yarn over, pull through all 3 loops)
- sc
- Single Crochet
- Round 26
Dec, sc in next 5 sts. (5)
Key2
- dec
- Invisible Decrease (insert hook into front loops of next 2 sts, pull up loop, yarn over, pull through all 3 loops)
- sc
- Single Crochet
- Round 27
Dec, sc in next 4 sts. (4)Pull the remaining sts closed. Do not stuff the trunk. Fasten off and weave in ends.Return to the head at Round 18. Insert safety eyes now if not already placed. Stuff the head firmly.
Key2
- dec
- Invisible Decrease (insert hook into front loops of next 2 sts, pull up loop, yarn over, pull through all 3 loops)
- sc
- Single Crochet
Body (Continuing from Round 18)
- Round 28
(= pattern Rnd 29): (Sc in next 1 st, inc) × 6. (18)
Key2
- inc
- Increase (2 sc in same stitch)
- sc
- Single Crochet
- Round 29
(= pattern Rnd 30): Sc in each of next 18 sts, joining arms as you go — position one arm on each side; sc 4–5 sts across the front between the arms. (18)
Key1
- sc
- Single Crochet
- Round 30
(= pattern Rnd 31): (Sc in next 2 sts, inc) × 6. (24)
Key2
- inc
- Increase (2 sc in same stitch)
- sc
- Single Crochet
- Round 31
(= pattern Rnd 32): Sc in each of next 24 sts. (24)
Key1
- sc
- Single Crochet
- Round 32
(= pattern Rnd 33): (Sc in next 3 sts, inc) × 6. (30)
Key2
- inc
- Increase (2 sc in same stitch)
- sc
- Single Crochet
- Round 33
(= pattern Rnd 34): Sc in each of next 30 sts. (30)
Key1
- sc
- Single Crochet
- Round 34
(= pattern Rnd 35): Sc in each of next 30 sts. (30)
Key1
- sc
- Single Crochet
- Round 35
(= pattern Rnd 36): Sc in each of next 30 sts. (30)
Key1
- sc
- Single Crochet
- Round 36
(= pattern Rnd 37): Sc in each of next 30 sts, attaching the tail as you go. Find the center back and tie the tail in place using the yarn tails, securing them between stitches. (30)
Key1
- sc
- Single Crochet
- Round 37
(= pattern Rnd 38): Sc in each of next 30 sts, joining legs as you go — sc 9 sts across the front between the legs. (30)
Key1
- sc
- Single Crochet
- Round 38
(= pattern Rnd 39): Sc in each of next 30 sts. (30)
Key1
- sc
- Single Crochet
- Round 39
(= pattern Rnd 40): Sc in each of next 30 sts. (30)
Key1
- sc
- Single Crochet
- Round 40
(= pattern Rnd 41): (Sc in next 3 sts, dec) × 6. (24)
Key2
- dec
- Invisible Decrease (insert hook into front loops of next 2 sts, pull up loop, yarn over, pull through all 3 loops)
- sc
- Single Crochet
- Round 41
(= pattern Rnd 42): (Sc in next 2 sts, dec) × 6. (18)Stuff the body fully now.
Key2
- dec
- Invisible Decrease (insert hook into front loops of next 2 sts, pull up loop, yarn over, pull through all 3 loops)
- sc
- Single Crochet
- Round 42
(= pattern Rnd 43): (Sc in next 1 st, dec) × 6. (12)
Key2
- dec
- Invisible Decrease (insert hook into front loops of next 2 sts, pull up loop, yarn over, pull through all 3 loops)
- sc
- Single Crochet
- Round 43
(= pattern Rnd 44): Dec × 6. (6)Pull closed, fasten off, and weave in the end securely.
Key1
- dec
- Invisible Decrease (insert hook into front loops of next 2 sts, pull up loop, yarn over, pull through all 3 loops)
Making up
- Step 1Ears: Fold each finished ear in half and secure the fold with two stitches before attaching. Sew each ear to Round 6 of the head, approximately 4 sts away from the nearest safety eye on each side. Use the long yarn tail and a whipstitch.
- Step 2Trunk tip: Optionally tack the very tip of the trunk up slightly with a small stitch or a dab of fabric glue to give it a gentle curve.
- Step 3Arms and legs: These are joined in-round during construction (Rnds 29 and 37 respectively) — ensure they are seated evenly and the seam sts are tight.
- Step 4Tail: Secure the tail's yarn tails between stitches at the center back and trim close.
- Step 5Embroidery: Using your cotton contrast yarn and a tapestry needle, embroider the sclera (whites of the eyes), eyelashes, eyebrows, and small contrast stripes along the trunk.
- Step 6Face sculpting: Use your tapestry needle and cotton yarn to sculpt the face to your preference by pulling tension sts through the head.
- Step 7Bow: Tie the satin ribbon into a bow and attach at the neck.
- Step 8Weave in all remaining ends.
Notes from the pattern
- The pattern offers two hook options, 2.75 mm or 3.25 mm; using the smaller hook keeps stitches tight enough that stuffing does not show through, which matters more here than matching an exact gauge.
- Place a stitch marker at the start of every round before beginning the continuous spiral body, head, and trunk section, since there is no join point to recount from if the stitch count drifts.
- The 8–10 mm safety eyes need inserting and securing before the head closes and before final stuffing, since ears are later sewn to Round 6 of the head roughly 4 stitches from each eye.
- Add fiberfill gradually as each piece is worked, particularly through the trunk and limbs, rather than stuffing all at once at the end, to avoid lumps once the opening closes.
The essentials
- Rounds
- 75
- Parts
- 7
- Level
- Intermediate
- Time
- 6-9 hours
- Hook
- 2.75 mm
- Yarn
- Fingering
Stitches you will use
- Continuous spiral rounds Used throughout the body, head, and trunk section, worked without joining or turning; a stitch marker at the start of each round is essential since there is no seam to check the count against.
- Double-layer edge joining Each ear is made as two separate four-round circles, held wrong sides together and joined with half double crochet through both layers at once — keep both circles aligned so the join sits evenly around the edge.
Troubleshooting
The base of a leg or arm looks pointed
This usually means the magic ring or first round was not pulled fully closed, or the increases in the early rounds are bunched rather than evenly spaced; unpick back to Round 1 or 2 and redistribute the increases before continuing.
A visible stepped line appears where
In a continuous spiral this jog is normal but can be minimised by changing colour on the very last stitch of the round, leaving the new colour to start the following round cleanly.
A sewn-on ear leans or flops at an odd
The fold at the base of the ear needs securing with two stitches before attaching; if this step was skipped, unpick a few whipstitches, refold the base, tack it, and re-sew to Round 6 of the head.
Substituting yarn
- DK-weight plush acrylic
- Produces a noticeably larger finished elephant; move up to roughly a 3.5–4 mm hook, allow for more fibrefill, and expect a softer, less defined stitch than the fingering-weight original.
- Fingering-weight cotton blend
- Gives crisper stitch definition and a firmer, less stretchy fabric; stuffing needs packing more evenly since cotton has less natural give to smooth over gaps.
- Standard (non-plush) fingering-weight acrylic
- Works at the same hook sizes but produces a thinner, less fuzzy fabric, so stuffing is more likely to show through unless worked at a slightly tighter tension.
Washing and care
- Hand wash in cool water only; both the polyester plush yarn and the polyester fibrefill can compress or mat if machine washed, so gentle hand washing and a light squeeze rather than wringing keeps the shape intact.
- Reshape the elephant while still damp, easing the limbs and ears back into position, then air dry flat away from direct heat or sunlight, which can flatten the plush pile or fade the colour.
The photographs taken while this was being made
Every one was taken by whoever published the pattern, in the order the source listed them.
FAQs
Questions
Is this pattern written in UK or US crochet terms?
The pattern is written in US terms throughout. UK crocheters should read every single crochet (sc) instruction as double crochet, since the two systems use the same word for different stitches.
Why are the arms and legs joined mid-pattern instead of sewn on afterwards?
They are worked in-round at Round 29 for the arms and Round 37 for the legs, which builds them directly into the body rather than requiring a separate sewing step. This keeps their placement consistent without matching up a seam afterwards.
Which hook size should be used, and does it matter?
Either the 2.75 mm or 3.25 mm hook works; the smaller size produces a tighter fabric that hides stuffing better, while the larger size works up slightly faster with a looser finish. Gauge itself is not critical since this is a stuffed toy.
How are the ears constructed?
Each ear is made from two separate four-round circles, one in contrast colour and one in main colour, joined together with half double crochet worked through both layers around the edge. The finished ear is then folded and tacked before being sewn to Round 6 of the head.
How much yarn is needed to complete the elephant?
A single skein of fingering-weight plush yarn (175 m / 100 g) in the main colour is generally enough for the body, head, trunk, legs, and arms. Small amounts of contrast yarn are also needed for the paw pads, inner ears, and facial embroidery.
These answers came from whoever first published the pattern, kept word for word.