 EVERY CROCHET
 Amigurumi 56 rounds No account, no download
Baby fox amigurumi pattern for confident beginners
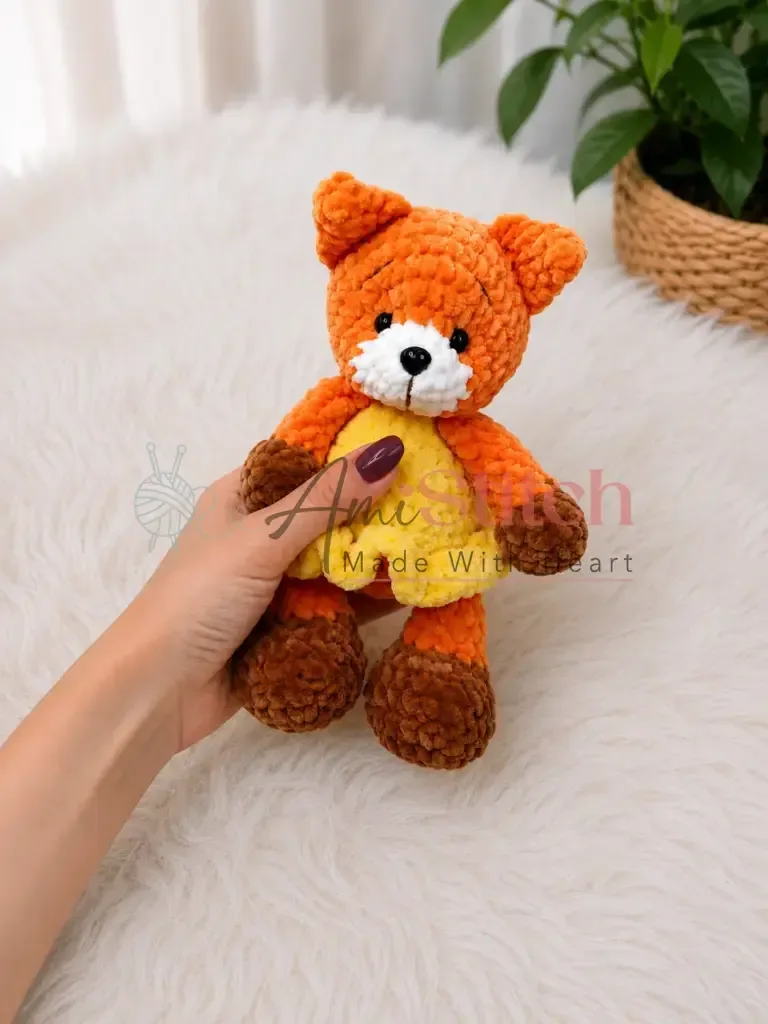
A beginner amigurumi fox worked in single crochet (UK double crochet); both US and UK stitch terms are given throughout.
- Skill
- Beginner
- Time
- 6-8 hours
- Yarn weight
- Bulky
- Hook
- 4.0 mm

Beginner
What the original write-up called it. Nothing here is graded again.

Bulky
What the sample was worked in. Any weight works; the size moves with it.

6-8 hours
What the original page reckoned. Your own pace is the one that matters.
About this pattern
A soft amigurumi fox made from six crocheted pieces — ears, upper arms, legs, tail, body and head — worked in bulky polyester-blend yarn on a 4.0–4.5 mm hook. The project uses single crochet (UK double crochet) in a continuous spiral, colour changes for the white muzzle and feet, safety eyes and a safety nose, and hand embroidery for the face. It suits a confident beginner comfortable with magic rings, increases and decreases.
This baby fox amigurumi is built from six separate pieces — ears, upper arms, legs, tail, body and head — worked almost entirely in single crochet (UK double crochet). The stitch stays dense and even throughout, which is what lets the finished toy hold its shape and keep the stuffing hidden. Increases and decreases shape each piece from a magic ring outward, giving the fox its rounded head, tapered limbs and curved tail without any separate shaping seams.
Each piece works in a continuous spiral from a magic ring, with the colour changing mid-piece where needed — white for the muzzle and foot sections, orange for the bulk of the body, head, ears and limbs. Safety eyes and a safety nose are inserted into the head before the final rounds close it. To finish, position the head on top of the body so the white muzzle faces forward, then thread the long yarn tail left from the body onto a tapestry needle and whipstitch firmly all the way around the neck opening, weaving the end in inside the body. Eyebrows and a mouth are then embroidered using brown cotton yarn, embroidery floss, or trimmed chocolate brown Dolphin Baby yarn — two small arched eyebrows above the eyes and a small curved mouth on the white muzzle, worked in simple straight stitches — giving the fox its expression.
Materials
Yarn
- Himalaya Dolphin Baby in orange (No. 80316), less than one skein — bulky weight, polyester blend
Yarn
- Himalaya Dolphin Baby in white, cream, or light ivory — bulky weight, polyester blend
Yarn
- Himalaya Dolphin Baby in chocolate brown (No. 80337) — bulky weight, polyester blend
Yarn
- Cotton yarn or embroidery floss (for embroidering eyebrows and mouth)
Hook
- US G-6 / 4.0 mm or US G-6–7 / 4.0–4.5 mm — choose whichever gives you a tight, even fabric
Safety eyes
- 11 mm diameter, 1 pair
Safety nose
- 10 × 11 mm, 1 piece
Stuffing
- Polyester fiberfill
- Yarn needle / tapestry needle
- Scissors
- Stitch markers
The list is the pattern's own wording.
Instructions
Every round is printed as the pattern wrote it, brackets and all. Open the key beside a round to see only the short forms that round uses.
Ears (make 2)
Work in continuous spiral using orange yarn.
- Round 1
6 sc in MR. (6)
Key2
- MR
- Magic Ring
- sc
- Single Crochet
- Round 2
sc in each st around. (6)
Key1
- sc
- Single Crochet
- Round 3
1 sc, inc repeat 3 times around. (9)
Key2
- inc
- Increase (2 sc in the same stitch)
- sc
- Single Crochet
- Round 4
2 sc, inc repeat 3 times around. (12)
Key2
- inc
- Increase (2 sc in the same stitch)
- sc
- Single Crochet
Do not stuff the ears. Flatten the piece and sl st through both layers to close. Leave a long yarn tail for attachment if you are sewing them on separately; if joining into the head during Round 11, leave the tail aside and follow the in-round joining method described in the Head.
Upper Arms (make 2)
Work in continuous spiral using orange yarn.
- Round 1
6 sc in MR. (6)
Key2
- MR
- Magic Ring
- sc
- Single Crochet
- Round 2
inc in each st around. (12)
Key1
- inc
- Increase (2 sc in the same stitch)
- Rounds 3–4
sc in each st around. (12)
Key1
- sc
- Single Crochet
- Round 5
3 dec, 6 sc. (9)
Key2
- dec
- Invisible Decrease (insert hook into the front loops of the next 2 stitches, draw up 2 loops, yarn over and pull through all 3 loops)
- sc
- Single Crochet
- Rounds 6–12
sc in each st around. (9)Stuff the arm lightly. Do not close — the open end will be joined into the body during Round 15 of the Body.
Key1
- sc
- Single Crochet
Legs (make 2)
Begin with white/cream yarn for the foot section. The legs are crocheted in two colors: white or cream for the "slipper/sock" section at the foot and orange for the leg. The color change happens at Round 8 of the Legs.
- Round 1
6 sc in MR. (6)
Key2
- MR
- Magic Ring
- sc
- Single Crochet
- Round 2
inc in each st around. (12)
Key1
- inc
- Increase (2 sc in the same stitch)
- Round 3
1 sc, inc repeat 6 times around. (18)
Key2
- inc
- Increase (2 sc in the same stitch)
- sc
- Single Crochet
- Round 4
5 sc, inc repeat 3 times around. (21)
Key2
- inc
- Increase (2 sc in the same stitch)
- sc
- Single Crochet
- Round 5
sc in BLO in each st around. (21)
Key2
- BLO
- Back Loop Only
- sc
- Single Crochet
- Round 6
sc in each st around. (21)
Key1
- sc
- Single Crochet
- Round 7
1 sc, dec repeat 6 times, 3 sc. (15)
Key2
- dec
- Invisible Decrease (insert hook into the front loops of the next 2 stitches, draw up 2 loops, yarn over and pull through all 3 loops)
- sc
- Single Crochet
- Round 8
1 sc, dec repeat 3 times, 6 sc. Switch to orange yarn and work the remaining stitches in this round in BLO. After completing the round, go back and sc into the front loops left unworked from Round 5 (the FLO edge of the foot opening) using white/cream yarn to create a clean cuff detail. (12)
Key4
- BLO
- Back Loop Only
- dec
- Invisible Decrease (insert hook into the front loops of the next 2 stitches, draw up 2 loops, yarn over and pull through all 3 loops)
- FLO
- Front Loop Only
- sc
- Single Crochet
- Rounds 9–13
sc in each st around. (12)Work 11 sc into the round, then fold the piece in half and sl st through both layers to close the top of the leg. Do not stuff the foot portion heavily — a light fill in the leg section is enough.
Key2
- sl st
- Slip Stitch
- sc
- Single Crochet
Tail
Begin with white/cream yarn.
- Round 1
6 sc in MR. (6)
Key2
- MR
- Magic Ring
- sc
- Single Crochet
- Round 2
1 sc, inc repeat 3 times around. (9)
Key2
- inc
- Increase (2 sc in the same stitch)
- sc
- Single Crochet
- Round 3
sc in each st around. (9)
Key1
- sc
- Single Crochet
- Round 4
2 sc, inc repeat 3 times around. (12)
Key2
- inc
- Increase (2 sc in the same stitch)
- sc
- Single Crochet
- Round 5
3 sc, inc repeat 3 times around. (15)
Key2
- inc
- Increase (2 sc in the same stitch)
- sc
- Single Crochet
- Round 6
sc in each st around. (15)Switch to orange yarn.
Key1
- sc
- Single Crochet
- Rounds 7–9
sc in each st around. (15)
Key1
- sc
- Single Crochet
- Round 10
3 sc, dec repeat 3 times around. (12)
Key2
- dec
- Invisible Decrease (insert hook into the front loops of the next 2 stitches, draw up 2 loops, yarn over and pull through all 3 loops)
- sc
- Single Crochet
- Round 11
2 sc, dec repeat 3 times around. (9)
Key2
- dec
- Invisible Decrease (insert hook into the front loops of the next 2 stitches, draw up 2 loops, yarn over and pull through all 3 loops)
- sc
- Single Crochet
- Round 12
1 sc, dec repeat 3 times around. (6)Work 3 sl st through both layers to close the tail. Cut yarn, fasten off, and weave in the end securely inside the tail.
Key3
- sl st
- Slip Stitch
- dec
- Invisible Decrease (insert hook into the front loops of the next 2 stitches, draw up 2 loops, yarn over and pull through all 3 loops)
- sc
- Single Crochet
Body
Work in continuous spiral using orange yarn. Have the legs and tail finished and ready before beginning Round 6. The arms, legs, and tail are joined directly into the body as you crochet the body rounds, so read through this section before starting so you know when to have each component ready.
- Round 1
6 sc in MR. (6)
Key2
- MR
- Magic Ring
- sc
- Single Crochet
- Round 2
inc in each st around. (12)
Key1
- inc
- Increase (2 sc in the same stitch)
- Round 3
1 sc, inc repeat 6 times around. (18)
Key2
- inc
- Increase (2 sc in the same stitch)
- sc
- Single Crochet
- Round 4
1 sc, inc repeat 9 times around. (27)
Key2
- inc
- Increase (2 sc in the same stitch)
- sc
- Single Crochet
- Round 5
2 sc, inc repeat 9 times around. (36)Now join the legs and tail into the next round:
Key2
- inc
- Increase (2 sc in the same stitch)
- sc
- Single Crochet
- Round 6
6 sc worked together with one leg (holding the leg alongside the body and working through both the body stitch and the corresponding stitch of the leg opening simultaneously for 6 sts), 11 sc in body sts, 6 sc worked together with the second leg in the same way, 5 sc in body sts, 3 sc worked together with the tail in the same way, 5 sc in body sts. (36)
Key1
- sc
- Single Crochet
If you plan to dress your fox in a crocheted sweater or dress, switch to your contrast color yarn at Round 8.
- Rounds 7–8
sc in each st around. (36)
Key1
- sc
- Single Crochet
- Round 9
2 sc, dec repeat 9 times around. (27)
Key2
- dec
- Invisible Decrease (insert hook into the front loops of the next 2 stitches, draw up 2 loops, yarn over and pull through all 3 loops)
- sc
- Single Crochet
- Round 10
sc in each st around. (27)
Key1
- sc
- Single Crochet
- Round 11
1 sc, dec repeat 9 times around. (18)
Key2
- dec
- Invisible Decrease (insert hook into the front loops of the next 2 stitches, draw up 2 loops, yarn over and pull through all 3 loops)
- sc
- Single Crochet
- Rounds 12–13
sc in each st around. (18)
Key1
- sc
- Single Crochet
- Round 14
4 sc, dec repeat 3 times around. (15)
Key2
- dec
- Invisible Decrease (insert hook into the front loops of the next 2 stitches, draw up 2 loops, yarn over and pull through all 3 loops)
- sc
- Single Crochet
- Round 15
1 sc, 4 sc worked together with one arm (holding the arm alongside the body and working through both simultaneously for 4 sts), 3 sc in body sts, 4 sc worked together with the second arm in the same way, 3 sc in body sts, sl st to finish. (15)Stuff the body firmly before the opening closes too much to reach inside easily. Fasten off and leave a long tail for sewing the head on.
Key2
- sl st
- Slip Stitch
- sc
- Single Crochet
Head
Begin with white/cream yarn for the muzzle. The ears are joined directly into the head during Round 11 — have both finished ears ready before you reach that round.
- Round 1
6 sc in MR. (6)
Key2
- MR
- Magic Ring
- sc
- Single Crochet
- Round 2
1 sc, inc repeat 3 times around. (9)
Key2
- inc
- Increase (2 sc in the same stitch)
- sc
- Single Crochet
- Round 3
2 sc, inc repeat 3 times around. (12)
Key2
- inc
- Increase (2 sc in the same stitch)
- sc
- Single Crochet
- Round 4
1 sc, inc repeat 6 times around. (18)Switch to orange yarn.
Key2
- inc
- Increase (2 sc in the same stitch)
- sc
- Single Crochet
- Round 5
6 sc, inc in each of the next 6 sts, 6 sc. (24)
Key2
- inc
- Increase (2 sc in the same stitch)
- sc
- Single Crochet
- Round 6
6 sc, 1 sc, inc repeat 6 times, 6 sc. (30)
Key2
- inc
- Increase (2 sc in the same stitch)
- sc
- Single Crochet
- Round 7
4 sc, inc repeat 6 times around. (36)
Key2
- inc
- Increase (2 sc in the same stitch)
- sc
- Single Crochet
- Rounds 8–10
sc in each st around. (36)Join the ears into the next round — have both finished ears ready:
Key1
- sc
- Single Crochet
- Round 11
11 sc in head sts, 6 sc worked together with one ear (working through both the head stitch and the corresponding ear stitch simultaneously for 6 sts), 4 sc in head sts, 6 sc worked together with the second ear in the same way, 9 sc in head sts. (36)
Key1
- sc
- Single Crochet
- Round 12
sc in each st around. (36)
Key1
- sc
- Single Crochet
- Round 13
4 sc, dec repeat 6 times around. (30)
Key2
- dec
- Invisible Decrease (insert hook into the front loops of the next 2 stitches, draw up 2 loops, yarn over and pull through all 3 loops)
- sc
- Single Crochet
- Round 14
3 sc, dec repeat 6 times around. (24)
Key2
- dec
- Invisible Decrease (insert hook into the front loops of the next 2 stitches, draw up 2 loops, yarn over and pull through all 3 loops)
- sc
- Single Crochet
- Round 15
2 sc, dec repeat 6 times around. (18)Before working Round 16, insert the safety nose and safety eyes at your preferred positions — the nose fits in the white muzzle area, and the eyes sit on either side of the color transition between white and orange. Stuff the head firmly.
Key2
- dec
- Invisible Decrease (insert hook into the front loops of the next 2 stitches, draw up 2 loops, yarn over and pull through all 3 loops)
- sc
- Single Crochet
- Round 16
1 sc, dec repeat 6 times around. (12)
Key2
- dec
- Invisible Decrease (insert hook into the front loops of the next 2 stitches, draw up 2 loops, yarn over and pull through all 3 loops)
- sc
- Single Crochet
- Round 17
dec 6 times around. (6)Cut yarn leaving a 10–15 cm tail. Fasten off. Pull the yarn needle through the remaining 6 stitches and draw tight to close the opening. Weave the tail end into the inside of the head.
Key1
- dec
- Invisible Decrease (insert hook into the front loops of the next 2 stitches, draw up 2 loops, yarn over and pull through all 3 loops)
Notes from the pattern
- The pattern allows either a US G-6 / 4.0 mm hook or a US G-6–7 / 4.0–4.5 mm hook; choose whichever size produces a tight, even fabric rather than following gauge, since gauge is not critical for this project — but the fabric should be tight enough that stuffing does not show through the stitches. If you can see gaps, drop down half a hook size.
- Place a stitch marker in the first stitch of every round on all six pieces and move it up each time — the fluffy texture of the yarn makes the stitch 'v' hard to see, especially at round ends.
- Work snugly throughout; if the hook feels like a slight struggle to insert, the tension is correct for amigurumi and will keep stuffing from showing through the bulky yarn.
- This pattern is written in US crochet terminology throughout. All pieces are worked in a continuous spiral — do not join at the end of each round unless specifically instructed — and stitch counts are given in parentheses at the end of each round.
The essentials
- Rounds
- 56
- Parts
- 6
- Level
- Beginner
- Time
- 6-8 hours
- Hook
- 4.0 mm
- Yarn
- Bulky
Stitches you will use
- Continuous spiral single crochet (UK double crochet) Used throughout all six pieces with no joining at round ends; losing the round start is the main risk, so a stitch marker is essential.
- Whipstitch assembly and embroidered facial features The head is whipstitched to the body around the neck opening, then eyebrows and a mouth are back-stitched onto the white muzzle; keep the seam tight and the embroidery stitches small and even.
Troubleshooting
The neck join looks loose or gappy
The whipstitch around the neck opening was not pulled firmly enough; redo the seam, pulling each stitch tight, before weaving the end inside the body.
Stuffing shows through the fabric on the body or head.
Tension is too loose for the bulky yarn; drop to the smaller end of the 4.0–4.5 mm hook range and work each stitch snugly to close the gaps.
Losing track of where a round starts on the ears or legs.
The fluffy yarn hides stitch definition at the round boundary; move the stitch marker into the first stitch of every single round without skipping any.
Substituting yarn
- Acrylic, bulky weight
- Gives a similar size using the same stitch counts and hook size, but with slightly less drape and softness than the polyester-blend yarn.
- Cotton-blend, aran or worsted weight
- Produces crisper stitch definition and a firmer fabric; sizing down the hook and adding a little extra stuffing keeps the rounded pieces full.
- Chenille-style, bulky weight
- Keeps the plush, soft finish close to the original, though stitches are harder to see, so a stitch marker becomes even more necessary; the hook size stays the same.
Washing and care
- Spot clean with a damp cloth and mild soap where possible; the polyester-blend fibre also tolerates a gentle hand wash in cool water if a full clean is needed.
- Reshape the pieces while slightly damp and leave flat to air dry away from direct heat, then store the finished fox out of direct sunlight to keep the orange and white colours from fading.
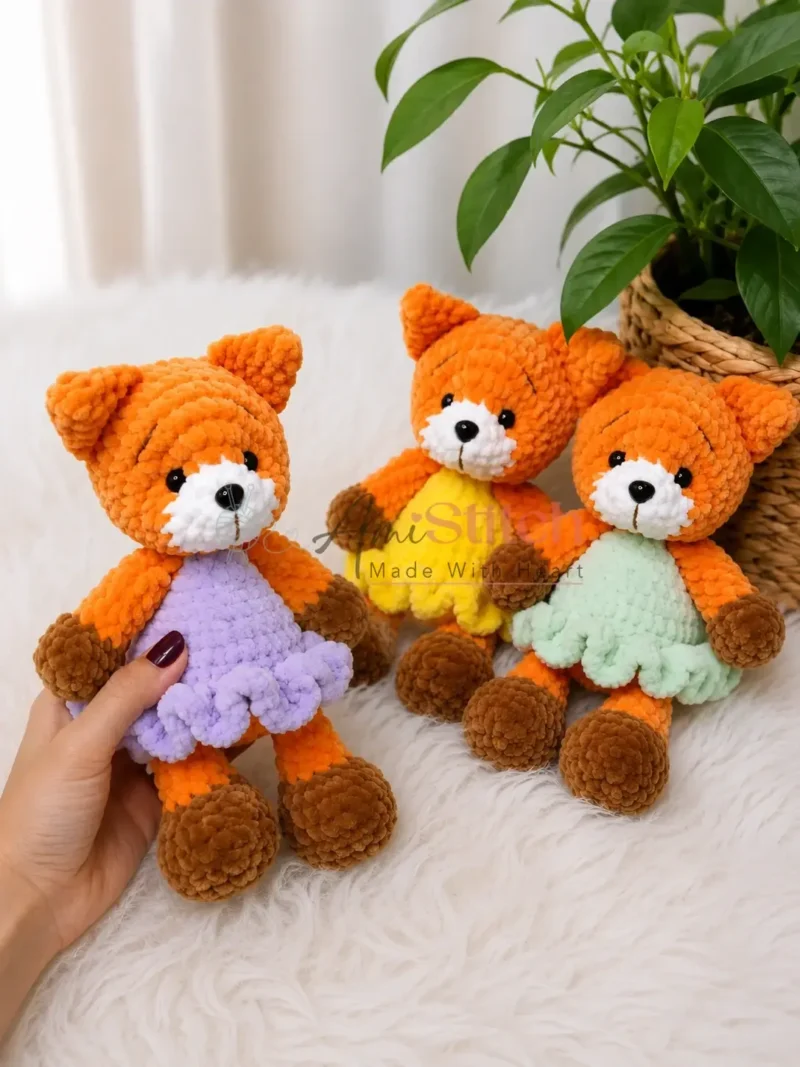
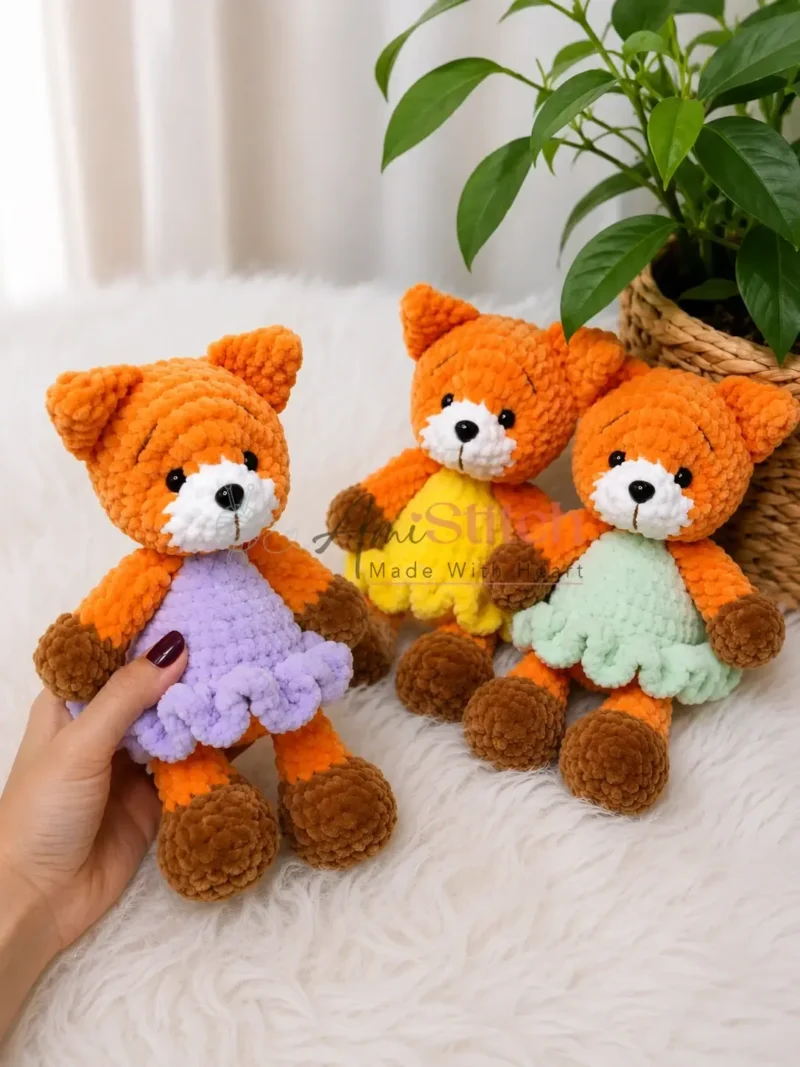
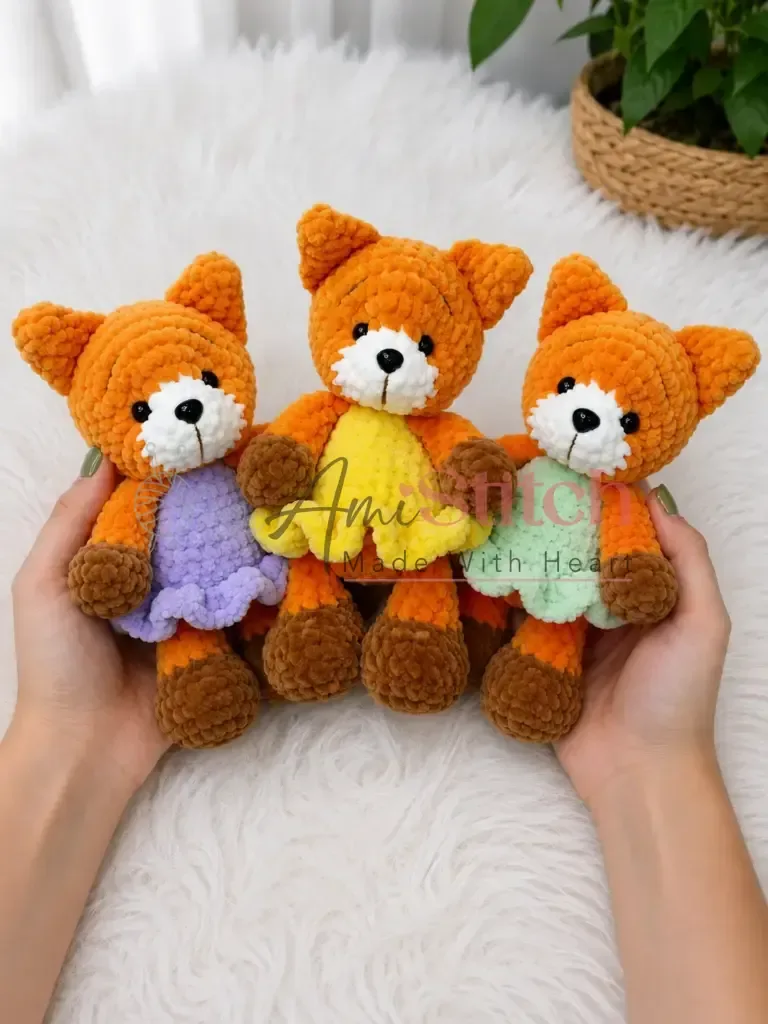
The photographs taken while this was being made
Every one was taken by whoever published the pattern, in the order the source listed them.
FAQs
Questions
What size are the safety eyes and nose?
The eyes are 11 mm in diameter, one pair, and the nose piece measures 10 × 11 mm. Both should be pushed firmly from inside the head before final closing to confirm the washers are locked.
Is this pattern written in US or UK crochet terms?
It is written in US terminology throughout, so US single crochet corresponds to UK double crochet. The difference matters mainly for anyone used to reading patterns written in UK terms.
How much yarn is needed for the orange sections?
Less than one skein of the bulky orange yarn covers the body, head, ears and upper arms, plus most of the legs and tail. The white/cream and brown yarns are used in much smaller amounts for the muzzle, feet and embroidered features.
These answers came from whoever first published the pattern, kept word for word.