 EVERY CROCHET
 Amigurumi 15 rounds No account, no download
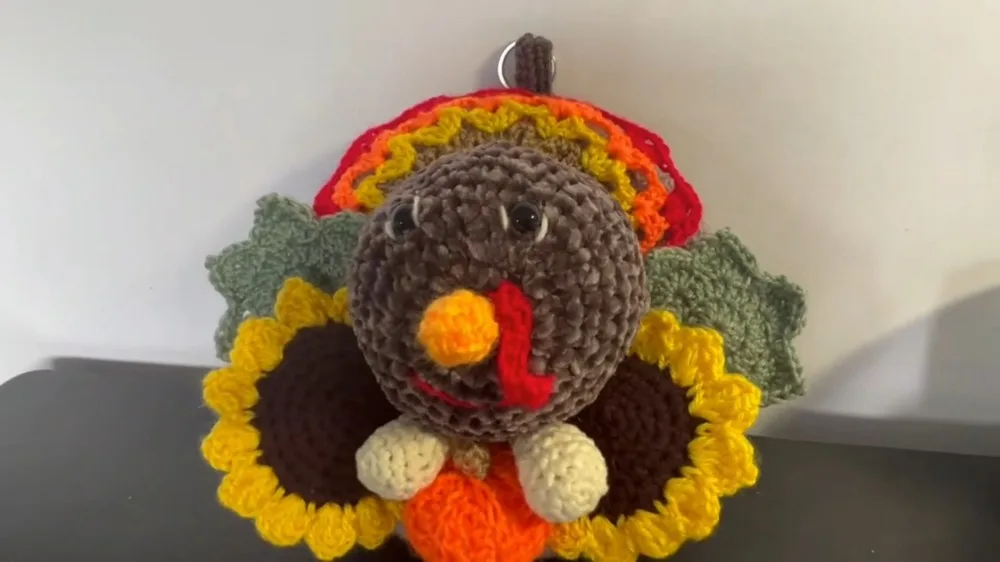
Autumn turkey wreath with pumpkin and sunflower motifs
Step-by-step autumn wreath using single crochet (UK double crochet) and half double crochet (UK half treble).
- Skill
- Intermediate
- Time
- 4-6 hours
- Yarn weight
- Worsted
- Hook
- 3.5 mm

Intermediate
What the original write-up called it. Nothing here is graded again.

Worsted
What the sample was worked in. Any weight works; the size moves with it.

4-6 hours
What the original page reckoned. Your own pace is the one that matters.
About this pattern
This is a dimensional autumn wreath made from several small crocheted motifs — a foam-circle cover, a stuffed pumpkin, two sunflowers, leaves, and a hanging loop — sewn together after a turkey motif from a separate tutorial is added. It uses a 3.5 mm hook and craft yarn in autumn colours, relies mainly on single crochet and half double crochet, and takes an evening or two to complete across the separate small pieces.
This wreath belongs to the single crochet (UK double crochet) family, built up as a series of small amigurumi-style motifs rather than one continuous piece. A fitted cover wraps a foam circle, and a pumpkin, a stalk, two sunflowers, a set of leaves and a turkey motif are each made separately before being joined to it, giving the finished wreath its layered, dimensional surface rather than a flat appliqué look.
Construction proceeds motif by motif. The foam circle cover starts from a chain of 31 and is worked in rows of single crochet through the back loops until it wraps the circle, then the ends are sewn together. The pumpkin is a stuffed half double crochet tube gathered at both ends, the stalk a short strip sewn to its top, and the sunflowers and leaves are worked as flat shaped rounds. All pieces are sewn onto the cover last, with the turkey motif and a crocheted hanging loop finishing the assembly.
Materials
- 3.5 mm crochet hook
- Small polyester foam circle
- Various colors of craft yarn (autumn colors)
- Darning needle
- Stuffing material
The list is the pattern's own wording.
Instructions
Every round is printed as the pattern wrote it, brackets and all. Open the key beside a round to see only the short forms that round uses.
Cover for the Foam Circle
Sew the two ends together to fit around the foam circle.
Stretch the cover over the foam circle and sew the ends together securely.
- Round 1
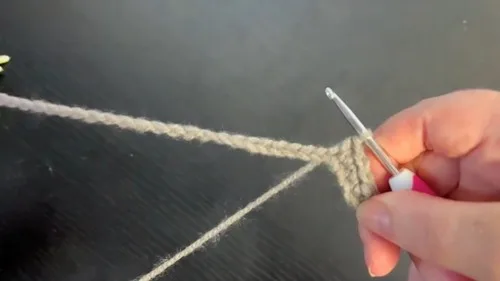
Start with a slip knot; Chain 31; Starting in the second chain from hook, single crochet in each stitch.
- Round 2
and onward: Chain 1 at the start of each new row; Continue with single crochet in the back loops until the piece wraps around the foam circle.
Pumpkin
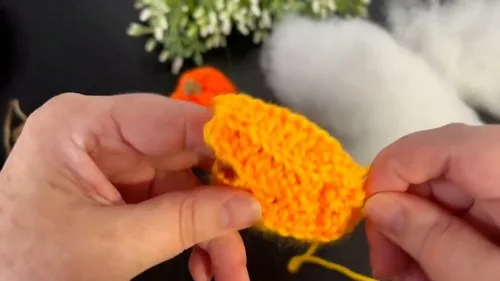
Weave in and out around the top and bottom of the pumpkin, then pull tightly and gather.
Add stuffing to the pumpkin, pull the thread to gather the top, and fasten off.
- Round 1
Slip knot, then chain 13; Starting from the second chain from the hook, half-double crochet in each stitch.
- Round 2
Chain 1, turn your work, then work half-double crochet in the back loops of each stitch.
- Rounds 3–12
Repeat the half-double crochet rows for a total of 10 more rows.
- Round 13
Put the ends together and single crochet across to connect.
Pumpkin Stalk
Sew onto the top of the pumpkin.
- Round 1
Slip knot, chain 5, work three rows of single crochet, fasten off.
Sunflowers
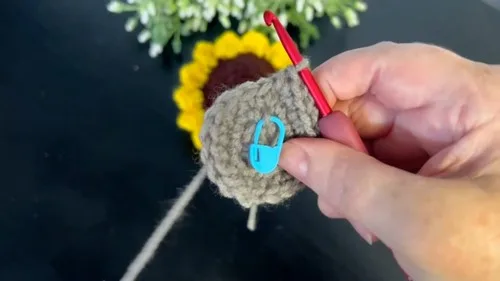
Use stitch markers to mark the start and end.
Make two sunflower pieces, sew them together with the right sides facing, leaving a gap for stuffing, then turn right-side out and stuff.
- Round 1
Slip knot, then chain 4 and join to make a ring.
- Round 2
Single crochet two stitches into each stitch around.
- Round 3
and onward: Keep increasing each round until you have the right size.Attach yellow yarn with a slip stitch, chain 2, then work through triple and double crochets to form the petals as described.
Leaves
- Round 1
Slip stitch and chain four, join to form a ring.
- Round 2
Chain 3 (counts as one double crochet) and make 11 more double crochets into the ring, join with a slip stitch. (12 dc)
Key1
- dc
- double crochet
- Round 3
Chain 3, work two double crochets into each stitch around, join.
- Round 4
Skip stitches and make clusters of five double crochets as shown for a leafy texture; finish with a slip stitch.
Hanging Mechanism
Attach a metal hook.
- Round 1
Create a hanging mechanism with a chain 15, work two rounds of single crochet, stitch the ends together.
Making up
- Step 1Arrange and sew the pumpkin, sunflowers, and leaves onto the foam circle cover.
- Step 2Place the turkey motif (as per another tutorial) in the desired location and secure.
- Step 3Create a hanging mechanism with a chain 15, work two rounds of single crochet, stitch the ends together, and attach a metal hook.
Notes from the pattern
- The 3.5 mm hook is sized for a fairly firm fabric on worsted-weight craft yarn; a looser gauge will make the chain-31 cover run short of wrapping the foam circle.
- Because most pieces are worked in turned rows rather than true joined rounds, a stitch marker on the first stitch of each row helps keep the back-loop pattern aligned, especially on the twelve-row pumpkin body.
- Match tension to the foam circle before starting the cover rows — the chain-31 foundation only fits properly if the fabric is neither stretched nor loose.
- Stuffing is used only for the pumpkin; keep the fill light so the gathered top and bottom stay smooth rather than puckered, and fasten off securely once gathered.
The essentials
- Rounds
- 15
- Parts
- 6
- Level
- Intermediate
- Time
- 4-6 hours
- Hook
- 3.5 mm
- Yarn
- Worsted
Stitches you will use
- Back-loop-only crochet Used throughout the foam circle cover and the pumpkin tube; working consistently through back loops only keeps the ridged texture even and prevents the fabric from twisting.
- Stuffing and gathering closed shapes Needed for the pumpkin, which is woven at top and bottom then pulled tight; add stuffing before the final gather so the shape stays round rather than flat.
- Multi-motif assembly onto a base The pumpkin, sunflowers, leaves and turkey motif are all sewn onto the finished cover; dry-arrange the pieces before stitching so spacing around the circle reads as balanced.
Troubleshooting
The cover will not stretch to meet around the foam circle
Tension on the chain-31 foundation was too tight; redo the chain and starting row slightly looser, or size up a hook for that piece only.
The pumpkin looks lumpy instead of evenly rounded
Stuffing went in unevenly or the gathering thread was pulled too hard on one side; add fill in small amounts and gather slowly, checking shape from all sides before fastening off.
The cover cups or curls instead of
Back-loop rows were worked too tightly; loosen tension slightly on the next piece and block the finished cover flat before sewing on motifs.
Substituting yarn
- Cotton, DK weight
- Gives a crisper, less stretchy fabric with sharper stitch definition on the pumpkin ribs; drop to a 3 mm hook to keep the fabric dense enough to hold stuffing.
- Wool-blend, Aran weight
- Produces a softer, slightly fuzzier wreath with more drape in the sunflower petals and leaves; move up to a 4 mm hook and expect the foam cover to need fewer rows to wrap round.
- Acrylic, chunky weight
- Bulks up the whole piece and speeds up the pumpkin's twelve rows considerably; a 5 mm hook suits this better, though the smaller motifs like the stalk will look noticeably larger in proportion.
Washing and care
- Craft yarn of this kind is generally machine washable on a gentle cycle, but hand washing in cool water protects the glued or sewn-in foam circle and the stuffing inside the pumpkin from shifting.
- Reshape the pumpkin and sunflower motifs by hand while damp and dry the wreath flat away from direct heat or sunlight, then store it unfolded in a box to keep the foam circle from flattening on one side.
The photographs taken while this was being made
Every one was taken by whoever published the pattern, in the order the source listed them.
FAQs
Questions
What size foam circle does this wreath need?
The pattern does not specify a diameter, only that the cover's chain-31 foundation should be worked and tested until it wraps the circle being used. Measure the circle's circumference before starting so the cover row count can be adjusted if the tension differs.
Where does the turkey motif come from?
It is not part of this pattern and is sourced from another tutorial, then simply positioned and secured onto the finished cover. Any small crocheted bird motif of a similar scale will sit well in its place.
Is the 3.5 mm hook used for every motif?
Yes, the same 3.5 mm hook is listed for the whole project, including the cover, the pumpkin, the sunflowers, the leaves and the hanging loop. Keeping one hook size simplifies the project since no size changes are noted between parts.
How many sunflowers and leaves are needed?
The pattern calls for two sunflowers and one leaf piece, each worked over four rounds. Both are made separately and sewn onto the cover during assembly, so they can be arranged to balance the pumpkin and turkey motif.
How is the hanging loop attached?
It is made from a chain of 15 worked into two rounds of single crochet, with the ends stitched together before a metal hook is attached. This loop is completed as its own small piece and fixed to the back of the wreath during the final assembly step.
These answers came from whoever first published the pattern, kept word for word.