 EVERY CROCHET
 Garments 15 rounds No account, no download
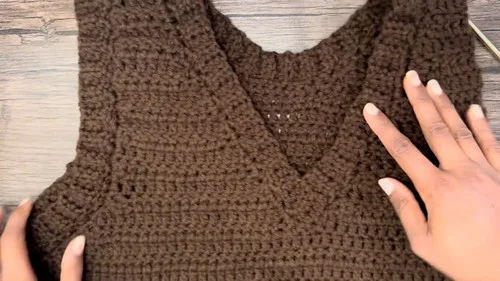
Ribbed v-neck sweater vest worked in half double crochet
A ribbed v-neck sweater vest worked in half double crochet (UK half treble) and double crochet (UK treble); both US and UK terms given.
- Skill
- Intermediate
- Time
- 6-8 hours
- Yarn weight
- Worsted (UK Aran)
- Hook
- 5 mm

Intermediate
What the original write-up called it. Nothing here is graded again.

Worsted (UK Aran)
What the sample was worked in. Any weight works; the size moves with it.

6-8 hours
What the original page reckoned. Your own pace is the one that matters.
About this pattern
This is a sleeveless V-neck vest built from a ribbed strip worked in back loop half double crochet (UK half treble) for eighty rows, joined into a waistband, then topped with a double crochet (UK treble) front panel shaped with paired decreases at the armhole and neckline. It uses medium weight yarn, a 5mm hook, and relies on careful stitch counting rather than complex stitch patterns.
This pattern builds a sleeveless V-neck sweater vest from a ribbed hem upward, using stitches from the half double crochet (UK half treble) family for the ribbing and double crochet (UK treble) for the body. US terms are used throughout, with the UK name given once here. The vest is worked flat as a strip and a shaped panel rather than in the round, which keeps the ribbing's stretch running in the right direction for a fitted hem.
The ribbing is worked first, as a long strip of back loop half double crochet turned for eighty rows, then its short ends are slip stitched together to form a stretchy waistband. The work is rotated, and double crochet stitches are placed across the ribbing ridges, three stitches for every two ridges, to build the front panel upward from that base. From there, paired decreases carve the armhole and the V-neckline across three founding rounds, continued through additional rows until the point of the V is reached.
This vest is designed for size small and uses simple stitches and clean shaping, making it a good project for beginners. Length and color can be adjusted to suit personal style, and the finished piece can be worn alone or layered over other garments.
Materials
- Medium weight yarn approx 250g
- 5 mm hook
- Yarn needle
- Scissors
- Stitch markers
The list is the pattern's own wording.
Instructions
Every round is printed as the pattern wrote it, brackets and all. Open the key beside a round to see only the short forms that round uses.
Bottom Ribbing
Make slip knot.
- Row 1
Chain 10. HDC in second chain from hook and across.
Key1
- hdc
- half double crochet
- Rows 2–80
Chain 1 and turn. Work BLHDC across. Repeat until 80 rows.Slip stitch ends together.
Key1
- blhdc
- back loop half double crochet
Body Of Sweater Vest
Rotate work.
- (120)Round 1
Chain 2. Place 3 DC over every 2 ribbing ridges. Work around for 120 stitches. Slip stitch to join.
Key1
- dc
- double crochet
- Rounds 2–18
Chain 2 and turn. DC in each stitch. Slip stitch to join. Continue until 18 rounds total.
Key1
- dc
- double crochet
Front Panel
Mark center between stitch 60 and 61.
- Rows 1–3
Chain 2 turn. DC3tog first 3 stitches. DC to last 3 before marker. DC3tog. Repeat 2 more rows.Count stitches and mark center between 24 and 25.
Key2
- dc3tog
- double crochet 3 stitches together (decrease)
- dc
- double crochet
- Row 4
Chain 2 turn DC3tog at armhole DC until 2 before center DC2tog
Key3
- dc2tog
- double crochet 2 stitches together (decrease)
- dc3tog
- double crochet 3 stitches together (decrease)
- dc
- double crochet
- Row 5
Chain 2 turn DC2tog at neckline DC to last 3 DC3tog
Key3
- dc2tog
- double crochet 2 stitches together (decrease)
- dc3tog
- double crochet 3 stitches together (decrease)
- dc
- double crochet
- Row 6
Repeat Row 4.
- Rows 7–19
Work 13 more rows with neckline decreases only. At neckline start: DC2tog then DC across.At neckline end: DC to last 2 then DC2tog. Fasten off.Attach yarn on other side.
Key2
- dc2tog
- double crochet 2 stitches together (decrease)
- dc
- double crochet
- 2nd Side: Rows 1-3
Work 3 rows with DC3tog at armhole and DC2tog at neckline.
Key2
- dc2tog
- double crochet 2 stitches together (decrease)
- dc3tog
- double crochet 3 stitches together (decrease)
- 2nd Side: Rows 4-16
Work 13 rows with DC2tog at neckline only.Fasten off.
Key1
- dc2tog
- double crochet 2 stitches together (decrease)
Back Panel
Attach yarn at midpoint.
- Rows 1–6
Chain 2 and turn. Work 6 rows with DC3tog at start and end.
Key1
- dc3tog
- double crochet 3 stitches together (decrease)
- Rows 7–12
Work 6 rows DC across.
Key1
- dc
- double crochet
- Row 13
Chain 2 turn. DC 11 then DC3tog.
Key2
- dc3tog
- double crochet 3 stitches together (decrease)
- dc
- double crochet
- Rows 14–19
Chain 2 turn. DC3tog then DC across. Repeat for 6 rows.Fasten off. Attach yarn other side and repeat.
Key2
- dc3tog
- double crochet 3 stitches together (decrease)
- dc
- double crochet
Making up
- Step 1Sew shoulders through top loops only
- Step 2Attach yarn at neckline
- Step 3Chain 1
- Step 4SC around neckline
- Step 5Slip stitch to join
- Step 6Attach yarn three stitches from center
- Step 7Chain 1
- Step 8Work 3 HDC
- Step 9Slip stitch to opposite side
- Step 10Slip stitch two together
- Step 11Turn
- Step 12Work 3 BLHDC
- Step 13Chain 1 turn
- Step 14Work 3 BLHDC
- Step 15Slip stitch to next stitch
- Step 16Slip stitch three together
- Step 17Repeat around neckline
- Step 18Fasten off and sew ends
- Step 19Attach yarn at armhole
- Step 20SC around
- Step 21Slip stitch to join
- Step 22Chain 4
- Step 23Turn
- Step 24HDC across
- Step 25Slip stitch next
- Step 26Slip stitch two together
- Step 27Turn
- Step 28BLHDC across
- Step 29Chain 1 turn
- Step 30BLHDC
- Step 31Repeat around
- Step 32Fasten off and sew ends
Notes from the pattern
- The 5mm hook drives both the ribbing gauge and the panel gauge; swap sizes only after checking a small test strip, since the ribbing needs enough stretch to reach around.
- Stitch markers matter for tracking the centre point, marked first between stitch 60 and 61 and again between stitch 24 and 25; place removable markers there before starting the decrease rows.
- BLHDC ribbing tends to tighten if worked snugly; keep the ribbing rows loose enough to match a stretchy waistband, or the finished strip will fight the join at the ends.
- Approximately 250g of medium weight yarn covers the whole vest as written; leave a small buffer if substituting a yarn with different yardage per gram.
- This vest is written for size small. Length and color can be adjusted to suit personal style, and it can be worn alone or layered over other pieces.
The essentials
- Rounds
- 15
- Parts
- 4
- Level
- Intermediate
- Time
- 6-8 hours
- Hook
- 5 mm
- Yarn
- Worsted (UK Aran)
Stitches you will use
- Back loop half double crochet (BLHDC) ribbing Worked for all eighty rows of the waistband strip; keep the turning chain and tension consistent so the ribbing stretches evenly once the ends are joined.
- Working stitches over ribbing ridges Used when rotating the ribbing strip to start the front panel, placing three double crochet stitches for every two ridges; miscounting ridges here throws off the whole panel's stitch count.
- Paired shaping decreases (DC3tog and DC2tog) Used at the armhole and neckline across the front panel rows; keep decreases aligned with the marked centre stitch so the V-neck stays symmetrical.
Troubleshooting
The ribbed waistband strip curls instead of lying flat.
This usually comes from BLHDC worked too tightly or an uneven turning chain across the eighty rows; loosen the tension slightly and keep the chain-1 turn consistent row to row.
The V at the neckline sits off-centre.
The centre marker has likely shifted from its original point between stitch 60 and 61, or 24 and 25 in later rows; recount from the marker before every decrease row rather than judging by eye.
The front panel flares or ripples just above the ribbing.
This points to uneven placement of the three-double-crochet-per-two-ridges rule; count the ribbing ridges fully before placing stitches instead of spacing them by eye.
Substituting yarn
- 100% cotton, medium weight (worsted / UK Aran)
- Produces a firmer, less stretchy ribbing, so the waistband may need working slightly looser or on a hook half a size larger to keep its give.
- Wool-blend, medium weight (worsted / UK Aran)
- Adds more natural stretch and drape to both the ribbing and the front panel, closer to the tension the pattern assumes with its 5mm hook.
- Acrylic, medium weight (worsted / UK Aran)
- Keeps the same weight and hook size but produces a stiffer ribbing with less recovery, so the waistband may loosen slightly with wear.
Washing and care
- The materials list does not name a specific fibre, so check the yarn band before washing; treat any blend by its most delicate fibre and hand wash in cool water where in doubt.
- Reshape the ribbing to its original width while damp and dry the vest flat, away from direct heat, to keep the waistband from stretching out of shape; store folded rather than hung.
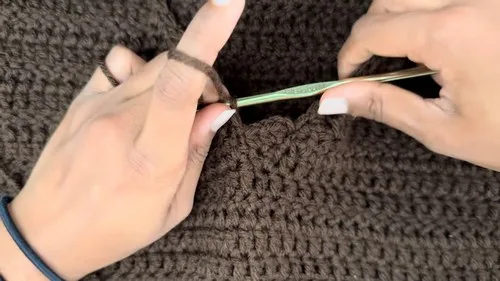
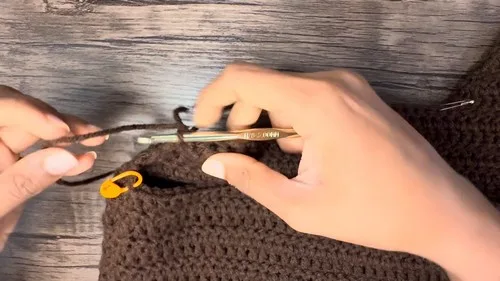
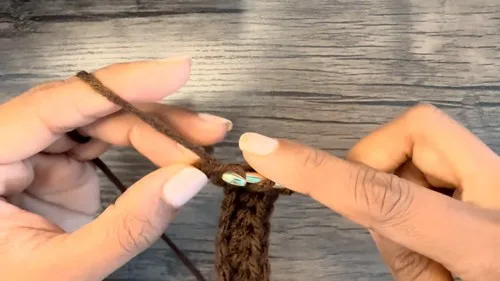
The photographs taken while this was being made
Every one was taken by whoever published the pattern, in the order the source listed them.
FAQs
Questions
How is the size of this vest determined?
The width comes from the eighty rows of the ribbed waistband strip, and the length from the decrease rows worked above it. Working more or fewer rows before the armhole decreases begin changes the finished length.
Why are US stitch names used instead of UK ones?
The pattern is written in US terms throughout, so half double crochet and double crochet appear as written. In UK terms these are worked as half treble and treble crochet respectively.
How much yarn is actually needed?
Around 250g of medium weight yarn covers the ribbing strip and the front panel as written. Buying slightly more is sensible when working at an unusually loose tension.
What keeps the V-neck symmetrical while decreasing?
The centre point marked between stitch 60 and 61, and later between 24 and 25, anchors both sides of the decrease pattern. Recounting from that marker before each row, rather than relying on the previous row's shape, keeps the point straight.
Can a different hook size be used?
A 5mm hook sets the gauge for both the ribbing and the panel above it, so changing size will change the finished measurements. A small test swatch of the ribbing is the quickest way to check before committing to all eighty rows.
These answers came from whoever first published the pattern, kept word for word.