 EVERY CROCHET
 Accessories 3 rounds No account, no download
Crochet puff stitch heart keychain pattern
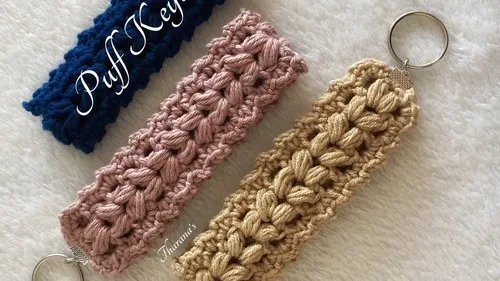
A puff stitch heart keychain pattern worked in rows with double crochet and a single crochet border, finished with a key ring for an easy
- Skill
- Intermediate
- Time
- 2-3 hours
- Yarn weight
- DK
- Hook
- 4 mm

Intermediate
What the original write-up called it. Nothing here is graded again.

DK
What the sample was worked in. Any weight works; the size moves with it.

2-3 hours
What the original page reckoned. Your own pace is the one that matters.
About this pattern
This pattern makes a small puff-stitch heart motif finished as a keychain, using Lazy Cotton Gold yarn and a 4mm hook. The main panel runs through Row 23 of repeated puff stitches framed by double crochet, then gets a single crochet and chain-two border around the edges. Assembly involves an invisible join, weaving in ends, and attaching a key ring and crimp, with a swivel clasp offered as an alternative.
This heart-shaped keychain is built from the puff stitch, a textured stitch that creates raised, dimensional bumps across an otherwise flat panel. The stitch instructions use double crochet (dc) to anchor each puff at the row ends. The result is a compact, dimensional motif sized for a keyring rather than a cushion or garment.
Construction starts from a short slip-knot chain, then builds a narrow panel row by row, each row adding a fresh puff and chain-one gap before closing on the double crochet left from the previous row. Once the panel reaches its full length at Row 23, a border of single crochet and chain-two corners is worked around the outer edge to firm up the shape and give the heart its defined outline. The finished panel is then joined, trimmed, and fitted with a key ring to become a keychain.
Materials
- Lazy Cotton Gold yarn
- 4mm crochet hook
- Key ring and crimp
- Scissors and needle for finishing
The list is the pattern's own wording.
Instructions
Every round is printed as the pattern wrote it, brackets and all. Open the key beside a round to see only the short forms that round uses.
Main Pattern
- Row 1
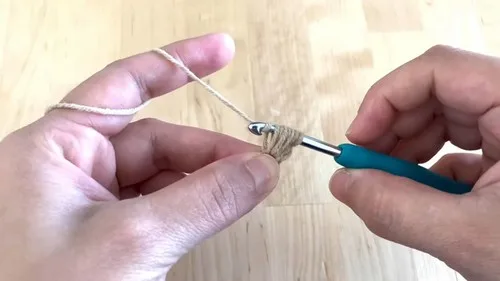
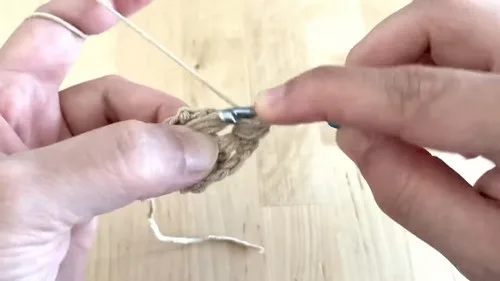
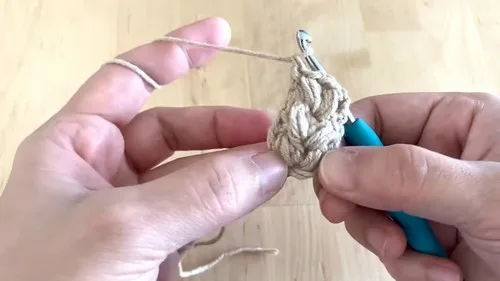
Crochet a puff stitch into the third chain from the hook: yarn over, insert the hook into the chain, yarn over and pull up a loop, repeat this two more times (total of 3 times), you should have 7 loops on the hook; yarn over and pull through all seven loops; chain 1; make another puff stitch into the same third chain; do a double crochet (dc) into the last chain. This completes the first row.
Key1
- dc
- double crochet
- Row 2
Chain 2 and turn your work; make one puff stitch and chain 1; make another puff stitch in the chain-1 space; double crochet (dc) onto the top of the chain two from the previous row.Repeat Row 2 until Row 23.
Key1
- dc
- double crochet
- Border
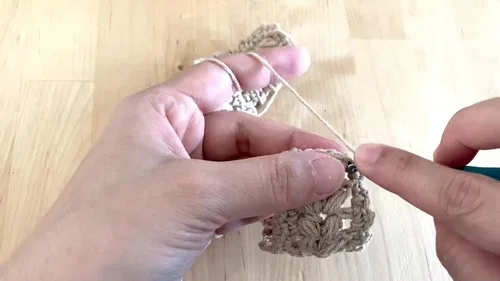
Chain 1 and turn your work to work along the long side; single crochet, chain 2, and single crochet into each row end working into spaces around the double crochets and chain twos. On the short side: chain 1, single crochet in the same space, chain 1, single crochet between the puff stitches, chain 1, single crochet in the space where the chain two meets. Repeat the same bordering process on the other side of the work. Finish the round with a single crochet, chain 1, and join to the starting stitch.
Making up
- Step 1Cut the yarn, leaving a tail.
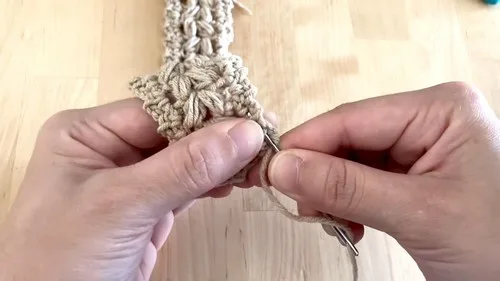
- Step 2Use the tail to make an invisible join to the beginning of the border.
- Step 3Weave in the ends using a needle, making sure to pass the yarn through several stitches in different directions securely.
- Step 4Attach the key ring and crimp onto a jump ring, then attach it to your crochet piece.
- Step 5You could use a swivel clasp instead of a simple key ring for more functionality.
Notes from the pattern
- The 4mm hook listed in the materials is matched to the cotton yarn; a thinner or thicker hook will change the gauge of the puffs and alter the finished keychain's size.
- No stitch markers are called for, but placing one at the start of each row makes it easier to find the chain-two turn after Row 2 without counting back.
- Tension matters most at the seven-loop pull-through of each puff stitch: pulling too tight flattens the bump, while a loose pull leaves it sitting unevenly against its neighbour.
- The pattern uses a single colour throughout and no stuffing, since the finished piece is a flat panel rather than a dimensional amigurumi shape.
The essentials
- Rounds
- 3
- Level
- Intermediate
- Time
- 2-3 hours
- Hook
- 4 mm
- Yarn
- DK
Stitches you will use
- Puff stitch Repeated in every row of the main panel; keep the three loop pull-ups even before closing through all seven loops, or the bump sits flat and uneven.
- Working into a chain-1 space Used at the start of each row repeat; insert the hook under the whole chain rather than splitting the strands so the puffs stay aligned down the panel.
- Edging into row ends Appears once the panel is finished, worked along the long side; space the single crochet and chain-two corners evenly so the border doesn't pull the panel out of shape.
Troubleshooting
The puff stitches look flat rather than raised.
The seven loops were likely pulled through too loosely or rushed; keep each loop pull-up snug and draw through all seven in one controlled motion.
The panel edges curl or wave instead of lying flat.
Tension across rows was uneven or the border was worked too tightly; relax the single crochet and chain-two stitches so the border matches the width of the row ends it sits in.
A gap appears at the chain-two turn at the start of a row.
The puff stitch there was worked too loosely into the previous row's chain-two; work it firmly with the hook inserted under both loops of the chain.
Substituting yarn
- Mercerised cotton, DK weight
- Gives a crisper, more defined puff than the gold cotton used here; may need a 3.5mm hook to keep the stitch count holding its shape.
- Cotton-acrylic blend, worsted weight
- Softer drape with slightly fuzzier puff definition; no hook change needed if the yarn thickness is close to the original.
- Linen-cotton blend, 4-ply (fingering) weight
- Produces a smaller, flatter keychain; pair with a 3mm hook to stop the border from gaping around the thinner fabric.
Washing and care
- Hand wash the finished keychain in cool water if it picks up dirt, since cotton holds its shape well but can felt slightly if machine washed on a hot cycle.
- Reshape the heart motif flat while damp and leave it to air dry away from direct heat; store it unclipped from heavy keys so the border stitches don't stretch out of shape over time.
The photographs taken while this was being made
Every one was taken by whoever published the pattern, in the order the source listed them.
FAQs
Questions
What makes the puff stitch create its raised texture?
Each puff is formed by pulling up three loops before drawing through all seven loops on the hook at once, which bunches the stitch into a raised bump rather than a flat stitch. This happens at the start of Row 1 and is repeated throughout the panel as the puffs stack row by row.
How many rows make up the main panel?
Row 2 is repeated until Row 23, so the panel runs from the starting chain through to the end of that repeat before anything else is added. The border is then worked separately around the finished edges.
Can a different clasp be used instead of a plain key ring?
Yes, a swivel clasp can replace the simple key ring and crimp for extra functionality. Either option attaches to the finished piece the same way, through a jump ring.
What yarn and hook does this pattern call for?
The listed materials are Lazy Cotton Gold yarn worked on a 4mm hook, along with a key ring and crimp for finishing. Scissors and a needle are also needed for the finishing steps.
How is the piece finished once the border is complete?
The yarn is cut leaving a tail, then that tail is used to make an invisible join back to the start of the border. The ends are woven in securely before the key ring and crimp are attached.
These answers came from whoever first published the pattern, kept word for word.