 EVERY CROCHET
 Garments 14 rounds No account, no download
Oversized chunky crochet hoodie for confident beginners
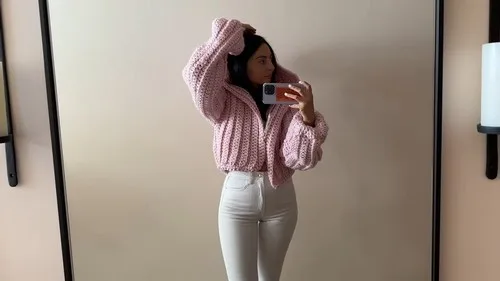
Beginner double crochet (UK treble) hoodie pattern in super chunky yarn, with US and UK stitch terms given throughout.
- Skill
- Intermediate
- Time
- 4-6 hours
- Yarn weight
- Super Bulky
- Hook
- 8 mm

Intermediate
What the original write-up called it. Nothing here is graded again.

Super Bulky
What the sample was worked in. Any weight works; the size moves with it.

4-6 hours
What the original page reckoned. Your own pace is the one that matters.
About this pattern
An oversized hoodie sweater worked in double crochet (UK treble crochet) using super bulky chunky yarn on an 8mm hook, built from five flat panels — two sleeves, two front panels with built-in hood, a back panel, cuffs and a bottom edging — then seamed together. It suits a confident beginner who has practised double crochet in back loop only and basic seaming, and takes roughly 16 to 18 balls of yarn for a size small.
This oversized hoodie sweater is built almost entirely from double crochet (UK treble crochet), worked in back loop only to create the ribbed, textured surface that runs through every panel. It is a project for a crocheter who already has double crochet fluent in the hands, since that single stitch carries the sleeves, front panels, back panel, cuffs and edging from start to finish.
Construction works flat in five separate pieces rather than in the round: two sleeves, two front panels with an integrated hood extension, one back panel, two ribbed cuffs and a bottom edging strip. The hood is shaped directly onto the front panels through an extra foundation chain and a run of increase rows, after which all pieces are seamed together — shoulders, hood, sleeve tubes and side seams — to form the finished garment.
The double crochet stitches worked in the back loops only give the fabric a knit-like appearance, so the finished hoodie looks store-bought while still being fully handmade. The pattern can also be customized in length, color, and sleeve width, making it a versatile project for personal use or thoughtful gifting.
Materials
- Paintbox Simply Super Chunky yarn Super Bulky Weight 6
- 8 mm hook
- Approximately 16 to 18 balls for size small
The list is the pattern's own wording.
Instructions
Every round is printed as the pattern wrote it, brackets and all. Open the key beside a round to see only the short forms that round uses.
Sleeves
- Round 1
Start with a slip knot and chain 43. Skip the 3rd chain from the hook and place 1 DC in every chain.
Key1
- DC
- double crochet
- Rounds 2–16
Chain 2, turn, and work 1 DC in the BLO of every stitch, for a total of 15 rows to complete each sleeve panel.
Key2
- BLO
- back loop only
- DC
- double crochet
Front Panels
- Round 1
Start with a slip knot and chain 32. Chain 2, skip the 3rd chain, and work 1 DC in every chain.
Key1
- DC
- double crochet
- Rounds 2–4
Chain 2, turn, and work 1 DC in the BLO for Rows 2 to 4.
Key2
- BLO
- back loop only
- DC
- double crochet
- Round 5
(Hood Row 1): At the end of Row 4, chain 36 for the hood extension; skip the next chain and work 1 DC in every chain back down the hood foundation; continue with 1 DC in the BLO across the main panel.
Key2
- BLO
- back loop only
- DC
- double crochet
- Rounds 6–12
(Hood Rows 2-8): Chain 2, turn, and work 1 DC in the BLO back up the hood; place 2 DC in the last stitch at the top of the hood for each increase; continue repeating the rows until you complete 8 total hood rows.
Key2
- BLO
- back loop only
- DC
- double crochet
Back Panel
- Round 1
Start with a slip knot and chain 34. Chain 2, skip the 3rd chain, and work 1 DC in every chain.
Key1
- DC
- double crochet
- Rounds 2–24
Chain 2, turn, and work 1 DC in the BLO for every row, continuing for a total of 24 rows.
Key2
- BLO
- back loop only
- DC
- double crochet
Sleeve Cuffs
- Round 1
Chain 1 and work 1 SC around the entire wrist edge; slip stitch to join.
Key1
- SC
- single crochet
- Round 2
Chain 1, work 3 SC then 1 SC decrease, repeat around; slip stitch to join.
Key1
- SC
- single crochet
- Round 3
Chain 1, begin with 1 SC decrease then work 3 SC, repeat around; slip stitch to join.
Key1
- SC
- single crochet
- Rounds 4–5
Chain 1, work 2 SC then 1 SC decrease, repeat around; slip stitch to join, for two rounds.Cut and fasten off, then repeat on the second sleeve.
Key1
- SC
- single crochet
Bottom Edging
- Round 1
Reattach yarn at the bottom corner, chain 1, and work 1 row of SC across.
Key1
- SC
- single crochet
- Round 2
Chain 1, turn, work 3 SC then 1 SC decrease, repeat across.Cut and fasten off and weave in all remaining ends.
Key1
- SC
- single crochet
Making up
- Step 1Turn all panels inside out for seaming.
- Step 2Attach the two front panels to the back panel along the shoulders.
- Step 3Seam the two hood edges together.
- Step 4Fold each sleeve panel and seam the long edge to form a tube.
- Step 5Attach each sleeve to the armhole opening.
- Step 6Seam the sides of the front and back panels together from underarm to hem.
Notes from the pattern
- An 8mm hook is used throughout every part of this pattern, so gauge checks and swatching should be done with that same hook before starting the sleeves or panels.
- Stitch markers are useful at the turn of each row in the BLO sections, since working into the wrong loop is easy to miss in a chunky, textured fabric until several rows later.
- Super Bulky Weight 6 yarn works up quickly, which means tension should be checked early on the first sleeve, as a loose or tight hand will show clearly over 15 rows.
- No colour changes are used anywhere in this pattern, so all yarn ends to weave in come only from starting and fastening off each of the seven panels.
- The hoodie can be customized in length, color, and sleeve width, making it a versatile project for personal use or thoughtful gifting.
The essentials
- Rounds
- 14
- Parts
- 5
- Level
- Intermediate
- Time
- 4-6 hours
- Hook
- 8 mm
- Yarn
- Super Bulky
Stitches you will use
- Back loop only double crochet (BLO) Used across every panel after the foundation row; working consistently into the back loop only is what produces the ribbed texture, so missing a loop on any row will show as a flat patch.
- Hood shaping with increases Appears in the Front Panels from Round 5 onward, where a 36-chain extension is worked and 2 DC increases are placed at the top of the hood across 8 rows; keeping the increase at the same stitch each row keeps the hood symmetrical.
- Flat panel seaming Needed for all assembly steps, including shoulder seams, the hood seam, sleeve tubes and side seams; turning panels inside out before seaming, as the assembly notes, keeps stitches aligned and the seam less visible on the right side.
Substituting yarn
- Acrylic, Super Bulky (Weight 6)
- Closest match to the original fibre; keeps the same 8mm hook and stitch counts, with slightly less drape and a lighter overall garment weight.
- Wool blend, Bulky (Weight 5)
- A smaller hook, around 6 to 6.5mm, is needed to match gauge; the finished hoodie will be noticeably smaller and denser than the sizing given unless extra rows are added.
- Cotton blend, Super Bulky (Weight 6)
- Hook size stays close to 8mm but the fabric drapes less and feels heavier on the body, which suits a more structured, less slouchy hoodie.
Washing and care
- Hand wash the finished hoodie in cool water and lay it flat to dry, since Super Bulky acrylic yarn can stretch out of shape under the weight of water if hung.
- Reshape the hood and cuffs gently while damp and store the folded garment flat rather than on a hanger, to keep the oversized silhouette from sagging at the shoulders.
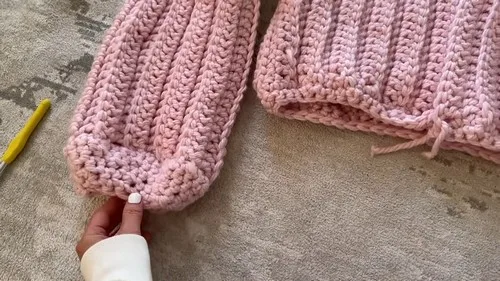
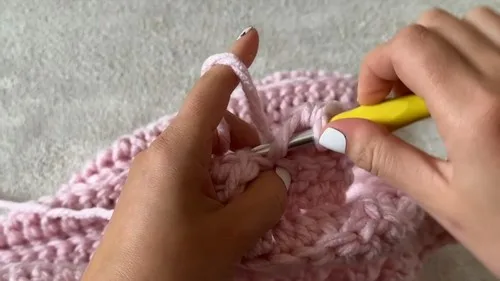
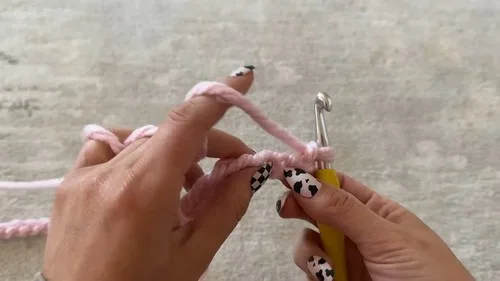
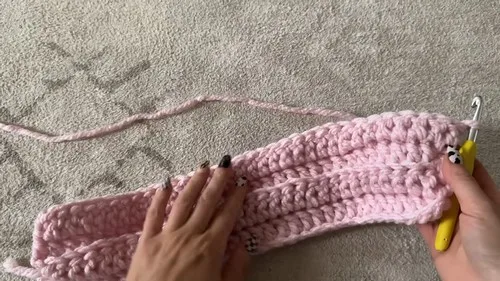
The photographs taken while this was being made
Every one was taken by whoever published the pattern, in the order the source listed them.
FAQs
Questions
Is double crochet the same stitch as UK treble crochet?
Yes, the double crochet used throughout this pattern is called treble crochet in UK terminology. The stitch itself does not change, only the name used for it.
How much yarn is needed for this hoodie?
The materials list calls for approximately 16 to 18 balls of Super Bulky Weight 6 yarn for a size small. Larger sizes worked from the same panel structure would need proportionally more.
Why is the hood worked as part of the front panels instead of separately?
The hood extension is built directly onto Round 5 of each front panel with an added 36-chain foundation, then shaped with increases over 8 rows. This keeps the hood seam to a single join down the centre rather than attaching a separate piece.
Can this pattern be made without a hood?
The hood rows are a distinct stage within the Front Panels, starting at Round 5, so stopping the front panels after Round 4 would leave a hoodless sweater front. The bottom edging and assembly steps would still apply as given.
What hook size does this pattern use throughout?
An 8mm hook is used for every part, from the sleeves through to the bottom edging. The same hook is used consistently, with no size changes between panels.
These answers came from whoever first published the pattern, kept word for word.