 EVERY CROCHET
 Bags & Totes 14 rounds No account, no download
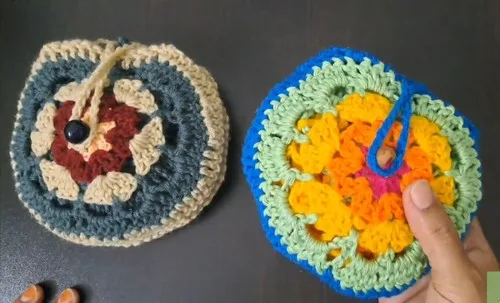
Mesh market bag with drawstring pouch and chained handles
A double crochet mesh market bag pattern with a drawstring pouch and chained handles, crocheted in two joined mesh panels.
- Skill
- Intermediate
- Time
- 4-6 hours
- Yarn weight
- Worsted
- Hook
- 4.5 mm

Intermediate
What the original write-up called it. Nothing here is graded again.

Worsted
What the sample was worked in. Any weight works; the size moves with it.

4-6 hours
What the original page reckoned. Your own pace is the one that matters.
About this pattern
This is a two-panel mesh market bag worked in double crochet, joined into a tote shape with an extended chain-loop body, a drawstring pouch inserted through a marked gap, and two chained handles. It needs a 4.5mm hook, a stitch marker for the pouch opening and handle placement, and both acrylic and cotton yarn for the different bag sections.
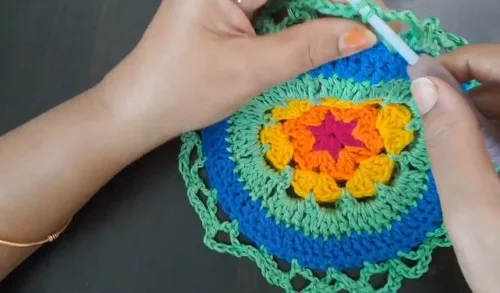
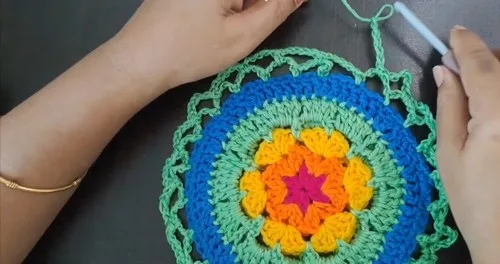
This market bag is built from double crochet worked into chain-1 gaps to create an open, stretchy mesh fabric. Two matching mesh panels form the sides, each starting from a magic circle and expanding through alternating rounds of shells and fan stitches, which is what gives the finished mesh its lacy, load-bearing structure rather than a solid one.
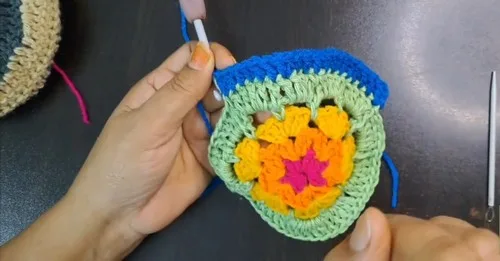
Construction works outward and then up: each mesh panel grows from its centre circle to a final round of shell increases, after which the two panels are joined wrong sides together around the edge. A chain-loop bag body is worked from that joined opening to extend the depth, a drawstring pouch is set into one side via a marked gap, and two matching chained handles are built and attached last.
Materials
- Acrylic yarn
- Cotton yarn
- 4.5 mm crochet hook
- Yarn needle
- Stitch marker
- Scissors
The list is the pattern's own wording.
Instructions
Every round is printed as the pattern wrote it, brackets and all. Open the key beside a round to see only the short forms that round uses.
Mesh Panel
Make two identical mesh panels using these same rounds.
- Round 1
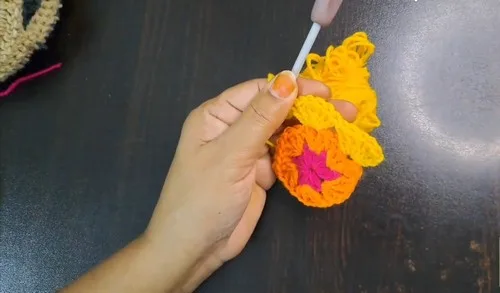
Make a slip knot and create a magic circle; chain 3 (counts as first dc), then work 11 double crochets into the circle; pull the circle tight and slip stitch to the top of the beginning chain-3; chain 1 and cut the yarn. (12)
Key1
- dc
- double crochet
- Round 2
Attach new color with a slip stitch in any space; chain 3, work 1 more double crochet in same space; chain 1, then work 2 more double crochets in the same space; skip next 2 dc; in the next space work 2 dc, chain 1, 2 dc, repeat around; slip stitch and change color.
Key1
- dc
- double crochet
- Round 3
In each chain-1 space, work 6 double crochets; slip stitch to join.
- Round 4
Form a loop and slip stitch; single crochet in same space, chain 4; skip 3 dc, half double crochet in next space; chain 4, hdc in next space — repeat around; chain 4, in each chain-4 space work 4 double crochets; in hdc spaces, work 1 dc, repeat around; slip stitch to join.
Key2
- hdc
- half double crochet
- dc
- double crochet
- Round 5
Change color; in any space, chain 3 and work 1 more dc; work 5 dc, one in each of next 5 stitches; then work 2 dc in next stitch, repeat around; slip stitch to join.
Key1
- dc
- double crochet
Bag Body
- Round 1
Attach yarn at the beginning of the opening; chain 5, skip 2 stitches, single crochet in the 3rd; repeat this pattern around the opening.
- Round 2
Chain 5, single crochet in each loop from the previous round.Continue repeating Round 2 for desired length, changing colors as desired.
Handles
- Round 1
Attach yarn and work 3 half double crochets in each loop around.
- Round 2
Chain 45 for the handle; skip 6 spaces and join with single crochet.Mark the opposite side of the opening for the placement of the second handle.
- Round 3
Single crochet to marker.
- Round 4
Chain 45 and join to marker.
- Round 5
Single crochet around.
- Round 6
Half double crochet in each chain of the handles.
- Round 7
Slip stitch to join, chain 1, and cut yarn.
Making up
- Step 1Repeat all previous steps to make a second identical mesh panel.
- Step 2Place wrong sides together and single crochet around to join.
- Step 3After a few stitches, skip 14 stitches, mark the 15th with stitch marker.
- Step 4Continue single crocheting.
- Step 5When reaching the marker, remove it and chain 25.
- Step 6Join with a single crochet in next stitch and continue single crocheting around.
- Step 7Fasten off.
- Step 8Weave in all ends.
- Step 9Turn the bag inside out and insert the pouch into the opening.
- Step 10Sew on a button to match the loop closure.
Notes from the pattern
- The pattern calls for a single 4.5mm hook throughout; swap only within a similar diameter, since the mesh's open chain-1 and chain-4 spaces depend on that gauge to hold their shape.
- A stitch marker is used twice for very different jobs: marking the 15th stitch for the drawstring pouch gap, and marking the opposite side of the bag opening for the second handle, so keep two markers on hand or move one carefully.
- Tension in the mesh panels should stay loose enough that the chain-1 and chain-4 spaces open up under light pull; working the shells too tightly is the main reason the mesh ends up stiff instead of flexible.
- Colour changes are worked at slip-stitch joins at the end of a round in the mesh panels and body, with the yarn cut and a new strand attached rather than carried, so ends need weaving in at each change.
The essentials
- Rounds
- 14
- Parts
- 3
- Level
- Intermediate
- Time
- 4-6 hours
- Hook
- 4.5 mm
- Yarn
- Worsted
Stitches you will use
- Magic circle start Used to begin each of the two mesh panels in Round 1; keep the centre pulled fully closed before working the first double crochet round, or the panel will show a hole at its core.
- Chain-space shell mesh Rounds 2 through 5 of each mesh panel work shells and fans into chain-1 and chain-4 spaces rather than into stitches; count spaces, not stitches, to keep the mesh sitting flat.
- Joining new colour and fastening securely Colour changes happen at slip-stitch joins in the mesh panels and again through the bag body and handles; leave tails long enough to weave in without pulling the join tight.
Troubleshooting
The mesh panel cups or bows instead of
This usually means the shell increases in Round 5 were skipped or missed in a space; check that each shell's five stitches, plus the 2-dc increase, landed in every repeat around the round.
The chain-5 loops along the bag body look uneven in size.
Each Round 2 repeat should land its single crochet in the same loop position from the previous round; working into the wrong loop shifts the spacing and makes the loops drift larger or smaller as the body grows.
A finished handle twists along its
The handle's chain-45 foundation chains in Rounds 2 and 4 need to stay untwisted before joining with a single crochet; recheck that the chain lies flat against the previous round before closing each loop.
Substituting yarn
- 100% cotton, worsted weight
- Produces a crisper, less stretchy mesh than acrylic and holds the bag's shape better when loaded, though it is heavier to work with over the full pattern; keep the 4.5mm hook.
- Cotton-acrylic blend, worsted weight
- Sits between the two materials listed, giving some of cotton's structure with acrylic's softer drape; little to no hook change is needed from the 4.5mm called for.
- Jute or rope-style cord, aran to bulky weight
- Makes a much sturdier, heavier-duty bag suited to produce and market use, but the thicker strand will need a larger hook than 4.5mm to keep the mesh spaces from closing up.
Washing and care
- Acrylic sections can go through a gentle machine wash and lie flat to dry; cotton sections also wash well but may shrink slightly, so check both yarn bands before machine drying.
- Reshape the mesh panels by hand while still damp, easing the chain-1 and chain-4 spaces back open, then store the bag flat or loosely folded rather than hung, to keep the handles from stretching under their own weight.
The photographs taken while this was being made
Every one was taken by whoever published the pattern, in the order the source listed them.
FAQs
Questions
Why does the pattern use both acrylic and cotton yarn?
The materials list includes both fibres so the maker can choose or combine them by section. Acrylic keeps the mesh panels light and stretchy, while cotton suits the bag body or pouch where more structure is wanted.
What is the chain-1 space doing in the mesh panel rounds?
The chain-1 and chain-4 spaces created in Rounds 2 and 4 are where the next round's stitches are worked, not the stitches themselves. Losing track of these spaces is the most common reason the mesh pattern goes off count.
Where does the drawstring pouch actually attach?
It is set in through the gap left by skipping 14 stitches and marking the 15th during the joining round of the two mesh panels. The pouch is inserted after turning the bag inside out, then the opening is closed with a chain-25 drawstring channel.
How are the two handles kept symmetrical?
The second handle's position is set by marking the side of the bag opening directly opposite the first handle before starting its rounds. Using the same stitch marker placement on both sides keeps the handles balanced when the bag is carried.
Can the bag body be made taller than shown?
Yes, Round 2 of the bag body is designed to be repeated for as many rounds as needed to reach the desired depth, changing colour as wanted along the way. The chain-5 loop structure stays consistent no matter how many times that round is repeated.
These answers came from whoever first published the pattern, kept word for word.