 EVERY CROCHET
Sweaters 15 rounds No account, no download
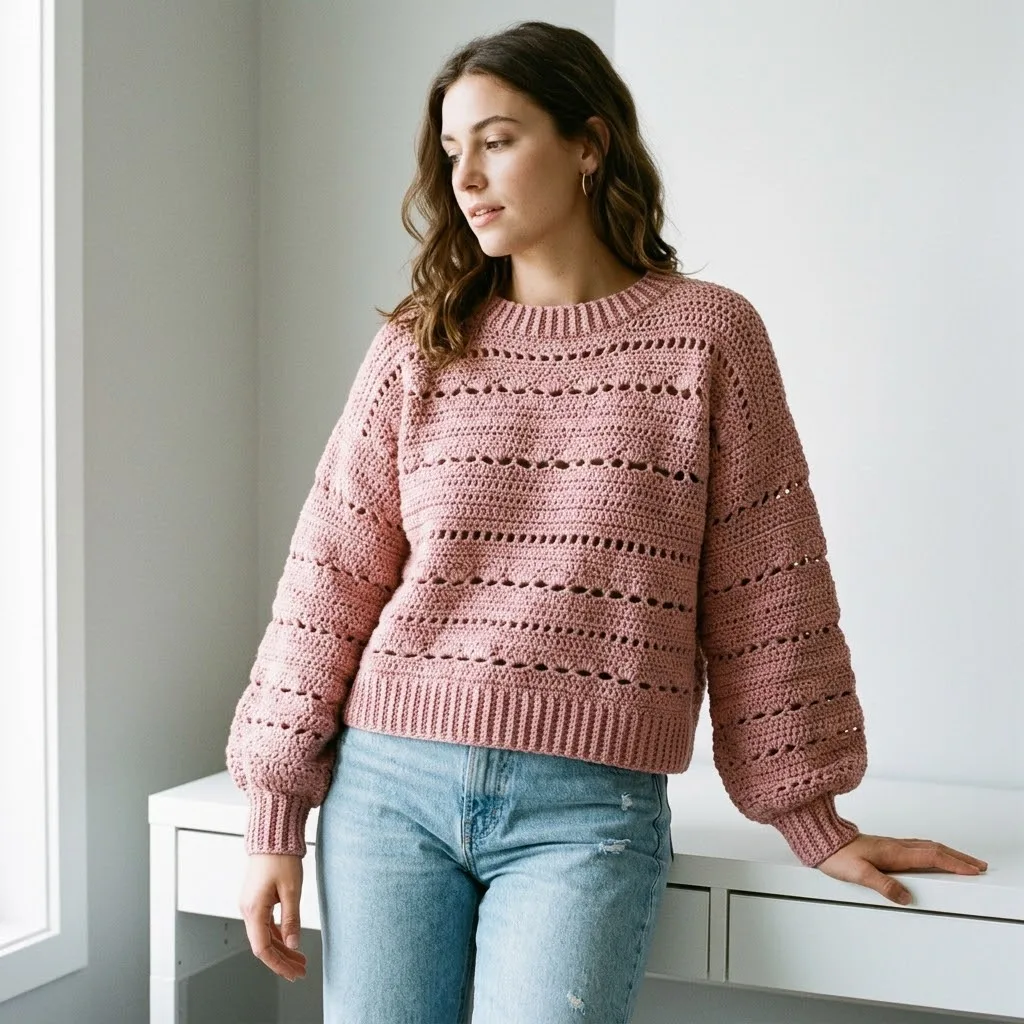
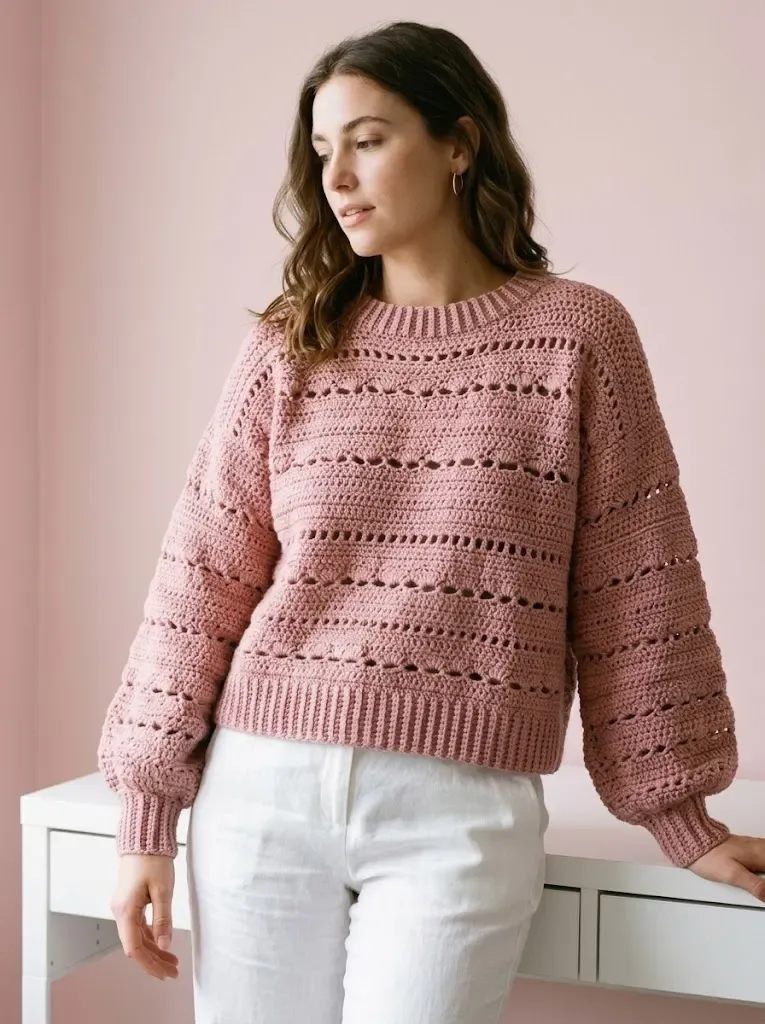
Dusty rose lace panel sweater worked in double crochet
Dusty rose sweater with a lace panel in double crochet (US) / treble crochet (UK); both stitch names are given.
- Skill
- Intermediate
- Time
- 8-12 hours
- Yarn weight
- Worsted
- Hook
- 5.0 mm

Intermediate
What the original write-up called it. Nothing here is graded again.
Worsted
What the sample was worked in. Any weight works; the size moves with it.
8-12 hours
What the original page reckoned. Your own pace is the one that matters.
About this pattern
A dusty rose sweater worked flat in rows, combining ribbed welts in back loop single crochet (UK: double crochet) with a lace body in double crochet (UK: treble crochet) broken by a chain-space row. The ribbing is worked first, then rotated so the body and sleeves grow from its long edge, using two hook sizes and about 1,200 to 1,400 yards of worsted weight yarn.
This dusty rose sweater is built from a lace panel worked in double crochet (UK: treble crochet), the open chain-space row set between solid double crochet rows to create drop-stitch lace across the body and sleeves. Close ribbing in back loop single crochet finishes the hem and cuffs, giving the garment a soft, textured surface without heavy cabling or colourwork, suited to a cotton blend or soft acrylic yarn.
Construction starts with the ribbing, worked flat in rows with the smaller hook and turned ninety degrees once finished so the body can be picked up along its long edge. The body is then worked upward in rows with the larger hook, holding straight double crochet rows until the lace row breaks the fabric with chain-1 spaces, followed by a recovery row that closes them again. Sleeves repeat the same ribbing-then-body sequence on a smaller scale, and the piece finishes with shoulder shaping and seaming.
Materials
Yarn
- Approximately 1,200 to 1,400 yards of worsted weight yarn (weight category 4)
- Sample shown in a dusty rose or mauve shade
Suggested brands
- Lion Brand Basic Stitch, Paintbox Yarns Simply Aran, or Drops Paris
Hook
- Size H/8 (5.0mm) crochet hook for main body
- Size G/6 (4.0mm) crochet hook for ribbing sections
Notions
- Yarn needle for seaming
- Stitch markers
- Measuring tape
- Scissors
Gauge
- 14 stitches and 16 rows = 4 inches in double crochet with larger hook
- Always check your gauge before starting
- Skill Level
- Working flat in rows
- Double crochet and chain stitches
- Creating chain spaces for lace effect
- Basic ribbing using back loop single crochet
- Seaming pieces together
- Simple neckline shaping
- Size Information
Bust
- 42 inches
The list is the pattern's own wording.
Instructions
Every round is printed as the pattern wrote it, brackets and all. Open the key beside a round to see only the short forms that round uses.
Ribbing
Using smaller hook, ch 11.
- Round 1
Sc in 2nd ch from hook and in each ch across, turn. (10 sc)
Key2
- ch
- chain
- sc
- single crochet
- Round 2
through 70: Ch 1, sc in BLO of each st across, turn. (10 sc) You should have approximately 70 rows or until the ribbing measures 20 inches unstretched. Fasten off but do not cut yarn.
Key4
- blo
- back loops only
- ch
- chain
- st
- stitch
- sc
- single crochet
Body
Rotate ribbing 90 degrees. Using larger hook, work along the long edge of the ribbing.
- Round 1
Ch 3 (counts as first dc here and throughout), work 69 dc evenly across the long edge of ribbing, turn. (70 dc)
Key2
- ch
- chain
- dc
- double crochet
- Round 2
through 5: Ch 3, dc in each st across, turn. (70 dc)
Key3
- ch
- chain
- st
- stitch
- dc
- double crochet
- Round 6
Lace Row Ch 3, dc in next st, *ch 1, sk 1, dc in next 2 sts*, rep from * to * across, turn. (70 sts including ch-1 sps)
Key6
- sts
- stitches
- rep
- repeat
- ch
- chain
- st
- stitch
- dc
- double crochet
- sk
- skip
- Round 7
Recovery Row Ch 3, dc in each dc and each ch-1 sp across, turn. (70 dc)
Key2
- ch
- chain
- dc
- double crochet
- Round 8
through 11: Ch 3, dc in each st across, turn. (70 dc) Rep Rows 6 through 11 five more times, or until piece measures approximately 15 inches from bottom of ribbing.
Key4
- rep
- repeat
- ch
- chain
- st
- stitch
- dc
- double crochet
Cuff Ribbing
Using smaller hook, ch 9.
- Round 1
Sc in 2nd ch from hook and each ch across, turn. (8 sc)
Key2
- ch
- chain
- sc
- single crochet
- Round 2
through 30: Ch 1, sc in BLO of each st across, turn. (8 sc)
Key4
- blo
- back loops only
- ch
- chain
- st
- stitch
- sc
- single crochet
Sleeve Body
Rotate and work along long edge with larger hook.
- Round 1
Ch 3, work 39 dc evenly across long edge of ribbing, turn. (40 dc)
Key2
- ch
- chain
- dc
- double crochet
- Round 2
through 4: Ch 3, dc in each st across, turn. (40 dc)
Key3
- ch
- chain
- st
- stitch
- dc
- double crochet
- Round 5
Increase Row Ch 3, 2 dc in next st, dc across to last 2 sts, 2 dc in next st, dc in last st, turn. (42 dc)Rows 6 through 9: Continue in pattern, working lace row on Row 6 and recovery row on Row 7.Continue working in pattern with lace panels every 6 rows. Work increase row every 4th row until you have 56 dc.Work even in pattern until sleeve measures 20 inches from cuff.
Key4
- sts
- stitches
- ch
- chain
- st
- stitch
- dc
- double crochet
Ribbing
- (6)Round 1
Sc in 2nd ch from hook and each ch across, sl st in next 2 sc of neckline, turn. (6 sc in ribbing)
Key4
- sl st
- slip stitch
- ch
- chain
- st
- stitch
- sc
- single crochet
- Round 2
Sk sl sts, sc in BLO of each ribbing st, turn.
Key5
- sts
- stitches
- blo
- back loops only
- st
- stitch
- sc
- single crochet
- sk
- skip
- Round 3
Ch 1, sc in BLO of each st, sl st in next 2 sc of neckline, turn. Rep Rows 2 and 3 around entire neckline. Join ends of ribbing with sl st. Fasten off and weave in ends.
Key6
- sl st
- slip stitch
- blo
- back loops only
- rep
- repeat
- ch
- chain
- st
- stitch
- sc
- single crochet
Hook
Size H/8 (5.0mm) crochet hook for main body Size G/6 (4.0mm) crochet hook for ribbing sections
Notions
Yarn needle for seaming Stitch markers Measuring tape Scissors
Gauge
14 stitches and 16 rows = 4 inches in double crochet with larger hook Always check your gauge before starting
Recovery Row
These two rows together create one lace panel. The chain spaces make the holes, and the recovery row fills everything back in with solid double crochet.
Next Row
Continue in established pattern (solid rows with lace panels every 6th row) for 6 more inches.
Right Shoulder
Work 2 more rows on these 18 sts. Fasten off.
Left Shoulder
Work 2 more rows. Fasten off.
Next Row
Continue decreasing at neck edge every row until 18 sts remain. Work even until front measures same length as back. Fasten off.
Next Row
Next 4 Rows: Ch 3, dc2tog, dc across to last 3 sts, dc2tog, dc in last st, turn.
Fasten off.
Seaming
Yarn Ends:
Weave ends through several stitches on the wrong side, then double back to secure. Trim close to fabric.
Notes from the pattern
- Check gauge, 14 stitches and 16 rows to 4 inches in double crochet with the larger hook, before starting, since the lace row depends on an accurate stitch count across the 70-stitch body.
- Place stitch markers at the start of the lace row to track the ch-1 space pattern across the row, particularly useful on the first pass through the repeat.
- Work ribbing, body and sleeves from the same dye lot of the dusty rose or mauve shade; a cotton blend and a soft acrylic drape differently even at the same gauge, so keep fibre consistent across pieces.
The essentials
- Rounds
- 15
- Parts
- 15
- Level
- Intermediate
- Time
- 8-12 hours
- Hook
- 5.0 mm
- Yarn
- Worsted
Stitches you will use
- Back loop single crochet ribbing Used in the Ribbing and Cuff Ribbing sections; keep tension even across the full row count so the welt doesn't flare or pull in once rotated for the body.
- Chain-space lace row Appears once in Row 6 of the Body as *ch 1, sk 1, dc in next 2 sts*; miscounting the repeat shifts the 70-stitch total before the recovery row closes it again.
- Shoulder shaping and seaming Covers the Right Shoulder, Left Shoulder and Seaming sections; match row counts on each side before joining so the neckline sits level.
Troubleshooting
The ribbing curls or won't lie flat once picked up for the body.
This usually comes from tension pulled too tight in the back loop single crochet; keep rows relaxed over the full row count so the welt sits flat before rotating it 90 degrees.
The lace row looks too open or the stitch count drifts from 70.
A missed chain-1 space or skipped stitch in the *ch 1, sk 1, dc in next 2 sts* repeat is the usual cause; count in groups of three sts as the row is worked to catch it early.
The body doesn't sit square on the ribbing after rotating it.
This comes from working more or fewer than 69 dc into the long edge in Row 1 of the Body; space the stitches evenly along the full unstretched edge rather than bunching them near one end.
Substituting yarn
- Mercerised cotton, worsted weight
- Gives crisper definition in the lace row but less drape than a cotton blend; sizing up the larger hook slightly can soften the hand.
- Superwash wool blend, worsted weight
- Adds warmth and more give in the back loop single crochet ribbing, but gauge often runs looser, so swatch with the larger hook before starting the Body.
- Smooth acrylic, worsted weight
- Closest match to the lighter sample option; keeps similar stitch definition and hook sizes while lowering cost.
Washing and care
- Hand wash in cool water or run a gentle machine cycle for either the cotton blend or soft acrylic named in the materials, since both hold shape without felting.
- Dry flat on a towel away from direct heat, easing the lace panel back into shape while damp, and store folded rather than hung so the ribbing doesn't stretch out of shape.
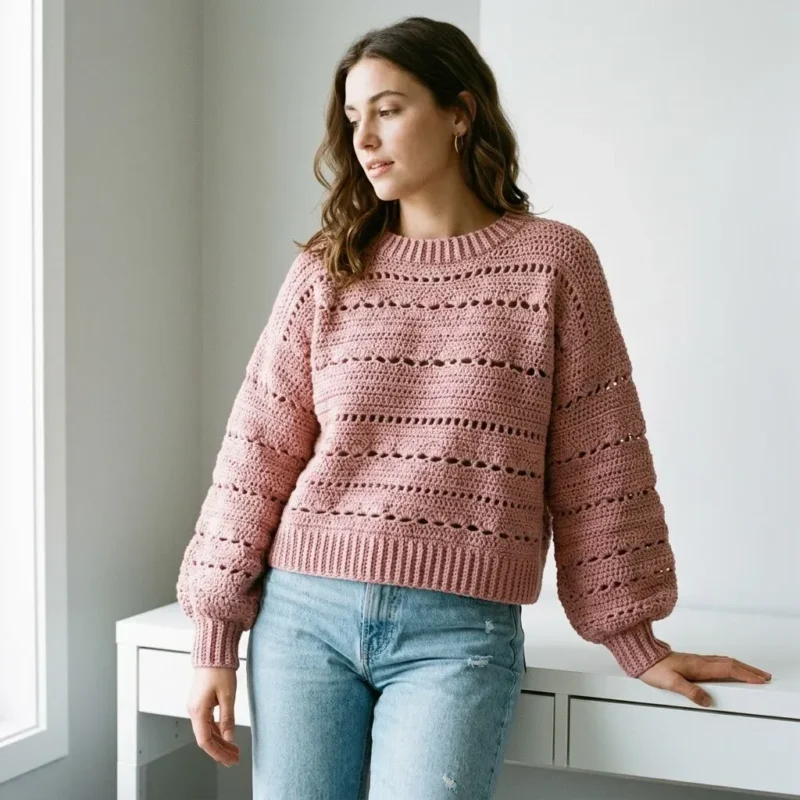
The photographs taken while this was being made
Every one was taken by whoever published the pattern, in the order the source listed them.
FAQs
Questions
What does "dc" mean in UK terms?
In this pattern, dc stands for the US double crochet, which is the same stitch as a UK treble crochet (tr). The ribbing's sc (US single crochet) corresponds to a UK double crochet.
Why is the ribbing worked first and then rotated?
Working the ribbing as a long strip in rows, then turning it 90 degrees, lets the body be picked up along its long edge rather than its short one. This gives a stretchy welt that runs opposite to the direction of the body rows.
How much yarn is needed in the dusty rose shade?
The materials list calls for approximately 1,200 to 1,400 yards of worsted weight yarn in total. The exact amount depends on gauge and finished size, so checking gauge before starting avoids running short mid-project.
What happens if gauge isn't checked before starting?
Since the lace row relies on a fixed stitch count across the body, a looser or tighter gauge than 14 stitches and 16 rows per 4 inches will shift the finished width and drape. Swatching with the larger hook first confirms gauge matches before working the Body section.
These answers came from whoever first published the pattern, kept word for word.