 EVERY CROCHET
 Baby & Kids 24 rounds No account, no download
Bobble stitch baby coverall worked from the legs up
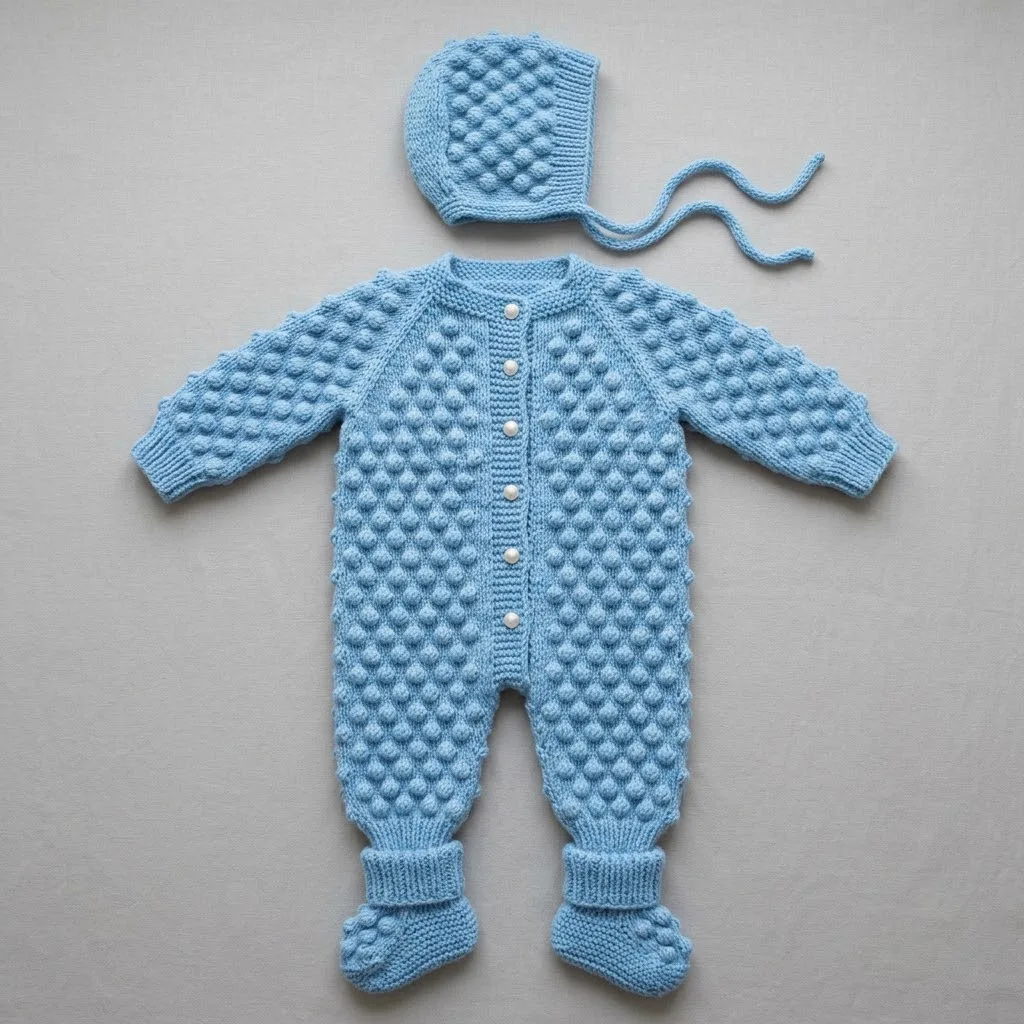
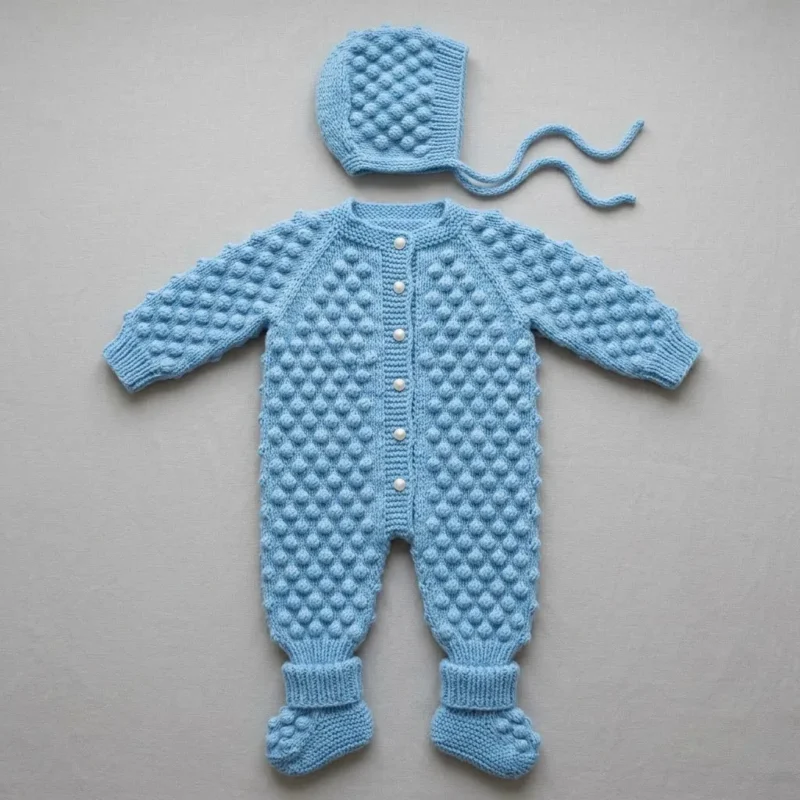
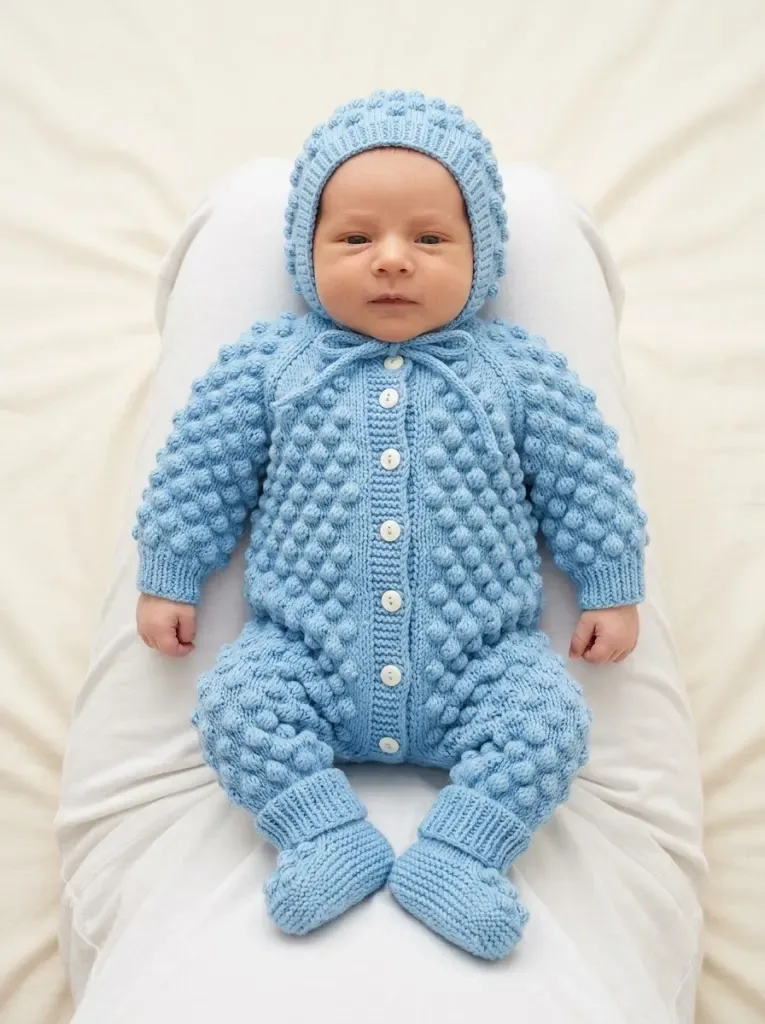
Sky blue bobble stitch baby coverall with matching bonnet and booties. Written in US crochet terms with UK equivalents noted.
- Skill
- Intermediate
- Time
- 6-9 hours
- Yarn weight
- DK (Light Worsted)
- Hook
- 4.0 mm

Intermediate
What the original write-up called it. Nothing here is graded again.

DK (Light Worsted)
What the sample was worked in. Any weight works; the size moves with it.

6-9 hours
What the original page reckoned. Your own pace is the one that matters.
About this pattern
This is a bobble stitch baby coverall set crocheted flat, starting with two legs joined at a gusset row, then split into front panels with sleeves, ribbed cuffs and a button band, plus a matching bonnet with ties and a pair of booties, all worked in the same stitch pattern. It needs roughly 400-450 yards of DK weight yarn, a 4.0mm hook for the bobble body, a 3.5mm hook for ribbed cuffs and edging, and six small buttons for the closure. Gauge is 18 stitches and 14 rows over 4 inches, sized for 0-3 months.
This coverall is worked in bobble stitch, a raised cluster technique from the same family as popcorn and puff stitches. Each bobble gathers five stitches into one closing loop, so five US double crochets (UK treble crochets) worked in the same stitch and drawn together produce a single bump. The background rows use US single crochet (UK double crochet), which is the naming difference worth flagging once, since a UK crocheter following the stitch names literally would produce a taller, more open fabric than intended.
Construction begins with two legs worked flat and separately over five rows each, then joined at a single row that adds a four-chain gusset at the crotch. The body continues in bobble pattern to 10 inches before armholes are shaped by slip-stitching over four stitches and decreasing at each edge. Above the armholes the piece splits into a left and right front panel, each shaped at the armhole, with sleeves, ribbed cuffs and a button band added, plus a matching bonnet and booties worked in the same stitch pattern.
This is an intermediate-skill pattern written for size 0-3 months. Finished measurements are approximately: chest 18 inches, length from shoulder to ankle 18 inches, sleeve length 7 inches, and bonnet circumference 14 inches.
Materials
- Approximately 400-450 yards of DK weight yarn (also called light worsted or category 3)
- A soft acrylic blend in sky blue was used, but any machine-washable DK weight yarn works; for baby items always choose something that can handle frequent washing
- 4.0mm (G/6) crochet hook for the main body
- 3.5mm (E/4) crochet hook for ribbed cuffs and edging
- 6 small buttons (approximately 10-12mm diameter)
- Yarn needle for weaving ends
- Stitch markers
- Measuring tape
- Scissors
The list is the pattern's own wording.
Instructions
Every round is printed as the pattern wrote it, brackets and all. Open the key beside a round to see only the short forms that round uses.
First Leg
With 4.0mm hook, ch 25.
- Round 1
Sc in 2nd ch from hook and in each ch across. (24 sts)
Key3
- sts
- stitches
- ch
- chain
- sc
- single crochet
- Round 2
Ch 1, turn. Sc in first st, *bob in next st, sc in next st* across. (24 sts, 12 bobbles)
Key5
- sts
- stitches
- bob
- bobble stitch: yarn over, insert hook into stitch, yarn over and pull up a loop, yarn over and pull through 2 loops (2 loops on hook); repeat this 4 more times in the same stitch (6 loops on hook); yarn over and pull through all 6 loops at once. Think of it as starting 5 double crochets in one stitch but finishing them all together at the top; the yarn bunches up and pops forward to create the raised bump.
- ch
- chain
- st
- stitch
- sc
- single crochet
- Round 3
Ch 1, turn. Sc in each st across. (24 sts)
Key4
- sts
- stitches
- ch
- chain
- st
- stitch
- sc
- single crochet
- Round 4
Ch 1, turn. Sc in first 2 sts, *bob in next st, sc in next st* across to last 2 sts, sc in last 2 sts. (24 sts, 11 bobbles)
Key5
- sts
- stitches
- bob
- bobble stitch: yarn over, insert hook into stitch, yarn over and pull up a loop, yarn over and pull through 2 loops (2 loops on hook); repeat this 4 more times in the same stitch (6 loops on hook); yarn over and pull through all 6 loops at once. Think of it as starting 5 double crochets in one stitch but finishing them all together at the top; the yarn bunches up and pops forward to create the raised bump.
- ch
- chain
- st
- stitch
- sc
- single crochet
- Round 5
Ch 1, turn. Sc in each st across. (24 sts) Repeat Rows 2-5 until piece measures approximately 6 inches from beginning, ending on a Row 5. Fasten off.
Key4
- sts
- stitches
- ch
- chain
- st
- stitch
- sc
- single crochet
Second Leg
Work exactly as First Leg but do NOT fasten off.
Joining Legs
- (52)Round 1
Joining row Ch 1, turn. Sc across Second Leg (24 sts), ch 4 for crotch gusset, then sc across First Leg (24 sts). (52 sts including ch)
Key3
- sts
- stitches
- ch
- chain
- sc
- single crochet
- Round 2
Ch 1, turn. Sc in first st, *bob in next st, sc in next st* across. (52 sts)
Key5
- sts
- stitches
- bob
- bobble stitch: yarn over, insert hook into stitch, yarn over and pull up a loop, yarn over and pull through 2 loops (2 loops on hook); repeat this 4 more times in the same stitch (6 loops on hook); yarn over and pull through all 6 loops at once. Think of it as starting 5 double crochets in one stitch but finishing them all together at the top; the yarn bunches up and pops forward to create the raised bump.
- ch
- chain
- st
- stitch
- sc
- single crochet
- Round 3
Ch 1, turn. Sc in each st across. (52 sts) Continue in established bobble pattern (alternating Rows 2-3 placement) until body measures 10 inches from joining row.
Key4
- sts
- stitches
- ch
- chain
- st
- stitch
- sc
- single crochet
Shape Armholes
- Round 1
Ch 1, turn. Sl st in first 4 sts, sc in each st across to last 4 sts, leave remaining sts unworked. (44 sts)
Key5
- sl st
- slip stitch
- sts
- stitches
- ch
- chain
- st
- stitch
- sc
- single crochet
- Round 2
Ch 1, turn. Sc2tog, work in bobble pattern to last 2 sts, sc2tog. (42 sts) Continue in pattern for 4 more inches. Fasten off.
Key3
- sc2tog
- single crochet 2 stitches together (decrease)
- sts
- stitches
- ch
- chain
Left Front Panel
With 4.0mm hook, ch 13.
Work bobble pattern as established on back panel, maintaining 12 stitches throughout.
Work leg section for 6 inches, matching back.
After joining (work one leg only, join with ch 2 at center), continue until piece measures same as back to armhole.
Shape Armhole
Decrease at armhole edge only (outside edge), keeping center front edge straight for button band.
Continue until piece matches back length. Fasten off.
Right Front Panel
Work as mirror image of Left Front Panel.
Sleeves
Make 2. With 4.0mm hook, ch 21.
- Row 1
Sc in 2nd ch from hook and each ch across. (20 sts)Work in bobble pattern, increasing 1 st at each end every 6th row until you have 28 sts. Continue even until sleeve measures 7 inches. Fasten off.
Key4
- sts
- stitches
- ch
- chain
- st
- stitch
- sc
- single crochet
Ribbed Cuffs
Switch to 3.5mm hook. Wrist Cuffs (make 2): Ch 7.
- Row 1
Sc in 2nd ch from hook and each ch across. (6 sts)
Key3
- sts
- stitches
- ch
- chain
- sc
- single crochet
- (6)Row 2
Ch 1, turn. Working in back loops only, sc in each st across. (6 sts) Repeat Row 2 until piece stretches to fit around sleeve opening. Join short ends with sl st. Attach to sleeve edge.Ankle Cuffs (make 2): Work same as wrist cuffs but ch 9 for starting chain (8 sts per row) and work until piece fits leg opening.
Key5
- sl st
- slip stitch
- sts
- stitches
- ch
- chain
- st
- stitch
- sc
- single crochet
Button Band
With 3.5mm hook and right side facing, join yarn at bottom of right front panel edge.
- Row 1
Work sc evenly up the entire front edge, approximately 3 sc per 2 rows.
Key1
- sc
- single crochet
- Row 2
Ch 1, turn. Sc in each st across.
Key3
- ch
- chain
- st
- stitch
- sc
- single crochet
- Row 3
Ch 1, turn. Sc in each st across. Fasten off.Repeat for left front panel, adding buttonholes on Row 2:
Key3
- ch
- chain
- st
- stitch
- sc
- single crochet
- Buttonhole Row
Sc in first 3 sts, *ch 2, sk 2 sts, sc in next 8-10 sts* 6 times evenly spaced, sc to end.
Key4
- sts
- stitches
- ch
- chain
- sc
- single crochet
- sk
- skip
Bonnet
With 4.0mm hook, ch 51.
- Row 1
Sc in 2nd ch from hook and each ch across. (50 sts)Work in bobble pattern for 4 inches.
Key3
- sts
- stitches
- ch
- chain
- sc
- single crochet
Shape Crown
Begin decreasing: sc2tog at beginning and end of every right side row until 20 sts remain.
Fold piece in half and seam the back of the crown closed.
Face Edging
With 3.5mm hook, work 2 rows of sc around face opening.
Ties (make 2): Ch 60. Sl st in 2nd ch from hook and each ch across. Fasten off.
Attach one tie to each bottom corner of bonnet.
Sole
With 4.0mm hook, ch 9.
- Round 1
Sc in 2nd ch from hook, sc in next 6 ch, 3 sc in last ch. Working on opposite side of chain, sc in next 6 ch, 2 sc in last ch. Join with sl st. (18 sts)
Key5
- sl st
- slip stitch
- sts
- stitches
- ch
- chain
- st
- stitch
- sc
- single crochet
- Round 2
Ch 1, 2 sc in first st, sc in next 6 sts, 2 sc in each of next 3 sts, sc in next 6 sts, 2 sc in last 2 sts. Join. (26 sts)
Key4
- sts
- stitches
- ch
- chain
- st
- stitch
- sc
- single crochet
- Round 3
Ch 1, sc in each st around. Join. (26 sts)
Key4
- sts
- stitches
- ch
- chain
- st
- stitch
- sc
- single crochet
Sides
- Rounds 4–6
Working in back loops only for Round 4, then both loops for Rounds 5-6, sc in each st around. Join. (26 sts)
Key3
- sts
- stitches
- st
- stitch
- sc
- single crochet
Toe Shaping
- Round 7
Sc in first 8 sts, sc2tog 5 times, sc in remaining sts. Join. (21 sts)
Key3
- sc2tog
- single crochet 2 stitches together (decrease)
- sts
- stitches
- sc
- single crochet
- Round 8
Sc in first 6 sts, sc2tog 4 times, sc in remaining sts. Join. (17 sts)
Key3
- sc2tog
- single crochet 2 stitches together (decrease)
- sts
- stitches
- sc
- single crochet
Cuff
Work 4 rounds of bobble pattern around ankle opening.
Switch to 3.5mm hook and work 3 rounds of sc for cuff. Fasten off.
Sewing the Coverall
1. Lay back panel flat with right side up 2. Place front panels on top, right sides together, matching shoulder edges 3. Seam shoulders using whip stitch or mattress stitch
4. Pin sleeves into armhole openings, easing any fullness 5. Sew sleeves in place 6. Sew side seams from underarm to ankle in one continuous seam
7. Sew inner leg seams from crotch to ankle 8. Attach cuffs to wrists and ankles 9. Sew buttons opposite buttonholes
Finishing
Weave in all ends securely. For baby items, make sure no loose yarn can come undone during washing.
Block gently if needed. Steam blocking works well for acrylic yarns.
Notes from the pattern
- Check gauge over 18 stitches and 14 rows in bobble pattern with the 4.0mm hook before starting; a coverall worked to the wrong gauge either won't fit over a nappy or will be too loose.
- Six buttons at approximately 10-12mm diameter are listed for the closure; place them against the front panel shaping during assembly rather than spacing them independently.
- Around 400-450 yards of DK weight yarn is needed; buy it from a single dye lot, since bobble texture shows colour variation more noticeably than a plain stitch fabric would.
- Finished measurements for the 0-3 month size are approximately 18 inches chest, 18 inches shoulder-to-ankle length, 7 inch sleeves, and a 14 inch bonnet circumference.
The essentials
- Rounds
- 24
- Parts
- 19
- Level
- Intermediate
- Time
- 6-9 hours
- Hook
- 4.0 mm
- Yarn
- DK (Light Worsted)
Stitches you will use
- Bobble stitch construction Used throughout First Leg, Joining Legs and the body rows; keep all six loops on the hook until the final pull-through so the bobble stays raised rather than collapsing flat.
- Chain-gusset joining Appears once at the Joining Legs row, where a 4-chain links the two legs; work evenly into all four chain stitches so the crotch lies flat rather than gapping.
Troubleshooting
The bobbles flatten instead of standing proud
This happens when the final yarn-over-and-pull-through-six-loops step is worked loosely; pull that closing stitch snug and avoid tightening the five preceding loops beforehand.
The crotch gusset gaps or puckers at the join
Caused by working an uneven number of stitches into the four-chain gusset; work into all four chain stitches evenly and check the row lies flat against both legs before continuing.
One armhole sits higher than the other
Comes from slip-stitching or leaving a different number of stitches unworked on each side during Shape Armholes; count the four slip-stitched and four unworked stitches at each edge before working the row.
Substituting yarn
- Cotton DK (8-ply)
- Gives crisper bobble definition and a cooler, more matte finish than acrylic, but has less stretch, so the ribbed cuffs at 3.5mm should be checked for enough give.
- Merino wool DK
- Adds softness and drape but is not machine washable unless superwash-treated, and repeated washing can felt the bobbles slightly, softening their raised texture.
- Bamboo-cotton blend DK
- Adds sheen and drape at the same 4.0mm and 3.5mm hook pair, but is heavier per yard, so the 400-450 yard estimate may not stretch as far.
Washing and care
- Wash on a gentle machine cycle if the acrylic blend named in the materials list is machine washable, and avoid high heat, which can flatten the bobble texture.
- Dry flat rather than tumble drying to keep the bobbles raised, and store the coverall folded rather than hung so the ribbed cuffs don't stretch out of shape.
The photographs taken while this was being made
Every one was taken by whoever published the pattern, in the order the source listed them.
FAQs
Questions
Why does the pattern call for two different hook sizes?
The 4.0mm hook keeps the bobble stitch pattern open enough for the bobbles to pop forward on the body. The 3.5mm hook tightens the ribbed cuffs and edging so they sit snugly at the wrists and legs.
What is the four-chain at the Joining Legs row for?
It forms the crotch gusset, adding ease between the two legs once they're combined into one body piece. It is worked into on the following row alongside the stitches of both legs.
How is the front opening shaped?
After the armholes are shaped, the body splits into a Left Front Panel and a Right Front Panel, each shaped separately at the armhole, then joined by sleeves, ribbed cuffs and a button band with buttonholes worked on the left panel.
Do the buttons need to be spaced to a specific measurement?
The materials list calls for six buttons around 10-12mm across, but exact placement is judged against the closure shaping worked into the front panels rather than measured independently.
These answers came from whoever first published the pattern, kept word for word.