 EVERY CROCHET
 Home Decor 20 rounds No account, no download
Round mandala doily crochet pattern for home decor
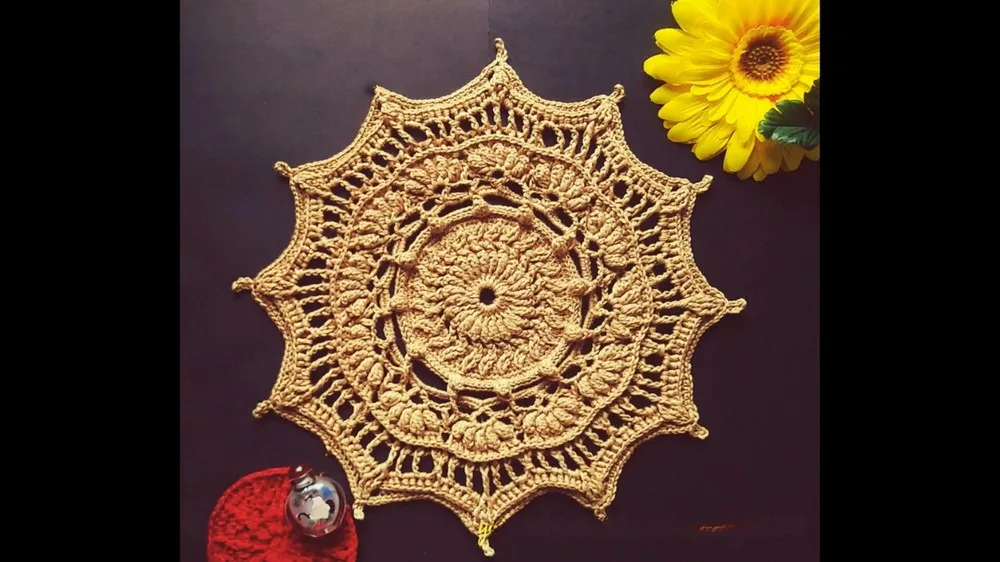
Mandala doily worked in double crochet with front post stitches, built up over 20 rounds from a chain-12 ring to a wide sunburst finish.
- Skill
- Intermediate
- Time
- 4-6 hours
- Yarn weight
- Worsted

Intermediate
What the original write-up called it. Nothing here is graded again.

Worsted
What the sample was worked in. Any weight works; the size moves with it.

4-6 hours
What the original page reckoned. Your own pace is the one that matters.
About this pattern
A flat, round mandala doily worked in double crochet from the centre outward over 20 rounds, starting with a 12-chain ring and 24 double crochets. Later rounds add front post double crochets, popcorn stitches and chain spaces to build texture and width. It needs a crochet hook, yarn, scissors, a tapestry needle, stitch markers and a measuring tape, and suits an intermediate maker comfortable tracking round counts.
This mandala doily belongs to the double crochet stitch family, worked outward in concentric rounds from a central chain circle to build the layered, sunburst look typical of mandala-style pieces. It reads as a flat decorative round suited to a table centre, wall hanging or shelf accent, with texture built up through post stitches rather than colour changes alone.
Construction starts with a foundation chain joined into a ring, into which 24 double crochets are worked and closed with a slip stitch to set the base round. Subsequent rounds build on this foundation using front post double crochets, popcorn stitches and chain spaces across a total of 20 rounds, so each round locks into the stitches below it and the piece grows outward symmetrically as the rounds are completed.
Materials
- Yarn
- Crochet Hook
- Scissors
- Tapestry Needle
- Stitch Markers
- Measuring Tape
The list is the pattern's own wording.
Instructions
Every round is printed as the pattern wrote it, brackets and all. Open the key beside a round to see only the short forms that round uses.
Material Needed
- (24)Round 1
Chain 12. In the circle formed, double crochet (abbreviated as DC). Chain 3 (counts as the first DC). Complete 24 double crochets in total. Slip stitch (SL ST) to finish the round.
Key3
- sl st
- slip stitch
- st
- stitch
- dc
- double crochet
- (24)Round 2
Start with a double crochet post. Chain 1. Front post double crochet. Chain 3 for space. Continue making front post double crochets with chain 1 in between, for a total of 24 front posts. Finish the round with a SL ST.
Key2
- sl st
- slip stitch
- st
- stitch
- Round 3
Chain 1, and use the same pattern of front post and double crochets as established, ending with five andos (likely a term or abbreviation specific to the pattern and may refer to a type of stitch or sequence). Complete the round with SL ST.
Key2
- sl st
- slip stitch
- st
- stitch
- Round 4
Using popcorn stitches (abbreviated as popc), continue the established pattern. Include front post single crochet with chain 2 spaces. Finish the round as previously.
Key1
- popc
- popcorn stitch
- (72)Round 5
Begin with front post single crochet. Chain 2 in the space. Make two double crochets in each pattern. Finish with 72 stitches.
- Round 6
Continue in the pattern, creating clusters and front post triple stitches. Add double crochets where specified. Repeat the sequence as instructed, ensuring the stitch count matches.
- Round 7
Work every stitch as a single crochet, creating a chain (single crochet cluster). Continue for the entire round.
- Round 8
Repeat the same process as Round 7.
- Round 9
Start creating “popc” counts and working in the back post single crochets. Create chains and skip certain stitches as instructed.
Key1
- popc
- popcorn stitch
- Round 10
Work front post stitches and create chain eight spaces as detailed.
- Round 11
In chain spaces created, work six single crochets, chain two, and six more single crochets. Repeat for each space around.
- Round 12
Work sleep stitches and double crochets in V shapes, with chain spaces varying in number.
- Round 13
Create double crochets, chains, and cluster formations as instructed. Include spaced front post stitches.
- Round 14
Work popcorn stitches separated by chain two spaces.
- Round 15
Continue with the popcorn stitches and add double crochets in specified spaces.
- Round 16
Progress with back post double crochet and chain two spaces.
- Round 17
Work a series of post stitches with chain three interludes, including exceptional triple crochet combinations.
- Round 18
Combine double crochet techniques in the spaces created, utilizing triple crochets as indicated.
- Round 19
Switch back to post double crochet, creating chains and clusters.
- Round 20
This is suggested to be the last round, working with single crochet and chain spaces, finishing off with the specified sequence.
Notes from the pattern
- Use a hook size that gives a firm but not stiff fabric, since post stitches need enough give to wrap around the stitch below without distorting the round.
- Stitch markers are worth placing at the start of each round, particularly once front post stitches begin, as the round's starting point becomes harder to spot by eye.
- Check tension every few rounds by laying the doily flat; a piece that starts to dome or ruffle signals a stitch count drifting from the round total.
- Weave in ends with the tapestry needle along the back of post stitches rather than across open chain spaces, so tails stay hidden without stiffening the lace-like sections.
The essentials
- Rounds
- 20
- Level
- Intermediate
- Time
- 4-6 hours
- Yarn
- Worsted
Stitches you will use
- Working in the round from a chain ring Round 1 forms the ring from a 12-chain foundation; keep the ring snug so the 24 double crochets sit evenly before closing with a slip stitch.
- Front post double crochet Introduced in Round 2; work around the post of the stitch below rather than into the top loops, which raises the texture — watch for stitches worked into the wrong point, which flattens the pattern.
- Chain spaces between stitch groups Used throughout to separate post stitches and create the mandala's open sections; keep chain counts consistent round to round so the spokes line up.
Troubleshooting
The doily cups instead of lying flat
Too few stitches have been added in that round, pulling the fabric inward; recount the round against the pattern's stitch total and add any missed stitches before continuing.
The doily ruffles or waves at the edge
Extra stitches have crept into a round, over-expanding that section; unpick back to the last accurate round and rework it to the stated count.
Front post stitches look uneven or twisted
The hook has gone around the wrong part of the post stitch below; insert it front to back around the full post each time, not through the top loops.
Substituting yarn
- Cotton, DK weight
- Produces a crisper, more defined doily with sharper post-stitch texture; a smaller hook than a worsted-weight project keeps the fabric from becoming floppy.
- Acrylic, worsted weight
- Close match to the pattern's likely base yarn; gives good stitch definition and drape at a similar hook size, with easier care for a piece that will be handled often.
- Wool-blend, aran weight
- Creates a larger, softer-draping doily with a slightly heavier hand; sizing up the hook helps stop the post stitches from tightening the fabric.
Washing and care
- Hand wash the finished doily in cool water with a gentle detergent, then lay it flat on a towel to air dry, easing the rounds back into shape while damp.
- Store flat rather than folded to keep the mandala rounds from creasing, and reshape with fingers or light steam if the edges lose their curve over time.
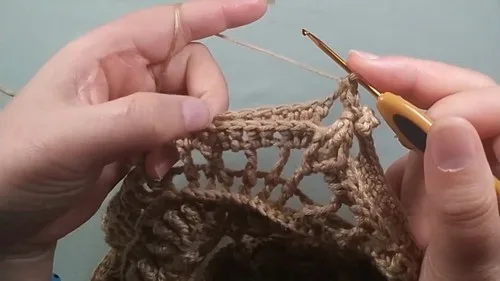
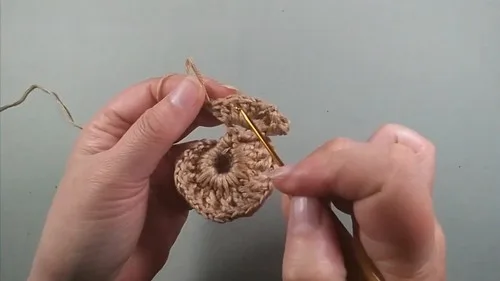
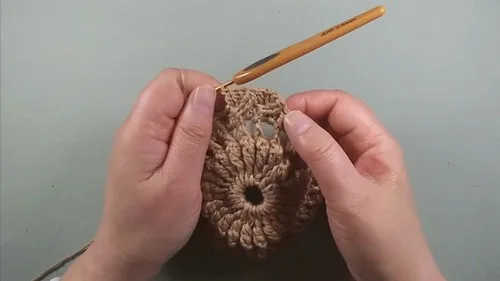
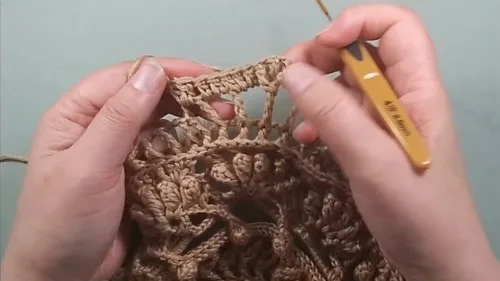
The photographs taken while this was being made
Every one was taken by whoever published the pattern, in the order the source listed them.
FAQs
Questions
Is this doily worked flat or in the round?
It is worked entirely in the round, starting from a 12-chain ring closed into a circle. The pattern runs for 20 rounds, with the earlier rounds each joined with a slip stitch before the next begins.
What does 'front post double crochet' mean in this pattern?
It means the hook goes around the post of the stitch in the round below rather than into its top loops, raising a ribbed texture. This starts from Round 2 and continues through later rounds.
Why are stitch markers included in the materials list?
A marker placed at the start of each round makes it far easier to spot where a new round begins, especially once front post stitches make the fabric less flat to read by eye.
Can the doily be made larger by adding rounds?
The pattern is written for 20 rounds, and stitch counts in later rounds build directly on the ones before them, so extra rounds would need to be worked out separately rather than added freely.
These answers came from whoever first published the pattern, kept word for word.