 EVERY CROCHET
 Garments 7 rounds No account, no download
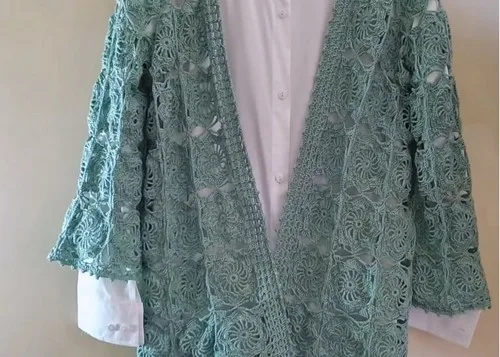
A granny square jacket built from simple motifs
A square-motif jacket worked in double crochet (UK: treble crochet), with squares joined into panels to build a full garment.
- Skill
- Intermediate
- Time
- Many hours across multiple sessions
- Yarn weight
- Any (pattern is weight-flexible)

Intermediate
What the original write-up called it. Nothing here is graded again.

Any (pattern is weight-flexible)
What the sample was worked in. Any weight works; the size moves with it.

Many hours across multiple sessions
What the original page reckoned. Your own pace is the one that matters.
About this pattern
A garment jacket made from repeated square motifs joined into panels rather than a single piece of fabric. Each square starts as a ring and builds through double crochet (UK: treble crochet), taller stitches, and chain corner spaces across seven rounds. Assembly joins squares into a six-by-seven back panel, two narrower front panels, and added units for sleeves, using slip-stitch seams instead of sewing.
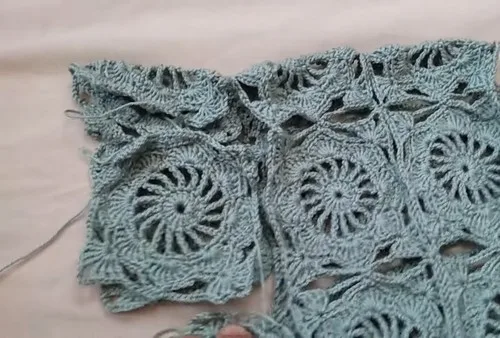
This jacket is built entirely from square motifs, placing it firmly in the granny-square family of crochet worked in the round. Each square opens with a ring and a base round of double crochet (UK: treble crochet), then grows taller through treble and double treble stitches, with chain spaces left at the corners and sides for later joining. The result is a textured, sculptural square rather than a flat granny disc, with open lacy sections balanced against solid stitch bands.
Squares are worked individually, then joined edge to edge rather than sewn as an afterthought: corners meet corners, and sides meet sides, using slip stitches in place of chains so seams sit flush. The back panel is assembled six units wide and seven units long, two narrower front panels are worked to match its height, and further motifs are added at the sides to build sleeves and shoulders, following an assembly layout rather than a single continuous piece.
Materials
- Yarn of choice
- Suitable hook size for your yarn
- Scissors
- Needle for weaving ends
The list is the pattern's own wording.
Instructions
Every round is printed as the pattern wrote it, brackets and all. Open the key beside a round to see only the short forms that round uses.
Square Motif
- Round 1
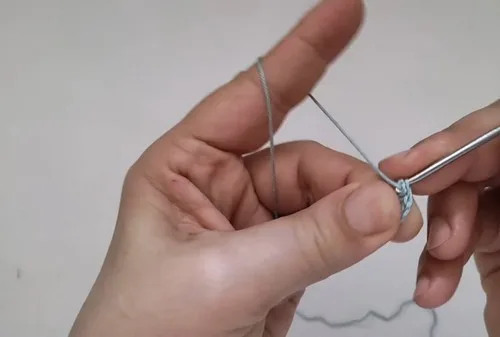
Slip knot and chain 8; slip stitch to join into a ring
- (16)Round 2
Chain 3 and work 15 double crochet into the ring to make 16 stitches then slip stitch to close
- Round 3
Chain 5 and work treble crochet with chain 2 spaces all around then slip stitch to close
- Round 4
Chain 1 work 3 single crochet in each chain 2 space and chain 1 over each treble then slip stitch to close
- Round 5
Slip stitch to the center of the 3 single crochet group chain 1 single crochet then work 7 double treble in the next chain 1 space skip 3 single crochet and single crochet in the next chain 1 space repeat around and slip stitch to close
- Round 6
Slip stitch to the fourth double treble chain 1 single crochet chain 5 single crochet in the space between shells chain 5 single crochet in the fourth double treble of the next shell repeat around
- Round 7
Slip stitch into the first chain 5 space chain 1 single crochet chain 7 work two double treble chain 1 two double treble chain 5 two double treble chain 1 two double treble in the next middle single crochet chain 7 single crochet in the middle of the side chain 7 repeat the corner and sides then slip stitch to close
Making up
- Step 1Replace chains with slip stitches when joining to another finished unit
- Step 2For corner joining work chain 2 slip stitch into the other unit's chain 5 corner space chain 2 and continue the corner stitches
- Step 3For side joining work chain 3 slip stitch into the chain 7 space chain 3 and continue as normal
- Step 4Join units to form a back panel made of six units wide and seven units long
- Step 5Create two front panels matching the back panel height but half the width
- Step 6Add extra units at the sides for the shoulder and sleeve opening
- Step 7Join front and back panels at the shoulders using additional units
- Step 8Work single crochet with chain 5 loops evenly around the entire jacket edge
- Step 9Slip stitch to the first loop chain 3 and work three double crochet in every loop
- Step 10For corners work three double crochet chain 5 three double crochet in the corner loop
- Step 11Work final edging using five single crochet then one picot made with chain 4 slip stitch repeat around
Notes from the pattern
- Use a hook one size larger than usual if squares start to dome once the taller stitches of round 5 are added; a too-tight round 5 is the most common cause of a cupped square.
- Mark the corner chain space of each finished square before setting it aside, since assembly depends on locating that space quickly when joining panels.
- If changing colour between squares or rounds, join the new colour at the start of a round rather than mid-round, since each round already begins with a chain that can carry a colour change cleanly.
- No stuffing is needed anywhere in this pattern; the squares stay flat throughout and are joined edge to edge into garment panels rather than filled.
The essentials
- Rounds
- 7
- Level
- Intermediate
- Time
- Many hours across multiple sessions
- Yarn
- Any (pattern is weight-flexible)
Stitches you will use
- Joining rounds with a slip stitch Every round of the square motif ends with a slip stitch to close; keep the join loose enough that round 3's corner chains and round 5's chain-1 spaces don't pull tight.
- Corner and side space joining (join-as-you-go) Used throughout assembly, working chain stitches into a neighbouring square's corner or side chain space instead of chaining fresh; check the two spaces line up before working into them.
- Working taller stitches into chain Round 3's treble crochet and round 5's double treble group both sit in chain spaces from the previous round; miscounting the skipped single crochet in round 5 is the easiest way to throw off the repeat.
Troubleshooting
The squares cup instead of lying flat
The taller stitches in round 5 are usually worked too tightly against the single crochet base of round 4; loosen tension on that round, or move up a hook size for rounds 3 to 5.
Corner chain spaces don't match up
Uneven corner spacing in round 3 is the usual cause; measure the corner space against a square already joined and unpick back to round 3 rather than forcing a mismatched join.
The joined back panel bows instead of sitting square
One or more squares in the six-by-seven grid are likely a different size from tension drift across the project; block every square to a matching size before joining, since joins can't fix a size mismatch afterwards.
Substituting yarn
- Mercerised cotton, 4-ply/fingering weight
- Gives a crisper square with sharper corner spaces, but more squares are needed to fill the same six-by-seven back panel, and a smaller hook is needed than for a worsted-weight version.
- Acrylic, worsted/aran weight
- Produces a squashier square that hides tension variation across a large number of motifs and needs a mid-size hook; drape is heavier than cotton, so the finished jacket sits stiffer.
- Wool-blend, DK weight
- Softer drape than acrylic with better stitch definition than cotton, blocks well to correct uneven squares, and takes a hook roughly between the cotton and acrylic options above.
Washing and care
- Since the materials list leaves yarn choice open, hand wash gently following the care instructions for whichever fibre was used, and dry the jacket flat so the joined panels don't stretch out of shape.
- Reshape damp squares to their blocked size before the jacket dries fully, and store it folded flat rather than on a hanger, since the weight of many joined motifs can pull a hung piece out of square over time.
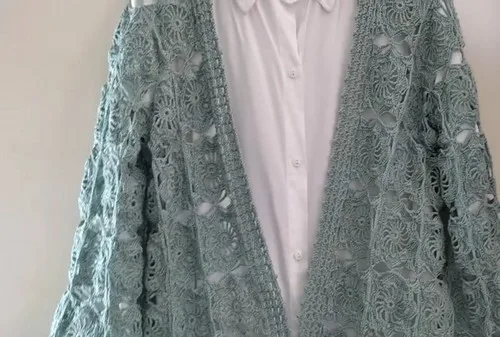
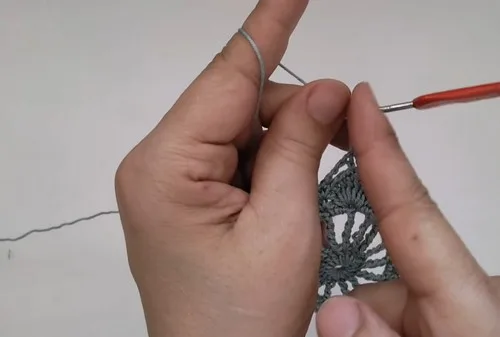
The photographs taken while this was being made
Every one was taken by whoever published the pattern, in the order the source listed them.
FAQs
Questions
How many square motifs does this jacket need in total?
The exact count depends on finished size, but the back panel alone is six units wide and seven units long, with two narrower front panels matching that height and further units added at the sides for sleeves and shoulders. The total should be worked out from the assembly layout before starting.
What does 'double crochet' mean in this pattern?
The pattern uses US stitch terms throughout, so double crochet refers to the UK treble crochet stitch. Every other stitch name follows the same US convention.
Is every square joined by sewing at the end?
No, joining happens as each square is finished: corners are worked into a neighbouring corner space and sides into a neighbouring side space, with slip stitches replacing chains during the join. This spreads the finishing work across the project instead of leaving it all for the end.
Can the front panels be made a different width from the back panel?
The front panels are designed to match the back panel's height but at half its width, keeping the unit count consistent across the jacket. Changing that width changes how the shoulders and sleeve units line up later.
Why does the panel bow or twist after several squares are joined?
This almost always signals that individual squares varied in size before joining. Blocking every square to a matching size before assembly prevents it.
These answers came from whoever first published the pattern, kept word for word.